Decorating kitchen shelves is about blending beauty with practicality. Start by clearing everything off and assessing your space, then choose a cohesive color scheme and style that matches your kitchen. Mix useful items like dishes and glassware with decorative pieces like plants and art, always leaving breathing room. The goal is a curated look that feels intentional, not cluttered, enhancing your kitchen’s daily enjoyment.
Let’s be honest: that open shelf in your kitchen can feel like a blessing and a curse. It’s prime real estate, offering a chance to show off your style, but it can also become a dumping ground for mismatched mugs and random gadgets that never seem to have a home. The secret to learning how to decorate a shelf in the kitchen isn’t about following a rigid set of rules; it’s about creating a beautiful, functional vignette that makes you smile every time you reach for a coffee cup. It’s about turning necessity into artistry. Whether you have one floating shelf or an entire wall of built-ins, this guide will walk you through every step, from the blank canvas to a stunning, personalized display that works for your life.
Key Takeaways
- Clear and Assess: Always begin by emptying your shelves completely to understand the true space you have to work with and identify any needed repairs.
- Establish a Color Palette: Choose 2-3 core colors plus metallic accents to create a cohesive, intentional look that ties your shelf decor to the rest of your kitchen.
- The Rule of Three: Group items in sets of three or odd numbers for visual interest and balance, varying their height and shape.
- Function First: Prioritize storing everyday kitchen items you actually use, making them both accessible and part of the decor.
- Create Visual Layers: Place items at different depths—some forward, some back—and vary heights using books or stands to add dimension.
- Leave Breathing Room: Avoid clutter by leaving negative space; a shelf should feel curated, not crammed.
- Edit Ruthlessly: If something doesn’t fit your style or serve a purpose, remove it. A few perfect items are better than many mismatched ones.
📑 Table of Contents
- 1. The Foundation: Understanding Your Space and Purpose
- 2. Choosing Your Style and Color Story
- 3. Functional Storage: Making the Shelf Work For You
- 4. Styling Like a Pro: The Art of Arrangement
- 5. Adding Life and Personality: The Finishing Touches
- 6. Maintenance and Seasonal Refreshes
- 7. Common Mistakes to Avoid
- Conclusion: Your Shelf, Your Story
1. The Foundation: Understanding Your Space and Purpose
Before you buy a single decorative vase or rearrange a single spice jar, you need to become an expert on your specific shelf. This foundational step prevents costly mistakes and ensures your final design is both beautiful and practical. Rushing into styling without this assessment is like building a house without a blueprint.
Measure Twice, Decorate Once
Grab a tape measure. You need the exact width, depth, and height of the shelf’s face and its clearance from the counter or floor below. This dictates the scale of items you can use. A deep shelf (over 10 inches) allows for layering items front to back. A shallow shelf requires flatter, more two-dimensional arrangements. Note the distance to the next shelf or overhead cabinet—this affects vertical space and how tall your objects can be without looking cramped.
Identify the Primary Function
Ask yourself: What is this shelf for? Is it a dedicated coffee station? A display for your favorite ceramic collection? A catch-all for daily-use dishes? The function will guide your content. A shelf used daily for cooking needs easy access to oils, spices, and utensils. A decorative shelf above a sink might hold pretty soap dispensers and a small plant. Defining the purpose upfront creates a filter for every item you consider placing there.
Check the Environment
Kitchens are high-traffic, high-moisture, and sometimes greasy environments. Consider:
- Light: Is the shelf in direct sunlight? This can fade fabrics and paper but is great for plants.
- Heat/Grease: Is it near the stove or dishwasher? Avoid paper art, delicate fabrics, or items that will quickly gather a film of grease.
- Traffic: Will items be brushed against or knocked? Secure items if needed, and avoid placing breakables on the edge of a shelf in a busy walkway.
2. Choosing Your Style and Color Story
Now for the fun part! With your shelf’s parameters and purpose clear, you can define its aesthetic. This doesn’t mean you need to overhaul your entire kitchen; your shelf should be a complementary chapter in your home’s larger design story.

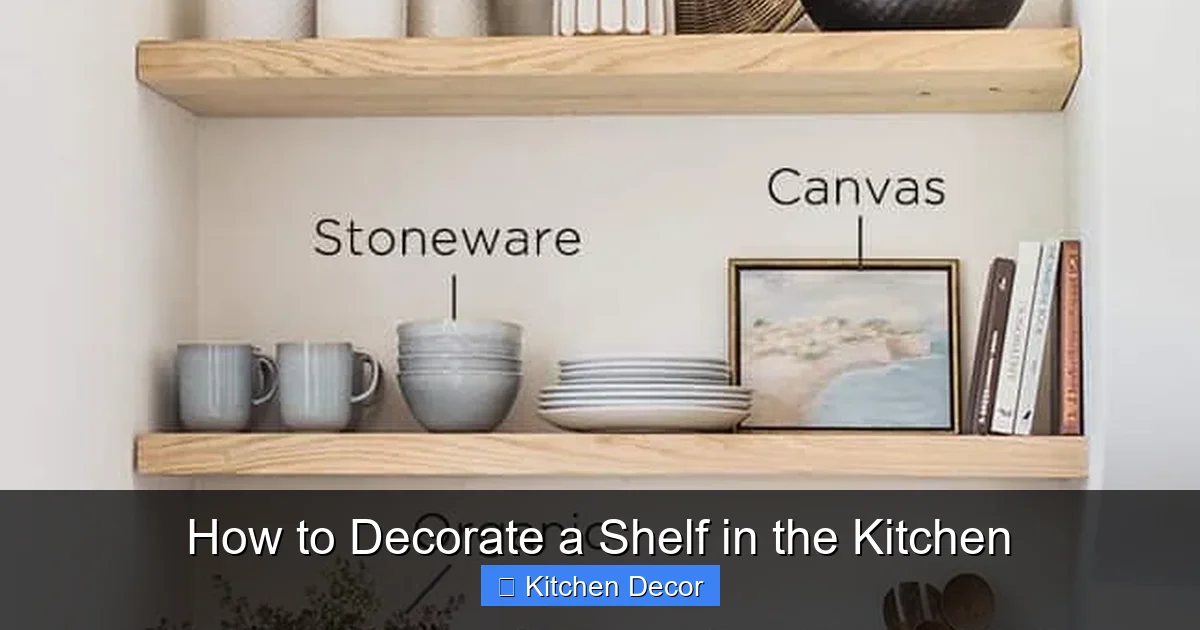
Visual guide about How to Decorate a Shelf in the Kitchen
Image source: thecraftpatchblog.com
Finding Your Kitchen’s “Vibe”
Look around your kitchen. Is it modern and sleek with stainless steel and quartz? Cozy and cottage-like with open cupboards and warm woods? Industrial with exposed brick and metal? Your shelf decor should echo these materials and moods.
- Modern/Transitional: Clean lines, symmetric arrangements, metallic accents (brushed brass, black iron), geometric shapes, and a limited color palette.
- Farmhouse/Cottage: Natural materials (wood, rattan, ceramic), vintage signs, enamelware, galvanized metal, and a relaxed, slightly asymmetrical feel.
- Minimalist: Very few objects, strong negative space, monochromatic or neutral tones, and an emphasis on form and texture over color.
- Boho/Global: Mixed textures (woven baskets, carved wood), plants, colorful pottery, and a layered, collected-over-time look.
Building a Cohesive Color Palette
A chaotic shelf is often a shelf with no color plan. Instead of picking random colors, create a simple formula:
- Base (60%): Neutral tones that provide grounding—think natural wood, white ceramic, black frames, beige linen. These are your shelf’s background.
- Accent (30%): 1-2 colors that add personality. This could be the blue of your favorite pottery, the green of your plants, or the gold of a metallic stand. Pull these colors from existing kitchen elements like a backsplash tile or a piece of art.
- Pop (10%): A surprise element—a small pop of coral, a vibrant orange bowl. Use this sparingly for a jolt of energy.
Stick to this ratio, and your shelf will look intentional, not messy.
3. Functional Storage: Making the Shelf Work For You
This is the non-negotiable heart of how to decorate a shelf in the kitchen. If your shelf isn’t functional, you’ll resent it within a week. The goal is to hide the mundane and highlight the beautiful, all while keeping essentials within arm’s reach.
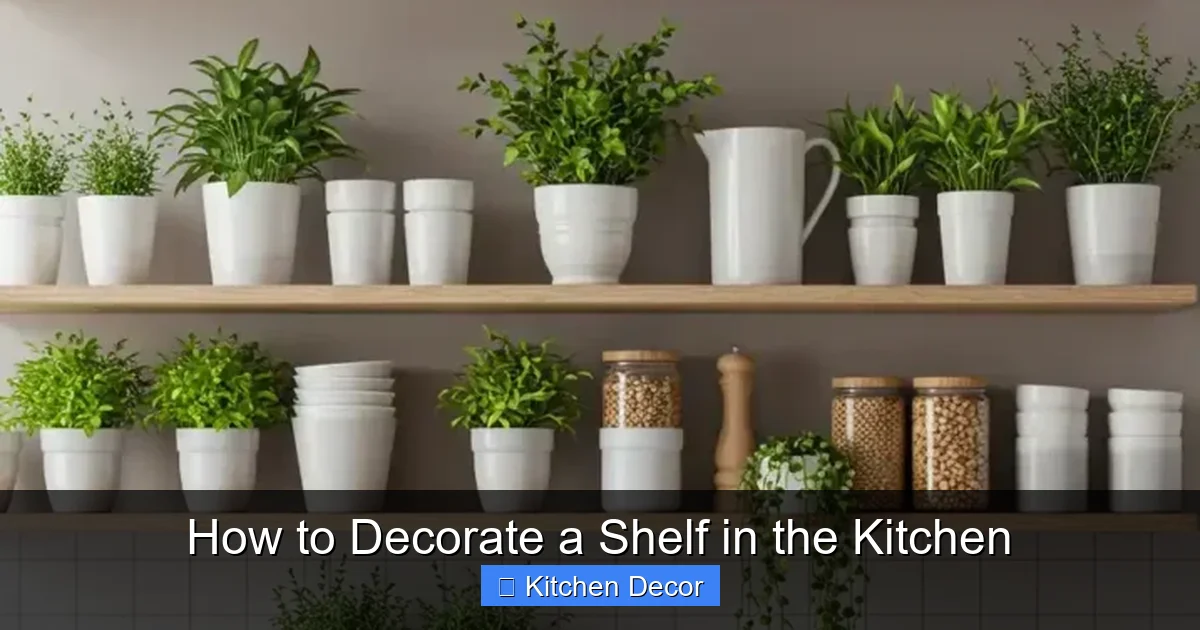
Visual guide about How to Decorate a Shelf in the Kitchen
Image source: jennasuedesign.com
Contain the Chaos
Bulk items in their original packaging are the #1 enemy of an attractive shelf. Invest in a few key, uniform containers:
- Glass Canisters: Perfect for coffee beans, tea bags, flour, sugar. They show contents and add a clean, classic look.
- Woven Baskets: Ideal for storing onions, potatoes, snack packets, or kitchen towels. They add wonderful texture and hide clutter.
- Ceramic or Stoneware Jars: For utensils, cooking oils, or spices. A collection of matching jars is incredibly satisfying.
- Trays and Platters: Use a tray to corral smaller items like salt and pepper shakers, a small knife block, or a set of olive oil bottles. This instantly creates a “group” and makes cleaning easier.
Strategic Placement of Essentials
Place your most-used items front and center or at a comfortable height. A daily coffee drinker needs the mugs and coffee maker accessible. A baker needs flour and sugar within reach. Think in zones:
- Beverage Zone: Mugs, tea pot, coffee carafe, sugar jar.
- Cooking Zone: Oils, vinegars, common spices, wooden spoons.
- Prep Zone: Cutting boards, mixing bowls, bowl of lemons or onions.
Group these zones together logically. The beverage items should be near the coffeemaker, not across the shelf from it.
Vertical Space is Prime Space
Don’t forget the vertical! Use the underside of a shelf above for hanging:
- Pot racks with S-hooks for pans or utensils.
- A small magnetic knife strip (if the shelf is metal-backed).
- Hooks for towels, oven mitts, or a small hanging basket for herbs.
This adds utility without using precious shelf surface area.
4. Styling Like a Pro: The Art of Arrangement
Now that your functional items are in their containers and zones, it’s time for the decorative layer that makes your shelf sing. This is where creativity meets a few simple design principles that anyone can master.
Visual guide about How to Decorate a Shelf in the Kitchen
Image source: decorateva.com
The Golden Rule: Vary Height, Shape, and Texture
A shelf full of short, round objects looks flat and boring. Your goal is to create a landscape:
- Height: Use books, small boxes, or cake stands to elevate shorter items. Place a tall vase or canister next to a low, wide bowl. Create a clear high point and low point.
- Shape: Mix cylinders (vases, canisters), boxes (trays, books), spheres (bowls, globes), and organic shapes (plants, driftwood). This contrast is visually dynamic.
- Texture: Combine smooth (ceramic, glass), rough (wood, stone), soft (linen, wool), and shiny (metal, lacquer). Texture adds incredible depth, even in a monochromatic color scheme.
The Rule of Three (and Odd Numbers)
Our eyes are drawn to odd-numbered groupings. A trio of objects feels more natural and balanced than a pair. When creating a vignette within your shelf, group items in 3s or 5s. For example: a stack of two books (counts as one object), a small plant, and a ceramic vase. Vary the heights within the group—tall, medium, short. This principle applies to collections of bottles, cans, or decorative objects.
Creating Layers and Depth
A shelf has depth! Use it.
- Back Row: Place your tallest, flattest, or most stable items here—large picture frames, a long rectangular tray, a row of books standing upright.
- Middle Row: Add medium-height items—medium canisters, medium-sized potted plants, a stacked pile of plates.
- Front Row: Place your shortest or most detailed items forward—a small bowl, a decorative figurine, a spice jar, a candle. This ensures nothing is hidden and creates a sense of abundance.
You can also use a small shelf riser or a stack of books to create a second, elevated layer in the front for smaller treasures.
The Power of Negative Space
This is the most important trick for a sophisticated look: leave empty space. Do not feel the need to use every inch. Empty space is a design tool that gives the eye a place to rest and makes the objects you do have look more special. If your shelf starts to look busy, step back and remove one or two items. You can always add them back, but you can’t easily create space once it’s full. Aim for about 30-40% negative space.
5. Adding Life and Personality: The Finishing Touches
Your functional containers are placed, your arrangement follows the rules of design. Now, inject soul. This is what transforms a well-arranged shelf into *your* shelf.
Greenery is Non-Negotiable
Plants are the single fastest way to make a kitchen shelf feel alive, fresh, and cared for. Choose based on your light:
- High Light: Pothos, philodendron, small fiddle leaf fig, herbs (basil, mint).
- Medium Light: Snake plant, ZZ plant, peace lily.
- Low Light: Cast iron plant, certain ferns.
Use interesting pots—terracotta, ceramic, or concrete. A trailing plant like a string of pearls or spider plant can soften the edge of a shelf beautifully. Even a single succulent in a tiny pot adds life.
Art and Personal Objects
This is where you tell your story.
- Small Art: Lean a framed print or photo against the back wall. A series of small, identical frames creates a gallery effect.
- Collections: Do you collect vintage cookie cutters, blue and white pottery, or ceramic animals? Dedicate a small zone to them. Grouping a collection together is powerful.
- Sentimental Objects: A child’s clay creation, a souvenir from a favorite trip, a heirloom ladle. These pieces add meaning that no store-bought item can match.
- Books: Cookbooks are obvious, but also consider small art books or novels with colorful spines. Stack them horizontally or stand a few vertically.
Light It Up
If your shelf has the wiring, a small puck light or LED strip under the shelf can create a dramatic, professional highlight. If not, incorporate light-reflective objects: a mirrored tray, metallic candlesticks, or a small mercury glass vase. A single candle (battery-operated for safety if near the stove) adds a warm glow. Light creates dimension and drama.
6. Maintenance and Seasonal Refreshes
A beautifully decorated shelf isn’t a “set it and forget it” project. It’s a living part of your kitchen that needs occasional tending to stay fresh and functional.
The Weekly 5-Minute Tidy
Once a week, do a quick sweep:
- Wipe down the shelf surface with a damp cloth (kitchens get dusty and greasy!).
- Straighten any crooked items.
- Remove any stray crumbs or spills from containers.
- Rotate any items that have been pushed to the back and are now forgotten (like a spice jar you haven’t used).
- Water any plants and remove dead leaves.
This tiny habit prevents clutter from building up and keeps your shelf looking intentional.
Seasonal and Holiday Swaps
You don’t need a whole new collection. Swap out 2-3 key elements to reflect the season:
- Spring: Add fresh flowers (daffodils, tulips), pastel ceramics, a small basket of lemons.
- Summer: Use bright blue or yellow textiles, a bowl of limes, a small pot of rosemary.
- Fall: Incorporate mini pumpkins, pinecones, a warm-toned scarf or napkin, cinnamon sticks in a jar.
- Winter/Holidays: Add evergreen sprigs, red berries, a small string of fairy lights, a festive mug.
This keeps the shelf feeling current and fun without a major overhaul.
7. Common Mistakes to Avoid
Even with the best intentions, a few pitfalls can derail your kitchen shelf decor. Here are the most common errors and how to fix them.
Mistake 1: Ignoring Scale and Proportion
Using tiny objects on a large, deep shelf makes everything look insignificant. Conversely, an oversized bowl on a narrow shelf will overwhelm it. Solution: Always consider the shelf’s size. For a large wall of shelves, use a few larger anchor pieces. For a small shelf, stick to small-to-medium objects. As a rule, no single object should be wider than 75% of the shelf’s width.
Mistake 2: Forgetting the “Backdrop”
Placing items directly on a bare wall or shelf with no background can make them look disconnected. Solution: Use the shelf itself as a backdrop. Lean art or large cutting boards against the back wall. Place a row of books standing upright to create a solid band of color. A simple piece of wallpaper or a painted board behind the shelf (if possible) can also define the space.
Mistake 3: Symmetry Overkill
While symmetry can be elegant, perfect mirror-image arrangements on a long shelf can feel rigid and boring, like a hotel lobby. Solution: Aim for “balanced asymmetry.” Have a tall item on the left, a medium cluster on the right, and a lower item in the center. The visual weight should feel even, but the items don’t have to be identical.
Mistake 4: Prioritizing Pretty Over Practical
We’ve all done it: hidden the olive oil behind a decorative box, making it impossible to grab when cooking. Solution: After styling, do a “use test.” Can you easily grab the salt, the daily mug, the knife? If not, rearrange. The most beautiful shelf is one you don’t have to fight with.
Conclusion: Your Shelf, Your Story
Learning how to decorate a shelf in the kitchen is a journey of blending utility with self-expression. It starts with a clear assessment of your space, builds with a cohesive color and style plan, solidifies with smart storage solutions, and comes to life with thoughtful arrangement and personal touches. Remember, there are no hard-and-fast rules—only guidelines to help you create something that works for *your* kitchen and *your* life. The most important rule is this: your shelf should make you happy. It should hold the things you love and use, displayed in a way that brings a little bit of joy into the heart of your home. So, clear everything off, take a deep breath, and start building your perfect kitchen vignette, one beautiful, functional piece at a time.
Frequently Asked Questions
How many items should I put on a kitchen shelf?
There’s no magic number, but a good rule is to fill about 60-70% of the visible surface, leaving 30-40% as empty “breathing room.” This prevents clutter. Start with your essential functional items, then add decorative pieces around them until it feels balanced but not crowded.
What are the best plants for a kitchen shelf?
Choose low-maintenance, humidity-tolerant plants. Pothos, snake plants, ZZ plants, and spider plants are excellent for most kitchen light conditions. If you have a sunny shelf, herbs like basil or mint are both beautiful and useful. Always use a pot with a drainage tray to protect your shelf.
How do I make my open kitchen shelves look organized?
Use uniform containers (matching canisters, jars, or baskets) to group like items. This instantly creates order. Then, apply the “rule of three” for groupings and vary heights using books or risers. Finally, embrace negative space—don’t be afraid of empty areas, as they make the organized items stand out more.
Should my kitchen shelf decor match the cabinets?
Not necessarily, but it should complement them. If your cabinets are a warm oak, incorporate wood tones on the shelf. If cabinets are sleek white, you have more freedom to add color. The shelf is an opportunity to introduce texture and personality that painted cabinets can’t always provide, so use it to add contrast or accent.
How often should I change my kitchen shelf decor?
Do a thorough edit and deep clean twice a year (spring and fall). For a quick refresh, swap out 2-3 items seasonally or whenever you get bored. This could be changing the plants, swapping a vase, or introducing a new textile like a seasonal tea towel or small piece of fabric.
What’s the biggest mistake to avoid when decorating kitchen shelves?
The biggest mistake is forgetting function for form. If you can’t easily access the salt, your favorite mug, or the coffee beans because they’re hidden behind a decor object, the shelf will become frustrating. Always prioritize the placement of everyday essentials, then style around them.