Revitalize your kitchen on a budget by learning how to cover cabinets with vinyl paper. This comprehensive guide walks you through every step, from selecting the perfect peel-and-stick vinyl to achieving a flawless, professional-looking finish. You’ll discover pro techniques for prepping surfaces, cutting around complex moldings, and avoiding common pitfalls like bubbling and peeling. It’s a surprisingly simple DIY project that delivers dramatic results, making it the perfect solution for outdated cabinets without the mess or expense of painting or full replacement.
Let’s be honest: kitchen cabinets are the workhorses of the heart of your home. They get opened, closed, splattered, and touched dozens of times a day. Over years, that wear and tear shows. The once-beautiful finish becomes scratched, stained, or just plain dated. The thought of replacing them is daunting—the cost, the mess, the disruption. But what if you could give them a complete cosmetic makeover in a weekend, for a fraction of the price, with minimal tools and no heavy demolition?
Enter the world of vinyl cabinet wrapping. Specifically, learning how to cover kitchen cabinets with vinyl paper—more accurately called peel-and-stick vinyl or adhesive-backed film—has become a game-changer for DIYers and renters alike. This isn’t the flimsy contact paper of yesteryear. Today’s high-quality vinyl films are durable, water-resistant, and come in an astounding array of finishes, from realistic wood grains and sleek matte solids to bold patterns and textured looks like shiplap or linen. It’s a transformative process that can make oak cabinets look like modern painted maple, or turn tired brown laminate into a chic, high-gloss statement. This guide will hold your hand through every single step, ensuring your project ends in pride, not regret.
Key Takeaways
- Surface Preparation is Everything: A perfectly clean, degreased, and smooth cabinet surface is the non-negotiable first step for long-lasting adhesion. Any grease or gloss will cause failure.
- Choose the Right Vinyl: Not all vinyl is created equal. Opt for a high-quality, permanent adhesive peel-and-stick vinyl with a matte or satin finish for cabinets to hide fingerprints and minor imperfections.
- Measure Twice, Cut Once: Always create a paper template for each cabinet face and drawer front. This saves material, ensures perfect fit, and allows you to plan your pattern alignment.
- The “Dry Fit” is Crucial: Never apply adhesive until the vinyl piece is perfectly positioned. Use painter’s tape to hold the template or the vinyl itself in place for a final check before committing.
- Technique Over Tools: While a squeegee and utility knife are essential, your application technique—working from the center out, using firm pressure, and managing heat for curves—matters more than expensive tools.
- Seams and Edges Require Special Attention: Plan where your seams will fall (ideally in less visible areas) and use a heat gun/hair dryer to soften the vinyl for a tight, sealed bond along edges and inside corners.
- Patience Prevents Problems: Rushing leads to bubbles, misalignment, and tears. Take your time with each cabinet, especially during the positioning and smoothing phases.
📑 Table of Contents
- Why Choose Vinyl Paper for Your Cabinets?
- Gathering Your Tools and Materials: The Essential Kit
- Phase 1: Preparation – The Foundation of a Successful Wrap
- Phase 2: Measuring, templating, and Cutting – Measure Twice, Cut Once
- Phase 3: Application – The Main Event
- Phase 4: Finishing Touches and Reassembly
- Maintenance, Troubleshooting, and Long-Term Care
- A Strong Conclusion: Your Dream Kitchen, Within Reach
Why Choose Vinyl Paper for Your Cabinets?
Before we dive into the “how,” let’s establish the “why.” Vinyl wrapping isn’t the only cabinet refresh option, but it has distinct advantages that make it the champion for many homeowners.
Unbeatable Cost and Time Efficiency
Refacing cabinets with real wood veneer or hiring a professional can cost thousands. A full kitchen paint job, while cheaper, still requires extensive prep, priming, and multiple coats, not to mention the intense labor of removing all cabinet doors and hardware. A quality vinyl wrap for an entire kitchen typically costs between $300 and $800 in materials. The time investment? Often a single weekend for a competent DIYer. You avoid the dust, fumes, and days of a unusable kitchen.
Incredible Design Flexibility
Are you dreaming of a bold, dark navy for your uppers? Or a warm, oak look for your lowers? What about a geometric tile pattern for a pop of personality? Vinyl film offers a universe of options that paint simply can’t match, especially when it comes to realistic textures and patterns. You can mix and match, create two-tone kitchens, or add an accent cabinet with a stunning marble or metallic finish. Changing your mind in a few years is also simpler; while removal takes care, it’s less destructive than stripping paint.
Durability and Ease of Maintenance
Modern cabinet-grade vinyl is tough. It’s resistant to moisture, stains, and everyday scratches far better than most painted surfaces. Cleaning is a breeze—a damp cloth with mild soap is all it needs. It creates a seamless, non-porous surface that won’t harbor grease or grime in the way wood grain can. For families with kids or busy cooks, this is a huge practical benefit.
Gathering Your Tools and Materials: The Essential Kit
Having everything within arm’s reach before you start is the secret to a smooth, frustration-free workflow. Don’t start your project only to realize you’re missing a critical tool halfway through.
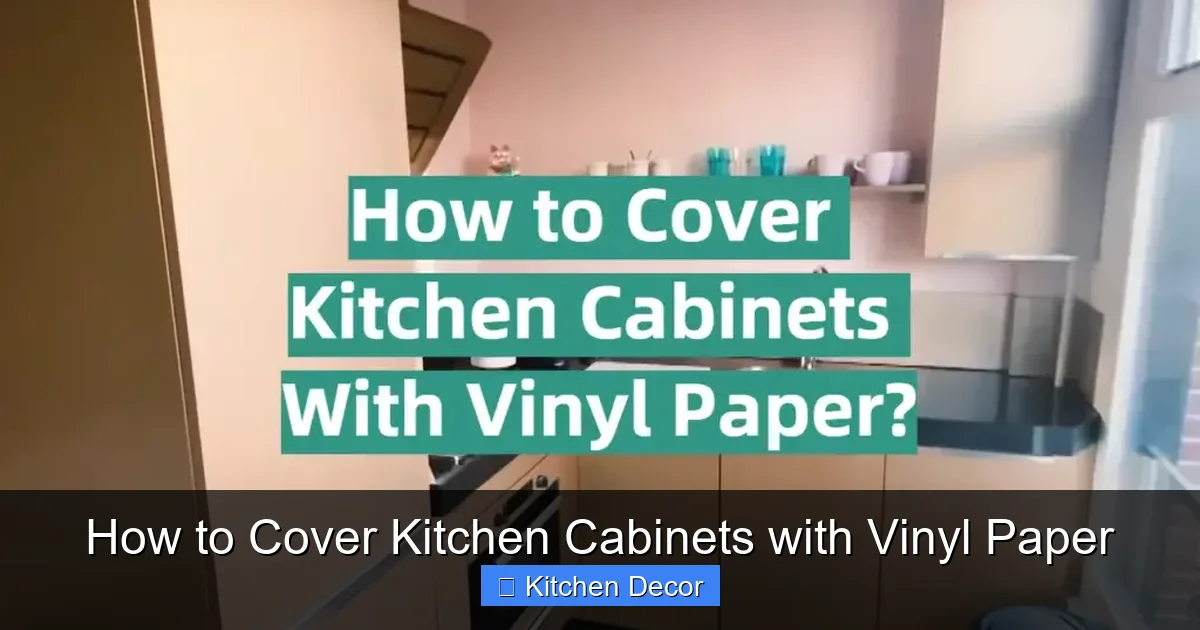
Visual guide about How to Cover Kitchen Cabinets with Vinyl Paper
Image source: kitchenprofy.com
Core Materials
- Peel-and-Stick Vinyl Film: This is your star. Buy from a reputable supplier (like 3M, ORACAL, or online specialty retailers). Look for terms like “premium,” “cast vinyl,” or “vinyl film for cabinets.” Avoid the thin, cheap “contact paper” found at craft stores. It will tear and bubble. Measure your total cabinet surface area (square footage) and add 15-20% for waste and pattern matching.
- Primer (Optional but Highly Recommended): If your cabinets have a glossy finish (laminate, some factory paints), a bonding primer like STIX or Grip Primer is a lifesaver. It creates a micro-abrasion for the vinyl to grip. For already matte, clean surfaces, you might skip it, but it’s cheap insurance.
Essential Tools
- Utility Knife & Fresh Blades: A sharp blade is your best friend for clean cuts. Change blades often; a dull blade drags and tears vinyl.
- Squeegee with Felt Edge: A plastic squeegee will scratch the vinyl. Invest in one with a soft, felt-covered edge for smoothing without marring.
- Hair Dryer or Heat Gun (on low setting): Crucial for working vinyl into curves, corners, and recessed panels. Heat makes the vinyl pliable and helps activate the adhesive for a perfect bond.
- Measuring Tape & Pencil: For precise measurements.
- Straight Edge or Metal Ruler: For guiding your utility knife cuts.
- Painter’s Tape: For temporary holding and creating crisp paint lines if you’re doing two-tone.
- Scissors: For rough cutting pieces from the roll.
- Cleaning Supplies: TSP substitute or degreaser (like Krud Kutter), rags, and rubbing alcohol (isopropyl alcohol) for a final wipe-down.
- Gloves: To keep hands clean and improve grip.
Helpful (But Not Mandatory) Extras
- Paper Trimmer or Rotary Cutter: For incredibly straight, clean cuts on your paper templates.
- Magnets or Small Clamps: To hold cabinet doors in an upright, stable position while you work on them.
- Workbenches or Sawhorses: To lay doors flat and stable.
- microfiber cloths: For final smoothing and buffing.
Phase 1: Preparation – The Foundation of a Successful Wrap
You cannot skip this step. I repeat: you cannot skip this step. 90% of vinyl application failures trace back to poor surface preparation. This phase will take you 30% of your total time but is responsible for 90% of your success.
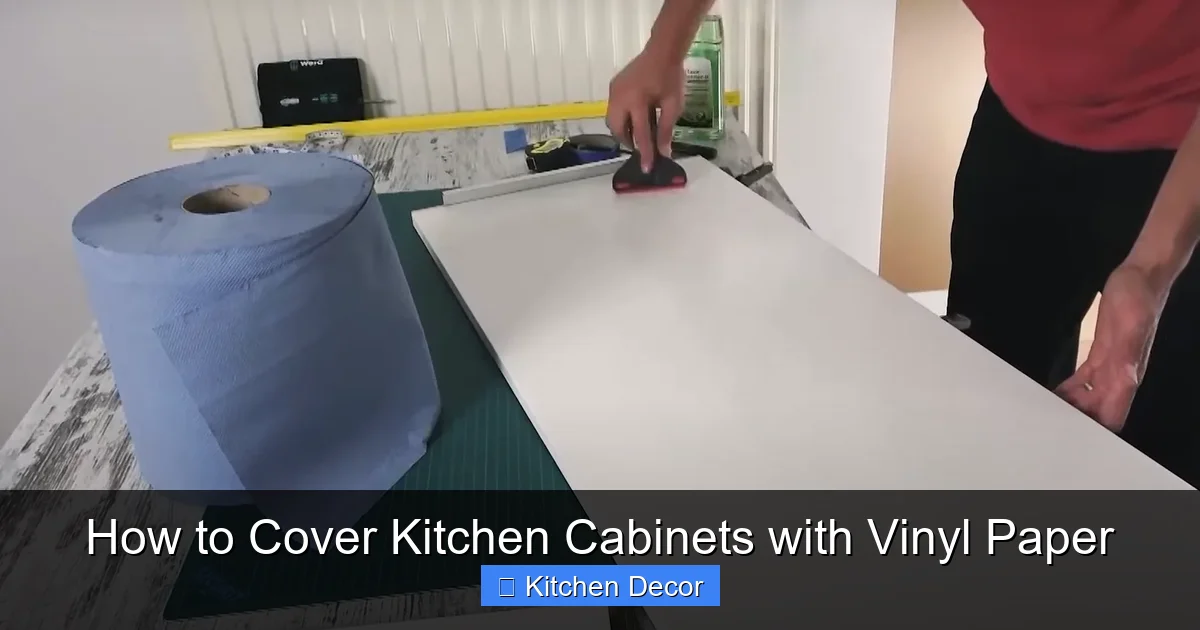
Visual guide about How to Cover Kitchen Cabinets with Vinyl Paper
Image source: kitchenprofy.com
Step 1: Remove Doors, Drawers, and Hardware
Number everything. Use a pencil to mark the inside of each door and its corresponding cabinet frame location (e.g., “Upper Left 1,” “Lower Right 2”). Do the same for drawer fronts. Remove all hinges, handles, and knobs. Store hardware in labeled bags. This is also the perfect time to clean the hinges and hardware if you plan to reuse them, or to install new hardware later.
Step 2: Clean and Degrease Every Surface
Cabinets are greasy. Cooking fumes settle on them. You must remove every trace. Wash each cabinet face, door, and drawer front with a TSP substitute or a strong degreaser according to the product directions. Rinse thoroughly with clean water. This removes the top layer of grease and finish.
Step 3: Sand and Smooth (If Needed)
Inspect the surface. Are there any rough spots, old drips from paint, or areas where the finish is flaking? Lightly sand these areas with 220-grit sandpaper until smooth. Wipe away all dust with a damp cloth. For glossy laminate or melamine, you MUST lightly scuff-sand the entire surface. This creates “tooth” for the adhesive. Wipe again with a damp cloth, then a final wipe with rubbing alcohol. Let it dry completely. The surface should feel matte, not slick.
Step 4: Apply Primer (If Required)
If you have a very glossy surface or are unsure about adhesion, apply a thin, even coat of a high-quality bonding primer. Follow the manufacturer’s dry time. This step is rarely needed on already-matte painted wood but is critical for laminates.
Phase 2: Measuring, templating, and Cutting – Measure Twice, Cut Once
This is where precision pays off. Rushing this leads to wasted vinyl and poorly fitting pieces.
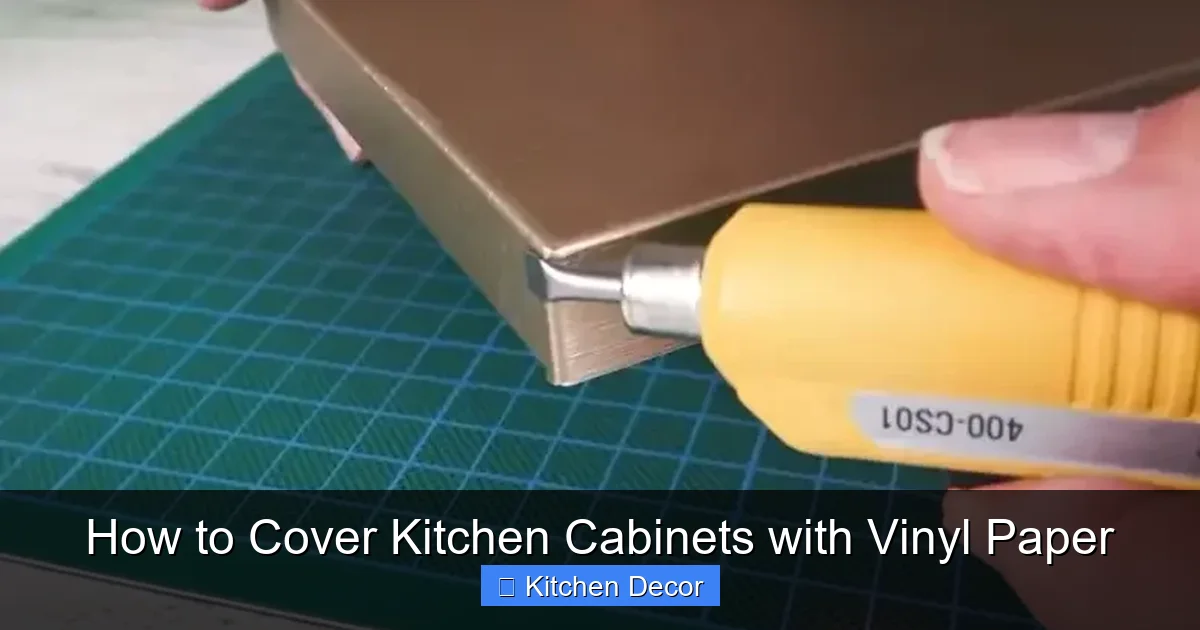
Visual guide about How to Cover Kitchen Cabinets with Vinyl Paper
Image source: kitchenprofy.com
Creating Your Paper Template
This is the single best piece of advice: never cut your expensive vinyl without a template first. Use plain brown kraft paper or large sheets of newsprint. Lay it over a cabinet door and trace the exact outline, including any raised panels, molding, or cutouts for handles. For a raised panel door, you will need separate templates for the frame and the panel itself. Label each template clearly. This template is your master copy.
Transferring to Vinyl and Cutting
Lay your template on the backside of the vinyl roll (the side without adhesive). Trace around it with a pencil. For patterned vinyl, this is your chance to align the pattern! Lay the template where you want the pattern to start (e.g., centered on the door). Use a straight edge and a sharp utility knife to cut out your piece. For complex shapes, use scissors to get close, then the knife for final edges. Always cut slightly (1/16″) larger than your template; you can trim the excess after application, but you can’t add it back.
Pattern Matching Considerations
If your vinyl has a pattern (like a wood grain), you must decide where the pattern will start on each door. For a seamless look across multiple cabinet faces, you may need to shift your starting point on adjacent cabinets. Use your template to plan this out on the floor before cutting any vinyl. Mark where the pattern “seam” should fall, often on the less-visible side of a door frame.
Phase 3: Application – The Main Event
Now for the satisfying part. Work in a clean, well-lit area. Temperature matters: ideal is 65-80°F (18-27°C). Cold vinyl is stiff; hot vinyl is too soft.
The Dry Fit: Your Final Safety Check
Before you peel the backing, do a dry fit. Hold the vinyl piece (with backing still on) up to the cabinet door. Check for fit. Does it clear the hinge recess? Is it centered? Use small pieces of painter’s tape to temporarily hold it in place. Step back. This is your last chance to make a perfect adjustment. Once the adhesive touches the surface, it’s game over.
The Application Process: A Methodical Approach
Start with the largest, flattest surfaces first (like the main panel of a shaker door). Leave intricate moldings and inside corners for last, as they require more heat and finesse.
- Peel and Position: Peel back about 6 inches of the backing paper. Align the exposed adhesive edge with your starting point (usually the top or a straight edge). Gently lay it down, working from your anchor point outward. Do not lay it down all at once.
- The Squeegee Technique: Using your felt-edged squeegee, start at your anchor point and firmly smooth the vinyl down, working outward in long, overlapping strokes. Apply firm, even pressure. Your goal is to push out air and ensure full contact from the center to the edges.
- Working with Heat: As you approach a curve, a recessed panel, or an inside corner, stop. Use your hair dryer on medium heat to warm the vinyl. Move the dryer constantly; don’t concentrate heat in one spot. The vinyl will soften and become more pliable. Now, gently stretch and work it into the curve with your fingers and squeegee. For deep inside corners, you may need to make a small relief cut in the vinyl to allow it to lay flat without bunching.
- Handling Bubbles: A tiny bubble or two is normal. For a small bubble, use a pin to make a tiny hole, then smooth the air out with your squeegee. For a large bubble, you can carefully lift the nearest edge and re-smooth, or use the heat method to soften the area and push the bubble to the nearest edge.
- The Final Trim: Once the piece is fully adhered, use your sharp utility knife and a straight edge to carefully trim away the excess vinyl from the edges. A glass or dedicated trim tool can give you a perfectly clean, crisp edge. For edges that meet the cabinet frame, press the vinyl firmly over the edge and onto the side, then trim the side piece separately for a seamless look.
Special Considerations for Raised Panel Doors
Treat each flat surface separately. Apply the vinyl to the center panel first. Then, move to the frame. You will have a seam where the panel meets the frame. This is unavoidable but can be minimized. Apply the frame piece carefully, pressing the seam down tightly. Use heat to seal the seam. The good news? From a normal viewing distance, this seam is often not noticeable, especially if you use a wood-grain vinyl that mimics a traditional frame-and-panel construction.
Phase 4: Finishing Touches and Reassembly
Your vinyl is on, but the job isn’t done yet. These final steps ensure a professional, durable result.
Sealing the Edges
This is the most critical step for preventing peeling, especially on the edges that get touched and on the sides of doors. Run your finger along every single edge. You should feel a firm, consistent bond. Go over all edges and seams again with your heat gun (on low!) and squeegee. The heat reactivates the adhesive and creates a permanent seal. Pay extra attention to the top and bottom edges of doors, where they are most likely to catch and peel.
Reattaching Hardware
Before you rehang anything, inspect your work. Look for any bubbles, loose edges, or imperfections. Now is the time to fix them. Once satisfied, reattach your hinges and hardware. If your old screw holes are stripped or you’re using new hardware, you may need to fill the old holes with wood filler, sand, and prime before applying vinyl to the cabinet frame (if you’re wrapping the frames too). For the cleanest look, consider filling the hinge holes on the door side with a small plug or simply covering them with your vinyl—they will be hidden when the door is closed.
The “Cure” Period
The adhesive is pressure-sensitive, but it reaches its full, ultimate bond over 24-72 hours. Avoid aggressively opening and closing cabinets, slamming doors, or getting them wet during this cure time. Let the adhesive set undisturbed. After this period, your wrap is ready for normal kitchen life.
Maintenance, Troubleshooting, and Long-Term Care
You’ve put in the work. Now, let’s keep it looking great for years.
Routine Cleaning
A soft, damp microfiber cloth is all you need for daily dust and light splatters. For tougher grease, use a mild dish soap diluted in water. Avoid abrasive cleaners, scrub pads (like SOS or steel wool), and harsh chemicals like acetone, nail polish remover, or oven cleaner. These will damage the vinyl’s surface. Always test any cleaner in an inconspicuous spot first.
Common Problems and Fixes
- Peeling Edges: The most common issue. Often caused by poor edge sealing or impact. To fix: Carefully lift the peeling edge. Clean the cabinet surface underneath with alcohol. Apply a thin bead of clear, silicone-based adhesive (like E6000 or a specific vinyl repair adhesive) to the cabinet edge. Carefully press the vinyl back down, using a hair dryer and squeegee. Weight it down for 24 hours.
- Bubbles Appearing Later: Usually from a contaminant (a speck of dust) trapped during application. If small, you can try the pin-prick method. If large, you may need to carefully cut out the bubbled section and patch it with a scrap piece, which is tricky and often visible.
- Scratches: Minor surface scratches on matte vinyl can often be buffed out with a microfiber cloth. Deep scratches are permanent. Prevention is key—use cutting boards and trivets.
When (and How) to Remove Vinyl
Vinyl is designed to be a semi-permanent solution. To remove it, start at a corner and slowly peel it back at a 45-degree angle. Use your hair dryer to heat the adhesive as you go, which will soften it and reduce residue. For stubborn adhesive left on the cabinets, use a citrus-based adhesive remover or a product like Goo Gone. Test in a small area first. The residue should come off with some patience and the right solvent. Removing vinyl from melamine/lamrame is generally easier than from porous wood, where the adhesive may have soaked in slightly.
A Strong Conclusion: Your Dream Kitchen, Within Reach
Learning how to cover kitchen cabinets with vinyl paper is more than just a weekend project; it’s a empowerment. It’s the realization that you don’t need a massive budget or a contractor’s license to create a space you love. The transformation is real. The grimy, oak cabinet from the 1990s can become a sleek, modern, charcoal-gray masterpiece. The builder-grade white can get a warm, textured linen look that adds depth and character.
The key, as we’ve detailed, is in the preparation and the patience. Respect the process. Take your time with the templates, the dry fits, and the careful smoothing. The tools are simple, the material is forgiving (to a point), and the result is a high-impact upgrade that will make you smile every time you walk into your kitchen. It won’t increase your home’s appraised value like a full remodel might, but it will increase your daily joy, and that’s priceless. So roll up your sleeves, grab your utility knife, and get ready to wrap your way to a beautiful new kitchen.
Frequently Asked Questions
Is vinyl paper on cabinets durable for long-term use?
Yes, high-quality, cabinet-grade peel-and-stick vinyl is very durable and designed to withstand daily use, moisture, and cleaning. It is often more scratch and stain-resistant than standard painted surfaces. However, it can be punctured by sharp objects and may peel at edges over many years if not properly sealed during installation.
Can I install vinyl over laminate or glossy cabinets?
You absolutely can, but it is mandatory to first lightly scuff-sand the entire glossy surface and clean it with rubbing alcohol. For the best and most reliable results on laminate, applying a coat of bonding primer before the vinyl is highly recommended to ensure a permanent bond.
Will the seams be visible on my cabinets?
Seams are inevitable on cabinets with raised panels or complex shapes. However, you can minimize their visibility by planning your pattern alignment, placing seams on the least noticeable parts of the frame (like the inside edge), and using a heat gun to tightly seal the seam. On flat, slab-style doors, you can often wrap the entire face without a seam if the door is smaller than your vinyl width.
How do I clean my vinyl-wrapped cabinets?
Clean them gently with a soft, damp microfiber cloth. For greasy splatters, use a mild soap solution (a few drops of dish soap in water). Wipe and immediately dry with a clean cloth. Never use abrasive scrubbers, steel wool, or harsh chemicals like acetone, ammonia, or commercial degreasers, as these will damage the vinyl surface.
Can I paint over vinyl cabinet wrap later?
Technically yes, but it is not recommended. The vinyl’s smooth, non-porous surface is a terrible base for paint. You would need to thoroughly degloss and prime it with a heavy-duty bonding primer, which adds significant work. It’s far easier to remove the vinyl (which is possible) and then paint the bare cabinet surface directly.
What is the biggest mistake beginners make when wrapping cabinets?
The number one mistake is skipping the dry fit and not properly preparing the surface. Peeling the backing and sticking the vinyl without a final position check leads to misalignment. Applying vinyl to a surface that isn’t 100% clean, degreased, and (if needed) primed leads to bubbles and peeling edges down the line. Patience in these two areas prevents almost all failures.