Buckwheat is a versatile, gluten-free pseudo-grain packed with protein and fiber. In 2026, cooking it perfectly is easier than ever with modern equipment and smart techniques. The key is mastering the water-to-grain ratio and understanding your chosen cooking method—whether a classic stovetop pot, a smart Instant Pot, or a dedicated rice cooker. This guide provides step-by-step instructions, troubleshooting tips, and creative flavor ideas to help you integrate this nutritious powerhouse into your weekly meal prep with confidence.
Key Takeaways
- Always rinse buckwheat: A quick rinse under cold water removes any debris and prevents bitterness, especially with untoasted groats.
- Water ratio is critical: Use 1.5 cups water per 1 cup buckwheat for the perfect, fluffy texture; adjust slightly for desired firmness.
- Toast for deeper flavor: Toasting raw groats in a dry pan for 3-5 minutes before boiling enhances their nutty, earthy aroma significantly.
- Rest after cooking: Let cooked buckwheat sit off the heat, covered, for 10 minutes. This allows steam to finish the job and yields separate grains.
- Modern equipment excels: Smart Instant Pots with precise programs and non-stick rice cookers remove much of the guesswork from 2026 cooking.
- It’s a meal prep champion: Cooked buckwheat stores exceptionally well in the fridge for 5 days and freezes for 3 months, making it ideal for batch cooking.
- Flavor it during cooking: Add aromatics like garlic, bay leaves, or a pinch of salt to the cooking water for a foundational boost of flavor.
📑 Table of Contents
- Your Ultimate Guide to Perfect Buckwheat in 2026
- Understanding Your Buckwheat: Kasha vs. Groats
- The Fundamental Stovetop Method: Your Foundation for Success
- 2026 Kitchen Tech: Cooking Buckwheat with Modern Equipment
- Flavor Foundations & Creative Culinary Pairings
- Storage, Reheating & Meal Prep Mastery
- Troubleshooting: Why Is My Buckwheat Mushy or Hard?
Your Ultimate Guide to Perfect Buckwheat in 2026
Let’s be honest. For years, buckwheat was that mysterious bag in the health food aisle. You knew it was good for you—packed with complete protein, rich in magnesium, and totally gluten-free—but the cooking instructions seemed vague. “Simmer until tender.” What does that even mean? In 2026, we’re changing the narrative. Cooking buckwheat isn’t a cryptic art; it’s a straightforward, rewarding skill that can transform your meals from ordinary to extraordinary. Whether you’re using a classic stainless steel pot or a Wi-Fi-enabled multi-cooker, the principles are simple, and the results are deliciously nutty and versatile.
This isn’t just about boiling grains. It’s about understanding the ingredient. Buckwheat, despite its name, isn’t a wheat at all. It’s a fruit seed related to rhubarb, which is why it’s naturally gluten-free. You’ll typically find it as “buckwheat groats” (the hulled triangular seeds) or “kasha,” which are groats that have been roasted. This roasting step is a game-changer for flavor, and we’ll show you how to easily replicate it at home. By the end of this guide, you’ll know exactly how to cook buckwheat to your preferred texture, how to avoid common pitfalls like mushiness, and how to use your favorite 2026 kitchen gadgets to make the process effortless. Let’s get cooking.
Understanding Your Buckwheat: Kasha vs. Groats
Before you turn on the stove, you need to identify what’s in your pantry. The two main forms you’ll encounter have different starting points.
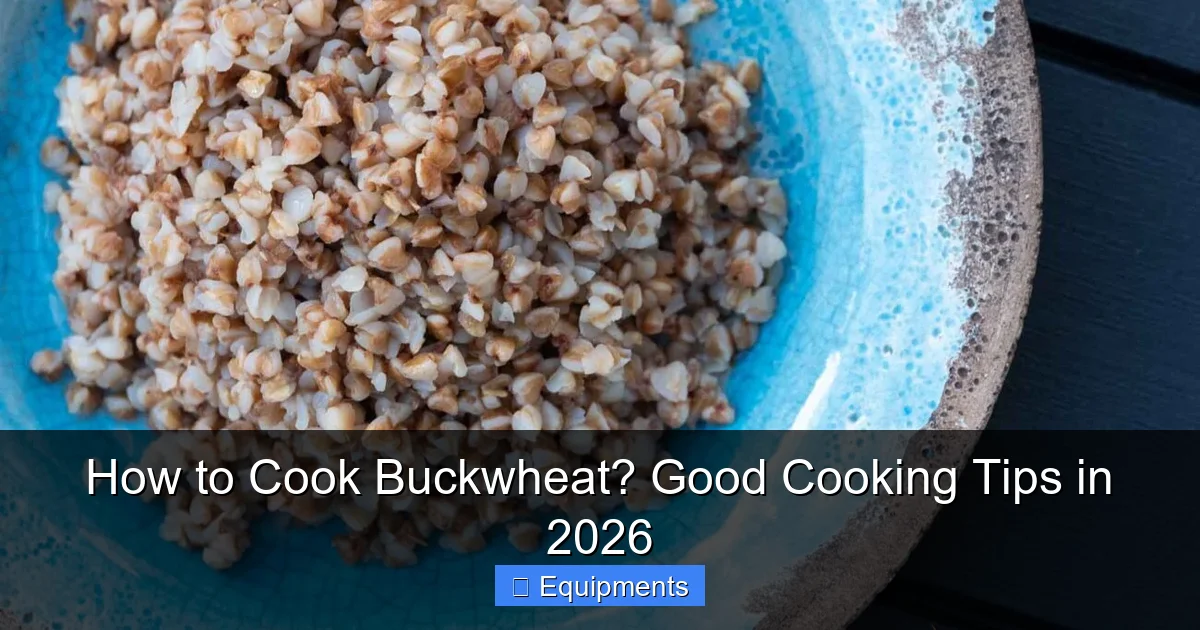
Visual guide about How to Cook Buckwheat? Good Cooking Tips in 2026
Image source: modernfamilycook.com
The Power of Pre-Toasted Kasha
If your package is labeled “kasha,” you’re starting with a major advantage. These groats have already been roasted, which gives them a deep, robust, almost cocoa-like nuttiness and a beautiful brown color. This roasting process also makes them slightly less absorbent, so they often require a touch less water and cook a bit faster. Kasha is the foolproof, full-flavor option. It’s what you want for a hearty side dish or a base for bowls where you want the buckwheat to stand out.
Working with Raw Buckwheat Groats
Raw or “whole” buckwheat groats are pale green or tan and have a milder, more delicate flavor. They are incredibly versatile but benefit immensely from a quick toast. Toasting your own raw groats is one of the best 2026 cooking tips we can give you. It unlocks a world of flavor in under 5 minutes. Simply heat a dry skillet over medium heat, add the groats, and stir constantly until they turn a golden brown and become fragrant. This step is non-negotiable for maximizing taste. Once toasted, they behave just like store-bought kasha.
The Fundamental Stovetop Method: Your Foundation for Success
Mastering the basic pot-on-the-stove method is essential. It’s reliable, requires no special equipment, and gives you complete control. This method works perfectly for both pre-toasted kasha and groats you’ve toasted yourself.

Visual guide about How to Cook Buckwheat? Good Cooking Tips in 2026
Image source: cookingwithelo.com
Step-by-Step: The 1.5:1 Water Ratio Technique
This ratio is your holy grail. For every 1 cup of buckwheat (kasha or toasted groats), you will use 1.5 cups of water or broth. This yields tender, separate grains without being soggy. Here’s the process:
- Rinse: Place the buckwheat in a fine-mesh strainer and rinse thoroughly under cold running water for 30 seconds. This removes any bitter dust.
- Combine: In a medium saucepan with a tight-fitting lid, combine the rinsed buckwheat, water/stock, and a pinch of salt (about ½ tsp per cup of grain). Add optional aromatics like a smashed garlic clove or a bay leaf now.
- Boil: Bring the mixture to a rolling boil over high heat.
- Simmer: Once boiling, immediately reduce the heat to the lowest possible setting. Cover the pot tightly.
- Cook: Let it simmer undisturbed for 18-22 minutes. Do not lift the lid! The buckwheat is done when all the water is absorbed and the grains are tender but still have a slight bite (al dente).
- Rest: Remove the pot from the heat and let it sit, still covered, for 10 minutes. This is crucial. The residual steam finishes the cooking and fluffs the grains.
- Fluff: Use a fork to fluff the buckwheat, just like you would with quinoa or rice. Serve immediately or use in your recipe.
Texture Control: From Salad Base to Porridge
The beauty of this method is its adaptability. For a firmer texture perfect for cold salads or grain bowls where you want distinct grains, use the full 1.5 cups of water and the full 10-minute rest. For a softer, porridge-like consistency ideal for a warm breakfast, increase the water to 2 cups per 1 cup buckwheat and extend the simmer time by 5 minutes. The resting step remains vital for both.
2026 Kitchen Tech: Cooking Buckwheat with Modern Equipment
Gone are the days of watching a pot. Today’s kitchen tech makes cooking grains perfectly effortless. Here’s how to leverage the best tools of 2026 for flawless buckwheat.

Visual guide about How to Cook Buckwheat? Good Cooking Tips in 2026
Image source: i.usefulfooddrinks.com
Smart Pressure Cookers & Multi-Cookers (Instant Pot, Ninja Foodi)
These appliances are arguably the best tool for buckwheat in 2026. They use precise pressure and temperature control to eliminate the guesswork. The “Multigrain” or “Rice” settings are ideal.
- Method: Add 1 cup rinsed/toasted buckwheat and 1.25 cups water or broth to the inner pot. Give it a quick stir. Close the lid, set the valve to “Sealing,” and select the “Rice” or “Multigrain” setting. The default time is usually perfect (around 12-15 minutes). Let the pressure release naturally for 10 minutes, then quick-release any remaining pressure.
- Pro 2026 Tip: Many newer models have app connectivity. Use the accompanying app to select the “Buckwheat” program if available, which is pre-calibrated for the ideal pressure cook time and natural release. The result is uniformly perfect grains every single time, with zero risk of boiling over.
Advanced Rice Cookers with “Grain” Settings
Don’t underestimate your rice cooker. High-end 2026 models from brands like Zojirushi or Cuckoo have specific settings for “Mixed Rice,” “Brown Rice,” and even “Germinated Brown Rice.” These settings apply the perfect combination of heat and resting time.
- Method: Add rinsed buckwheat and water to the inner pot using the 1.5:1 ratio. Wipe the outer pot dry, place it in the cooker, and select the “Brown Rice” or “Mixed Grain” setting. The cooker will automatically switch to a “Keep Warm” mode once done. Let it rest in the cooker for 10-15 minutes before opening to finish the steaming process.
- Why It Works: These cookers use fuzzy-logic technology to make micro-adjustments to temperature, ensuring the water is fully absorbed without scorching the bottom—a common stovetop worry.
The No-Fuss Microwave Method (For Small Batches)
For cooking a single serving quickly, your microwave is a surprisingly effective 2026 tool.
- Method: In a large microwave-safe bowl (it will expand!), combine ½ cup rinsed/toasted buckwheat and ¾ cup water. Cover the bowl tightly with a microwave-safe plate or lid. Microwave on high for 6 minutes. Let it stand, covered, for 5 minutes. Fluff with a fork. If it’s still too firm, microwave in 1-minute bursts until tender.
Flavor Foundations & Creative Culinary Pairings
Buckwheat is a culinary canvas. Its earthy, nutty base pairs with an incredible range of flavors. Start by building flavor into the cooking liquid, then think about final additions.
Infusing the Cooking Liquid
The easiest way to add depth is to substitute some or all of the water with another flavorful liquid.
- Broths: Use vegetable, chicken, or mushroom broth for a savory, umami-rich base perfect for main dishes.
- Milk or Plant Milk: For a creamy breakfast porridge, use a 1:1 mix of water and milk (dairy, almond, oat). The fat and sugars in the milk create a richer, softer texture.
- Aromatics: Always add a pinch of salt. Consider adding a smashed garlic clove, a few peppercorns, a bay leaf, or a sprig of thyme to the pot. Remove the aromatics before fluffing.
Post-Cooking Flavor Boosters
Once your buckwheat is cooked and fluffed, the real fun begins. Think of it like a blank slate for global cuisines.
- For a Japanese-Inspired Bowl: Toss with a splash of rice vinegar, a drizzle of toasted sesame oil, and finely chopped scallions. Top with a soft-boiled egg and nori strips.
- For a Hearty European Style: Sauté onions and mushrooms, then fold into the hot buckwheat with a pat of butter and fresh dill. This is classic kasha.
- For a Mediterranean Salad: Let the buckwheat cool, then toss with chopped cucumber, cherry tomatoes, Kalamata olives, red onion, and a lemon-oregano vinaigrette.
- For a Sweet Breakfast: Stir in a spoonful of maple syrup or honey, cinnamon, and chopped toasted nuts. Add a splash of milk for a porridge.
Storage, Reheating & Meal Prep Mastery
Cooked buckwheat is one of the best grains for meal prep. Its structure holds up beautifully to refrigeration and freezing without becoming gummy.
Refrigerator Storage: The 5-Day Rule
Let your cooked buckwheat cool completely at room temperature (no more than 2 hours). Transfer it to an airtight container. It will stay fresh and flavorful in the refrigerator for 5 full days. To prevent it from drying out, you can press a piece of parchment paper directly onto the surface before sealing the container.
Freezing for Future You: The 3-Month Gold Standard
For long-term storage, freezing is your best friend.
- Portion the cooled buckwheat into freezer-safe bags or containers. For bags, lay them flat on a baking sheet to freeze solid first; this creates easy-to-stack “buckwheat bricks.”
- Squeeze out excess air from bags to prevent freezer burn.
- Label with the date. Properly frozen buckwheat maintains excellent quality for up to 3 months.
Reheating to Perfection
Never reheat dry in the microwave. Always reintroduce moisture.
- Stovetop: Place the desired amount in a saucepan, sprinkle with 1-2 tablespoons of water or broth, cover, and heat over low-medium heat, fluffing occasionally, until steaming hot (5-7 minutes).
- Microwave: Place in a microwave-safe bowl, add a teaspoon of water per cup, cover with a damp paper towel, and microwave in 60-second bursts, fluffing between bursts, until hot.
Troubleshooting: Why Is My Buckwheat Mushy or Hard?
Even with the best equipment, issues can arise. Here’s your diagnostic guide for 2026.
The Problem: Mushy, Gluey, or Sticky Buckwheat
Cause: The most common culprit is using too much water. The 1.5:1 ratio is for *unsoaked* groats. If you soaked your groats beforehand (which isn’t usually necessary), you must reduce the cooking water by about ¼ cup per cup of groats. Another cause is not letting it rest covered after cooking; the steam needs that time to finish the grains without overcooking them.
Solution: Next time, measure precisely. If you have a pot of mush, spread it on a baking sheet to cool and dry out slightly. You can then use it as a binder for veggie burgers or in a hearty soup where texture is less critical.
The Problem: Undercooked, Crunchy Grains
Cause: The heat was too low, the simmering time was cut short, or the lid was lifted too early, releasing crucial steam. It could also be from using old, stale buckwheat that has lost moisture.
Solution: Ensure your heat is at a true, gentle simmer—you should see small bubbles. Keep the lid on for the full time. If using an older bag, add an extra 2 tablespoons of water and extend the simmer by 5 minutes. For a pot that’s mostly done but has a few hard bits, add 2 tablespoons of boiling water, cover, and let it sit off the heat for an extra 10 minutes.
The Problem: Burnt Bottom
Cause: Heat was too high, or the pot’s bottom isn’t perfectly flat on the burner (a common issue with older stovetops).
Solution: Always bring to a boil first, then immediately drop to the lowest heat. Use a heavy-bottomed pot like enameled cast iron or quality stainless steel, which distributes heat evenly. If using a new or different burner, you may need to adjust the “low” setting. The 2026 fix? Use your Instant Pot or rice cooker, which completely eliminates this risk.
Frequently Asked Questions
Do I need to rinse buckwheat before cooking?
Yes, always rinse buckwheat under cold water in a fine-mesh strainer. This removes any natural dust or debris and helps eliminate any potential bitter notes, especially with untoasted groats.
Can I substitute buckwheat for rice or quinoa in recipes?
Absolutely. Buckwheat has a similar cooking time to quinoa and a heartier texture than white rice. Use a 1:1 substitution by volume in most recipes, but be aware it has a distinct nutty flavor that will change the final dish’s taste profile.
Is it necessary to toast raw buckwheat groats?
While not strictly necessary for cooking, toasting raw groats is highly recommended. It significantly enhances their nutty, earthy flavor and aroma, transforming them from mild to deeply flavorful in just 4-5 minutes in a dry skillet.
How long does cooked buckwheat last in the fridge?
When stored properly in an airtight container in the refrigerator, cooked buckwheat will stay fresh and tasty for 4-5 days. Always let it cool completely before refrigerating to prevent sogginess from condensation.
Can I cook buckwheat in a rice cooker?
Yes, most modern rice cookers handle buckwheat excellently. Use the “brown rice” or “multigrain” setting with the standard 1.5 cups liquid to 1 cup buckwheat ratio. The cooker will manage the heat and resting cycle automatically.
Why is my cooked buckwheat still crunchy after the recommended time?
This is usually due to old, dry groats or insufficient liquid. Ensure you’re using the correct water ratio. If groats are very old, soak them in warm water for 30 minutes before cooking (and reduce cooking liquid by ¼ cup), or simply extend the simmer time by 5-10 minutes.