Regularly cleaning your Ninja Air Fryer Oven heating element is non-negotiable for optimal performance, food taste, and appliance longevity. Always unplug the unit and let it cool completely before any cleaning. Use only gentle, non-abrasive methods like soft brushes, mild soapy water, vinegar, or baking soda pastes. Never submerge the element or use harsh chemicals/metal tools, as this causes irreversible damage. A clean heating element ensures even cooking, prevents smoke, and avoids unpleasant odors in your food.
Key Takeaways
- Safety First: Always unplug and cool the appliance entirely. Never clean a hot or plugged-in unit to avoid electrical hazard and burns.
- Frequency Matters: Light cleaning after each use and a deep clean of the heating element every 1-2 months prevents stubborn, baked-on grime buildup.
- Gentle Tools Only: Use soft-bristled brushes (like a clean toothbrush), microfiber cloths, and non-scratch sponges. Avoid steel wool, metal utensils, and abrasive scrubbers.
- Natural Cleaners Preferred: Mild dish soap, white vinegar, and baking soda are highly effective and safe. Avoid oven sprays, bleach, and acidic cleaners that can corrode the element.
- Never Submerge: The heating element and its surrounding housing are not waterproof. Wiping and gentle brushing are the only safe methods; never run water over or soak it.
- Prevention is Key: Use liners or trays below the element to catch drips and crumbs. Avoid overly greasy foods that cause heavy splatter and residue.
- Know When to Stop: If you notice visible damage (blisters, cracks) on the element or persistent issues after cleaning, discontinue use and contact Ninja support.
📑 Table of Contents
- Why Cleaning Your Ninja Air Fryer Oven Heating Element is Crucial
- Understanding Your Ninja Air Fryer Oven Heating Element
- Safety First: Non-Negotiable Pre-Cleaning Steps
- Step-by-Step Cleaning Methods for the Heating Element
- What NEVER To Do: Common Cleaning Mistakes to Avoid
- Establishing a Maintenance Routine for Long-Term Health
- Troubleshooting: When Cleaning Isn’t Enough
Why Cleaning Your Ninja Air Fryer Oven Heating Element is Crucial
Your Ninja Air Fryer Oven is a kitchen workhorse, delivering crispy fries, juicy meats, and baked goods with impressive efficiency. At the heart of this performance is the heating element—the glowing, coiled component usually located at the top of the cooking chamber. This element generates the intense, radiant heat that cooks your food quickly and gives it that beloved fried texture without a deep fryer. But like any hardworking part, it gets dirty. Food particles, grease splatters, and sugar-based residues bake onto its surface over time. Ignoring this grime isn’t just unsightly; it directly impacts your cooking.
A coated heating element can’t transfer heat as effectively. You might notice longer preheat times, unevenly cooked meals (with some parts burnt and others underdone), and a persistent, acrid smoke or burning smell during operation. The residue essentially insulates the element, forcing it to work harder and potentially shortening its lifespan. Furthermore, old, carbonized food bits can ignite during a high-heat cycle, causing smoke alarms to blare and leaving a nasty odor that seeps into your food. Regular, proper cleaning of the Ninja Air Fryer Oven heating element is the single most important maintenance task to ensure delicious results, safe operation, and years of reliable service from your appliance. It’s a simple process that takes minutes but saves you from major headaches and costly replacements down the line.
Understanding Your Ninja Air Fryer Oven Heating Element
The Anatomy of the Heating System
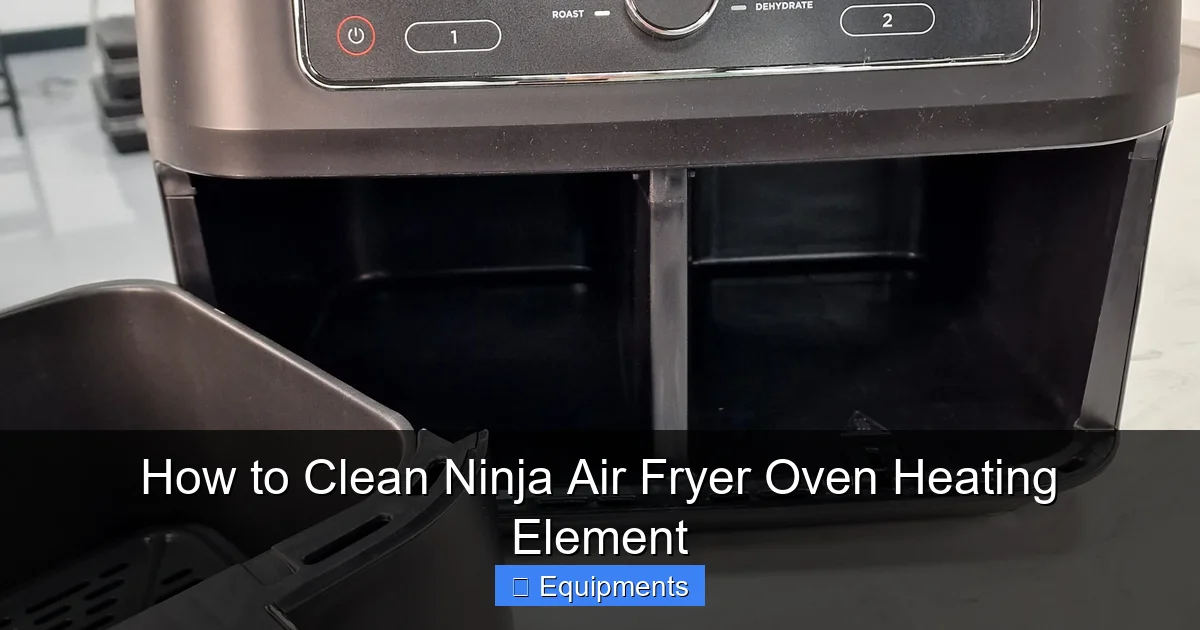
Before you clean, it helps to know what you’re looking at. In most Ninja Air Fryer Oven models (like the Ninja Foodi Dual Zone or Ninja Ninja OG901), the primary heating element is a tubular, metal coil, often protected by a metal mesh or guard. It’s typically positioned on the top interior of the oven cavity. Some models also have a secondary, lower heating element or a fan-forced convection system that circulates the hot air. The element you can see is the one that accumulates the most visible grime. It’s connected to the appliance’s internal wiring and is permanently installed—you cannot remove it for soaking. This fixed design is why our cleaning methods must be gentle and focused on the surface.
Visual guide about How to Clean Ninja Air Fryer Oven Heating Element
Image source: cdn.mos.cms.futurecdn.net
What Exactly Gets on It?
The debris on your heating element comes from three main sources: 1) Airborne Grease: When cooking fatty foods like chicken wings or bacon, tiny grease particles aerosolize and drift upward, condensing on the hot element. 2) Drips and Splatters: Saucy, juicy, or loose foods (like marinated meats or cheesy dishes) can bubble over and drip directly onto the element below. 3) Dry Crumbs & Sugar: Items like breaded foods, pastries, or anything with a sugary glaze can send fine particles or caramelized sugar sprays into the air, which then bake onto the element into a hard, carbonized layer. This mixture of polymerized grease and burnt sugar is what creates that stubborn, dark, flaky coating.
Safety First: Non-Negotiable Pre-Cleaning Steps
This is the most critical part of the entire guide. The heating element is an electrical component. Water and electricity are a dangerous mix. Rushing this step can ruin your appliance or, worse, cause injury. Follow these steps every single time, without exception.
Visual guide about How to Clean Ninja Air Fryer Oven Heating Element
Image source: ninjachoice.blog
1. Unplug the Appliance
This seems obvious, but it’s the golden rule. Physically pull the power cord from the wall outlet. Do not just turn the control panel off. The element can remain hot for a long time after cooking, and there is always a risk of residual current. Unplugging eliminates all electrical risk.
2. Allow for Complete Cooling
Let your Ninja Air Fryer Oven sit untouched for at least 60 minutes after its last use. The cooking chamber, racks, and especially the heating element retain immense heat. Touching them can cause severe burns. For a true deep clean, waiting several hours or overnight is ideal. You should be able to comfortably place your hand inside the cavity without feeling warmth.
3. Remove and Soak Accessories
Take out the cooking rack/grill, air fryer basket, and any trays or rotisserie parts. These are usually dishwasher-safe (check your manual), but for best results against baked-on grease, soak them in hot, soapy water for 15-30 minutes before scrubbing. Set them aside to dry while you work on the element itself. Clearing the cavity gives you full, unobstructed access.
4. Prepare Your Workspace
Have all your cleaning tools ready: soft brush, microfiber cloths, your chosen cleaning solution (soap water, vinegar, or baking soda paste), and a dry cloth for final wiping. Lay a towel or paper towels on your counter below the open oven door to catch any drips. Never use excessive liquid that could pool and seep into the appliance’s lower electrical components or fan.
Step-by-Step Cleaning Methods for the Heating Element
With safety protocols complete, you can begin. Start with the gentlest method and escalate only if necessary. Always test a small, inconspicuous area first if you’re concerned about discoloration (though the methods below are safe for the element’s finish).
Visual guide about How to Clean Ninja Air Fryer Oven Heating Element
Image source: ninjachoice.blog
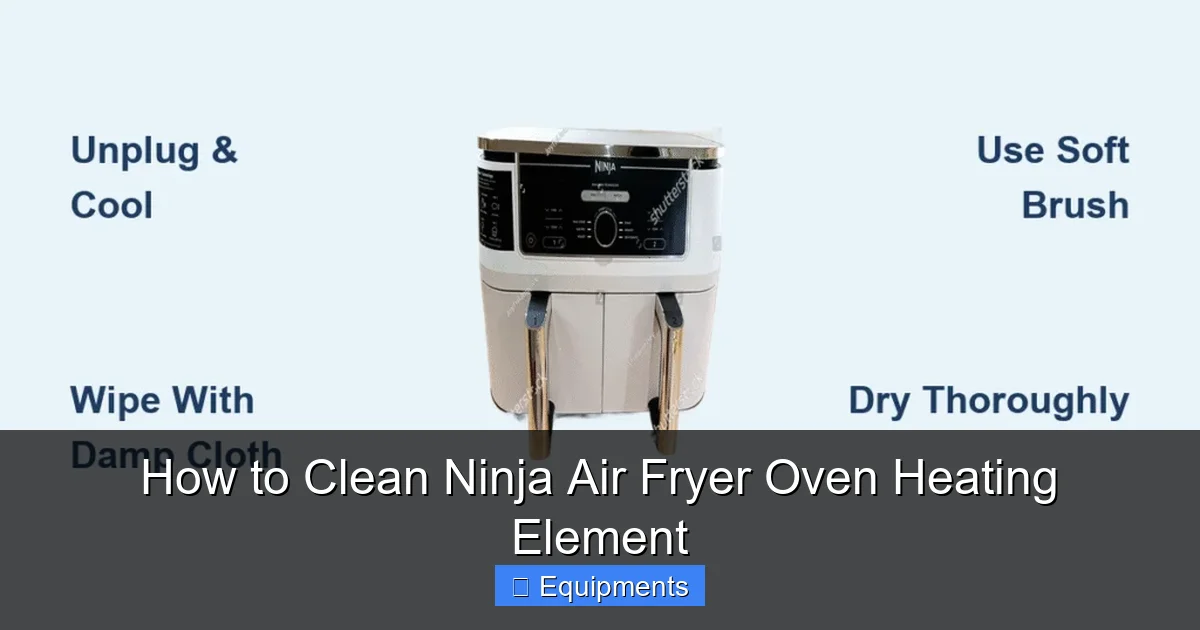
Method 1: The Routine Wipe-Down (For Light Grease)
This is the maintenance clean you should aim for after every 2-3 uses. It takes 2 minutes and prevents heavy buildup.
- What you need: A dry or slightly damp microfiber cloth. For slightly sticky residues, a cloth dampened with a drop of mild dish soap diluted in water, then wrung out until almost dry.
- Process: With the element cool, gently wipe the length of the coil and the protective mesh guard with the dry or damp cloth. Use a light touch. The goal is to remove fresh, loose crumbs and light grease film before it bakes on permanently. For the guard, wipe in the direction of the mesh lines.
- Why it works: Catching residue early means you never have to tackle the tough, carbonized layer. It’s the easiest way to maintain a consistently clean element.
Method 2: The Soft Brush & Soapy Water (For Moderate Buildup)
For noticeable greasy films or light baked-on spots, this is your go-to deep clean, done monthly.
- What you need: An old, clean toothbrush (soft bristles) or a dedicated appliance cleaning brush. A bowl of warm water with 1-2 drops of mild dish soap (like Dawn). A dry microfiber cloth.
- Process:
- Dip the bristles of the soft brush into the soapy water. Shake off excess liquid so the brush is damp, not dripping.
- Gently scrub the heating element coil and guard. Use small, circular motions on stubborn spots. The soft bristles will dislodge grime without scratching.
- Immediately wipe the area with a dry microfiber cloth to absorb the moisture and dissolved grease. Do not let soapy water sit or pool.
- Repeat, refreshing your soapy water as it gets dirty, until the element looks significantly cleaner.
- Pro Tip: For mesh guards, you can gently use a soft-bristled baby hair brush or a clean paintbrush (size 0 or 1) to get between the mesh lines without applying pressure that could bend the metal.
Method 3: White Vinegar Spray (For Stubborn Grease & Odors)
Vinegar is a natural degreaser and deodorizer. Its acetic acid cuts through grease and evaporates cleanly, leaving no residue. Perfect for monthly or bimonthly use.
- What you need: A small spray bottle filled with undiluted white distilled vinegar. A soft brush (toothbrush) and dry microfiber cloths.
- Process:
- Lightly mist the heating element coil and guard with the vinegar. You don’t need to soak it; a fine spray is sufficient.
- Let it sit for 5-10 minutes. This allows the vinegar to break down the grease bonds.
- Using the dry or very slightly damp brush, gently agitate the surface to lift the now-loosened grime.
- Wipe thoroughly with a dry microfiber cloth. Follow with a second dry wipe to ensure no vinegar moisture remains.
- Why it’s great: It tackles both grease and any lingering “old oil” smells. The vinegar scent will disappear once the element is dry and you run the oven empty for a cycle.
Method 4: Baking Soda Paste (For Carbonized, Burnt-On Residue)
When you have that hard, black, flaky coating—the result of burnt sugar or severely polymerized grease—baking soda is your mild abrasive hero.
- What you need: Baking soda, a few drops of water, a soft brush (toothbrush), and microfiber cloths.
- Process:
- Create a thick paste: Mix 3 parts baking soda with 1 part water in a small bowl.
- Apply a generous amount of paste directly onto the affected areas of the heating element. Focus only on the grimy spots; you don’t need to coat the entire element.
- Let the paste sit for 15-30 minutes. It will darken slightly as it draws out the grime.
- Using the soft brush, gently scrub the paste in circular motions. The mild abrasive action of baking soda will lift the carbonized layer without harming the metal. You’ll see the paste and grime turn dark gray/black.
- Wipe away the paste and debris with a cloth dampened with clean water, then immediately dry thoroughly with a separate dry cloth. Repeat application if necessary for the toughest spots.
- Caution: Do not use this method on a hot element, and ensure no paste residue is left behind, as it could smoke if heated.
Method 5: The Final “Burn-Off” Cycle (For All Deep Cleans)
After any of the deep cleaning methods (3 or 4), it’s best practice to run a final cycle to evaporate any remaining moisture or cleaning agent traces and to burn off any microscopic particles.
- Process:
- Ensure the element and interior are completely dry to the touch.
- Place the empty cooking rack inside.
- Set the oven to a high temperature (400°F / 200°C or the “Broil” setting if your model has it, but monitor closely).
- Run it for 10-15 minutes. You may see a little wisps of smoke or smell a faint odor as the last bits burn off—this is normal. Ensure your kitchen is well-ventilated.
- Turn off, unplug, and let cool completely before your next use.
What NEVER To Do: Common Cleaning Mistakes to Avoid
Understanding what to avoid is just as important as knowing what to do. These mistakes can permanently damage your Ninja Air Fryer Oven heating element and void your warranty.
Never Submerge or Run Water Over the Element
The heating element is an electrical component housed in a sealed unit, but it is not waterproof. Pouring water, spraying heavily, or submerging the oven cavity will allow water to seep into the insulation and wiring behind the element. This can cause short circuits, corrosion, and complete failure. Always use a damp (not wet) cloth on the element surface only.
Never Use Abrasive Scrubbers or Metal Tools
Steel wool, SOS pads, harsh scrub pads, and metal spatulas will scratch the surface of the element coil and its protective guard. These scratches become new hiding places for future grease and grime, making cleaning progressively harder. They can also damage the protective coating on some elements, leading to faster degradation. Stick to soft brushes and cloths.
Never Use Commercial Oven Cleaners or Harsh Chemicals
Aerosol oven sprays are extremely caustic and designed for bare, cold metal ovens. They can eat through the protective finishes on your Ninja’s element and internal components. Similarly, avoid bleach, ammonia, or acidic cleaners (like lemon juice in high concentration). They can cause corrosion and pitting. Your natural cleaners (vinegar, baking soda, soap) are perfectly sufficient and safe.
Never Attempt to Remove the Heating Element
The heating element is not a user-serviceable part. It is wired into the appliance’s internal harness. Forcing it out will break connections, damage wires, and almost certainly ruin the oven. Cleaning is a surface-only task. If the element is so damaged internally that it doesn’t work, it requires professional replacement.
Never Clean a Warm or Hot Element
Applying liquid to a hot surface causes instant vaporization, which can create pressure that might damage the element’s surface. More importantly, the risk of severe burns from steam or contact with the hot metal is extremely high. Patience is mandatory.
Establishing a Maintenance Routine for Long-Term Health
Consistency is the secret to a perpetually clean heating element. Adopt this simple habit cycle to make deep cleans rare and easy.
The After-Every-Use Habit (2 Minutes)
Once your oven has cooled (but is still warm to the touch, not hot), use a dry microfiber cloth to wipe out any loose crumbs from the bottom tray and walls. Give the heating element a quick, gentle pass with the dry cloth to knock off any fresh, loose debris. This prevents the daily accumulation that bakes on later.
The Weekly Wipe (5 Minutes)
During your regular kitchen cleanup, do a more thorough wipe-down. Dampen a cloth with soapy water (well-wrung), wipe the interior walls, door, and give the heating element a gentle once-over with your soft brush or cloth. Dry everything with a separate towel. This manages the light grease film before it thickens.
The Monthly Deep Clean (15-20 Minutes)
Pick one method from the step-by-step section (Vinegar Spray is excellent for this frequency). Perform a focused cleaning on the heating element. Follow it with the final burn-off cycle. Schedule this on your calendar, perhaps the first Saturday of every month.
Smart Cooking Practices to Minimize Mess
Your cooking style directly affects cleaning frequency. Use the provided air fryer basket or a rack to elevate food, allowing grease to drip down to the tray below, away from the top element. For messy foods (cheese, saucy ribs), place a layer of foil or a silicone mat on the tray beneath the food—but never on the element itself or blocking air flow. Trimming excess fat from meats reduces airborne grease. These small adjustments dramatically cut down on element grime.
Troubleshooting: When Cleaning Isn’t Enough
You’ve followed all the steps, but problems persist. Here’s what to check.
Persistent Smoke or Burning Smell During Use
If you’ve cleaned the element thoroughly but still get smoke on the first use after cleaning, it’s likely residual cleaning moisture (from a cloth that was too wet) or leftover baking soda paste vaporizing. Ensure the element is bone-dry before heating. Run an empty burn-off cycle. If the smell continues after several uses, there may be residue trapped in the element’s protective mesh or in the fan/vent system. You may need to gently clean the fan blades (if accessible) with a cotton swab or consult your manual for deeper vent cleaning.
The Element Looks Clean But Performance is Poor
If the element appears visually clean but cooking is uneven or slow, the issue may not be surface grime. Check the fan for blockages from food debris. A clogged fan can’t circulate hot air properly, mimicking the symptoms of a dirty element. Also, ensure you are not overloading the basket, which blocks air circulation. Finally, the element itself could be failing—a common issue after years of use. If it’s old and underperforming despite being clean, it may need professional inspection.
Visible Damage to the Element
If you see blisters, cracks, or significant discoloration (like a rainbow patina) on the metal coil itself, stop using the appliance immediately. This indicates the element is damaged and at risk of failing or causing a fire. Do not attempt to clean a damaged element. Contact Ninja Customer Support for diagnosis and potential replacement part information. Using a damaged heating element is a serious fire hazard.
Frequently Asked Questions
How often should I clean my Ninja Air Fryer Oven heating element?
Perform a quick dry wipe after each use, a gentle soap-and-water wipe weekly, and a deep clean with vinegar or baking soda every 1-2 months, depending on your usage frequency and the types of foods cooked.
Can I use a metal brush or scraper on the heating element?
No. Metal tools will scratch and permanently damage the element’s surface and protective guard, creating rough spots where more grime will accumulate and potentially shortening the element’s life. Always use soft-bristled brushes and cloths.
Is it safe to spray cleaner directly onto the heating element?
It is safe to lightly spray undiluted white vinegar from a small spray bottle. However, you should never use commercial oven cleaners, and you must avoid heavy spraying that causes liquid to drip or pool. Always wipe away any moisture immediately after application and ensure the element is completely dry before use.
My heating element still smells like burnt food after cleaning. What now?
Run an empty “Burn-Off” cycle at 400°F for 10-15 minutes. Ensure the element is completely dry first. If the odor persists, there may be residue trapped in the mesh guard or nearby vents. A second vinegar treatment and burn-off cycle usually resolves this.
What are the signs that my heating element is damaged and not just dirty?
Look for visible physical damage like blisters, cracks, or chunks missing from the coil. Also, if the element glows unevenly (some sections dark while others bright red) or fails to heat at all despite being clean, it is likely faulty and needs professional replacement.
Can I clean the heating element by running the oven with a bowl of vinegar inside?
No. This is a common misconception. The steam from a bowl of vinegar will not effectively clean the heating element itself; it will mostly clean the interior walls. To clean the element, you must apply your cleaning agent (vinegar, paste) directly to its surface and agitate it gently with a brush. The bowl-of-vinegar method is for deodorizing the general cavity.

Pingback: Large Air Fryer Oven - kitchenandhouseware.com
Pingback: Ninja Air Fryer Troubleshooting - kitchenandhouseware.com