Battling grease on your stainless steel cooker hood? It’s a common challenge, but with the right approach, you can restore its shine without causing damage. This guide covers everything from understanding grease buildup to using safe, effective cleaning solutions—both DIY and commercial. We emphasize avoiding abrasive tools that scratch the delicate finish and provide a simple maintenance routine to prevent future grime. Follow our structured steps for a sparkling clean hood that looks like new and functions efficiently.
Key Takeaways
- Prevention is key: A quick daily wipe with a microfiber cloth and mild soap drastically reduces heavy grease accumulation.
- Avoid abrasives at all costs: Steel wool, scouring pads, and harsh chemicals will permanently scratch and dull stainless steel.
- Work with the grain: Always wipe and scrub in the direction of the brushed metal pattern to maintain the finish and prevent streaks.
- Degreaser choice matters: For tough, baked-on grease, use dedicated stainless steel degreasers or gentle DIY acids like vinegar or baking soda pastes.
- Safety first: Always disconnect power to the hood, remove filters if possible, and ensure good ventilation when using any cleaning product.
- Rinse and dry thoroughly: Leaving cleaning residue can cause spotting and attract more dirt; a final rinse with water and immediate drying is essential.
- Regular deep cleans are easier: Cleaning your hood monthly is far less work than tackling months of caked-on grease.
📑 Table of Contents
- Introduction: The Shiny Challenge of a Greasy Hood
- Understanding the Grease Buildup: Your Enemy’s Composition
- Essential Tools and Products: What You Actually Need
- Step-by-Step Cleaning Methods: From Routine to Restoration
- Maintenance and Prevention: Keeping the Grease at Bay
- Troubleshooting and Special Considerations
- Conclusion: A Sparkling Hood is Within Reach
Introduction: The Shiny Challenge of a Greasy Hood
Your stainless steel cooker hood is the workhorse of your kitchen, silently battling steam, smoke, and airborne grease particles every time you cook. Its sleek, modern finish is a point of pride, but that same smooth surface has a dark secret: it’s a magnet for a stubborn, sticky film. That greasy layer isn’t just unsightly; it can impede your hood’s ventilation performance and, if left unchecked, become a fire hazard. Learning how to remove grease from a stainless steel cooker hood properly is essential for both aesthetics and safety. Many people reach for the nearest abrasive sponge or harsh chemical, only to find they’ve scratched the surface or left discoloration. This guide will walk you through the process with care, using methods that protect your investment while delivering a truly clean result. We’ll start with understanding your enemy—grease—and then move into the safe, effective tools and techniques that will have your hood gleaming again.
Understanding the Grease Buildup: Your Enemy’s Composition
Grease in your kitchen isn’t a single substance; it’s a complex mixture. It includes cooking oils and fats that vaporize, then condense on cooler surfaces like your hood. This is mixed with dust, food particles, and other airborne contaminants. Over time, especially with high-heat cooking, this layer bakes onto the stainless steel, becoming a tough, polymerized film that’s much harder to remove than fresh grease. Heat accelerates this process, making the area directly above your burners and the interior of the hood the worst-affected zones.

Visual guide about How to Remove Grease from Stainless Steel Cooker Hood
Image source: static-src.com
The Science of Sticking: Why Stainless Steel Gets So Grimy
Stainless steel is an alloy prized for its resistance to rust and corrosion, thanks to a passive chromium oxide layer. However, this layer is not invincible. Grease and grime can adhere to microscopic imperfections in the finish. The brushed texture of most cooker hoods provides more surface area for grease to grip compared to a polished surface. When this grease is repeatedly heated and cooled, it essentially “cures” onto the metal, bonding chemically and physically. This is why a simple wipe with a dry cloth works for fresh splatters but fails completely on older buildup. The key is to break down these grease polymers without compromising the steel’s protective layer.
Identifying Buildup Stages: Fresh vs. Baked-On
Before you start, assess the job. Is this a routine monthly clean, or has it been over six months? Fresh grease is light, translucent, and waxy. It responds well to warm, soapy water and gentle wiping. Baked-on grease is dark, thick, flaky, or crusty. It feels solid and often requires a degreaser to sit and soften before scrubbing. Recognizing this difference saves you time and prevents you from using unnecessarily harsh methods on a simple job, or underestimating the effort needed for a severe one.
Essential Tools and Products: What You Actually Need
Success in cleaning starts with the right arsenal. Using the wrong tool is the fastest way to ruin a stainless steel surface. Forget about anything with a gritty, abrasive texture. Your toolkit should focus on softness, absorbency, and pH-appropriate cleaners.
Visual guide about How to Remove Grease from Stainless Steel Cooker Hood
Image source: thekitchenix.com
The Non-Negotiables: Your Cleaning Kit
First, gather your basics. You will need several microfiber cloths. These are soft, highly absorbent, and won’t leave lint. Designate one for applying cleaner and a separate, clean one for buffing and drying. A set of soft-bristled nylon brushes (like those for baby bottles or detail cleaning) is invaluable for getting into vent grilles and seams. Have a plastic or silicone scraper on hand for gently lifting thick, softened grease without scratching. For buckets or bowls, use plastic. Always have a source of clean, warm water for rinsing.
Choosing Your Cleaner: From Pantry to Professional
This is where you have excellent options. For light to moderate grease, a solution of warm water and a few drops of mild dish soap (like a clear, grease-cutting formula) is surprisingly effective. For tougher jobs, reach for white distilled vinegar. Its acetic acid cuts through grease and is safe for stainless steel. A paste made from baking soda and water offers a very mild abrasive action that is usually safe for stainless steel when used gently with a soft cloth. For the most stubborn, baked-on grime, invest in a dedicated stainless steel cleaner/degreaser. Look for products labeled as non-abrasive and specifically for stainless steel appliances. Avoid anything containing chlorine bleach, as it can cause pitting and corrosion. Always read the manufacturer’s instructions for your specific hood model first.
Step-by-Step Cleaning Methods: From Routine to Restoration
Now, let’s get to work. The process differs slightly based on the severity of the grease, but the core principles remain: degrease, agitate gently, rinse, and dry. Always start with the gentlest method and escalate only if needed.
Visual guide about How to Remove Grease from Stainless Steel Cooker Hood
Image source: thekitchenix.com
Method 1: The Routine Clean (Weekly/Monthly)
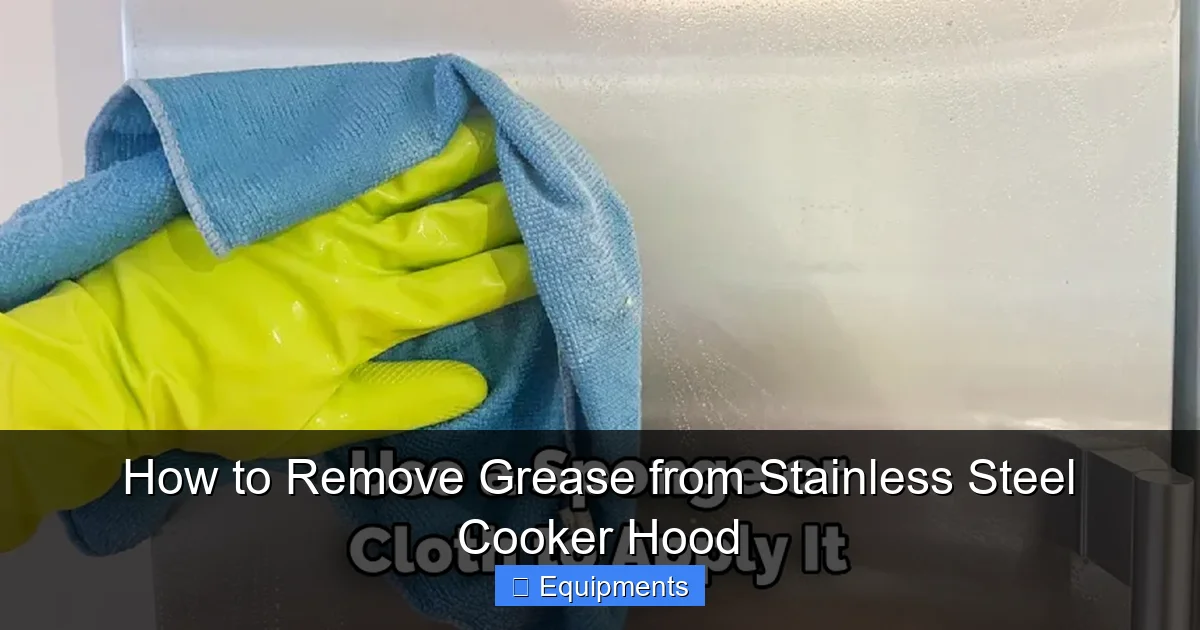
This is your maintenance routine to prevent heavy buildup. Ensure the hood is cool to the touch. Mix a few drops of mild dish soap in a bowl of warm water. Dip a microfiber cloth into the solution, wring it out thoroughly so it’s only damp, and wipe down the entire exterior surface of the hood. Pay special attention to the area around the control panel and the front edge. Immediately follow with a clean, damp microfiber cloth to remove any soap residue. Finally, buff the surface dry with a completely dry microfiber cloth, following the grain of the stainless steel. This simple habit will save you hours of hard work later.
Method 2: Tackling Moderate Grease with Vinegar
For a hood with a visible, sticky film, undiluted white vinegar is your best friend. Dampen a microfiber cloth with vinegar and wipe the affected areas. For extra cleaning power, you can heat the vinegar slightly (do not boil). Let the vinegar sit on the surface for 5-10 minutes to break down the grease. For textured surfaces or grilles, use a soft-bristled brush dipped in vinegar to agitate the grease. Wipe away the loosened grime with a cloth dampened with clean water. Rinse the cloth frequently. Finish with a thorough dry buff. The vinegar smell will dissipate quickly.
Method 3: The Baking Soda Paste for Stubborn Spots
When you encounter a thick, dark patch, make a paste: three parts baking soda to one part water. Apply this paste directly to the grease spot. Using a soft microfiber cloth or a soft sponge side, gently rub in circular motions, always with the grain. The mild alkalinity of baking soda helps saponify (break down) the grease, while the slight grit provides gentle abrasion. Let it sit for 10-15 minutes on very tough spots. Wipe away with a damp cloth and rinse thoroughly. This method is excellent for the metal grease filters, which can be soaked in a baking soda and hot water solution.
Method 4: Commercial Degreaser and Deep Clean Protocol
For a hood that hasn’t been cleaned in over a year, a commercial degreaser is the most efficient tool. Always read the label. Ensure it’s safe for stainless steel. Apply the degreaser according to instructions, usually by spraying or applying with a cloth. Let it dwell for the recommended time (often 3-5 minutes) to allow the chemicals to penetrate and soften the baked-on grease. Using a soft-bristled brush, gently agitate the surface, working in sections. Wipe away the dissolved grease with a damp cloth. This is critical: You must then rinse the area with a cloth dampened in clean water to neutralize the degreaser. Any residue left can attract dirt faster and potentially damage the finish over time. Dry immediately and completely with a clean microfiber towel.
Method 5: Cleaning the Grease Filters (The Most Important Step)
The metal or charcoal filters are the primary grease traps and often the dirtiest part. Check your user manual first. Most metal filters are removable and dishwasher-safe (check if they are coated). If not, or if you prefer hand washing: Fill your sink or a large basin with hot water and add a generous amount of degreasing dish soap or a cup of baking soda. Submerge the filters and let them soak for at least 30 minutes, longer for heavy buildup. Use a soft brush to scrub between the pleats. Rinse under hot running water until all soap is gone. For charcoal filters, these are not washable and must be replaced according to the manufacturer’s schedule (usually every 3-6 months with heavy use).
Maintenance and Prevention: Keeping the Grease at Bay
Cleaning a filthy hood is a chore. Keeping it clean is a habit. A consistent, light maintenance routine is infinitely easier than periodic deep cleans. The goal is to stop grease from ever baking on in the first place.
The 30-Second Daily Wipe
After your evening cooking session, while the hood is still warm (not hot), grab a dry or slightly damp microfiber cloth. Quickly wipe down the entire front surface and the control panel. This removes the fresh, still-soft grease film before it has a chance to harden. It takes less time than washing a single pot and makes your monthly deep clean a breeze. Keep a dedicated “hood cloth” in a drawer near your stove.
Weekly Boost and Filter Care
Once a week, use your vinegar spray or soapy water method from the routine clean. This tackles the accumulated film from daily cooking. Check your filters weekly. If they look visibly greasy or dark, it’s time for a wash or a check on their condition. Never run your hood without filters in place, as grease will then coat the internal motor and ducts, causing a major professional cleaning issue.
Mind Your Cooking Habits
Your cooking style directly impacts hood cleanliness. Using the back burners more often positions the pots directly under the hood’s suction path. Using lids on pots reduces splatter and vapor release. Try to avoid extremely high heat for prolonged periods, as this maximizes grease vaporization. A slightly lower simmer or sauté produces less airborne grease. While it won’t eliminate the need for cleaning, these habits dramatically slow the accumulation rate.
Troubleshooting and Special Considerations
Even with the best methods, you might encounter specific issues. Here’s how to handle them.
Dealing with Discoloration and Heat Tints
Sometimes, after cleaning, you might notice a rainbow-like discoloration or a yellowish tint, especially around high-heat areas. This is often a heat tint or a thin layer of oxide that forms on the steel. It’s not grease. To remove it, you can use a dedicated stainless steel polish (not a cleaner) applied with a soft cloth, following the grain. A paste of cream of tartar and water can also work. Apply, let sit for 15 minutes, rinse, and dry. If the tint is severe, it may be permanent heat damage, which is cosmetic and doesn’t affect function.
Scratches: Prevention and Minor Repair
Prevention is the only cure. Never use anything abrasive. If you have a very fine, hairline scratch, you can sometimes minimize its appearance. Use a very fine stainless steel polishing compound (like those for jewelry) and a soft cloth. Rub very gently in the direction of the grain. This can blend the scratch into the surrounding finish. Deep scratches, however, are permanent and require professional metal polishing to remove.
Charcoal Filters and Internal Ducts
Your hood’s internal motor housing and ductwork are not designed for DIY deep cleaning. Grease that escapes the filters will coat these parts. If you notice a significant drop in suction power or a persistent, strong grease smell even after filter cleaning, it’s likely time for a professional kitchen hood cleaning service. They have the tools and chemicals to safely degrease the internal components and ducts, which is a fire safety essential for commercial setups and a good periodic practice for heavy home use.
Conclusion: A Sparkling Hood is Within Reach
Removing grease from your stainless steel cooker hood doesn’t require elbow grease that damages the surface. It requires patience, the right tools, and an understanding of what you’re cleaning. By committing to a simple daily wipe and a monthly deep clean with gentle, effective solutions like vinegar, baking soda, or a proper stainless steel degreaser, you can maintain that beautiful, hygienic shine indefinitely. Remember the golden rules: always work with the grain, never use abrasives, and rinse and dry thoroughly. Your cooker hood is a vital appliance. Treating it with care ensures it looks great, performs optimally, and contributes to a safer, more pleasant kitchen environment for years to come. Now, grab your microfiber cloth and enjoy the satisfaction of a job well done.
Frequently Asked Questions
Can I use steel wool or a scouring pad on my stainless steel hood?
No. Steel wool and abrasive scouring pads will permanently scratch the brushed finish of stainless steel, creating a dull, damaged surface that will attract dirt even more. Always use soft microfiber cloths and non-abrasive cleaners.
Is it safe to use bleach or oven cleaner on my stainless steel hood?
No. Chlorine bleach is highly corrosive to stainless steel and can cause pitting and permanent discoloration. Oven cleaner is extremely alkaline and formulated for ceramic or enamel surfaces; it will likely damage the protective layer on your stainless steel. Stick to pH-neutral or mildly acidic cleaners like vinegar.
How often should I deep clean my stainless steel cooker hood?
For average home cooking, a thorough deep clean every 1-2 months is recommended. If you do a lot of high-heat frying or wok cooking, you may need to deep clean monthly. The daily 30-second wipe is the most important habit to extend the time between deep cleans.
What’s the best way to clean the textured grease filter?
Remove the filter according to your manual. Soak it in a sink of hot water with a heavy-duty degreasing dish soap or a cup of baking soda for at least 30 minutes. Use a soft bottle brush or nylon brush to scrub between the pleats. Rinse extremely well under hot water and dry completely before reinstalling.
My hood has a rainbow-like tint after cleaning. Is it damaged?
This is likely a heat tint, a common oxidation from the hood’s normal operation, not damage from cleaning. It can often be removed with a dedicated stainless steel polish or a paste of cream of tartar and water, applied gently with a soft cloth following the grain, then rinsed and dried.
Can I use the same cleaner on the hood’s motor housing and internal parts?
No. The internal motor housing and fan blades should not be soaked or saturated with liquid. For light surface dust, use a dry or slightly damp microfiber cloth. For internal grease buildup beyond the filters, it’s best to consult a professional, as improper cleaning can damage the motor and create a fire hazard.