Cleaning a Kitchenaid oven with a blue interior requires a gentle, informed approach to protect its unique enamel finish. Unlike standard stainless steel, the vibrant blue coating is susceptible to scratches and discoloration from abrasive tools and harsh chemicals. This guide provides a detailed, step-by-step roadmap for both routine upkeep and intensive deep cleaning, ensuring your oven remains a functional centerpiece and a beautiful part of your kitchen for years to come.
Key Takeaways
- Protect the Finish: Always avoid abrasive scrubbers (steel wool, harsh pads) and caustic chemicals (oven cleaners with lye) on the blue enamel, as they will cause permanent scratches and etching.
- Embrace Gentle Cleaners: Use pH-neutral soaps, baking soda pastes, vinegar solutions, and cleaners specifically labeled safe for enamel or colored surfaces for all routine and deep cleaning tasks.
- Prevention is Primary: Regular, light cleanings after spills and using oven liners or drip trays are the most effective strategies to prevent baked-on grime and protect the blue interior.
- Self-Clean Cycle Caution: The high-heat self-clean feature is generally safe for the blue interior but requires thorough preparation (remove all racks, wipe loose debris) and careful post-cycle cleaning of ash.
- Tool Selection Matters: Use only non-scratch sponges (the blue side), soft microfiber cloths, nylon brushes, and plastic or silicone scrapers to avoid any surface damage during the cleaning process.
- Cool Before You Clean: Never attempt to clean the oven interior while it is warm or hot. Allow it to cool completely to avoid burns and to prevent cleaners from baking onto the surface.
- Test in an Inconspicuous Spot: Before applying any new cleaning solution to a large area, test it on a small, hidden section of the blue interior to ensure compatibility and prevent unexpected discoloration.
📑 Table of Contents
- Introduction: Preserving the Beauty of Your Blue Kitchenaid Oven
- Understanding Your Blue Interior: What Makes It Special (and Sensitive)
- The Essential Toolkit: Safe Supplies for Your Blue Oven
- The Daily & Weekly Defense: Routine Maintenance That Works
- The Deep Clean: A Step-by-Step Guide to Tackling Tough Grime
- Leveraging the Self-Clean Cycle: A Safe Guide for Blue Interiors
- Troubleshooting: Solving Common Blue Interior Dilemmas
- Conclusion: A Commitment to Gentle Care
Introduction: Preserving the Beauty of Your Blue Kitchenaid Oven
You chose a Kitchenaid oven with a blue interior for a reason. That stunning, vibrant color transforms your kitchen from a purely functional space into a statement of style and personality. It’s a bold design choice that reflects confidence and a love for cookware that’s as beautiful as it is capable. But let’s be honest: that beautiful blue surface also shows every splatter, spill, and speck of baked-on grease. The fear of scratching or dulling that perfect finish can make the simple task of cleaning feel daunting. You might find yourself staring at a stubborn cheese drip or a sugary spill, wondering if a special, expensive product is needed or if you’re doomed to live with the stain.
This comprehensive guide is here to dispel the anxiety. Cleaning your Kitchenaid oven with blue interior is not about finding magic potions; it’s about understanding the surface you’re working with and employing the correct, gentle techniques. We will walk you through everything from the daily 60-second wipe-down that makes deep cleans a breeze to the safe execution of the self-clean cycle. By the end, you’ll have the knowledge and confidence to keep your blue oven looking showroom new, protecting your investment and ensuring it remains a joy to cook with and look at for years. Forget harsh scrubbing and damaging chemicals; it’s time to embrace smart, safe cleaning.
Understanding Your Blue Interior: What Makes It Special (and Sensitive)
The Blue Enamel Finish: Porcelain-Coated Steel
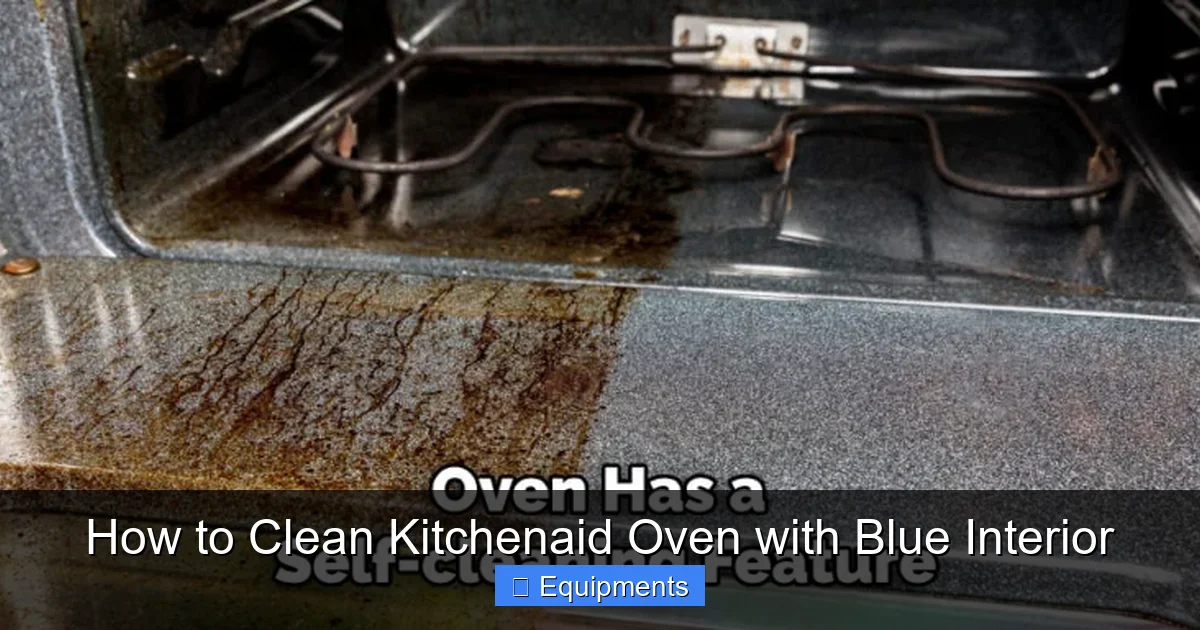
That rich blue color isn’t just paint. Kitchenaid (and most premium brands) uses a porcelain-enamel coating on the interior of their ovens, particularly on colored models. This is a glass-like material fused to the steel body at extremely high temperatures. The result is a surface that is incredibly durable against heat and corrosion, non-porous (so food residues don’t soak in), and available in a stunning array of colors, including that iconic blue. However, this glassy surface has a critical vulnerability: it is susceptible to scratches from anything harder than the enamel itself and can be etched or dulled by highly acidic or alkaline (caustic) cleaners.
Visual guide about How to Clean Kitchenaid Oven with Blue Interior
Image source: thekitchenix.com
Why Standard Oven Cleaners Are a No-Go
Many traditional, heavy-duty oven cleaners contain powerful chemicals like sodium hydroxide (lye) or other strong alkalis. These are designed to chemically break down thick, carbonized grease. While effective on bare metal, they are too aggressive for a colored enamel finish. They can cause the blue color to fade, become patchy, or develop a permanent, chalky haze. The abrasive particles sometimes suspended in these sprays or pastes can also create fine scratches, making the surface look permanently dull and worn. For a Kitchenaid oven with a blue interior, the rule is simple: if the label says “caustic,” “lye-based,” or “for stainless steel only,” do not use it.
The Stainless Steel Comparison
If you’re familiar with cleaning a stainless steel oven, you must unlearn some habits. Stainless steel is a metal with a protective chromium oxide layer. It can often tolerate slightly more aggressive scrubbing (with the grain) and certain stainless-specific polishes. The blue enamel is a completely different beast. It has no “grain” to scrub with, and any abrasive action will leave a visible mark. Think of it more like cleaning a fine ceramic dish or a glass stovetop—the goal is to lift debris without touching the surface itself.
The Essential Toolkit: Safe Supplies for Your Blue Oven
Before you start, gather your tools. Having the right equipment on hand is 80% of the battle. Using the wrong sponge or scraper is the fastest way to cause irreversible damage.

Visual guide about How to Clean Kitchenaid Oven with Blue Interior
Image source: thekitchenix.com
- Non-Scratch Sponges: The blue-and-yellow side of a standard non-scratch sponge (like a Scrub Daddy or similar brand) is perfect. The “blue” side is typically the gentle, non-abrasive one. Never use the green or yellow scouring side.
- Microfiber Cloths: Several soft, clean microfiber cloths are indispensable for wiping, drying, and polishing without lint or scratches.
- Soft-Bristled Nylon or Plastic Brushes: A bottle brush or a dedicated oven brush with nylon bristles is ideal for getting into corners, along the door gasket, and around heating elements.
- Silicone or Plastic Scrapers: For lifting baked-on food without gouging, a flexible silicone spatula or a plastic ice scraper is your best friend. Metal scrapers are a absolute no.
- Spray Bottles: Have one for your vinegar-water solution and another for your homemade baking soda paste if desired.
- Rubber Gloves: Protect your hands from hot water and any cleaning agents, even gentle ones.
- Bucket or Large Bowl: For warm soapy water.
Your Recommended Cleaning Agents: Stick to these safe options. Dish soap (a few drops in warm water) is your everyday hero. White distilled vinegar is a fantastic natural degreaser and descaler. Baking soda creates a mild abrasive paste when mixed with water, perfect for lifting grime without scratching. Commercial enamel-safe cleaners like Bar Keepers Friend (the non-abrasive, liquid version labeled for cookware) or Weiman’s Ceramic & Porcelain Cleaner are excellent investments for tougher jobs. Always read the label to confirm “enamel” or “porcelain” safe.
The Daily & Weekly Defense: Routine Maintenance That Works
The secret to a perpetually clean blue oven is not one massive effort, but a series of tiny, effortless habits. Letting spills sit is what turns a quick wipe into a hours-long scrubbing session.
Visual guide about How to Clean Kitchenaid Oven with Blue Interior
Image source: thekitchenix.com
The 60-Second Post-Cook Wipe
This is the single most important habit to develop. Once your oven has cooled down to a warm (not hot) temperature—usually 30-45 minutes after turning it off—take a damp microfiber cloth with a drop of dish soap and quickly wipe the entire interior. Pay special attention to the bottom, where liquids and food particles tend to pool. The warmth actually helps loosen any fresh splatters. This prevents anything from baking on permanently. It takes less time than unloading the dishwasher and saves you from monumental effort later.
Managing Drips and Spills Immediately
If something bubbles over or drops while cooking, stop the oven if safe to do so. Use a pair of long tongs or a wooden spoon to carefully remove any large food debris. While the oven is still warm (use extreme caution), carefully wipe the area with a damp cloth. For sugary spills (like pie filling or caramel), sprinkle a little kosher salt on the spill immediately. The salt absorbs the liquid and creates a barrier, preventing it from caramelizing and sticking. You can wipe the salt away later with your regular clean.
Using Oven Liners and Drip Trays Strategically
A high-quality, custom-fit silicone oven liner for the bottom rack is a game-changer. It catches drips and spills and can be removed and washed in the sink. Crucially, never place an oven liner directly on the oven floor if your oven has a heating element underneath, as it can melt or trap heat. Place it on the rack below where you are cooking. A simple aluminum foil “boat” on the rack below a messy dish (like a meatloaf or lasagna) also works wonders for catching grease splatters. Just be sure the foil does not touch the heating elements.
The Deep Clean: A Step-by-Step Guide to Tackling Tough Grime
Even with the best habits, a deep clean is necessary every few months. Here is a safe, effective method for your blue interior that uses baking soda as the primary workhorse.
Preparation: The First Step to Success
1. Cool Completely: Ensure the oven has been off for several hours and is cool to the touch. This is a safety must.
2. Remove Everything: Take out all racks, thermometer probes, pizza stones, etc. Set them aside to be cleaned separately.
3. Ventilate: Open a window. While we’re using gentle cleaners, the process can still release odors.
4. Gently Scrape: Using your plastic scraper, gently lift any large, loose pieces of baked-on food. Don’t force it; if it’s stuck solid, the paste will loosen it.
Creating and Applying the Baking Soda Paste
In a small bowl, mix baking soda with just enough water to form a thick, spreadable paste—similar to the consistency of peanut butter. The magic of baking soda lies in its mild alkalinity and slight grittiness, which lifts grease without harming enamel. Using your non-scratch sponge or even a gloved hand, spread a generous layer of this paste over every dirty surface of the blue interior. Pay extra attention to the back wall, the corners, and the area around the heating elements (be careful not to get paste *inside* any element housing if it’s exposed). For very dirty ovens, you can also apply a thin layer of paste to the oven door. Let this paste sit for at least 3-4 hours, or ideally, overnight. The longer it sits, the more it will work to break down the grime. You’ll see it darken as it absorbs grease and debris.
Scrubbing and Rinsing: The Gentle Approach
After the paste has dried and darkened, dampen your non-scratch sponge with warm water. Begin scrubbing in small, circular motions. The dried paste acts as a gentle abrasive. You’ll see the grime lift away. For stubborn spots, apply a little extra paste and let it sit for another 15 minutes before scrubbing again. Do not flood the oven with water. Keep your sponge damp, not soaking. Once you’ve removed all the paste and grime, take a clean, damp microfiber cloth and wipe down the entire interior multiple times to remove all baking soda residue. Any leftover paste will leave a white film. Finally, dry the entire interior with a dry microfiber towel. Admire your sparkling blue oven!
Cleaning the Oven Door and Gasket
The oven door, especially the interior glass, needs special care. For the glass, use your vinegar-water solution (equal parts) in a spray bottle. Spray it on, let it sit for 5 minutes, and wipe with a microfiber cloth. For any baked-on grime on the glass, use the baking soda paste method described above. The rubber door gasket can harbor grease and odors. Wipe it thoroughly with your warm soapy cloth, then rinse with a cloth dampened with plain water. Never pull or pry the gasket; just wipe its surface.
Leveraging the Self-Clean Cycle: A Safe Guide for Blue Interiors
Your Kitchenaid oven’s self-clean or pyrolytic cycle is a powerful tool that heats the interior to temperatures around 900°F (480°C), incinerating food residue to ash. The good news is that this process is generally safe for the porcelain-enamel blue coating, as the finish is designed to withstand extreme heat. However, proper preparation is non-negotiable to protect other components and ensure a clean result.
When to Use (and Not Use) Self-Clean
Use the self-clean cycle for heavy, years-worth of buildup that manual cleaning can’t handle. Do not use it frequently. The extreme heat places stress on the oven’s components (especially the door lock and wiring) and can potentially cause discoloration or fading of the blue interior over many cycles. Limit it to once or twice a year at most. Never use the self-clean cycle if you have recently used commercial oven cleaner inside the oven. The chemicals can react violently at high temperatures, creating toxic fumes and potentially damaging the enamel.
Critical Pre-Clean Preparation
This step cannot be skipped.
1. Remove All Interior Items: Take out racks, thermometer, pizza stone, and any accessories. The heat will warp or ruin them.
2. Manual Wipe-Down: Use your warm soapy cloth to wipe away any large, loose food particles, excess grease, or spills. The self-clean cycle is for stuck-on carbon, not puddles of oil. Large amounts of grease can smoke excessively.
3. Clean the Door Gasket: Wipe the gasket clean. Any debris here can burn and create a bad smell.
4. Ventilate the Kitchen: Open windows and turn on your range hood vent to its highest setting. The cycle will produce smoke and odors as debris burns off.
5. Lock the Door: Ensure the oven door is fully closed and locked. The oven will not start the cycle if the lock isn’t engaged.
Running the Cycle and Post-Clean Care
Set the oven to the self-clean function according to your model’s manual. The cycle will take 2-4 hours. Stay home during this time, keep children and pets away from the kitchen, and keep the kitchen well-ventilated. After the cycle finishes and the oven cools completely (this can take several hours), open the door. You will find a fine, white ash-like residue on the blue interior floor and walls. Do not use a wet cloth on this ash while the oven is warm. Once cool, use a soft brush (like a pastry brush) or a vacuum with a brush attachment to gently sweep away all the ash. Then, wipe the entire interior with a damp microfiber cloth to remove any remaining film. Dry thoroughly. Your blue interior should be clean and ready for use.
Troubleshooting: Solving Common Blue Interior Dilemmas
The Rainbow Stain: Hard Water Deposits
If you see iridescent, rainbow-like streaks, especially after cleaning with water, this is almost always hard water mineral deposits. The minerals in your tap water can leave this film on the smooth enamel surface. The fix is simple: use a white vinegar solution. Spray it directly on the affected areas, let it sit for 10-15 minutes, and wipe with a clean microfiber cloth. The mild acid in the vinegar dissolves the mineral scale. For extreme cases, soak a cloth in vinegar and lay it over the stain for an hour before wiping.
Stubborn, Baked-On Sugar or Caramel
Sugar-based spills are the nemesis of any oven. Once caramelized, they are incredibly tough. Your first line of defense is the baking soda paste method applied thickly and left overnight. If that fails, try a poultice: make a thick paste of baking soda and a few drops of water, apply it, and cover it with a cloth soaked in hot (not boiling) water. Let it sit for several hours. The steam and gentle alkali work together to re-hydrate and lift the sugar. Be patient; this may require 2-3 applications.
Discoloration or Fading Spots
If you’ve already used a harsh cleaner and notice a lightened or chalky spot, unfortunately, this is likely permanent damage to the enamel’s color layer. You cannot re-color it. The best approach is to ensure the rest of the oven is impeccably clean so the spot is less noticeable. In the future, the only way to avoid this is strict adherence to using only enamel-safe products. Prevention is infinitely better than trying to fix this type of damage.
Conclusion: A Commitment to Gentle Care
Your Kitchenaid oven with its beautiful blue interior is more than an appliance; it’s a testament to thoughtful design in your kitchen. Keeping it clean doesn’t require a arsenal of toxic chemicals or elbow grease that risks scratching the surface. It requires a shift in mindset: from aggressive removal to gentle, consistent lifting. By embracing the daily 60-second wipe, using the right tools (non-scratch sponges, plastic scrapers), and relying on safe, natural cleaners like baking soda and vinegar, you can maintain that vibrant blue luster indefinitely. The self-clean cycle is a powerful but occasional ally, not a weekly solution. Remember, every time you choose a soft cloth over a steel wool pad, you are actively preserving the beauty and value of your kitchen. This approach ensures your blue oven remains not just a workhorse for culinary creations, but a stunning point of pride in your home for the long haul.
Frequently Asked Questions
Can I use Bar Keepers Friend on my Kitchenaid blue oven interior?
Yes, but only the specific non-abrasive liquid or powder formula labeled for “Ceramic/Glass” or “Porcelain.” Avoid the classic “powdered” version with oxalic acid, which can be abrasive. Always test on a small hidden area first and use a soft cloth, not the provided pad.
Is it safe to use the self-clean cycle on the blue enamel? Will it fade the color?
The self-clean cycle is generally safe for the enamel finish as it’s designed to withstand high heat. However, repeated frequent use (more than 1-2 times per year) can potentially cause gradual fading or discoloration over many years. It should be used sparingly for major buildup, not as routine maintenance.
What’s the best way to remove melted plastic or foil that’s stuck to the bottom?
First, ensure the oven is completely cool. Use a plastic scraper to gently lift as much as possible. Then, apply a thick baking soda paste over the remaining residue and let it sit for several hours or overnight. The paste will help soften the plastic. You can also try heating the oven to its lowest setting (around 150-200°F) for 10-15 minutes to soften the plastic, then immediately scrape and wipe with a damp cloth—use extreme caution to avoid burns.
Can I use a magic eraser (melamine foam) on the blue interior?
No. While Magic Erasers are excellent for many surfaces, they are a very fine abrasive. They will create micro-scratches on the smooth enamel surface, leading to a permanent dull, matte finish. They should be avoided on all painted, coated, or glossy surfaces like your oven interior.
How do I clean the blue oven racks without damaging them?
Soak the racks in a bathtub or large tub with hot water and a generous amount of dish soap or a cup of baking soda for several hours. For stuck-on grime, use a non-scratch sponge. You can also use a paste of baking soda and water directly on the racks and let it sit before scrubbing. Avoid steel wool or abrasive pads. Rinse thoroughly and dry completely before returning to the oven.
My oven still smells like burnt food after deep cleaning. How do I deodorize it?
After your oven is completely clean and dry, place a small, oven-safe bowl filled with white vinegar or a few sliced lemons on the center rack. Heat the oven to a low temperature (around 200°F) and let it run for 30-45 minutes. The acidic steam will neutralize and absorb lingering odors. Leave the door closed until it cools slightly, then open to let fresh air in.