Cleaning the bottom shelf of your Samsung refrigerator is essential for food safety and appliance efficiency. Follow our detailed, safe process using common household items to eliminate grime, odors, and bacteria, ensuring your fridge operates optimally and keeps food fresh. Regular maintenance makes this quick and easy.
Key Takeaways
- Safety First: Always unplug your refrigerator or turn off the ice maker before removing shelves to prevent accidents.
- Gentle Cleaners Only: Use mild dish soap, warm water, or a vinegar solution to avoid damaging plastic, glass, or coatings on Samsung shelves.
- Remove Completely: Take the bottom shelf out entirely for a thorough clean, accessing the floor, walls, and spill trays underneath.
- Don’t Forget Accessories: Clean bins, drawers, and the drip pan (if accessible) located beneath the shelf area for complete hygiene.
- Dry Thoroughly: Ensure all parts are completely dry before reassembling to prevent mold, mildew, and ice buildup.
- Preventative Habits: Wipe spills immediately and do a quick weekly wipe-down to avoid tough, caked-on grime.
📑 Table of Contents
- Why Cleaning the Bottom Shelf of Your Samsung Refrigerator is Non-Negotiable
- Gathering Your Tools: Safe & Effective Cleaning Supplies
- The Step-by-Step Process: How to Deep Clean the Bottom Shelf
- Special Considerations for Different Samsung Shelf Types
- Proactive Maintenance: Keeping the Bottom Shelf Clean Longer
- Troubleshooting: Tackling Stubborn Grime and Mysteries
Why Cleaning the Bottom Shelf of Your Samsung Refrigerator is Non-Negotiable
Let’s be honest: the bottom shelf of the refrigerator often becomes the forgotten frontier of kitchen hygiene. It’s the landing zone for drips, spills, forgotten containers, and the occasional mystery puddle. For Samsung refrigerator owners, keeping this area clean isn’t just about aesthetics—it’s a critical task for your family’s health and your appliance’s longevity. The bottom shelf is prime real estate for raw meat juices, sticky condiment leaks, and crumbs that accumulate in seams and corners. These organic residues are a buffet for bacteria like Salmonella and E. coli, which can cross-contaminate other foods. Furthermore, gunk buildup can insulate the refrigerator’s floor, forcing the compressor to work harder and increasing energy bills. A clean bottom shelf means a safer kitchen, a more efficient fridge, and peace of mind.
Samsung designs its refrigerators with various shelf types—glass, plastic, wire, and sleek stainless steel finishes. Each requires a slightly different approach, but the core principles of safe, effective cleaning remain the same. Neglecting this chore can lead to stubborn stains, persistent odors that infiltrate your fresh food, and even mold growth in dark, damp corners. By making this a simple, regular habit, you protect your investment and ensure every meal you prepare starts with a clean storage environment.
Gathering Your Tools: Safe & Effective Cleaning Supplies
Before you start, assembling the right tools is half the battle. The golden rule for cleaning any Samsung refrigerator interior is to avoid abrasive scrubbers, harsh chemicals like bleach or ammonia, and abrasive powders. These can scratch surfaces, degrade plastic, and leave toxic residues that could contaminate food. Instead, opt for gentle, food-safe solutions. Here’s your essential checklist:
Visual guide about How to Clean Bottom Shelf of Samsung Refrigerator
Image source: i.ytimg.com
The Basic Cleaning Kit
- Microfiber Cloths (2-3): These are lint-free and highly absorbent. Use one for washing, one for rinsing/wiping, and a dry one for final drying.
- Soft Sponge or Non-Scratch Scrub Pad: For gentle agitation on textured surfaces.
- Warm Water: The universal solvent. Fill a basin or bucket.
- Mild Dish Soap: A few drops in warm water create the perfect, safe cleaning solution. Choose a brand without heavy fragrances or moisturizers.
- White Distilled Vinegar: A natural disinfectant and deodorizer. Mix a 1:1 solution with water for tougher grime and odor elimination.
- Baking Soda: Excellent for paste-making to tackle sticky residues and absorbing odors.
- Soft-Bristled Toothbrush or Small Cleaning Brush: Crucial for scrubbing along shelf edges, grooves, and the seams where the shelf meets the refrigerator wall.
- Rubber Gloves: To protect your hands from cold water and any residue.
- Large Towel or Old Cloth: To place under the shelf while you work and for drying.
- Bucket or Large Bowl: For your cleaning solution.
For specific Samsung models with stainless steel interior panels or tempered glass shelves, you can occasionally use a dedicated stainless steel cleaner (applied to a cloth, not directly) for a streak-free shine, but soap and water is perfectly adequate for routine cleaning. Always check your user manual for any model-specific warnings.
The Step-by-Step Process: How to Deep Clean the Bottom Shelf
Now, let’s get our hands dirty—safely. This methodical process ensures every nook and cranny is addressed without damaging your refrigerator.
Visual guide about How to Clean Bottom Shelf of Samsung Refrigerator
Image source: i.ytimg.com
Step 1: Preparation and Safety
First, clear the immediate area. Remove all food items, containers, and bins from the bottom shelf and the area immediately below it. Place perishable items in a cooler with ice packs. This is your chance to check expiration dates and discard anything spoiled! Next, for safety and energy efficiency, unplug the refrigerator from the wall outlet. If your model has an ice maker in the freezer compartment above, turn it off via the control panel or ice maker arm. This prevents any accidental activation or water flow while you work. Place your large towel on the floor in front of the fridge to catch any drips.
Step 2: Shelf Removal
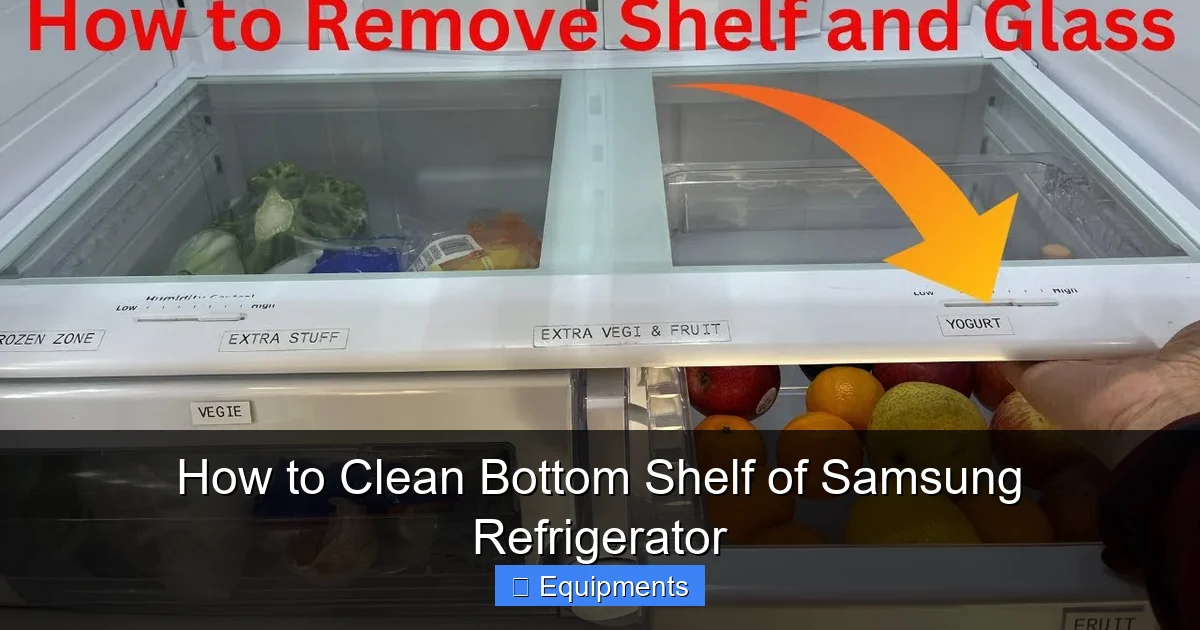
Samsung refrigerator shelves are typically designed for easy removal. Locate the locking mechanism or tabs at the back of the shelf where it slides onto support rails. Gently lift the front of the shelf slightly (about an inch) to disengage the tabs from the rails, then pull the shelf straight out toward you. Be cautious; a full shelf of items can be heavy. If your model has a spill-proof shelf or a lip around the edge, tilt it slightly as you pull to avoid catching on the wall. Place the shelf carefully on your towel-covered counter or table. For wire shelves, be mindful of sharp edges.
Step 3: Soak and Pre-Treat
Fill your basin or bucket with warm water and add a generous squirt of mild dish soap. If the shelf is extremely greasy or has dried-on spills, submerge it in the solution and let it soak for 10-15 minutes. For baked-on food or sticky residues (like syrup or jam), create a paste with baking soda and a little water. Apply this paste directly to the stains and let it sit for 5-10 minutes. The mild alkaline nature of baking soda will break down the grime without scratching.
Step 4: Scrubbing and Washing
Using your soft sponge or non-scratch pad, gently scrub the entire surface of the shelf. Pay special attention to the edges, corners, and any textured patterns where gunk loves to hide. For the grooves where the shelf slides into the fridge, use your soft-bristled toothbrush dipped in your soapy solution. This is a critical spot often missed. If you have a glass shelf, wash both sides. Rinse the shelf thoroughly under warm running water or wipe it with a clean, damp cloth soaked in plain water to remove all soap residue. Soap film can attract dirt and leave a strange taste if it contacts food.
Step 5: Cleaning the Shelf Housing and Underneath
This is the part that makes cleaning the bottom shelf so valuable. With the shelf out, you now have full access to the refrigerator’s floor and the back wall where the shelf sits. You’ll likely find a collection of crumbs, leaked liquids, and maybe a forgotten pea or noodle. Use your damp cloth or sponge to wipe this entire area. If your model has a spill-proof tray or crisper drawer humidity control housing in this area, pull it out (if designed to be removable) and clean it separately. Check the back wall for any frozen drip pans or vents—wipe these gently. A vacuum cleaner with a brush attachment can be handy for sucking up loose crumbs from hard-to-reach corners before wiping.
Step 6: Drying and Reassembly
This step is vital. Using your dry microfiber cloth, thoroughly dry the entire shelf, including all edges and the underside. Ensure the shelf housing area inside the fridge is bone dry as well. Any leftover moisture will freeze into ice or promote mold growth. Once everything is completely dry, carefully lift the shelf and align it with the support rails at the back of the refrigerator. Tilt the front down slightly as you push it back until the front tabs lock onto the rails. You should feel a slight click or resistance. Give it a gentle tug forward to ensure it’s securely seated. Plug the refrigerator back in and turn the ice maker on if you disabled it.
Special Considerations for Different Samsung Shelf Types
Samsung equips its refrigerators with several shelf designs. Tailoring your approach prevents damage.
Visual guide about How to Clean Bottom Shelf of Samsung Refrigerator
Image source: i.pinimg.com
Cleaning Tempered Glass Shelves
Glass shelves are elegant and easy to wipe but can be slippery when wet. Handle with two hands. Avoid any abrasive cleaners or pads (like steel wool). Stick to the soapy water method. For hard water spots, wipe with a solution of equal parts water and white vinegar, then rinse and buff dry with a microfiber cloth for a streak-free shine. Never use a glass cleaner containing ammonia, as it can damage the sealant around the glass edge.
Cleaning Plastic or Polycarbonate Shelves
These are the most common and durable. They can develop fine scratches over time from abrasive cleaning. Always use soft cloths and non-scratch pads. For yellowing or stubborn stains on white plastic, make a paste of baking soda and hydrogen peroxide (3%), apply it to the stain, let it sit in sunlight for a few hours, then rinse. The mild bleaching action can restore whiteness. Avoid using chlorine bleach, which can degrade the plastic and cause it to become brittle.
Cleaning Wire Shelves (often in freezer or French door models)
Wire shelves have crevices where gunk can accumulate. The soaking method is highly effective here. After soaking, use your soft-bristled brush to scrub between the wires. Ensure you dry all parts of the wire thoroughly, as moisture trapped in the wire coils can lead to rusting over time, especially in a freezer environment. A hair dryer on a cool setting can help blast moisture from between the wires if needed.
Handling “Spill-Proof” or “Anti-Spill” Shelves
Many Samsung models feature shelves with a raised lip or a containment system. These are fantastic for preventing spills from dripping down, but they create a groove where liquid can pool. When cleaning, pay extra attention to this lip and the channel behind it. Your toothbrush is your best friend here. If your model has a removable spill-proof tray beneath the shelf, take it out and clean it separately in the sink.
Proactive Maintenance: Keeping the Bottom Shelf Clean Longer
The best clean is the one you don’t have to do. Adopt these habits to minimize deep-cleaning frequency.
Weekly Wipe-Down Ritual
Once a week, take just 5 minutes. Remove any obvious debris from the shelf surface with a dry cloth. Then, using a cloth dampened with your mild soap solution, quickly wipe down the shelf surface, the front edge, and the sides. Follow with a damp-water wipe and dry. This prevents sticky buildup.
Spill Response Protocol
Rule number one: clean spills immediately. A forgotten jam spill will become a permanent, sticky resident. If a liquid spills, soak it up with a paper towel. Then, clean the area with your soapy cloth. For leaks from containers (like a weeping milk jug), place that container on a small plate or tray to contain any future drips.
Smart Organization
Use bins and organizers on your bottom shelf. Designate one bin for raw meats (to contain any potential leaks) and another for condiments. This creates barriers that make cleaning easier—you just wash the bin, not the entire shelf surface. Ensure bins are not pushed so far back that they block airflow from the vent.
The Odor-Absorbing Secret
Place an open box of baking soda on the bottom shelf or in the door. It won’t clean physical grime, but it will absorb lingering odors, making the space feel fresher between deep cleans. Replace the box every three months.
Monthly Inspection
Once a month, do a more thorough visual and tactile inspection. Run your finger along the seams and the back wall. Feel for sticky residue or crumbs. This early detection allows for a quick spot-clean before it becomes a major project.
Troubleshooting: Tackling Stubborn Grime and Mysteries
Even with regular care, some challenges arise. Here’s how to solve them.
The Case of the Sticky, Caked-On Mystery Goo
Whether it’s old syrup, dried juice, or congealed sauce, heat and moisture are your allies. Dampen a microfiber cloth with very warm (not boiling) soapy water. Wring it out and place it over the sticky spot for 2-3 minutes to let the heat and moisture soften the bond. Gently scrape with a plastic spatula or the edge of a credit card (never metal). Then, scrub with your non-scratch pad. For extreme cases, the baking soda paste is your go-to. Apply, let sit for 15 minutes, then scrub.
Eliminating Persistent Odors
If a smell lingers after cleaning, it’s likely trapped in a crevice or the plastic itself. After your standard clean, wipe the entire shelf and housing area with a 1:1 white vinegar and water solution. Vinegar is a superb natural deodorizer. Leave the fridge empty and unplugged for a few hours with the door open to air out. Alternatively, place a shallow dish of vanilla extract or coffee grounds inside to absorb odors.
Addressing Mold or Mildew
If you discover black spots, especially in dark corners or under the shelf, act fast. Mix a solution of 1 tablespoon of bleach with 1 quart of water only if your shelf is solid, non-porous plastic and your manual permits it. (When in doubt, use vinegar). Apply with a cloth, let it sit for 10 minutes, scrub with your brush, then rinse extremely thoroughly with a water-dampened cloth multiple times. Ensure the area is completely dry. Improve ventilation by not overpacking the fridge and ensuring the door seal is clean and intact.
Dealing with a Frozen Drip Pan
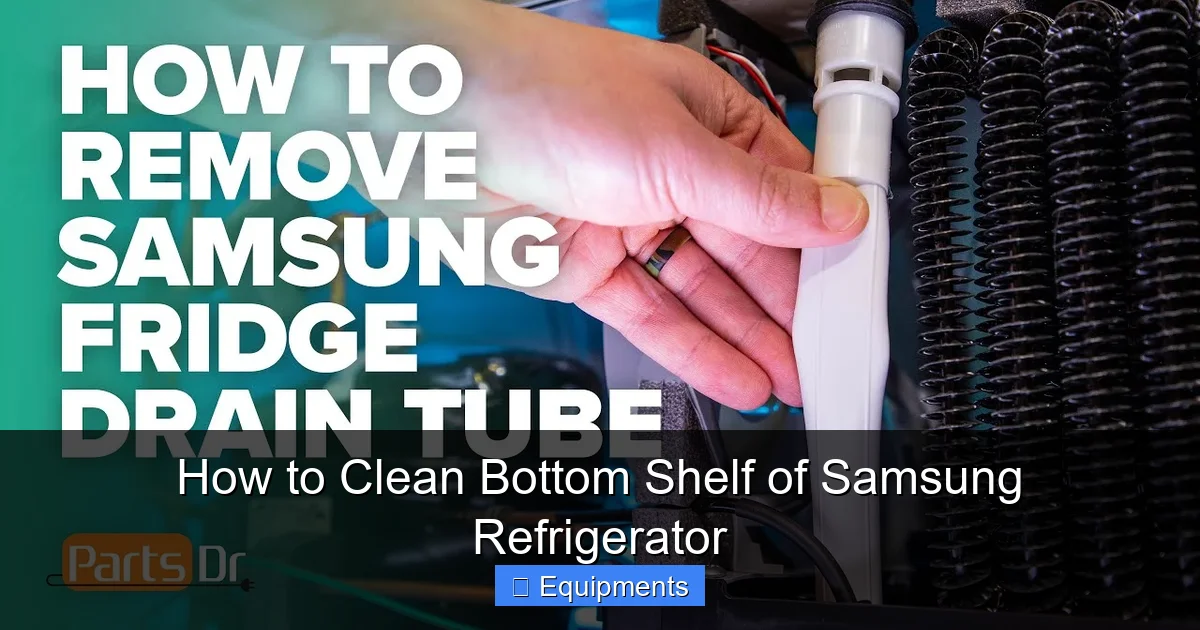
Some Samsung models have a drain hole leading to a drip pan at the very bottom rear of the fresh food compartment, often under the bottom shelf. If you see ice buildup there, it means the drain is clogged. Locate the drain hole (a small hole in a channel). Use a turkey baster to flush warm water down it, or gently insert a flexible plastic straw or pipe cleaner to dislodge debris. Follow with a vinegar rinse.
Frequently Asked Questions
How often should I deep clean the bottom shelf of my Samsung refrigerator?
You should perform a thorough deep clean, including shelf removal, every 1 to 2 months. This frequency depends on usage; families with children or who store lots of raw meat may need to do it monthly. Complement this with a quick weekly wipe-down.
Can I use commercial kitchen cleaners or bleach on my Samsung fridge shelf?
It’s best to avoid harsh commercial cleaners and undiluted bleach. They can damage plastic and glass finishes, leave toxic residues, and void warranties. Stick to mild dish soap, warm water, white vinegar, or baking soda for safe, effective cleaning.
What is the best way to remove a shelf that seems stuck?
Do not force it. Ensure you have fully disengaged the locking tabs at the back by lifting the front of the shelf slightly. Some Samsung models have a release button or lever. Consult your user manual for the specific removal mechanism for your model to avoid breaking plastic components.
My plastic shelf has a yellow tint. Can I whiten it?
Yes, make a paste with baking soda and hydrogen peroxide (3%). Apply it to the yellowed areas, place the shelf in direct sunlight for a few hours, then rinse thoroughly. The mild bleaching action of hydrogen peroxide combined with UV light can reverse yellowing.
Where is the drip pan, and do I need to clean it?
The drip pan is usually located at the very bottom rear of the fresh food compartment, underneath the bottom shelf area. It catches defrost water. It can harbor mold and odors. If your model has a removable one, take it out during your deep clean, wash it with soapy water, and dry it completely before replacing.
Is it safe to clean the refrigerator interior while it’s still plugged in?
For surface wiping, it’s generally fine. However, for a deep clean involving shelf removal and accessing the floor and back wall, you should unplug the refrigerator for safety to prevent any accidental activation of the ice maker or lights, and to save energy. Always ensure your hands are dry when handling the plug.
Pingback: How to Make Buttermilk Out of Regular Milk - kitchenandhouseware.com