Installing a pot filler requires careful planning and precise plumbing work, starting with shutting off the water supply and confirming your wall material can support the unit. You’ll need to run a dedicated cold water line from an existing plumbing access point, install a proper shutoff valve, and meticulously connect and test all joints for leaks before finishing the wall. Success hinges on accurate measurements, using the correct fittings, and ensuring a watertight seal to avoid costly damage.
Key Takeaways
- Plan your installation location carefully: Ensure it’s within reach of your stove and aligns with your sink’s plumbing.
- Always shut off the main water supply first: This is the critical safety step before cutting or disconnecting any pipes.
- Use durable materials like copper or PEX: These provide reliable, long-lasting connections for your water line.
- Install a dedicated shut-off valve: This allows for easy maintenance and repairs without disrupting your home’s main water.
- Thoroughly test all connections for leaks: Re-pressurize the system and check every joint before closing walls.
- Verify local plumbing codes and permits: Compliance is essential for safety and to avoid issues when selling your home.
- Consult a professional if unsure: Incorrect installation can cause significant water damage and costly repairs.
📑 Table of Contents
- How to Install a Pot Filler Water Line
- Understanding the Basics: What You’re Really Doing
- Tools and Materials: Your Pot Filler Installation Checklist
- Step-by-Step Installation Guide: From Basement to Wall
- Common Pitfalls and How to Avoid Them
- Maintenance and Care for Your New Pot Filler
- Conclusion: The Reward of a Job Well Done
How to Install a Pot Filler Water Line
Remember that moment? You’re standing at your kitchen sink, a heavy pot of water for pasta sloshing dangerously as you try to carry it from the sink to the stove. Your back aches, the floor is wet, and you think, “There has to be a better way.” Enter the pot filler – that elegant, swiveling faucet mounted directly above your cooktop. It’s the ultimate kitchen convenience, transforming a mundane chore into a one-handed, effortless task. But that sleek fixture doesn’t magically appear; it needs a dedicated water source. Installing a pot filler water line is the crucial, often overlooked, step that makes the whole system work. This isn’t a project for a complete beginner, but for a confident DIYer with some plumbing experience, it’s an incredibly rewarding upgrade. Think of it as the hidden hero of your dream kitchen. We’re going to walk through the entire process together, from the planning stages in your basement to the final, satisfying twist of the shut-off valve. By the end, you’ll know exactly what it takes to bring this luxury into your home.
Understanding the Basics: What You’re Really Doing
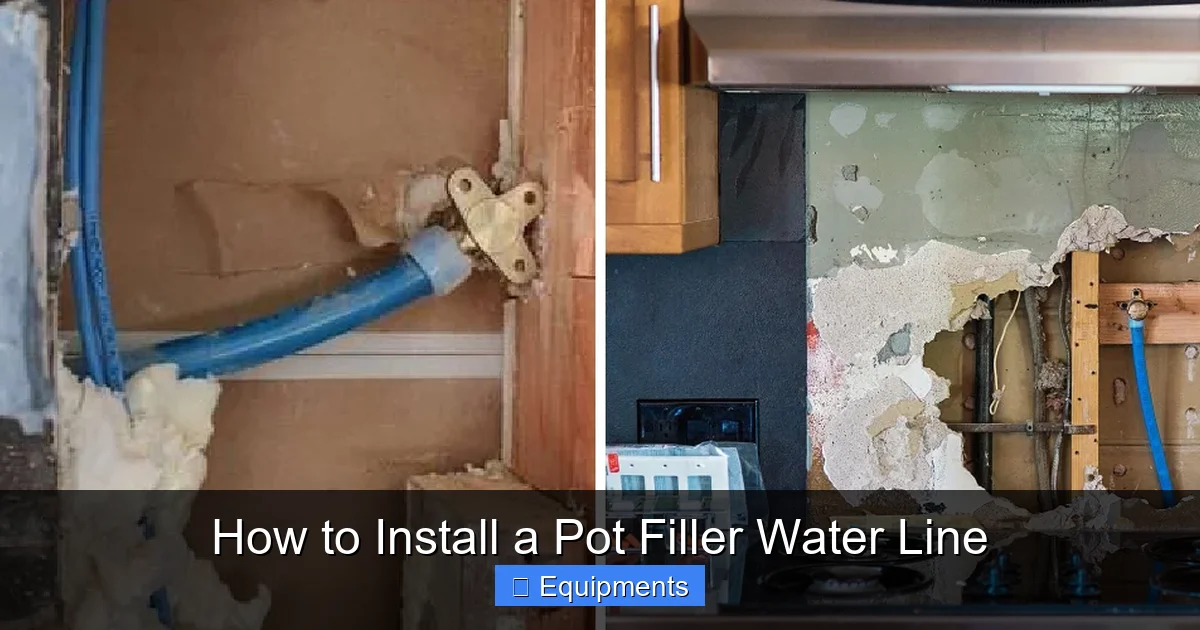
Before we grab a wrench, let’s get on the same page. Installing a pot filler water line means running a new, dedicated cold water pipe from an existing water source (usually your basement or crawlspace) to the spot behind your kitchen wall where the pot filler will mount. It’s not about replacing a faucet; it’s about creating a new water pathway. This is a permanent plumbing modification, which means we need to respect a few fundamental rules.
Visual guide about How to Install a Pot Filler Water Line
Image source: thekitchenix.com
Why a Dedicated Line?
A pot filler typically requires a ½-inch dedicated cold water line. You cannot just tap into an existing line for your sink or refrigerator. Why? First, code. Plumbing codes almost universally require a dedicated line for any fixed appliance that isn’t a sink. Second, function. Your sink’s line is already serving a major fixture. Adding another draw on it can cause pressure drops, making both fixtures perform poorly. A dedicated line ensures your pot filler has strong, consistent pressure, and it isolates any future work on the sink from your cooking station.
The Importance of Local Plumbing Codes
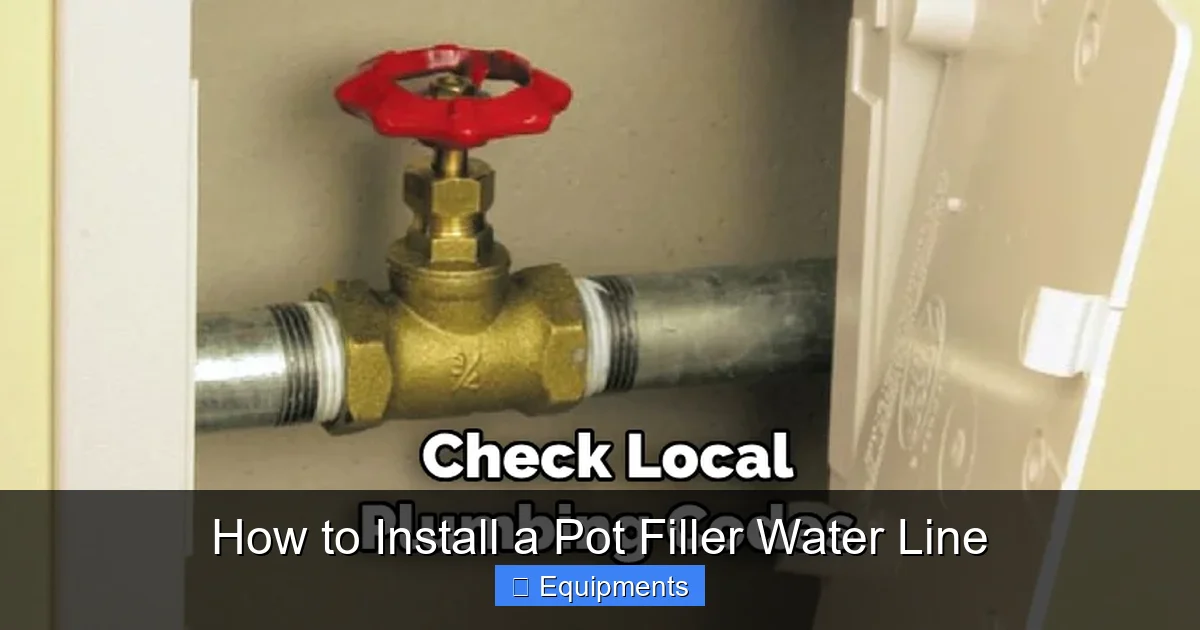
This is your first and most important checkpoint. Plumbing codes vary by city, county, and state. They dictate everything from the type of pipe material you can use (copper, PEX, CPVC) to how you must support the pipe, where shut-off valves are required, and what kind of fittings are acceptable. Do not skip this step. Contact your local building department. Often, you can get the information over the phone or online. For many jurisdictions, installing a new branch line like this is considered a minor alteration that a homeowner can permit and do themselves, but you must follow the rules. A quick call now saves a failed inspection (or worse, a leak inside your wall) later.
Tools and Materials: Your Pot Filler Installation Checklist
Having the right tools before you start is 90% of the battle. A missing tool means a trip to the hardware store, which kills momentum and can lead to rushed, sloppy work. Let’s build our master list, separating the must-haves from the nice-to-haves.
Visual guide about How to Install a Pot Filler Water Line
Image source: thekitchenix.com
Essential Tools
- Adjustable Wrench (10” and 6”): Your primary tool for tightening fittings.
- Tubing Cutter: For copper or plastic pipe. A clean, square cut is non-negotiable for a good seal.
- Pipe Reamer/Deburring Tool: Removes the sharp burr left after cutting. Critical for preventing damage to pipe seals.
- Pipe Thread Sealant (Teflon Tape or Pipe Dope): For threaded connections. Use Teflon tape rated for potable water.
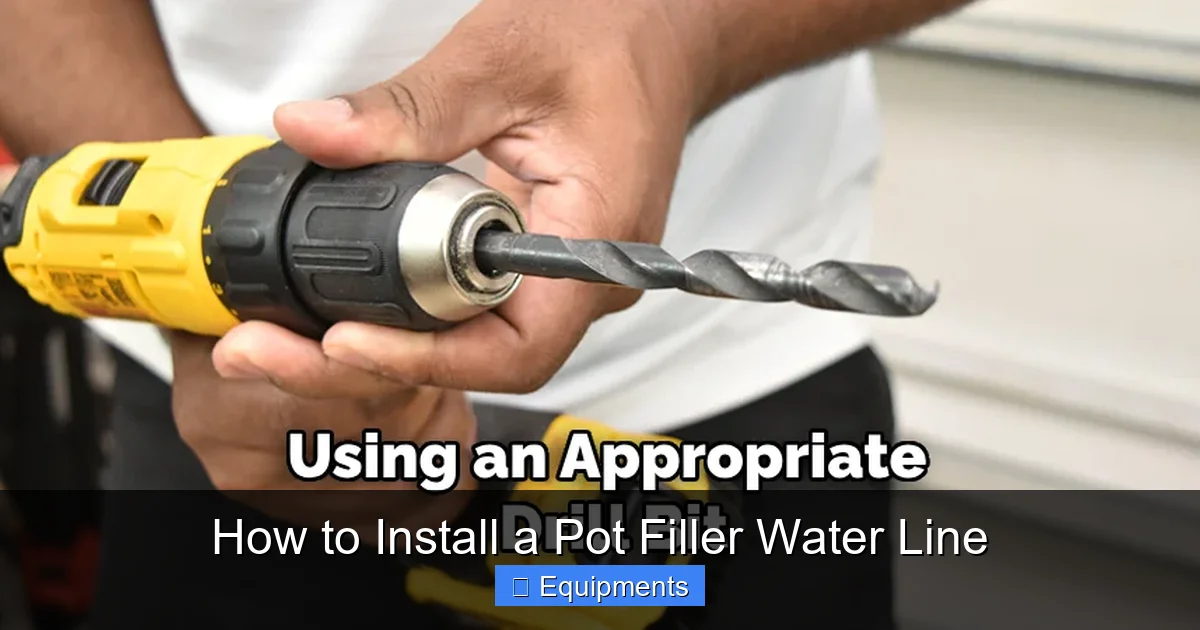
- Drill with Hole Saw Bits: To drill through floor joists and the top plate. You’ll need a bit size that matches your pipe’s outer diameter plus a little room for insulation.
- Utility Knife & Hacksaw: For trimming insulation and cutting pipe in a pinch.
- Level & Tape Measure: For precise alignment and length calculations.
- Pipe Support Straps & Screws: To secure the pipe every 4-6 feet, per code.
- Safety Glasses & Gloves: Always.
Material Selection: Copper vs. PEX
This is a big decision. Both are common for interior water lines, but they have different characteristics. Here’s a practical comparison to help you choose.
| Material | Pros | Cons | Typical Cost (per ft.) | Best For… |
|---|---|---|---|---|
| Copper (Type M or L) | Extremely durable, fire-resistant, proven 100-year track record, no plastic taste concerns, can be soldered for a very strong permanent joint. | Requires soldering skill/torch, more expensive, can be dented, heavier, can develop pinhole leaks in acidic water. | $2.00 – $4.00 | Homeowners wanting a “gold standard” permanent install, areas with strict code bans on plastics, those comfortable with soldering. |
| PEX (Cross-linked Polyethylene) | Very flexible (easier routing around obstacles), no soldering needed (uses crimp or clamp rings), cheaper, resistant to scale and chlorine, quieter water flow. | Can be damaged by UV light (must be indoor), not as heat-resistant as copper (keep away from furnace flues), some older codes restrict use. | $0.50 – $1.50 | DIYers for its ease of use, retrofits in tight spaces, colder climates (freeze-resistant to a point), budget-conscious projects. |
Specific Parts You’ll Need
Beyond the main pipe, you’ll need a collection of fittings. A typical run needs:
- A ½” tee fitting to tap into your existing cold water line.
- Shut-off valves: You need at least two. One right at the tee (to isolate the new line for repairs) and one right behind the pot filler itself (for servicing the fixture). Ball valves are preferred for their reliability.
- Elbows (90° and 45°): For changing direction.
- Pipe thread adapters: To connect your pipe material to the threaded ports on the valves and the pot filler’s supply tubes.
- The Pot Filler Itself: Ensure you know its rough-in requirements (the distance from the wall center to the mounting holes). This dictates your final wall penetration point.
- Wall Plate/Flange: The decorative cover that mounts to the wall, hiding the hole and the pipe connection.
Step-by-Step Installation Guide: From Basement to Wall
Alright, theory is done. Let’s get our hands dirty. This process is linear: plan, tap the source, run the line, mount the fixture. Rushing the planning is the #1 cause of mistakes.
Visual guide about How to Install a Pot Filler Water Line
Image source: thekitchenix.com
Phase 1: Planning and Layout
This is the mental (and physical) mapping stage. Go to your basement or crawlspace. Identify your main cold water line (usually near the water heater or main shut-off). Find the spot on the floor directly below where your pot filler will be on the first floor. Use a stud finder to locate the studs on the wall above. Your pipe will need to run vertically up from the basement, through the floor, and then horizontally between studs to your mounting location.
Key Tip: Use a long level or a plumb bob to transfer your exact mounting point from the kitchen floor down to the basement ceiling. Mark this spot clearly. This is your target. Now, plot the shortest, straightest route from your water source to this target, avoiding obstructions like HVAC ducts, wiring conduits, or major plumbing stacks. You want to drill through as few floor joists as possible—ideally, you can run the pipe in the open basement ceiling along the bottom of a joist, then drill straight up through the first-floor subfloor and bottom plate into the wall cavity.
Phase 2: Shut Off Water and Tap the Source
This is the critical safety step. Locate your home’s main water shut-off valve. Turn it off. Open a faucet downstairs to relieve pressure and drain the pipes. Now, find the section of your cold water line you’ll tap into. Cut out a short section using your tubing cutter. Install your tee fitting here. This is where your soldering or crimping skills come into play. If using copper, clean all surfaces, apply flux, heat, and solder the tee in place. If using PEX, use the appropriate crimp rings and a crimping tool. Immediately install the shut-off valve on the new branch of the tee. This valve controls your entire pot filler line. Do not skip this valve.
Phase 3: Running the Vertical and Horizontal Line
From your new shut-off valve, run your pipe vertically. Secure it to a joist with a pipe strap. At the floor above, you’ll need to drill a hole through the subfloor and the top plate of the wall. Use a hole saw that’s at least ¼” larger than your pipe’s outer diameter to allow for insulation and movement. Always check above and below for wiring or other pipes before drilling. Feed the pipe through this hole into the wall cavity. Now, run it horizontally to your marked mounting location. You’ll likely need to notch the side of a stud (if code allows in your area) or run the pipe along the face of a stud inside the cavity. Secure it with straps every 4-6 feet. Keep it at least 1” away from electrical wires or cables for safety.
Phase 4: The Wall Penetration and Mounting Prep
At your exact mounting spot, you’ll drill one final hole through the drywall. This hole must be perfectly sized for your wall flange/plate—usually 1-1/2” to 2” in diameter. Carefully cut this hole. Now, from the basement, feed your pipe up through the floor hole, through the wall cavity, and out this new hole. You should have a length of pipe protruding from the wall. Leave about 3-4” of pipe sticking out. Install your second shut-off valve (the one that will be behind the wall plate) onto this pipe end, using the appropriate fittings. This is the valve you’ll use to turn the water on/off to the pot filler itself for maintenance.
Phase 5: Final Connections and Testing
With the wall valve in place, you can now attach the pot filler’s supply tubes (usually supplied with the faucet). Connect these tubes to the outlets on your wall valve. Now, do a pressure test before you close up the wall. Turn the main water back on, then slowly open your new branch shut-off valve. Check every connection in your run—the tee, all fittings, the wall valve—for any sign of leaks. Use a dry paper towel to feel for moisture. Let the system pressurize for 15-30 minutes. If it’s bone dry, fantastic. If you see a drip, tighten the fitting slightly and retest. Once confirmed leak-free, you can install the wall plate over the hole, hiding the pipe and valve. Then, mount the pot filler to the wall plate according to the manufacturer’s instructions. Finally, attach the supply tubes to the pot filler’s inlets and tighten. Open the wall valve and your new pot filler is live!
Common Pitfalls and How to Avoid Them
Even with a good plan, things can go wrong. Knowing the common mistakes helps you sidestep them.
Poor Planning: The “Measure Once, Cut Twice” Nightmare
The biggest error is not accounting for the exact length and path. You cut your pipe too short, or you didn’t realize a wiring conduit was in the way. Solution: Run a string or thin piece of wood from your source to your destination to simulate the pipe’s path. Measure that string. Add a few extra inches for fitting connections and errors. It’s better to have a little extra pipe than to be short.
Forgetting the Support
Pipe that isn’t properly supported can sag, stress fittings, and eventually fail. Codes are very specific about support intervals (usually every 4-6 feet and within 12” of each valve). Solution: Install your straps as you go. Don’t wait until the end. A loose pipe is a ticking time bomb.
Skipping the Pressure Test
This is the cardinal sin. You close up the wall, paint, and then, months later, a slow leak soaks your drywall and subfloor. Solution: Always, always pressure test with the wall open and the fixture disconnected. Do it for at least 30 minutes. It’s the only way to guarantee your joints are sound.
Underestimating Wall Thickness
You drill a hole for your pipe, but it’s too short to reach the cavity because you forgot about multiple layers of sheathing, insulation, or plaster. Solution: Before drilling, use a small inspection camera or a long, thin drill bit to probe the wall cavity and confirm the total wall thickness from the basement side up.
Maintenance and Care for Your New Pot Filler
Your work is done, but a little maintenance ensures years of trouble-free service. The good news? Pot fillers are simple.
Regular Flushing and Checking
Every few months, open the pot filler fully and let it run for a minute. This flushes any sediment that might have settled in the line or the faucet’s internal aerator (if it has one). While it’s running, check the base of the faucet and the supply line connections under the sink (if accessible) for any drips. Catching a tiny leak early is easy; fixing water damage is not.
Winterizing (For Cold Climates)
This is critical if your pot filler is on an exterior wall or in an unheated garage. Water left in the faucet’s internal passages can freeze and crack the valve body. Before the first hard freeze, shut off the dedicated wall valve. Then, open the pot filler handle to drain any remaining water in the faucet itself. Leave it open for the winter. Some homeowners also blow out the line with compressed air for extra security, but the drain-and-leave-open method is usually sufficient for interior walls.
Aerator Cleaning
If your water pressure at the pot filler seems low, the aerator (the small mesh screen at the tip) might be clogged with mineral deposits. Unscrew it (you may need pliers, but wrap the faucet with a cloth to avoid scratching). Soak it in white vinegar for an hour, then scrub gently with a toothbrush and rinse.
Conclusion: The Reward of a Job Well Done
Installing a pot filler water line is a project that sits at the perfect intersection of practicality and luxury. It’s not the simplest DIY task on your list, but it’s far from the most complex. By respecting the process—checking codes, planning meticulously, choosing the right materials, and testing thoroughly—you can successfully add a feature that will bring daily joy and convenience to your kitchen for decades. That moment of filling a huge stockpot right at the stove without a single strain? That’s the payoff. It’s the feeling of knowing you didn’t just buy an upgrade; you built it yourself. Remember, there is zero shame in calling a licensed plumber for the parts you’re uncomfortable with, especially the initial tap-in to the main line. A hybrid approach—you run the line, a pro makes the final connection—is a smart and common path. However you get there, the destination is the same: a more functional, beautiful, and thoughtful kitchen. Now, go measure that spot behind your stove. Your future self, holding a pot of boiling pasta, will thank you.
Frequently Asked Questions
What tools do I need to install a pot filler water line?
You will need basic plumbing tools including a pipe cutter, adjustable wrenches, a soldering torch and solder (for copper), or crimping tools (for PEX). A drill, hole saw, and pipe joint compound or Teflon tape are also essential for a proper installation.
Can I install a pot filler water line myself?
A DIY installation is possible if you have experience with soldering copper pipes or working with PEX and understand your home’s plumbing layout. However, because it involves tapping into your main water supply, hiring a licensed plumber is strongly recommended for most homeowners to ensure safety and code compliance.
Can I tap into an existing water line for my pot filler?
Yes, the most common method is to tap into an existing cold water line, typically under the sink behind the wall where the pot filler will be installed. You must ensure the existing pipe has sufficient capacity and pressure to supply the new line without affecting other fixtures.
What type of pipe is best for a pot filler water line?
Copper is the traditional, durable choice for a pot filler water line and handles hot water well. PEX is a modern, flexible alternative that is easier to install and freeze-resistant. The best choice depends on your existing plumbing, budget, and local building codes.
How do I shut off the water before installing the pot filler line?
First, locate and turn off the main water shutoff valve for your home. Then, open a faucet downstream to relieve pressure and drain the pipes. For a more localized approach, you can shut off the nearest accessible shutoff valves on the pipes you’ll be tapping into, but turning off the main is the safest method.
How do I test the new pot filler water line for leaks?
After installation but before closing up walls, turn the main water supply back on slowly and check all new connections, joints, and the pot filler valve itself for any signs of leaking. Let the system pressurize and inspect thoroughly; tighten fittings slightly if minor drips occur before finalizing the installation.
