Storing strawberries in a mason jar is a simple, effective way to extend their freshness and prevent waste. The airtight seal of the jar controls moisture and limits exposure to air, which are the main culprits behind mold and mushiness. By properly prepping, layering with a paper towel, and refrigerating promptly, you can keep your berries crisp and flavorful for up to a week. This method is ideal for meal prep and ensures you always have ready-to-use strawberries for snacks, salads, and recipes.
Have you ever felt that pang of disappointment when you reach into the fridge for a handful of fresh strawberries, only to find a fuzzy patch of mold or a pile of mushy, sad berries? It’s a common kitchen tragedy. We buy them with the best intentions—for morning smoothies, afternoon snacks, or a vibrant salad—only for them to go bad too quickly. But what if I told you there’s a charming, effective, and incredibly simple solution hiding in your cupboard? The answer lies in understanding how to store strawberries in a mason jar.
This isn’t just a trendy food storage hack; it’s a return to a fundamental principle of food preservation: controlling moisture and air exposure. The classic mason jar, with its sturdy glass walls and reliable two-piece lid, creates a near-perfect microclimate for delicate berries. It’s a method that respects the fruit’s fragility while actively fighting the forces of decay. In this complete guide, we’ll walk through every step, from selection to storage to ultimate usage, ensuring your strawberries stay plump, sweet, and ready for your next recipe. Let’s transform that fridge drawer from a graveyard of wasted produce into a showcase of lasting freshness.
Key Takeaways
- Always start with dry, firm berries: Moisture is the enemy. Wash strawberries only right before you plan to use them, or ensure they are completely dry if washed ahead.
- The paper towel is essential: Placing a dry paper towel at the bottom and top of the jar absorbs excess humidity, preventing the berries from sitting in liquid and spoiling faster.
- Layer gently, don’t pack: Place berries in a single layer if possible, or loosely stack them. Packing them tightly crushes delicate fruit and creates bruising points where mold starts.
- Refrigeration is key for fresh storage: Store the sealed mason jar in the coldest part of your fridge, usually the main body, not the door, for consistent temperature.
- Use within 5-7 days: Even with perfect storage, fresh strawberries have a limited shelf life. Plan to use them within a week for best flavor and texture.
- Freezing is a great long-term option: For storage beyond a week, freeze strawberries on a baking sheet first, then transfer the frozen berries to a mason jar for a freezer-safe, space-efficient method.
- Mason jars are reusable and airtight: Unlike plastic containers, glass mason jars provide a superior seal and don’t retain odors or stains, making them perfect for pungent fruits like strawberries.
📑 Table of Contents
- Why the Mason Jar? The Science of Smart Storage
- Step-by-Step: The Perfect Prep for Mason Jar Storage
- The Art of Layering: Building Your Berry Jar
- Refrigeration vs. Freezing: Your Storage Timeline
- From Jar to Table: Using Your Stored Strawberries
- Common Mistakes and How to Avoid Them
- The Delicious Conclusion: A Jar Full of Possibility
Why the Mason Jar? The Science of Smart Storage
Before we dive into the “how,” let’s talk about the “why.” Why is a humble mason jar so superior to a plastic clamshell or a standard storage container? It comes down to three key factors: seal, material, and visibility.
The Airtight Advantage
The standard two-piece lid (band and flat lid with sealing compound) creates an excellent vacuum seal when processed correctly, but even for fridge storage, the threaded band and flat lid provide a much tighter seal than most plastic lids. This seal does two critical jobs: it keeps out external odors from your fridge (like that leftover onion or strong cheese), and it limits the amount of oxygen circulating inside the jar. Oxygen accelerates spoilage and decay. By minimizing it, you slow down the metabolic processes of the berries and the growth of aerobic mold spores.
Glass vs. Plastic
Glass is non-porous and inert. It won’t absorb stains from the berries’ red pigment or retain flavors and odors from previous contents. Plastic containers, especially older or scratched ones, can harbor smells and bacteria in their microscopic grooves. Furthermore, glass doesn’t leach any chemicals, a concern for some with certain plastics, especially when storing acidic fruits. The clarity of glass is also a bonus—you can instantly see how many berries you have and their condition without opening the jar.
The Moisture-Management System
Here’s the secret weapon: the paper towel. The mason jar’s shape and the absorbent paper towel work in tandem. The jar’s wide mouth allows for easy layering, and the paper towel acts as a humidity regulator. It wicks away any moisture that naturally transpires from the berries (yes, they continue to “breathe” after picking) or any residual surface moisture. This keeps the berries dry, which is the single most important factor in preventing mold. A wet berry in a sealed plastic bag is a mold magnet; a dry berry in a sealed jar with an absorbent layer is a preservation champion.
Step-by-Step: The Perfect Prep for Mason Jar Storage
Success starts long before the berries touch the jar. Proper preparation is 90% of the battle. Rushing this step or skipping a key action can undermine the entire process. Follow these steps meticulously for optimal results.
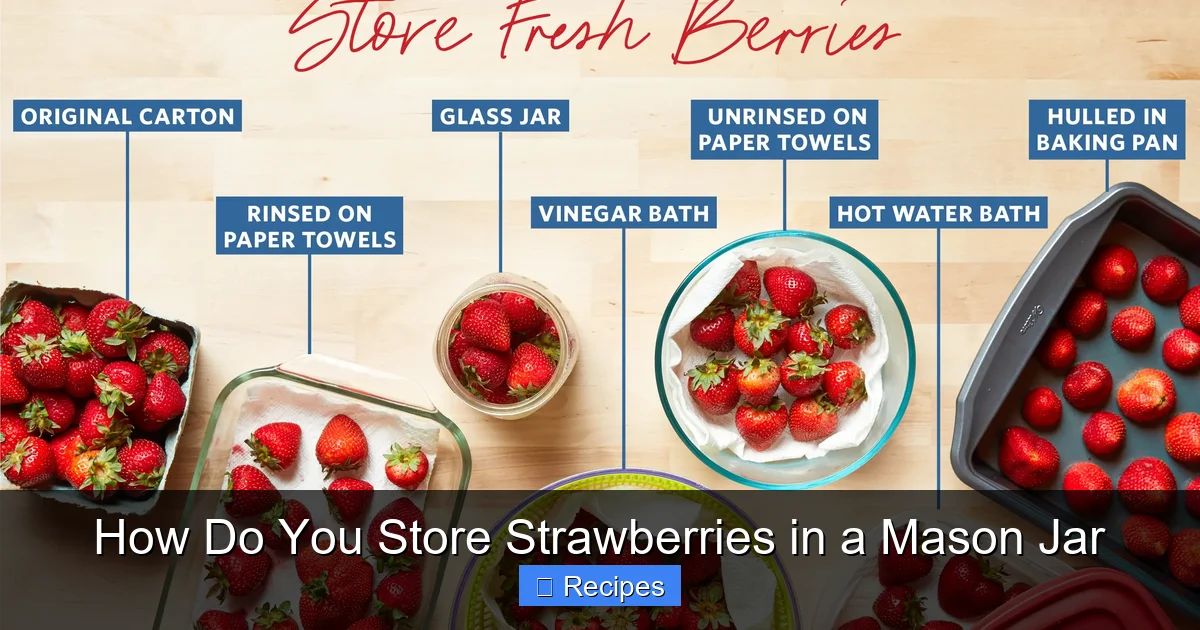
Visual guide about How Do You Store Strawberries in a Mason Jar
Image source: cdn.apartmenttherapy.info
1. Selection is Everything
Begin with the best possible berries. When shopping, look for strawberries that are firm, plump, and have a deep, uniform red color. Avoid any with white or green tips (they won’t ripen further), soft spots, bruises, or visible mold. The stems should be fresh and green. If you’re picking your own, choose berries that detach easily from the plant with a gentle tug—a sign of full ripeness. Remember, you are storing them for future perfection, so you must start with fruit that is already near-perfect.
2. The Great Wash Debate: To Wash or Not to Wash?
This is the most common point of confusion. The cardinal rule of berry storage is: do not wash them until you are ready to use them. Water is the catalyst for decay. Any moisture left on the surface will be trapped in the jar and create a humid environment perfect for mold. However, if you buy berries that are visibly dirty or you prefer to wash them immediately for peace of mind, you must dry them thoroughly.
- If NOT washing ahead: Gently inspect your berries and remove any that are damaged or already showing signs of spoilage. One bad berry can spoil the bunch. Do not wash.
- If washing ahead: Fill a large bowl with cold water. Submerge the berries briefly and swish gently. Do not soak. Drain in a colander. Then, and this is crucial, spread them out on a clean kitchen towel or paper towels in a single layer. Allow them to air-dry completely for at least 30 minutes, or pat them very gently with additional paper towels. They must be bone-dry.
3. Hulling: To Stem or Not to Stem?
The green leafy top, or hull, can be left on. It can actually provide a tiny bit of protection to the berry’s core. However, if you are planning to use the berries for slicing, dicing, or in recipes where the hull would be intrusive (like in a smoothie or jam), you can hull them now. The key is to be gentle. Use a small knife or a huller and avoid cutting too deeply into the fruit. If you leave the hulls on, it’s one less step when you’re ready to use them.
The Art of Layering: Building Your Berry Jar
Now for the satisfying part: packing the jar. The goal is to create a stable, breathable, and crush-free environment. Think of it as building a cozy, dry bed for each berry.
Visual guide about How Do You Store Strawberries in a Mason Jar
Image source: deavita.net
Step 1: The Foundation
Take a clean, completely dry mason jar (any size will do, from pint to quart). Place one dry paper towel on the bottom. This is your moisture-absorbing foundation. If you have a very large batch, you can use a second towel later for the top layer.
Step 2: The Berry Bed
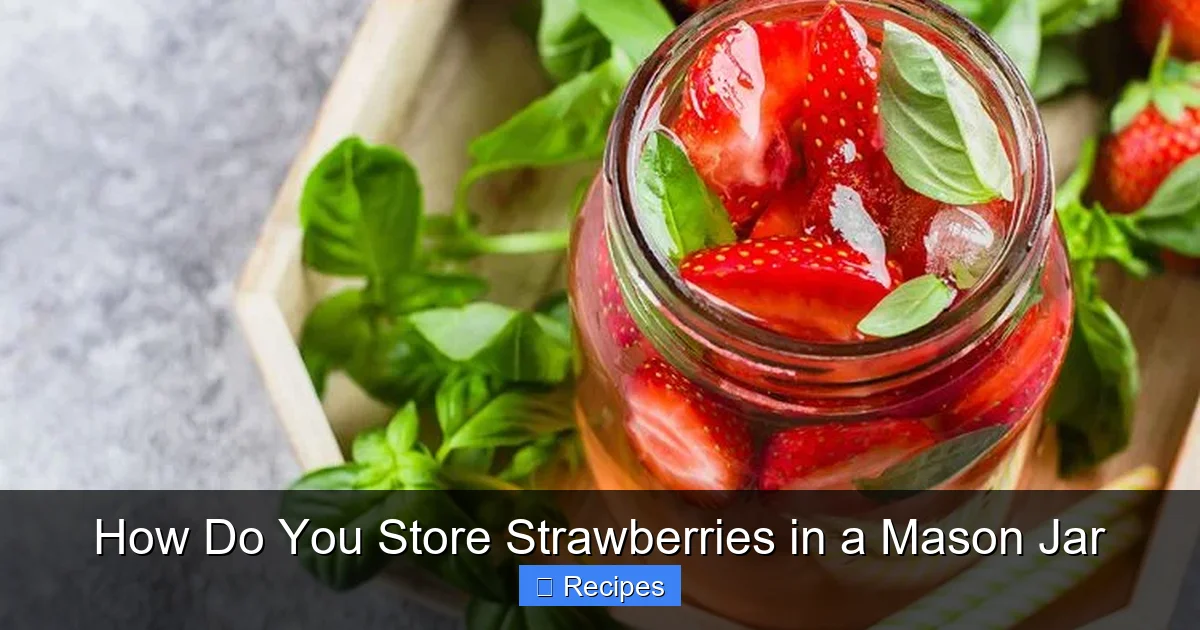
Gently place your dry, prepped strawberries into the jar. Here’s the golden rule: do not overfill. The berries should fit loosely. If you have to force them in or they are pressing against each other and the glass, you’ve packed too tightly. Ideally, create a single layer. If your jar is tall and your batch is large, you can create a second layer, but be extra gentle. The weight of the top layer can crush the berries underneath. For best results, use multiple smaller jars instead of one overstuffed large jar.
Step 3: The Protective Cap
Once your berries are in, place another dry paper towel on top. This top layer is vital. It absorbs any moisture that might rise from the berries during storage and also provides a cushion if the jar is jostled in the fridge. It prevents the top berries from being pressed directly against the metal lid, which could cause condensation to drip back onto them.
Step 4: Seal and Label
Secure the lid with the band. You don’t need to process it for a shelf-stable seal; just screw the band on fingertip-tight. Now, for organization, use a piece of masking tape or a reusable label on the lid. Write the date and contents (“Strawberries – Fresh”). This simple act prevents the “mystery jar” syndrome and helps you use the oldest jars first.
Refrigeration vs. Freezing: Your Storage Timeline
Your mason jar can serve two masters: the refrigerator for short-term freshness and the freezer for long-term preservation. The method differs slightly for each destination.

Visual guide about How Do You Store Strawberries in a Mason Jar
Image source: mentalscoop.com
For the Fridge: The 5-7 Day Freshness Plan
Place the sealed jar in the main compartment of your refrigerator, not in the door. The door experiences temperature fluctuations every time it’s opened. The cold, consistent air of the main body is best. Stored this way, your dry, properly layered strawberries should stay fresh, firm, and mold-free for 5 to 7 days. You might notice the very top berry or two softening first; simply remove and use those immediately. The rest will be perfectly preserved. This method is ideal for having ready-to-grab berries for snacks, yogurt bowls, and salads all week.
For the Freezer: Preserving the Summer Harvest
Want to capture peak-season strawberries for winter smoothies or baked goods? The mason jar is your friend here too, but with a critical preliminary step: flash freezing.
- Prepare your berries (hulled, washed, and COMPLETELY dry).
- Spread them in a single layer on a baking sheet lined with parchment paper. Ensure they aren’t touching.
- Place the tray in the freezer for 2-4 hours, or until the berries are solid.
- Once frozen, you can safely transfer them to your clean, dry mason jar. Pack them in, leaving about ½ inch of headspace (liquid expands when frozen).
- Seal the jar tightly and return it to the freezer.
This method prevents the berries from freezing into one giant, inseparable clump. You can easily scoop out just the amount you need. Frozen strawberries will keep for 10-12 months. No need for a paper towel in the freezer, as there’s no risk of liquid moisture.
From Jar to Table: Using Your Stored Strawberries
Storing strawberries perfectly is only half the victory. The other half is using them in delicious ways that celebrate their preserved freshness. Because this method keeps berries firm and not waterlogged, they are incredibly versatile.
The Perfect Snack & Salad Topper
This is the easiest use. Simply grab a handful from the jar. Because they are dry and cold, they have a satisfying, almost crisp bite—superior to the often-soggy berries from a plastic container. Toss them whole onto a spinach salad with goat cheese and walnuts, or layer them with granola and yogurt for a parfait. Their shape holds up beautifully.
Smoothies and Sauces
For a thick, frosty smoothie, toss ¾ of the jar directly into your blender with a banana, some spinach, and your liquid of choice. Because they are cold and firm, they help chill the smoothie without diluting it like ice would. For a warm sauce, gently heat the berries in a saucepan with a splash of lemon juice and a spoonful of sugar or honey. The firm berries hold their shape better, giving you a sauce with nice fruit pieces rather than a complete puree.
Baking and Toppings
Drain any minimal surface moisture (there shouldn’t be much) before folding them into muffin or pancake batter. Their firmness means they won’t bleed color excessively and will distribute evenly. For a stunning topping on cheesecake or shortcake, you can quickly macerate them: toss with a teaspoon of sugar and let sit for 15 minutes. The sugar will draw out just a little juice, creating a natural syrup while the berries remain intact.
Common Mistakes and How to Avoid Them
Even with the best intentions, a few pitfalls can ruin your strawberry jar. Let’s troubleshoot the most common errors.
Mistake 1: The Damp Berry Disaster
The Error: Putting even slightly damp berries into the jar.
The Result: Condensation forms inside the sealed jar, creating a humid sauna. Mold appears within 2-3 days.
The Fix: Be obsessive about dryness. If you wash them, use a salad spinner on low speed or pat with towels until no moisture beads on the surface. If in doubt, wait another 15 minutes to air-dry.
Mistake 2: The Overpacked Jar
The Error: Stuffing the jar to the brim, crushing the berries in the process.
The Result: Bruised spots turn soft and brown quickly, becoming initiation points for mold that spreads to neighboring berries.
The Fix: Choose a jar size that allows for a loose, single-layer fill. It’s better to use two pint jars than to cram one quart. Handle berries as if they are eggs.
Mistake 3: Skipping the Paper Towel
The Error: Thinking the jar’s seal is enough and omitting the absorbent layers.
The Result: Natural berry moisture has nowhere to go. It pools at the bottom of the jar, sitting the bottom layer in liquid and hastening decay.
The Fix: Never skip the paper towel. It’s non-negotiable. Use a good quality, lint-free towel. If you run out, a clean, dry cloth napkin or even a coffee filter can work in a pinch.
Mistake 4: Temperature Abuse
The Error: Leaving the jar on the counter for hours before refrigerating, or storing it in the fridge door.
The Result: Strawberries are highly perishable and should be kept cold (below 40°F/4°C) at all times after purchase. Warmth accelerates spoilage exponentially.
The Fix: As soon as you finish prepping and layering, put the jar straight into the fridge. Make it the last thing you do before closing the fridge door after grocery unloading.
The Delicious Conclusion: A Jar Full of Possibility
Learning how to store strawberries in a mason jar is more than a kitchen trick; it’s a mindset shift towards mindful consumption and reducing waste. It connects you to your food, making you aware of its journey from the farm to your fridge. That simple glass jar becomes a tool for intention—you’ve taken proactive steps to protect the sweetness and nutrition of those berries, ensuring they fulfill their destiny in a smoothie, on a shortcake, or as a simple, healthy snack.
The beauty of this method is its elegance and accessibility. It requires no special equipment, no complicated processes, just a few minutes of your time and a commitment to keeping things dry. So next time you bring home a lush container of strawberries, resist the urge to just dump them in the crisper drawer. Take a moment. Sort, dry, layer. Seal that jar and place it in the cold. Then, throughout the week, you’ll experience the quiet joy of opening the fridge to find a jar of pristine, ruby-red berries, perfectly preserved and ready to brighten your day. That’s the true power of the mason jar: it doesn’t just store food; it stores possibility.
Frequently Asked Questions
How long do strawberries last in a mason jar in the refrigerator?
When properly prepped (dry, with paper towel layers) and stored in the main compartment of your refrigerator, strawberries will stay fresh and mold-free for 5 to 7 days. Always use the oldest jar first.
Can I freeze strawberries directly in a mason jar without flash freezing first?
You can, but they will freeze into a solid, inseparable block. For easy portioning, it’s highly recommended to flash-freeze the berries on a baking sheet first, then transfer the frozen berries to the jar for long-term freezer storage.
Should I wash the strawberries before putting them in the mason jar?
Ideally, no. The cardinal rule is to store strawberries dry. Only wash them immediately before you plan to eat or use them. If you must wash them ahead, you must ensure they are 100% completely dry before jarring them.
Can I use any glass jar, or does it have to be a specific mason jar?
Any clean glass jar with a tight-fitting lid will work. A true mason jar is ideal because its two-piece lid provides a superior seal, but a recycled glass pasta sauce or pickle jar with a rubber-gasket lid can also be effective for fridge storage.
Can I add sugar or vinegar to the jar to preserve the strawberries?
For fresh fridge storage, no. Adding sugar creates a syrup that will make the berries soggy and promote fermentation. Vinegar is not recommended. The goal for fresh storage is to keep them dry. For making preserves or quick-pickled strawberries, you would use a completely different canning process.
How can I tell if the strawberries in the jar have gone bad?
Look for visible mold (fuzzy spots, usually white or green) or a significantly mushy, leaking texture. A sour or fermented smell is a clear sign of spoilage. If a few berries on top are soft but the rest are firm, you can remove and discard the soft ones and use the rest immediately.
Pingback: Can You Freeze Olives - kitchenandhouseware.com