Unlock the secret to perfect classic shortbread cookies with just three core ingredients and simple steps. This guide demystifies the process, ensuring you achieve that iconic melt-in-your-mouth, crumbly texture every time. Follow our precise tips on ingredient temperature, dough handling, and baking to become a shortbread master.
Key Takeaways
- Ingredient Quality is Non-Negotiable: Use the best quality unsalted butter and pure vanilla extract you can find; they define the cookie’s flavor.
- Temperature is Everything: Butter and eggs must be at room temperature for proper emulsification and a cohesive dough.
- Chill the Dough Rigorously: Chilling prevents spreading, ensures clean cuts, and develops flavor. Don’t skip or shorten this step.
- Handle the Dough Gently: Overworking the dough develops gluten, leading to toughness. Mix just until combined.
- Bake Until Just Set: Shortbread should be pale golden on the edges but still soft in the center. It firms up as it cools.
- Proper Storage is Key: Store in an airtight container with a piece of parchment paper between layers to maintain texture.
📑 Table of Contents
- Introduction: The Magic of Three Ingredients
- The Holy Trinity: Understanding Your Core Ingredients
- Essential Equipment: Keeping It Simple
- Step-by-Step: The Foolproof Method
- Troubleshooting: Why Did My Shortbread Fail?
- Delicious Variations on a Classic Theme
- Storage and Serving: Keeping the Magic Alive
- Conclusion: Your Shortbread Journey Begins
Introduction: The Magic of Three Ingredients
There is something profoundly comforting about a classic shortbread cookie. It is the culinary embodiment of simplicity and elegance—a perfect ratio of butter, sugar, and flour that transforms into a delicately crumbly, richly buttery treat that seems to melt on your tongue. Yet, for many home bakers, achieving that signature texture can feel elusive. Dough that spreads too much, cookies that are tough instead of tender, or a lack of that iconic “sandy” crumble are common pitfalls.
This guide is here to change that. We are breaking down the classic shortbread cookie recipe made simple, removing all mystery and intimidation. This isn’t about fancy techniques or obscure ingredients. It’s about understanding the why behind each step so you can consistently bake cookies that would make any Scottish grandmother proud. Get ready to experience the pure, buttery joy of a truly perfect shortbread.
The Holy Trinity: Understanding Your Core Ingredients
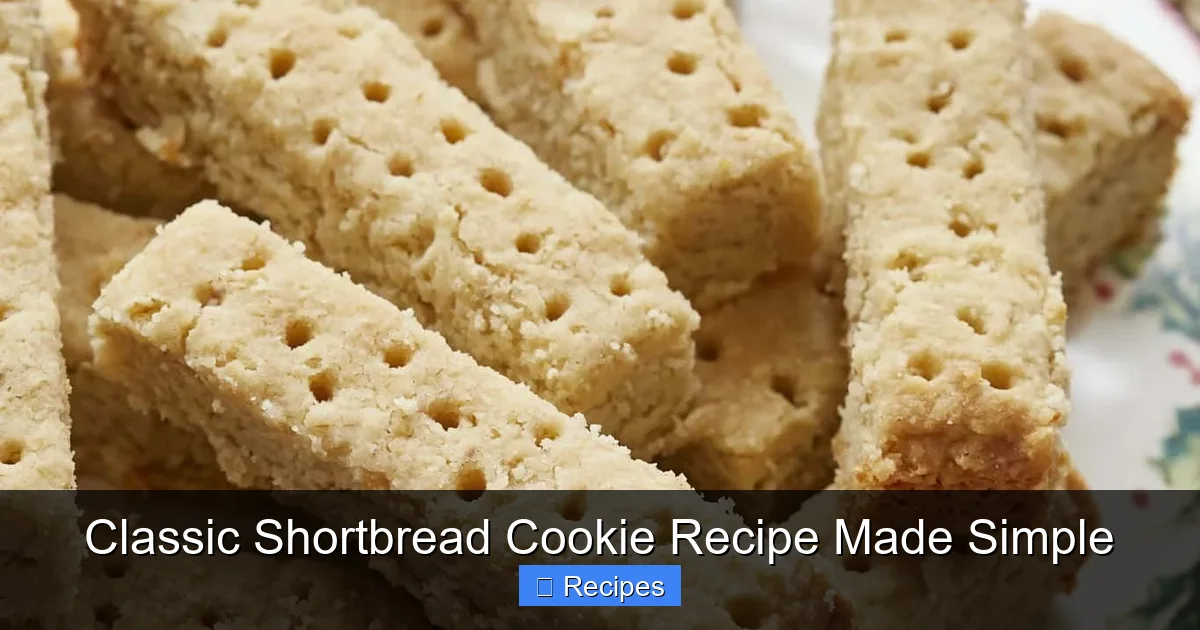
Shortbread is named for its high fat content (“shortening” the gluten strands), which is why its ingredient list is famously brief. The quality of these three components directly dictates your success. Let’s examine each one.

Visual guide about Classic Shortbread Cookie Recipe Made Simple
Image source: i.pinimg.com
1. The Butter: Your Foundation of Flavor
Unsalted butter is the undisputed star. Its fat content (typically 80%) creates the tender, crumbly structure. Using salted butter is possible, but it introduces an unpredictable salt level. For a classic shortbread cookie recipe made simple, we recommend a high-quality European-style butter, which has a slightly higher fat content (82-86%) and less water, yielding an even richer, more tender result. The butter must be at true room temperature—pliable but not greasy or oily—to cream properly with the sugar.
2. The Sugar: Sweetness and Structure
Granulated sugar is traditional. Its coarse crystals create a slightly crisp edge as they caramelize during baking. Some recipes use a mix of granulated and confectioners’ sugar for a more tender crumb, but our classic version sticks with all granulated for authenticity. It also aids in creaming the butter, incorporating air that contributes to a light texture.
3. The Flour: The Structural Framework
All-purpose flour is standard. It has a moderate protein content (10-12%) that provides just enough structure without creating too much gluten. The key is to measure it correctly. Always spoon flour into your measuring cup and level it off with a knife; scooping directly from the bag compacts it, adding too much flour and leading to a dry, crumbly dough.
Essential Equipment: Keeping It Simple
You don’t need a bakery’s worth of tools. A classic shortbread cookie recipe made simple relies on a few key items:
Visual guide about Classic Shortbread Cookie Recipe Made Simple
Image source: biggerbolderbaking.com
- Mixing Bowls: One medium bowl for creaming, one for dry ingredients.
- Electric Mixer: A stand mixer is ideal for efficient creaming, but a powerful handheld mixer works perfectly.
- Measuring Cups and Spoons: Accuracy is crucial in baking.
- Baking Sheets: Heavy-duty, rimmed baking sheets promote even browning.
- Parchment Paper: Non-negotiable for easy release and cleanup.
- Cookie Cutters or a Knife: For shapes. A sharp knife for rectangles or squares is just as classic as round cutters.
- Wire Cooling Rack: Allows air to circulate and cookies to cool evenly.
Step-by-Step: The Foolproof Method
Follow these steps precisely for guaranteed success. This method is designed for reliability and ease.

Visual guide about Classic Shortbread Cookie Recipe Made Simple
Image source: it.vihaad.com
Step 1: Prep and Preheat
Begin by preheating your oven to 300°F (150°C). This is a lower temperature than many cookies, which is essential for shortbread. It allows the butter to render slowly, setting the cookie’s structure before it can spread excessively. Line your baking sheets with parchment paper. Measure all your ingredients accurately. Take your butter out of the refrigerator at least one hour before baking to ensure it reaches the perfect room temperature.
Step 2: Cream the Butter and Sugar
In the bowl of your mixer fitted with the paddle attachment, combine the softened, room-temperature butter and granulated sugar. Start on low speed to incorporate, then increase to medium-high. Cream for a full 3-5 minutes. The mixture will become very pale in color, increase in volume, and have a smooth, fluffy texture. This step is critical—it aerates the butter, which is the primary source of leavening in shortbread. Do not rush it.
Step 3: Incorporate the Dry Ingredients
While the butter creams, whisk together the all-purpose flour and a pinch of salt (if using unsalted butter) in a separate bowl. This ensures even distribution. With the mixer on low speed, gradually add the flour mixture to the creamed butter. Mix just until no dry flour streaks remain. Stop the mixer and scrape down the bowl. The dough will look shaggy and dry, but will come together when pressed. Overmixing here is the #1 cause of tough shortbread. The warmth from the mixer will eventually bring it together.
Step 4: Chill the Dough (The Most Important Step)
Turn the dough out onto a sheet of parchment paper. Gather it into a ball and flatten it into a 1-inch thick disk. Wrap it tightly in plastic wrap and refrigerate for at least 2 hours, or up to 3 days. This firm chill does three vital things: it re-solidifies the butter, making the dough easy to roll and cut without sticking; it hydrates the flour fully, preventing a dry, crumbly texture; and it relaxes any gluten that formed during mixing, ensuring tenderness. For rolled cookies, chill the rolled-out dough on the sheet for 15 minutes before cutting.
Step 5: Cut and Bake
Preheat the oven again if it cooled. Place the chilled dough disk between two sheets of parchment paper and roll it to 1/4-inch thickness. Cut into shapes and transfer to the prepared baking sheet, leaving about 1 inch between cookies as they will spread very minimally. For a rustic look, simply press or pat the dough into a 1/4-inch thick rectangle on the sheet and score it into squares with a knife. Bake for 18-22 minutes, rotating the sheet halfway through. The cookies are done when the edges are just beginning to turn a pale golden color and the centers look set but not browned. They will look underdone—this is correct!
Step 6: Cool Completely
Let the cookies cool on the baking sheet for 5 minutes to set. Then, use a spatula to transfer them to a wire rack to cool completely, about 30-45 minutes. Shortbread continues to firm up significantly as it cools. Do not try to move them too soon or they will break.
Troubleshooting: Why Did My Shortbread Fail?
Even with a classic shortbread cookie recipe made simple, issues can arise. Here’s how to diagnose and fix them.
Problem: Cookies Spread Too Much
Cause: Butter was too soft or warm when creamed, or dough was not chilled sufficiently. Oven temperature might also be too high.
Solution: Ensure butter is pliable, not soft. Chill the dough for the full time. Use an oven thermometer to verify your oven’s actual temperature.
Problem: Cookies Are Tough or Dense
Cause: Overmixing the dough after adding flour, which develops gluten. Or, too much flour was measured (from scooping).
Solution: Mix on low speed and stop as soon as flour is incorporated. Measure flour by spooning and leveling. Consider using a lower-protein cake flour for an even more tender result.
Problem: Dough is Crumbly and Won’t Hold Together
Cause: Butter was not soft enough, or dough was over-chilled and needs to warm slightly.
Solution: Let the dough sit at room temperature for 5-10 minutes, then knead it gently a few times until it comes together. It should feel like play-dough.
Problem: Cookies Taste Bland
Cause: Using low-quality butter or vanilla. Also, under-baking can mute flavors.
Solution: Use the best butter you can. Add 1/2 teaspoon of fine sea salt with the flour to enhance flavor. Bake until the edges are just golden.
Delicious Variations on a Classic Theme
Once you’ve mastered the basic recipe, have fun experimenting. The beauty of a simple base is its versatility.
- Citrus Zest Shortbread: Add the finely grated zest of one lemon or orange to the creamed butter and sugar.
- Lavender Shortbread: Stir 1-2 teaspoons of culinary dried lavender buds into the flour mixture.
- Chocolate-Dipped Shortbread: Dip half of each cooled cookie into melted dark chocolate and let set on parchment.
- Spiced Shortbread: Add 1/2 teaspoon of ground cinnamon or cardamom to the dry ingredients.
- Brown Butter Shortbread: Brown the butter first, then chill it until solid before using. It adds an incredible nutty, toffee-like depth.
Storage and Serving: Keeping the Magic Alive
Properly stored, classic shortbread cookies last for weeks and their flavor often improves. Store completely cooled cookies in an airtight container at room temperature. Place a sheet of parchment paper between layers to prevent sticking. They are best eaten within 2 weeks. Shortbread also freezes beautifully—bake and cool the cookies, then layer them with parchment in an airtight container. Freeze for up to 3 months. Thaw at room temperature on a rack. Serve with a cup of tea or coffee, or alongside a scoop of vanilla ice cream for an elegant dessert.
Conclusion: Your Shortbread Journey Begins
Baking a classic shortbread cookie recipe made simple is less about complex skills and more about respecting the process. It’s the patience to let butter come to room temperature, the discipline to chill the dough thoroughly, and the wisdom to pull the cookies from the oven before they look “done.” These small acts of attention transform three humble ingredients into something extraordinary. You are not just making a cookie; you are practicing a small, beautiful craft. Now, preheat your oven, roll up your sleeves, and experience the profound satisfaction of a perfect, crumbly, buttery shortbread. Your tea time will never be the same.
Frequently Asked Questions
Can I use salted butter in shortbread?
Yes, you can. If you do, reduce or omit any added salt in the recipe. However, using unsalted butter gives you precise control over the salt level, which is why it’s preferred in professional baking and this classic shortbread cookie recipe made simple.
Why is my shortbread dough so crumbly and won’t stick together?
A crumbly dough usually means the butter was too cold or not soft enough when you started. Let the dough sit at room temperature for 5-10 minutes, then gently knead it until it comes together. If it’s still dry, you may have over-measured your flour.
Can I roll the dough without it sticking?
Yes, but only if you chill it properly. Always roll chilled dough between two sheets of parchment paper. If it starts to soften and stick, slide the entire parchment-and-dough sheet onto a baking sheet and chill for 10-15 minutes before continuing.
My cookies spread too much. What went wrong?
Spreading is almost always due to butter that was too soft when the dough was mixed or not enough chilling time. Ensure your butter is room temperature but not oily, and chill the dough for the full recommended time. An oven that runs hot can also cause excessive spread.
How do I know when the shortbread is done baking?
Shortbread is done when the edges are just barely starting to turn a pale golden color. The top will look set but still soft, and the center will look slightly underdone. This is correct! It will firm up completely as it cools on the wire rack. Do not wait for the cookies to turn golden brown.
Can I make the dough ahead of time?
Absolutely. This is one of the best features of this classic shortbread cookie recipe made simple. The dough can be made, shaped into a disk, wrapped tightly, and refrigerated for up to 3 days. You can also freeze the dough disk for up to 3 months. Thaw in the refrigerator before rolling and baking.