Nitro cold brew is creamy, smooth coffee infused with nitrogen gas. In 2026, home brewers have access to smarter, more affordable equipment than ever. This guide breaks down exactly what you need, the precise brewing steps, and key tips to avoid common pitfalls, helping you achieve that iconic cascading pour and sweet, foam-topped finish every time.
Remember the first time you saw that magical, cascading pour of nitro cold brew? It looked like a Guinness, but it was coffee. That rich, velvety foam that settled into a silky-smooth, slightly sweet cup with no bitterness—it felt like a café secret. For years, it was locked behind the doors of specialty coffee shops with their expensive, complex draft systems. But not in 2026. The barrier to entry has crumbled. Today, with the right equipment and know-how, you can craft this transformative drink in your own kitchen, consistently. This isn’t just a recipe; it’s a deep dive into the engineering, science, and 2026-specific gear that turns cold brew into nitro cold brew. We’ll walk through every step, from green beans to that perfect, foamy pour.
The journey to nitro is a two-part process: first, you make an exceptionally strong and smooth cold brew concentrate. Second, you infuse that concentrate with nitrogen gas under pressure. The magic happens in that second phase. Nitrogen bubbles are tiny and don’t dissolve easily. When forced into the cold, viscous coffee and then released through a special faucet, they create a massive, creamy head and a texture that feels like it has cream already in it, even if it’s black. The goal here is to demystify the gear and the process, so you can focus on the pleasure of that first, amazing sip.
Key Takeaways
- Equipment is everything: Your choice of keg system (keg, keggle, or dedicated nitro brewer) and nitrogen source (tank vs. cartridge) defines your process and final result.
- Nitrogen, not CO2: True nitro cold brew uses pure nitrogen (N2), not carbon dioxide (CO2). Nitrogen creates the signature creamy texture and stable foam, while CO2 makes it fizzy like soda.
- Steep time matters: A 12-24 hour steep at a low coffee-to-water ratio (1:4 to 1:6) is non-negotiable for a strong, sweet concentrate that won’t dilute when charged.
- The cascade is key: A proper, forceful pour through a stout faucet is required to agitate the coffee, activate the nitrogen, and create the visual “waterfall” effect and thick head.
- 2026 tech is smarter: Look for IoT-connected brewers with app control, eco-friendly nitrogen capsules, and kegs with improved insulation and pressure management for consistency.
- Troubleshooting is part of the craft: Flat beer? Check for leaks or insufficient nitrogen. Overflow? Your coffee may be too warm or your steep ratio too high. Always start cold and charge correctly.
- It’s a base, not a finish: Nitro cold brew concentrate is a versatile canvas. Experiment with flavor additions *after* charging, like vanilla syrup, cinnamon, or a splash of oat milk.
📑 Table of Contents
Understanding the Beast: What Exactly *Is* Nitro Cold Brew?
Before we talk tools, let’s clarify the science, because misunderstanding this is the #1 reason home attempts fail. Nitro cold brew is simply cold brew coffee that has been infused with nitrogen gas (N2) under pressure and served on draft through a restrictor faucet (often called a “stout” or “nitro” faucet).
The Role of Gas: Nitrogen vs. Carbon Dioxide
This is the core distinction. Regular draft beer uses a mix of CO2 and sometimes nitrogen (for stouts). CO2 is soluble in water (and coffee), creating carbonation—those sharp, bubbly bubbles. Nitrogen is largely insoluble. When you charge a keg with pure nitrogen, you’re not carbonating the liquid; you’re pressurizing the headspace with an inert gas. When you pull the tap handle, the sudden pressure drop and agitation from the faucet’s restrictor plate cause the nitrogen to come out of solution all at once, creating a cascade of tiny bubbles. This results in:
- Creamy Mouthfeel: The nitrogen bubbles give a smooth, “draft” texture, similar to a milkshake or a stout beer.
- Stable Foam: The head (the foam on top) is thick, long-lasting, and has a texture like whipped cream.
- Sweet Flavor Profile: The agitation and bubbles can reduce perceived bitterness and acidity, highlighting natural chocolate and caramel notes in the coffee.
Using a CO2 tank will make your coffee fizzy and acidic—a completely different, and generally unpleasant, drink. So, your first equipment investment is a source of pure nitrogen.
The Two-Phase Process: Concentrate & Charge
Phase one is cold brewing. You need a very strong concentrate because charging with nitrogen dilutes it slightly as the gas pushes liquid out. A standard cold brew ratio is often 1:4 to 1:8 (coffee to water by weight). For nitro, you’ll aim for the stronger end, around 1:4 to 1:6. This ensures the final poured coffee is still full-bodied. Phase two is the nitro infusion, which requires a sealed vessel (keg) and a gas source to pressurize it.
The 2026 Equipment Arsenal: What You Actually Need
Gone are the days when your only option was a $500 commercial Cornelius keg and a welding tank. The home nitro market has exploded with innovation. Here’s your 2026 equipment breakdown, from budget to prosumer.
Visual guide about Step on How to Make Nitro Cold Brew? Good Tips in 2026
Image source: cheatdaydesign.com
1. The Vessel: Kegs & Brewers
This is where your coffee lives and gets charged. Your choice here dictates your entire setup.
- Standard Ball Lock or Pin Lock Kegs (Cornelius Kegs): The classic homebrew workhorse. 1.5 to 5-gallon stainless steel or food-grade plastic kegs. They’re versatile, durable, and you can find them everywhere. In 2026, look for models with improved silicone gaskets and easier-lift bail handles. Best for: The tinkerer who wants a reusable, scalable system.
- Keggle / DIY Keg: A repurposed beer keg or a custom-built vessel. This is for the serious DIYer with welding skills. Not recommended for beginners in 2026, as factory-made options are so good.
- Dedicated Nitro Cold Brew Makers (All-in-One Systems): This is the 2026 game-changer. Brands like Nitro Cold Brew Co., Royal Coffee, and newer entrants offer sleek, countertop units. They often combine a small keg (0.5-1.5 gallons), an integrated nitrogen cartridge system, and a proprietary stout faucet in one package. Some 2026 models feature digital pressure gauges, app connectivity to track steep times, and even built-in chilling units. Best for: The beginner or convenience-seeker who wants plug-and-play simplicity and countertop aesthetics.
- Nitro Creamer Taps (Whipped Cream Dispenser Hack): The ultra-budget entry point. You use a standard 1L whipped cream dispenser (like iSi or similar) and charge it with a small N2O (nitrous oxide) cartridge. Warning: N2O is not the same as N2 (nitrogen). It will create foam, but the texture and stability are different—often more like a foam than a true draft cascade. It’s a fun experiment but not for purists. 2026 has seen better seals on these dispensers, making them more reliable.
2. The Gas: Nitrogen Tanks & Cartridges
You must have a source of pure nitrogen (N2). Not CO2, not N2O.
- Large Nitrogen Tank (D or 5lb): For a standard keg system, you’ll need a tank from a welding supply store or a beverage gas supplier. You’ll also need a nitrogen-specific regulator (often with a CGA-580 connection) and the correct gas hose with fittings for your keg (usually flare fittings). This is the most professional, cost-effective-per-cup long-term solution. 2026 tip: Look for composite tanks that are lighter than steel.
- Nitrogen Cartridge System: Used by dedicated brewers and the whipped cream dispenser hack. These are small, disposable metal canisters filled with pure N2. They thread into a charger on your keg or tap. They are incredibly convenient, require no regulator, and are perfect for a 0.5-1 gallon home system. The downside is cost per cup and waste. 2026 innovation: Refillable, eco-friendly cartridge programs are emerging from several brands.
- Keg Conditioning Kits: Some all-in-one systems use a proprietary small nitrogen capsule that you insert into a chamber on the unit. This is the ultimate in simplicity but locks you into a brand’s ecosystem.
3. The Faucet: The Stout Tap
A standard beer faucet will not work. You need a nitro/stout faucet. Its magic is in the restrictor plate (or creamer plate) at the tip—a disk with many tiny holes. As the coffee is forced through these holes, it agitates violently, forcing the nitrogen out of solution and creating the cascade and foam. These faucets come in two main styles:
- Standard Stout Faucet: Requires a separate shank and faucet body. You install it into a countertop or a wooden board.
- Picnic Faucet (or “Nitro Faucet”): A simple, all-in-one unit that screws directly onto a Cornelius keg post. It’s the easiest for beginners. 2026 models often have a more ergonomic handle and a better-sealing restrictor plate.
Pro Tip: Always use a nitro faucet cleaning kit (with flexible brush) to clean the restrictor plate holes. A clogged plate ruins your cascade.
4. Supporting Cast
- Filtration System: For your cold brew concentrate. A metal mesh filter (like a French press screen) is okay, but for clarity, use a paper filter (V60 or Chemex filters) or a dedicated cold brew filter bag (nylon). 2026 sees more reusable, ultra-fine cloth filter bags made from organic cotton.
- Grinder: A high-quality burr grinder is essential. You need a coarse grind, similar to raw sugar. Too fine = over-extraction and sludge. Too coarse = weak tea. A consistent coarse grind is key. 2026 tip: Many grinders now have a dedicated “Cold Brew” setting.
- Scales: A precision scale (0.1g accuracy) is non-negotiable for consistency. Measure coffee and water by weight, not volume.
- Temperature Control: Your coffee must be cold (near 34°F / 1°C) before and during charging. This helps the nitrogen stay in solution until the pour. A dedicated refrigerator or a keg fridge (a small mini-fridge with a tower for the tap) is the gold standard. 2026 innovation: Insulated keg jackets and keg cooling coils that attach to your existing fridge.
The Step-by-Step Process: From Beans to Cascade
Now, let’s assemble the orchestra. This process assumes you’re using a standard ball lock keg and a nitrogen tank system, the most common and flexible setup in 2026.

Visual guide about Step on How to Make Nitro Cold Brew? Good Tips in 2026
Image source: coffeebelly.com
Step 1: The Concentrate – Brewing Cold Brew
This is your foundation. A weak concentrate will yield a weak, watery nitro coffee.
- Grind: Weigh out 1 pound (454g) of your favorite medium-dark roast coffee beans. Grind on a coarse setting.
- Mix: Add the grounds to a large, clean vessel (a 2-gallon stockpot or your empty keg if it’s clean). Slowly add 4 cups (1 liter) of filtered, cold water per pound of coffee. Stir thoroughly to ensure all grounds are saturated. For a 1:4 ratio, that’s 4 cups water to 1 lb coffee. For a 1:6 ratio, use 6 cups.
- Steep: Cover and let it sit at room temperature (or in a cool pantry) for 18-24 hours. Do not agitate.
- Filter: After steeping, filter the concentrate. Pour it through your chosen filter (paper bag, cloth filter, or a fine-mesh strainer lined with a paper filter) into a clean vessel. Press gently to extract all liquid. You should have about 1 gallon of concentrate from 1 lb of coffee with a 1:4 ratio. Discard the grounds.
- Chill: Immediately refrigerate the filtered concentrate. It must be stone cold (34-40°F / 1-4°C) before it touches the keg. This is critical. Warm concentrate will not hold nitrogen properly.
Step 2: Kegging & Charging
This is where the magic happens. Work quickly and keep everything cold.
- Sanitize: Thoroughly sanitize your entire keg, lid, and faucet assembly using a no-rinse sanitizer (like Star San). Rinse with cold water if required. Any residual soap or bacteria will ruin your coffee.
- Load the Keg: Pour the cold concentrate into the sanitized keg. Leave about 1-2 inches of headspace at the top. Seal the lid tightly.
- Connect Gas: Attach your nitrogen regulator to the tank, then connect the gas hose to the “IN” post on your keg. Ensure all connections are snug.
- Pressurize: Open the nitrogen tank valve slowly. Open the regulator to set your pressure. For nitro cold brew, you typically want 30-40 PSI. The exact pressure can depend on your keg temperature and desired pour speed. Colder liquid needs slightly higher pressure. Set it and let the keg sit under pressure for a few minutes.
- Shake (The “Burp”):strong>: With the gas still connected and the keg upright, gently rock and shake the keg back and forth for 30-60 seconds. You’ll hear a hissing sound as the nitrogen dissolves into the cold liquid. This is the most important manual step for a home system. It forces gas into solution. After shaking, you can disconnect the gas line if you like, or leave it attached to maintain pressure.
- Wait: Let the keg sit, pressurized, in the refrigerator for at least 2-4 hours, and ideally overnight (12 hours). This allows the nitrogen to fully equilibrate throughout the liquid. Patience rewards you with a perfect cascade.
Step 3: The Pour – Achieving the Cascade
This is your moment of truth. The pour is a performance.
- Chill Your Glass: Use a very cold glass. A room-temperature glass will kill the foam instantly.
- Open Fully, Quickly: Pull the tap handle all the way open in one swift motion. Do not halfway-pull. The restrictor plate needs full pressure to work its magic.
- Direct the Pour: Hold the glass slightly tilted under the faucet. Let the coffee rush in. You should see a dark, vigorous cascade of liquid and bubbles, like a dark waterfall, filling the glass. The foam will rise to the top.
- Close Firmly: When the glass is about ¾ full (the foam will expand), close the handle firmly.
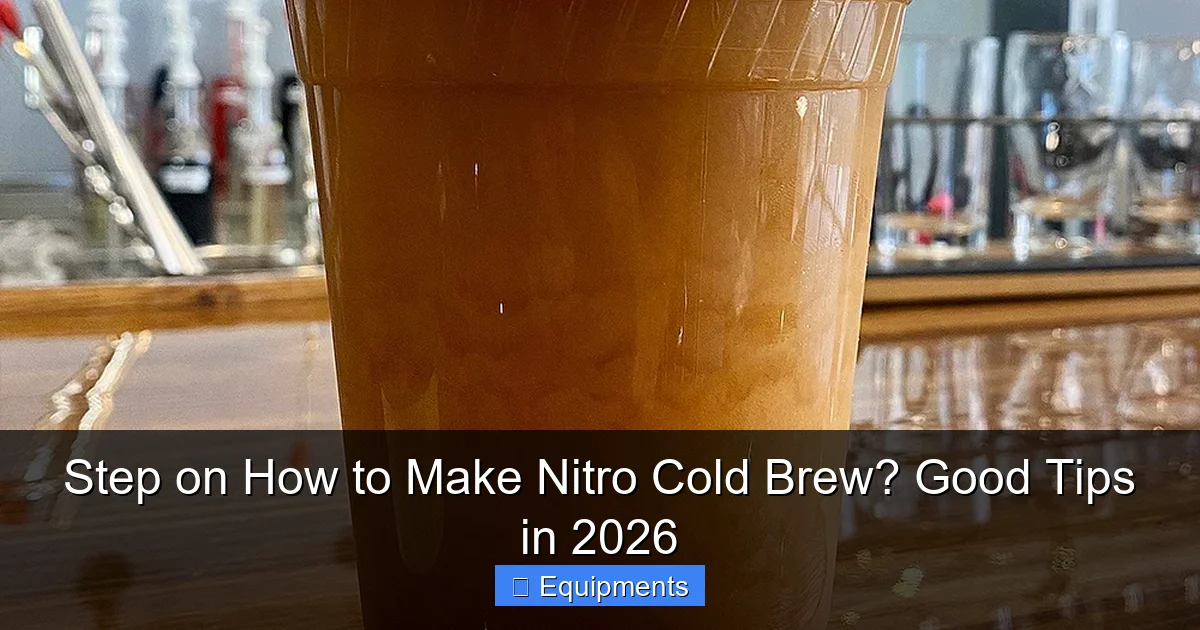
- Let it Settle: Wait 30-60 seconds. Watch as the foam collapses slightly and the liquid underneath becomes clear, revealing the beautiful layers. The foam on top should be thick, creamy, and tan-colored.
- Serve Immediately: Nitro cold brew is best consumed within 30 minutes of pouring, as the nitrogen gradually dissipates.
2026 Pro Tips & Advanced Techniques
Now that you have the basics down, here’s how to elevate your game with the latest insights and gear.

Visual guide about Step on How to Make Nitro Cold Brew? Good Tips in 2026
Image source: thequarterrestaurant.com
Smart Tech & IoT Integration
The biggest 2026 trend is connectivity. New all-in-one brewers and keg systems offer:
- Bluetooth/Wi-Fi Monitoring: Apps that track your steep time, keg pressure, and temperature. You get alerts when your coffee is ready or if pressure drops.
- Recipe Storage: Save your perfect grind size, steep time, and pressure settings for each coffee bean you use.
- Predictive Maintenance: The system reminds you to clean your faucet or replace seals based on usage.
While not essential, this tech removes guesswork and dramatically improves consistency, especially for beginners.
The Sustainability Angle: Eco-Conscious Nitro
2026 brewers are thinking about waste. Consider:
- Refillable Nitrogen Cartridges: Some brands now offer a program where you return empty cartridges for cleaning and refilling, reducing metal waste.
- Compostable Filter Bags: Made from plant-based materials like hemp or abaca.
- Local Nitrogen Filling: If you use a large tank, find a local gas supplier who offers tank exchanges instead of buying new tanks.
Flavor Experimentation: Beyond the Black Cup
Your nitro concentrate is a blank canvas. Add flavors after the kegging/charging process, in the glass:
- Infusions: Add a vanilla bean or a cinnamon stick to the keg after charging for 24 hours for a subtle infused nitro.
- Syrups: A pump of classic simple syrup, lavender syrup, or maple syrup complements the natural sweetness.
- Citrus Zest: A small strip of orange or lemon peel added to the glass before pouring can add a bright note.
- Spices: A pinch of freshly grated nutmeg or cardamom on the foam is stunning.
- Creamers: A splash of oat milk or half-and-half poured gently over the finished nitro coffee creates a “nitro latte” effect without diluting the cascade.
Never add flavorings to the concentrate before kegging. Sugars and solids can clog the faucet and interfere with nitrogen solubility.
Troubleshooting: Why Your Nitro Isn’t Working
Even with perfect gear, things go wrong. Here’s your 2026 diagnostic guide.
Symptom: No Cascade, Just a Flat Pour
Likely Causes:
- Leak: The #1 culprit. Check every connection on your keg and gas line. Spray with soapy water; bubbles indicate a leak. Tighten fittings.
- Insufficient Nitrogen: Your tank might be empty or regulator not set high enough (aim for 30-40 PSI).
- Warm Coffee: The concentrate was not cold enough. It must be near 34°F. Nitrogen solubility plummets with warmth.
- Not Enough Shake/Burp: You didn’t agitate the keg sufficiently after pressurizing. Shake it vigorously for a full minute.
- Not Enough Rest Time: You poured too soon after charging. Let it sit under pressure for at least 4 hours, preferably 12.
Symptom: Overflowing Foam, Impossible to Pour
Likely Causes:
- Too Much Pressure: Reduce regulator pressure to 25-30 PSI.
- Coffee Too Strong: Your steep ratio may be too high (e.g., 1:3). Try 1:5 or 1:6 next batch.
- Faucet Restrictor Plate Clogged: Disassemble and clean the faucet tip thoroughly with a brush and cleaner.
- Pouring Too Slowly: You must pull the handle open fully and quickly. A hesitant pour creates too much agitation at the start.
Symptom: Foam is Thin and Disappears Quickly
Likely Causes:
- Nitrogen Leak: The gas is escaping over time. Check for slow leaks in the system.
- Old/Stale Coffee: Use fresh, high-quality beans. Stale beans produce flat, thin coffee that won’t hold foam.
- Water Quality: Hard water or water with chlorine can affect foam stability. Use filtered water.
- Faucet Issue: A worn restrictor plate may have enlarged holes. Replace the plate.
Conclusion: Your Journey to the Perfect Pour
Making nitro cold brew at home in 2026 is no longer a pipe dream; it’s an accessible, rewarding craft. The path to that legendary cascade is straightforward: start with a potent, cold concentrate, use pure nitrogen, keep everything impeccably cold and clean, and master the forceful pour. Your equipment choices—from a simple picnic tap to a smart, connected brewer—define your experience, but the core principles remain the same.
Don’t be discouraged by a flat first pour. Troubleshooting is part of the journey. Check your seals, your temperature, your pressure. Each batch teaches you something. The moment you nail it—seeing that dark, beautiful waterfall fill a glass, topped with a dollop of tan foam that tastes like sweet, creamy coffee—is pure magic. It’s a skill that transforms your kitchen into a micro-café. So, grab your grinder, choose your vessel, and start experimenting. The future of coffee is cold, creamy, and nitrogenated, and it’s waiting in your fridge.
Frequently Asked Questions
Can I make nitro cold brew without a keg or special tap?
You can mimic the texture using a whipped cream dispenser with N2O cartridges, but the result is a foam, not a true draft cascade. For authentic nitro, a sealed vessel (keg) and a stout faucet are required to build and release pressure correctly.
How long does nitro cold brew last in the keg?
When kept continuously refrigerated and under pressure (30-40 PSI), your nitro cold brew will stay fresh and maintain its cascade for 1-2 weeks. After that, the coffee flavors will degrade, and the nitrogen will slowly dissipate, leading to a flatter pour.
Is making nitro cold brew at home cost-effective compared to buying it?
Yes, long-term. Initial equipment costs range from $100 (basic picnic tap setup) to $500+ (all-in-one smart brewer). Your consumables are coffee beans and nitrogen (a tank fill lasts for many kegs). Once set up, your cost per cup is significantly lower than $5-$7 café prices, especially with premium beans.
Is the nitrogen gas used for nitro cold brew safe?
Absolutely. The nitrogen (N2) used for beverage service is the same inert, food-grade gas that makes up 78% of the air we breathe. It is non-toxic, non-flammable, and simply provides the texture without altering the flavor or adding calories.
How is nitro cold brew different from regular cold brew in taste and caffeine?
p>Taste-wise, nitro cold brew is perceptibly sweeter and creamier with a smoother mouthfeel, often masking bitterness. The caffeine content is identical to the original cold brew concentrate used; the nitrogen infusion does not add or remove caffeine.
Can I carbonate my nitro cold brew? Can I use a CO2 tank by mistake?
p>You can carbonate it, but you’ll get a fizzy, acidic drink—not nitro. CO2 creates classic carbonation. For true nitro, you must use pure nitrogen (N2). Using a CO2 tank will ruin the texture and flavor profile you’re aiming for. Always clearly label your gas tanks!
Pingback: How to Make Cold Brew Coffee - kitchenandhouseware.com