This Monster Cookie Recipe with Oats & Peanut Butter is the legendary, over-the-top cookie that lives up to its name. It’s a massively thick, chewy, and soft cookie loaded with peanut butter, old-fashioned oats, chocolate chips, and M&M’s®. The dough is incredibly forgiving and bakes up perfectly every time. It’s the ultimate crowd-pleasing treat for bake sales, potlucks, or any cookie craving.
Have you ever encountered a cookie so colossal, so densely packed with goodies, that it feels like a meal in itself? That’s the magic of a monster cookie. It’s not just a cookie; it’s an event. And when you bring together the two beloved flavors of peanut butter and hearty oats, you create a masterpiece of texture and taste. This isn’t just any cookie recipe—it’s the definitive, foolproof guide to making the biggest, chewiest, most satisfying monster cookie you’ve ever laid eyes on. We’re talking about a cookie that’s soft in the center, slightly crisp at the edges, and absolutely bursting with chocolate and color. Get ready to bake a legend.
Key Takeaways
- It’s All About Texture: The combination of creamy peanut butter, quick-cooking oats, and brown sugar creates an unbelievably chewy and soft-centered cookie that stays moist for days.
- Mix-In Madness: True “monster” cookies are defined by their abundant mix-ins. This recipe uses both chocolate chips and colorful M&M’s® for visual appeal and bursts of sweetness in every bite.
- Ingredient Temperature is Key: Using room temperature butter and eggs is non-negotiable for proper creaming and dough emulsification, ensuring the perfect rise and texture.
- Chill for Success: While optional, chilling the dough for at least 30 minutes prevents excessive spreading and intensifies the flavor, leading to a thicker, more bakery-style cookie.
- Highly Customizable: This base recipe is a template. Feel free to swap in different chips, nuts, or dried fruit to make it your own signature monster cookie.
- Storage Magic: These cookies store incredibly well in an airtight container at room temperature for up to 5 days, and the dough can be frozen for fresh-baked cookies anytime.
- No Mixer Required: You can easily make this entire Monster Cookie Recipe with Oats & Peanut Butter with just a mixing bowl and a sturdy spoon, making it accessible for all bakers.
📑 Table of Contents
What Exactly *Is* a Monster Cookie?
The term “monster cookie” is delightfully vague, which is part of its charm. At its core, it’s a cookie that refuses to be subtle. It’s a declaration of indulgence. The identity of a monster cookie is built on three pillars: size, mix-in abundance, and a chewy texture. Unlike a delicate shortbread or a crisp sugar cookie, a monster cookie is robust, hearty, and meant to be shared (though you might not want to).
The Legend of the Loaded Mix-In
What transforms a simple oatmeal cookie into a monster? The mix-ins. And we’re not talking about a light sprinkle. A true monster cookie is loaded. The classic combination is peanut butter chips and chocolate chips, but our version takes it up a notch. We’re using creamy peanut butter in the dough itself for foundational flavor, then doubling down with two types of chocolate: semi-sweet chips for richness and colorful M&M’s® for that fun, crunchy candy shell and visual pop. The oats add substance and a pleasant, chewy bite that balances the sweetness. It’s a cookie that truly has it all in every single scoop.
Why This Recipe is the One You’ll Make Forever
After testing countless variations, this recipe strikes the perfect balance. The ratios of butter, sugar, and flour are calibrated for a cookie that spreads just enough to be substantial but holds its height. The brown sugar to white sugar ratio is key—more brown sugar means more moisture and chew. The peanut butter is both a flavor agent and a tenderizer. And the oats? They absorb just enough moisture to prevent cakeyness while contributing their signature texture. This is the monster cookie you’ve been dreaming of, and it’s surprisingly easy to achieve.
The Ingredient Breakdown: Why Each One Matters
Baking is a science, and in a recipe with this many components, each ingredient has a critical job. Let’s dissect the cast of characters in this Monster Cookie Recipe with Oats & Peanut Butter so you understand why we can’t skip or substitute willy-nilly.
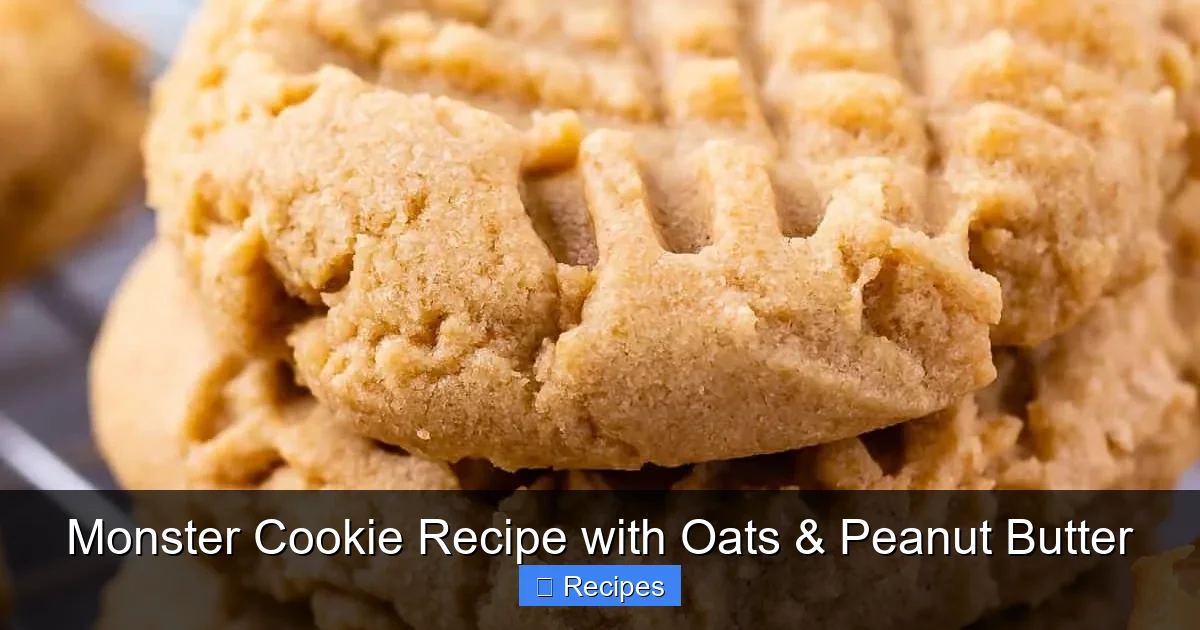
Visual guide about Monster Cookie Recipe with Oats & Peanut Butter
Image source: crazyforcrust.com
The Foundation: Fats and Sugars
We use both unsalted butter and creamy peanut butter. The butter provides the classic, rich cookie flavor and aids in spread. The peanut butter (use a standard, shelf-stable kind like Jif or Skippy—not the natural oily kind) adds deep, roasted flavor and makes the cookie incredibly tender. For sugars, we use a combination of packed light brown sugar and granulated white sugar. The brown sugar is hygroscopic, meaning it attracts and holds moisture, which is the secret to chewiness. The white sugar promotes crisp edges and helps with spread.
The Structure: Flour and Oats
All-purpose flour provides the backbone. Measuring it correctly is vital—spoon and level it into your measuring cup, don’t scoop from the bag. Old-fashioned rolled oats (not instant) are non-negotiable here. They give the cookie its hearty, slightly grainy texture and absorb flavors beautifully. Quick oats can become mushy, so stick with the classic rolled variety.
The Binders and Leaveners
Large eggs at room temperature bind everything together and add structure. Vanilla extract enhances all the other flavors. Baking soda is our sole leavener. It reacts with the moisture and acidity (from the brown sugar and peanut butter) to create those lovely, crackly tops and a good rise. Salt is the flavor amplifier—it makes the sweet and nutty notes sing. Don’t omit it!
The Stars: The Mix-Ins
Here’s where we go monster mode. We use 2 cups each of semi-sweet chocolate chips and M&M’s® candy. That’s a full 4 cups of mix-ins total! This ratio ensures you get a glorious mix of chocolate and candy in every bite. You can absolutely use dark chocolate chips, butterscotch chips, or chopped candy bars instead. The key is abundance.
Step-by-Step Guide to Monster Cookie Dominance
Follow these steps precisely for guaranteed cookie success. The process is straightforward, but a few techniques make all the difference.
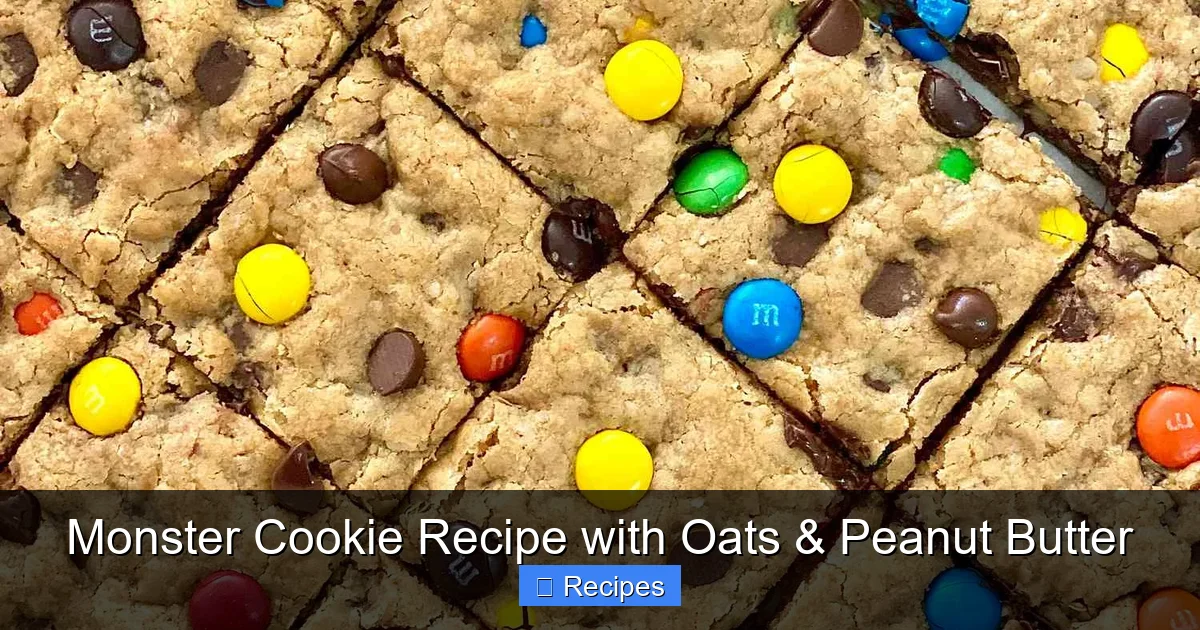
Visual guide about Monster Cookie Recipe with Oats & Peanut Butter
Image source: simplyrecipes.com
Step 1: Prep and Preheat
Always start by preheating your oven to 350°F (175°C). Line your baking sheets with parchment paper or silicone mats. This prevents sticking and promotes even browning. Have all your ingredients measured and ready—this is called mise en place and makes the process smooth.
Step 2: Cream the Butter and Sugars
In a large mixing bowl, using a hand mixer or a stand mixer fitted with a paddle attachment, beat the softened room-temperature butter, brown sugar, and white sugar together on medium-high speed for 2-3 minutes. This step is crucial! You’re not just combining them; you’re aerating the mixture, which incorporates air bubbles that help the cookies rise. The mixture will become noticeably lighter in color and texture.
Step 3: Incorporate Peanut Butter and Wet Ingredients
Add the creamy peanut butter and mix on medium speed until fully combined and smooth, about 1 minute. Then, add the room-temperature eggs one at a time, mixing well after each addition. Scrape down the sides of the bowl. Finally, mix in the vanilla extract.
Step 4: Combine Dry Ingredients
In a separate medium bowl, whisk together the all-purpose flour, baking soda, and salt. This ensures the leavener and salt are evenly distributed, preventing clumps in your dough.
Step 5: Bring It All Together
Gradually add the dry ingredient mixture to the wet ingredients, mixing on low speed just until no flour streaks remain. Do not overmix. Overmixing develops gluten in the flour, leading to tough cookies. Once the flour is incorporated, turn off the mixer.
Step 6: The Grand Mix-In Addition
This is the moment. Using a sturdy wooden spoon or spatula, fold in the rolled oats first, just until distributed. Then, and this is the fun part, fold in the chocolate chips and M&M’s®. Be gentle but thorough. You want every scoop of dough to be loaded with mix-ins. The dough will be thick, heavy, and studded with color—this is exactly what you want.
Step 7: Chill the Dough (Highly Recommended)
While you can bake immediately, covering the bowl and chilling the dough in the refrigerator for at least 30 minutes, or up to 72 hours, is a game-changer. Chilling allows the flour to fully hydrate and the flavors to meld. It also solidifies the butter, which means the cookie will spread less in the oven, resulting in a thicker, chewier center. If you’re in a hurry, you can skip it, but the results are worth the wait.
Step 8: Portion and Bake
Preheat your oven again if it cooled. Using a large cookie scoop (a 3-tablespoon size is perfect) or a generous 1/3 cup measure, drop massive mounds of dough onto your prepared baking sheets. Leave at least 2 inches between them—these are monsters; they need room to breathe! Gently flatten each mound slightly with the bottom of a glass or your palm.
Bake for 10-12 minutes. You’re looking for golden brown edges and centers that still look soft and slightly underdone. They will continue to set on the baking sheet. Do not overbake. Overbaked monster cookies are dry and hard. It’s better to underbake them slightly.
Step 9: The Patience of Cooling
Let the cookies cool on the baking sheet for at least 5 minutes. They are very fragile when hot. Then, carefully transfer them to a wire rack to cool completely. This final cooling period allows the center to set fully while retaining that signature chew.
Customization Station: Make It Your Own
The beauty of this base Monster Cookie Recipe with Oats & Peanut Butter is its versatility. Once you master the technique, you can become a cookie alchemist.
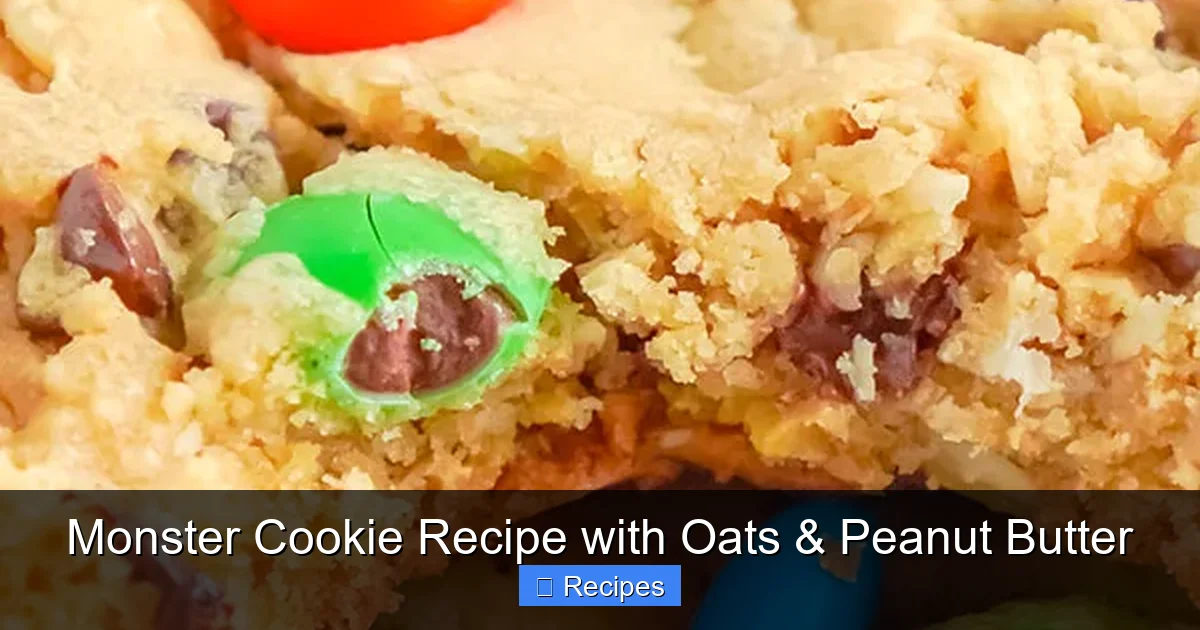
Visual guide about Monster Cookie Recipe with Oats & Peanut Butter
Image source: theslowroasteditalian.com
Mix-In Swaps and Additions
- Chocolate Variations: Use dark chocolate chunks, white chocolate chips, or a mix of all three. Chopped peanut butter cups are an epic addition.
- Nutty Goodness: Fold in 1 cup of chopped toasted pecans, walnuts, or peanuts for extra crunch and flavor.
- Dried Fruit: A cup of dried cranberries, cherries, or apricots adds a lovely tart contrast to all the sweetness.
- Candy Bar Chaos: Finely chop your favorite candy bar (Snickers, Milky Way, etc.) and use it in place of some of the chocolate chips.
Flavor Twists to the Dough
- Espresso Power: Add 1-2 teaspoons of instant espresso powder to the dry ingredients. It won’t make them taste like coffee, but it will deepen the chocolate and peanut butter flavors.
- Spice It Up: Add 1 teaspoon of cinnamon or a pinch of pumpkin pie spice to the flour for a warm, cozy note.
- Sea Salt Finish: Before baking, sprinkle a few flakes of flaky sea salt on top of each dough mound. The salty-sweet contrast is divine.
Storage, Freezing, and Serving Like a Pro
You’ll likely have cookies for days. Here’s how to keep them perfect and how to serve them for maximum enjoyment.
Room Temperature Storage
Store the completely cooled cookies in an airtight container at room temperature. Layer them between sheets of parchment paper to prevent sticking. They will stay soft and chewy for up to 5 days. If they start to dry out, place a small piece of bread in the container—the cookies will absorb the moisture and soften right up.
Freezing the Dough for Future Baking
This is the best tip for always having fresh-baked cookies. Portion the dough onto a parchment-lined baking sheet as if you were going to bake it. Freeze the individual dough balls solid, then transfer them to a freezer bag. When a cookie craving hits, bake from frozen, adding 1-2 minutes to the baking time. No need to thaw!
Freezing Baked Cookies
Baked cookies also freeze beautifully. Let them cool completely, then layer them in an airtight container with parchment paper between layers. They’ll keep for up to 3 months. Thaw at room temperature or warm them briefly in a 300°F oven.
Serving Suggestions
While a monster cookie is a complete meal in a cookie, it’s phenomenal with a cold glass of milk. For a dessert upgrade, place a scoop of vanilla ice cream on top of a warm cookie for an a la mode experience. Crumble them over yogurt or ice cream as a topping. They are also a star ingredient in a cookie trifle or crumbled as a crust for a cheesecake.
Troubleshooting: Why Didn’t My Cookies Turn Out Right?
Even with a foolproof recipe, things can go awry. Here are the most common issues and their fixes.
Problem: My cookies are flat and crispy.
Likely Cause: Butter was too warm or you over-creamed the butter and sugar. The dough was too warm when it went into the oven. You used instant oats instead of rolled oats. You overbaked them.
Solution: Ensure butter is softened but not oily. Cream for the recommended time only. Chill the dough. Use old-fashioned oats. Bake for the minimum time and check them at 10 minutes.
Problem: My cookies are cakey and puffy.
Likely Cause: You used too much flour (measured incorrectly by scooping). You overmixed the dough after adding the flour. You used baking powder instead of baking soda.
Solution: Spoon flour into the measuring cup and level it off. Mix just until the flour disappears. Double-check you’re using baking soda.
Problem: The mix-ins are sinking to the bottom.
Likely Cause: The dough is too thin or runny. This can happen if your peanut butter is too oily (natural style) or if your eggs were extra large.
Solution: Use standard, shelf-stable peanut butter. If the dough seems excessively sticky or wet after mixing, add a tablespoon of flour at a time until it’s thick and holds its shape. Toss your mix-ins in a tiny bit of flour before folding them in to help suspend them.
Frequently Asked Questions
Can I use natural peanut butter (the kind with oil on top)?
It’s not recommended. Natural peanut butter has a different fat and moisture content and often separates, which can make the cookie dough oily, cause excessive spreading, and result in a dry, crumbly cookie. For best results, use a standard, homogenized creamy peanut butter.
Can I make these cookies smaller?
Absolutely! You can use a smaller cookie scoop (about 2 tablespoons) and reduce the baking time by 1-2 minutes. Keep an eye on them as they will bake faster. The mix-in-to-dough ratio will be slightly higher, which is never a bad thing.
What if I don’t have M&M’s®?
No problem! You can use any chocolate candy-coated candy, like Reese’s Pieces, or simply increase the chocolate chips by another cup. You can also use chopped up candy bars or dried fruit for a different flavor profile.
Why is my cookie dough so sticky and hard to scoop?
This is normal! The dough will be very thick and sticky due to the high fat and sugar content. Using a large cookie scoop is the easiest way to portion it. If it’s truly unworkable, your butter may have been too soft or your kitchen is very warm. Pop the bowl in the fridge for 20-30 minutes to firm up before scooping.
Can I make the dough ahead of time for a party?
Yes! You can make the dough up to 3 days ahead. Keep it covered in the refrigerator. For best results, you can also pre-scoop the dough onto baking sheets, chill them, and then bake them fresh the day of your event. This ensures they are perfectly soft and chewy.
My cookies are browning too fast on the bottom but are still raw in the center. What happened?
This is often a sign of a hot oven or a dark baking sheet. Always use parchment paper or a silicone mat. If your oven runs hot, try lowering the temperature to 325°F and baking for a slightly longer time. Rotate the baking sheet halfway through baking for even color.