Wrapping a frying pan properly is essential to protect its cooking surface, especially non-stick coatings, from scratches and dents during storage or transit. The process involves cleaning the pan, selecting appropriate protective materials like bubble wrap or parchment paper, and securing it tightly to prevent movement. Following these simple steps ensures your valuable cookware arrives or is stored in perfect condition, saving you from costly replacements.
Key Takeaways
- Always Clean and Dry: A pristine, bone-dry pan prevents moisture traps that cause rust and protects wrapping materials from getting soggy or stained.
- Material Matters: Use soft, non-abrasive materials like bubble wrap, parchment paper, or moving blankets directly against the cooking surface; never use newspaper or rough paper.
- Protect the Cooking Surface First: The primary goal is to shield the non-stick layer or seasoned finish. Start your wrap here before addressing the exterior and handle.
- Secure, Don’t Constrict: Use packing tape or stretch wrap to hold the protective layers in place, but avoid taping directly to the pan’s surface to prevent adhesive residue.
- Consider the Destination: The wrapping method differs slightly for long-term storage, moving house, or shipping—factor in potential pressure points and handling.
- Handle with Care: The handle is a vulnerability. Pad it separately or ensure your wrapping method immobilizes it to prevent it from banging into the pan body or other items.
📑 Table of Contents
- Why Properly Wrapping Your Frying Pan Isn’t Just a Good Idea—It’s Essential
- Gathering Your Arsenal: The Essential Tools for the Job
- The Step-by-Step Sanctuary: Wrapping Your Pan for Storage or Moving
- Shipping Specifics: How to Wrap a Frying Pan for Mail or Courier
- Special Considerations: Different Pans, Different Wraps
- Common Mistakes & How to Avoid the Pitfalls
- Beyond the Basics: Creative & Practical Wrapping Hacks
- Conclusion: The Peace of Mind in a Perfectly Wrapped Pan
Why Properly Wrapping Your Frying Pan Isn’t Just a Good Idea—It’s Essential
Let’s be honest: a good frying pan is a kitchen workhorse. You’ve seared steaks in it, scrambled eggs, and maybe even tried your hand at a delicate pan sauce. It’s seen heat, soap, and the occasional forgotten soak. But when it comes time to put that trusty pan away for a while—maybe for a big move, seasonal storage, or to ship it to a family member—its journey from cupboard to box is a perilous one. A single scratch on a non-stick surface can ruin its performance. A dent in the bottom can cause uneven heating. This is where knowing how to wrap a frying pan correctly becomes less of a chore and more of an act of preservation.
Think of it like sending your kid off to summer camp. You wouldn’t just toss their favorite sweater in a duffel bag with a pair of muddy sneakers, right? You’d fold it carefully, maybe put it in a protective bag, and place it on top. Your frying pan deserves the same TLC. The goal is to create a cozy, shock-absorbent cocoon that guards against scratches from other cookware, dents from drops or bumps, and the slow creep of moisture that leads to rust. Whether you’re a moving veteran or a first-time shipper, mastering this skill will save you from the heartbreak (and wallet ache) of a damaged pan. So, grab your pan, and let’s walk through the process together, step by simple step.
Gathering Your Arsenal: The Essential Tools for the Job
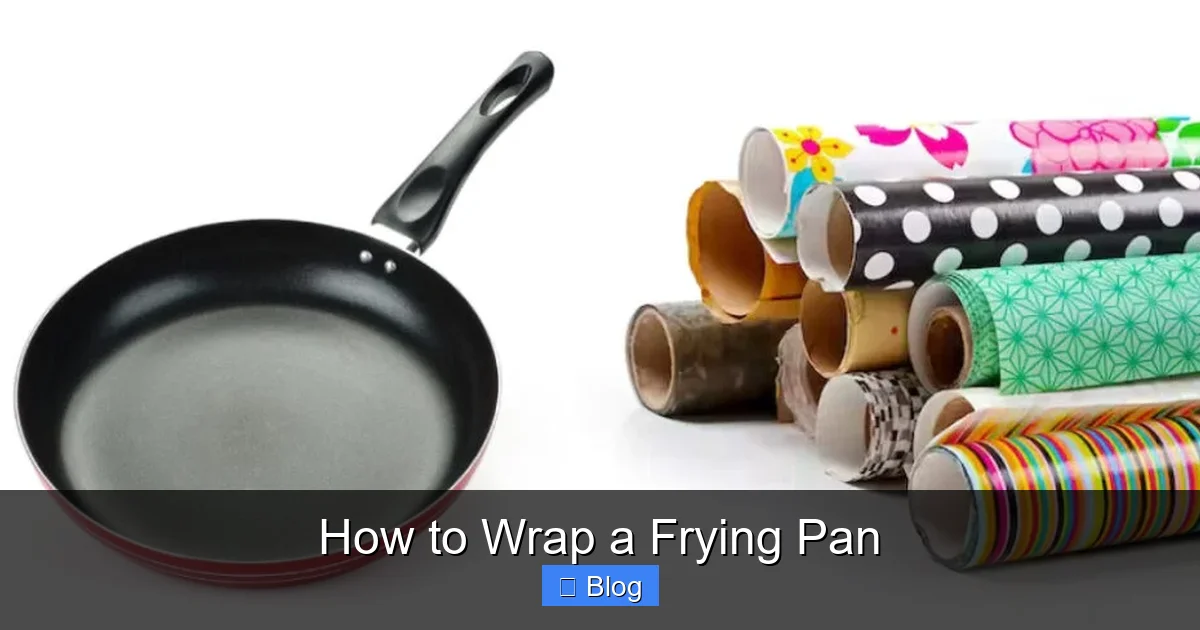
Before we dive in, you need the right supplies. Scrambling for materials mid-wrap is a recipe for a poorly protected pan. The good news? You likely have most of this stuff at home already, or can pick it up cheaply at a hardware or office supply store. The key is to avoid anything abrasive or chemically reactive.
Visual guide about How to Wrap a Frying Pan
Image source: thekitchenix.com
The Protective Padding: Your Pan’s First Line of Defense
This layer goes directly against the cooking surface. It must be soft, clean, and non-scratching. Here are your best bets, ranked from most to least ideal for different scenarios:
- Bubble Wrap (The Gold Standard): The bubbles provide excellent cushioning against impacts. For non-stick or delicate surfaces, use the “bubble-side out” method so the smooth paper side touches the pan, minimizing any potential transfer of texture. For seasoned cast iron, bubble side in is fine as the surface is tougher.
- Parchment Paper or Butcher Paper: An excellent, acid-free option that creates a smooth, non-abrasive barrier. It’s perfect for preventing scratches between the pan and other materials and is especially good for long-term storage as it allows the pan to breathe slightly, reducing moisture risk.
- Old, Clean Tea Towels or Cloth Napkins: Soft cotton or linen is ideal. Ensure they are completely clean and dry. This is a great eco-friendly option, but for shipping, it may not provide enough structural rigidity on its own.
- Moving Blankets or Furniture Pads: These are fantastic for the *outer* layers of protection, especially during a move. They’re bulky but offer supreme shock absorption for the whole package.
The Securing Squad: Holding It All Together
You need something to keep your padding from unraveling.
- Packing Tape (Painter’s Tape for Delicate Finishes): Standard clear packing tape is strong. For painted handles or delicate finishes, use painter’s tape first on the surface, then packing tape over it. This prevents residue.
- Stretch Wrap (Plastic Wrap for Furniture): This is a game-changer. It conforms to the shape, holds everything snugly without tape touching the pan, and creates a moisture-resistant barrier. A small roll is worth its weight in gold for moving multiple items.
- Rubber Bands or String: Useful for holding a initial paper or towel wrap in place before the final securing layer.
The Outer Shell: The Final Barrier
This is what faces the world—the cardboard box, another pan, or the rough interior of a moving truck.
- Cardboard Box (The Perfect Fit): Find a box that the wrapped pan fits into with only an inch or two of space on all sides. Too much room allows the pan to shift; too tight a squeeze risks pressure points. A dishpack box from a moving supply store is ideal.
- Additional Cardboard Sheets: Use these to line the box and create layers if you’re packing multiple pans. A sheet between each wrapped pan is non-negotiable.
- Packing Peanuts or Crumpled Paper: For filling empty space in the box. The goal is to prevent any and all movement.
The Step-by-Step Sanctuary: Wrapping Your Pan for Storage or Moving
Now, the main event. This method is your go-to for putting a pan away in a storage unit, packing it for a house move, or prepping it for a long rest in the back of a cupboard. The priority is scratch prevention and immobilization.
Visual guide about How to Wrap a Frying Pan
Image source: indoorense.com
Step 1: The Foundation of Cleanliness
This is the most critical, often skipped step. Take a clean cloth and thoroughly wash and dry your frying pan. Any food residue, grease, or water is a problem. Grease can degrade paper and attract pests. Water, even microscopic droplets, will lead to rust, especially on carbon steel or cast iron. Place it on a towel and let it air-dry completely, or speed the process with a low heat on the stove. A clean pan is a happy pan.
Step 2: Enveloping the Cooking Surface
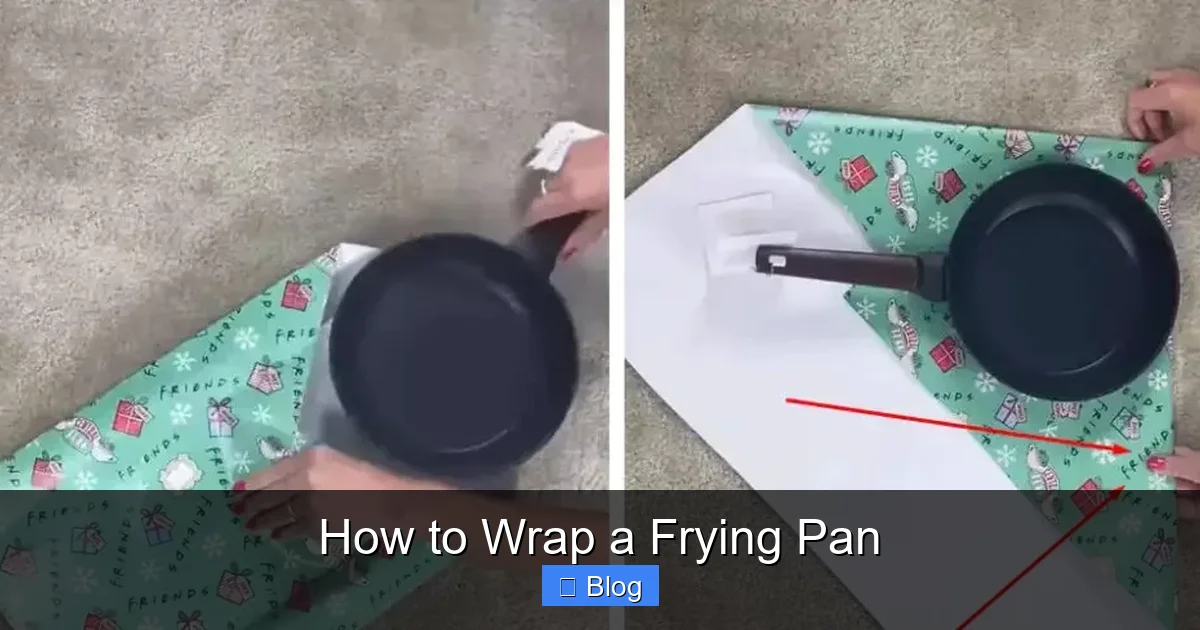
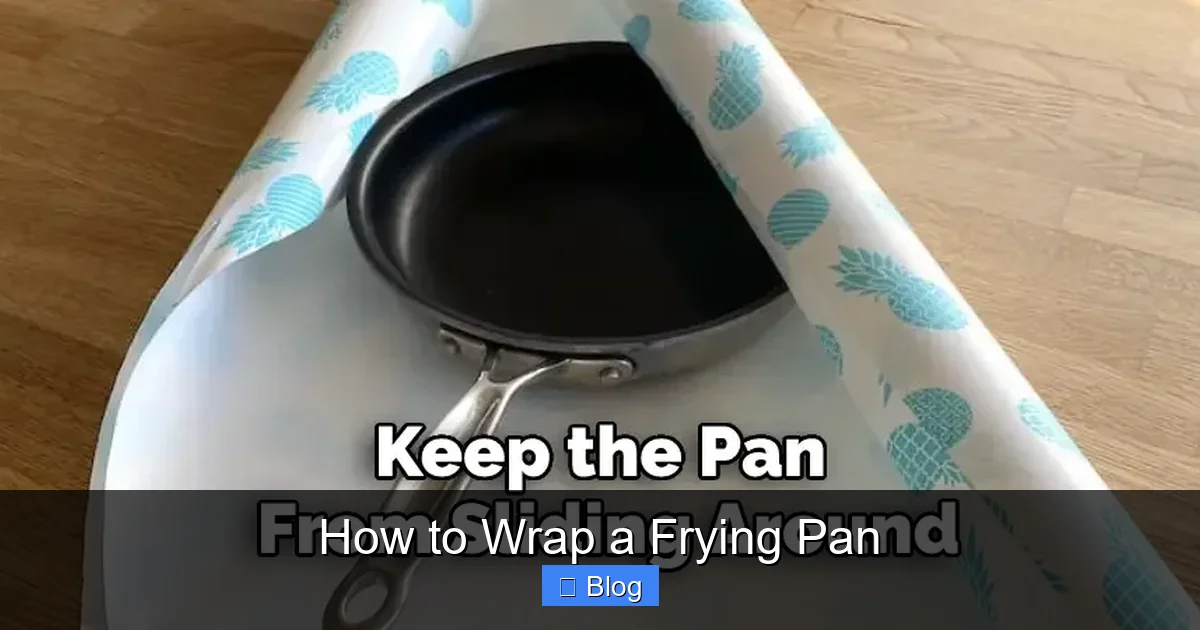
Lay your chosen padding material (a large sheet of parchment paper or a towel) on a flat surface. Place the pan cooking-side down onto it. This might feel counterintuitive, but it protects the most vulnerable part first. Pull the material up and over the pan, covering the entire cooking surface and extending past the edges. If using bubble wrap, position it so the smooth side is against the pan. Smooth out any wrinkles. For a fry pan with a deep, curved side, you may need to gently tuck the paper into the curve.
Step 3: Securing the Primary Wrap
With the pan still on the padded surface, take a piece of painter’s tape (if concerned about finish) and lightly secure the padding in place around the handle or rim. Then, take your stretch wrap or packing tape. If using stretch wrap, cut a long piece, anchor one end to the table, and spin the pan, wrapping it tightly but not so tight it deforms the pan. The goal is to make the padding a single, cohesive unit. If using tape, apply strips horizontally and vertically across the back (now facing up) to hold the padding in a tight bundle.
Step 4: The Exterior Cocoon
Now, flip the entire wrapped bundle over so the cooking surface (still padded) is facing down on your work surface. Take a larger piece of your padding material—a moving blanket piece or a huge sheet of paper—and wrap the entire pan again. This time, cover the sides, bottom, and handle. This outer layer absorbs shocks from the box or other items. Secure this layer with more stretch wrap or tape. You should now have a somewhat rectangular, padded bundle.
Step 5: The Handle’s Special Treatment
The handle is a long, lever-like protrusion that can easily get bent or scratch other things. If your pan has a long, delicate handle (like on a French steel skillet), pad it individually. Wrap the handle in a small towel or several layers of bubble wrap, then secure it with tape. You can then incorporate this padded handle into the main bundle wrap, ensuring it’s immobilized and can’t flop around.
Step 6: Boxing It Up for Good
Line your chosen cardboard box with a layer of crumpled paper or a cardboard sheet. Gently place your wrapped pan bundle inside. It should fit snugly. If there’s more than an inch of space on any side, fill it with more packing material. The pan should not be able to shift if you shake the box gently. Place a final layer of cardboard on top before sealing the box. Label it clearly: “FRAGILE – COOKWARE – THIS SIDE UP.”
Shipping Specifics: How to Wrap a Frying Pan for Mail or Courier
Shipping adds another layer of complexity: rough handling, stacking with heavier packages, and longer transit times. The principles are the same, but the execution needs to be more robust.
Visual guide about How to Wrap a Frying Pan
Image source: indoorense.com
Double-Boxing: The Ultimate Insurance Policy
For valuable or non-stick pans, never ship in a single box. First, wrap the pan meticulously as described above. Then, place that wrapped bundle into a slightly larger box with ample cushioning (2-3 inches of peanuts or paper on all sides). Seal that box. Then, place that box into a second, even larger outer box, again cushioning all sides. This “box-in-a-box” system absorbs impacts that would crush a single box.
Immobilization is Everything
Inside the inner box, the pan must not move. Period. Use molded pulp trays or cut pieces of cardboard to create a custom cradle for the pan’s shape. Surround it completely with packing material until it’s cemented in place. A moving pan inside its own box is the number one cause of damage in transit.
Choosing the Right Carrier and Service
For a heavy item like a cast iron skillet, consider the shipping cost versus the item’s value. Some carriers have weight limits or surcharges. Always declare the contents accurately as “cookware” or “kitchenware.” Avoid “surface mail” or the slowest, cheapest services for fragile items. The extra cost for a tracked, insured, and slightly faster service is peace of mind you can’t put a price on.
Special Considerations: Different Pans, Different Wraps
Not all frying pans are created equal. Your wrapping strategy should adapt to the material and value of your cookware.
Non-Stick & Ceramic Coated Pans: Handle With Kid Gloves
The coating is incredibly susceptible to scratches from even a fingernail. For these, your inner layer must be perfectly smooth. Parchment paper is your best friend here. Avoid bubble wrap with the bubble side touching the coating, as the pattern could imprint. Wrap the entire pan twice in parchment, then a layer of soft towel, and secure gently. These pans often have plastic or silicone handles—avoid high heat during any drying process and ensure no tape touches these parts.
Cast Iron & Carbon Steel: The Rust-Proofing Imperative
For these rugged pans, the enemy is moisture, not scratches (though you still want to prevent them). After the thorough cleaning and drying step, consider applying a very thin layer of cooking oil to the entire surface before wrapping. This re-seasons the pan and adds a protective barrier. Then, wrap in a paper that allows some breathability, like a clean cotton towel or uncoated butcher paper, before your outer layers. Avoid plastic wrap directly against the surface for very long-term storage, as it can trap condensation.
Stainless Steel & Aluminum: Focus on Dents and Scuffs
While scratch-resistant, these pans can dent easily, especially if thin. The focus here is on cushioning and preventing point pressure. Use generous amounts of bubble wrap or moving blankets. Pay special attention to the rim and any flared edges. If the pan has a detachable handle, wrap it separately and pad the connection point on the pan body.
Common Mistakes & How to Avoid the Pitfalls
Even with the best intentions, it’s easy to slip up. Here are the most frequent errors and how to sidestep them.
Mistake 1: The Damp Pan Disaster
Wrapping a pan that’s even slightly damp is like wrapping a sandwich in plastic—it’s a breeding ground for rust. The moisture has nowhere to go. The Fix: After washing, place the pan on a stove burner on low for 5-10 minutes to evaporate all traces of water. Let it cool completely on a dry rack before wrapping.
Mistake 2: Newspaper as a “Protective” Layer
Old newspaper seems like a free, plentiful padding source. It is not. The ink can transfer onto finishes, especially light-colored non-stick or ceramic. The paper is also relatively rough and acidic. TheThe Fix: Use plain brown packing paper, parchment paper, or clean cloths. Save the newspaper for filling box space, not for direct contact.
Mistake 3: The Tape Trap
You secure your bundle with strong packing tape… directly on the pan’s painted handle or brushed stainless surface. Months later, you peel it off to find a sticky, discolored mess. The Fix: Always use a barrier. Apply a strip of painter’s tape to the pan first, then apply the packing tape to the painter’s tape. Or, use stretch wrap, which adheres to itself and not to the pan.
Mistake 4: The Overstuffed Box
You cram three wrapped pans and a lid into one box, sealing it with a sigh of accomplishment. Inside, they’re rattling around like marbles in a can. The Fix: One pan per box is the safest rule. If you must box multiple, wrap each individually, then separate them with vertical cardboard dividers and surround each with at least 2 inches of cushioning on all sides. The box should feel solid, not hollow.
Beyond the Basics: Creative & Practical Wrapping Hacks
Once you know the rules, you can bend them for specific situations. Here are some pro-level tips.
The “Pantry Purge” Method for Seasonal Storage
Putting away your summer grill pan for winter? For short-term, in-home storage where the pan will sit on a shelf in a basement or garage, you can simplify. After cleaning and drying, place a paper towel or small cloth inside the pan to absorb any ambient moisture. Then, slide the pan into a large, clean pillowcase. This protects it from dust and minor scrapes from neighboring items. It’s not for moving, but it’s perfect for a few months of hibernation.
The Lid Conundrum: To Wrap Together or Separately?
This is a classic debate. Wrapping the lid to the pan with a layer of parchment or towel in between is space-efficient and keeps the set together. However, this creates a bulky, awkward shape that’s hard to box securely. The superior method is to wrap the lid separately using the same technique. Then, you can place it on top of the wrapped pan in the box, using a cardboard sheet separator. This allows you to pad each piece optimally and prevents the lid’s knob from denting the pan’s surface.
Repurposing Household Items as Padding
No bubble wrap? No problem. Get creative. Flattened cardboard boxes from online deliveries make fantastic rigid sheets. Old sweaters or sweatshirts are thick, soft cushions. Socks can be used to wrap handles or small knobs. Even a layer of aluminum foil (dull side out) can provide a slick, protective barrier against moisture before your outer layers. The goal is to create a soft-but-structured nest using what you have.
Conclusion: The Peace of Mind in a Perfectly Wrapped Pan
So, there you have it. Wrapping a frying pan isn’t just about tossing it in a box; it’s a small ritual of care for a tool that feeds you and your family. It’s the difference between a pan that emerges from a move ready to sear and one that’s a scratched, rusted reminder of a job half-done. By taking the time to clean it properly, choosing the right soft materials to cocoon it in, securing it thoughtfully, and boxing it with intention, you’re not just packing an object—you’re preserving memories, meals, and a piece of your kitchen’s soul.
The next time you face a stack of boxes and a cupboard full of cookware, don’t dread the frying pan. See it as an opportunity. A few extra minutes spent on its wrap now means you can unpack it later with a smile, ready to fire up the stove and create your next great meal without a second thought to its journey. That’s the real payoff: functionality preserved, and a little bit of kitchen peace of mind, neatly packed and ready to go.
Frequently Asked Questions
Can I use plastic wrap (Saran Wrap) to wrap a frying pan?
Plastic wrap can be used as a final moisture barrier over your soft padding, especially for short-term storage, but never as the primary protective layer against scratches. It offers no cushioning and can trap condensation against the pan’s surface, potentially leading to rust. It’s best used in conjunction with bubble wrap or paper.
What’s the absolute worst material I could use to wrap my non-stick pan?
Abrasive materials like newspaper (due to ink and rough texture), steel wool, or sandpaper are the worst. Also, avoid anything with a coarse texture or chemical residue, like used paper towels that may have cleaning agents on them. These will guaranteed to scratch and damage the delicate coating.
Do I need to remove the handle from my frying pan before wrapping it?
If the handle is removable (screwed on), absolutely yes. Wrap the pan body and the handle separately. This is the safest way to prevent the handle from breaking off or denting the pan during transit. If it’s a fixed, riveted handle, you must pad it extensively as part of the main wrap to immobilize it.
Is it okay to stack multiple wrapped frying pans in the same box?
It is possible, but it’s high-risk and not recommended for valuable pans. If you must, you need to create a rigid compartment for each one. Wrap each pan individually, then cut cardboard pieces to form a divider that prevents them from touching. Fill every void with cushioning so no pan can shift. One pan per box is always the safest protocol.
How long can I leave a frying pan wrapped in bubble wrap for storage?
For short-term (3-6 months), it’s fine. For very long-term storage (a year or more), avoid trapping plastic directly against the metal for extended periods, as it can promote condensation. For long-term, use breathable materials like cotton towels or parchment paper as the inner layer, and store the box in a cool, dry place. Check on it every few months if possible.
My frying pan has a glass lid. Does it need special wrapping?
Yes, glass lids require extreme caution. Treat them like a piece of glassware. Wrap the entire lid in several layers of bubble wrap, paying special attention to the knob and edges. Then, place it in a separate, small box filled with packing material so it floats and cannot be crushed. Never place it directly against the pan or anything hard. Label the box clearly as “GLASS.”