To fix a broken mug, use a food-safe epoxy for a strong, durable bond. Ensure surfaces are clean and dry before applying, and allow ample curing time for best results.
Key Takeaways
- Safety First: Wear gloves to protect hands from sharp shards and cuts.
- Check Food Safety: Only use food-safe adhesives for mugs intended for drinking.
- Clean Thoroughly: Ensure all broken pieces are completely clean and dry before gluing.
- Choose the Right Adhesive: Select a strong, clear-drying epoxy for best structural results.
- Apply Adhesive Sparingly: Use a small amount to avoid messy excess and ensure a tight bond.
- Allow Full Curing: Respect the adhesive’s complete cure time before using the mug.
- Test for Leaks: Check the repair with water and understand the fix may not be permanent.
📑 Table of Contents
- How to Fix a Broken Mug: Giving Your Favorite Cup a Second Life
- Step 1: The Initial Assessment – Know What You’re Working With
- Step 2: Gathering Your Arsenal – Essential Tools & Materials
- Step 3: The Epoxy Method – A Step-by-Step Guide to a Strong Repair
- Step 4: Alternative Repair Techniques – For Specific Situations
- Step 5: Safety, Finishing Touches, and Long-Term Care
- Step 6: When to Say Goodbye – And Creative Ideas for repurposing
- The Final Sip: Embracing Imperfection and Memory
How to Fix a Broken Mug: Giving Your Favorite Cup a Second Life
There’s a special kind of heartbreak that comes from hearing that distinctive crack or seeing your favorite mug shatter on the floor. It’s rarely just about the object; it’s the memories—the lazy Sunday mornings, the late-night study sessions, the gift from a dear friend. That mug held your coffee, your tea, your quiet moments. Throwing it away feels like losing a small piece of your daily ritual. But what if I told you that, more often than not, you can learn how to fix a broken mug and restore it to functional, even beautiful, service? It’s not magic, but it is a rewarding, hands-on process that combines a little science with a lot of care. Over the years, I’ve salvaged everything from a cherished childhood teacup to a expensive artisan ceramic piece. Some repairs are invisible, some are character-revealing, but all of them tell a story of resilience. This guide will walk you through every step, from the initial, gut-wrenching assessment to the final, cautious wash, ensuring you have the knowledge to make the right call for your broken ceramic companion.
Step 1: The Initial Assessment – Know What You’re Working With
Before you grab any glue, take a deep breath and play detective. Rushing into a repair is the number one reason for failed fixes. The goal here is to understand the enemy: the break itself and the material it’s made from. A clean, simple crack is a world away from a thousand tiny shards.
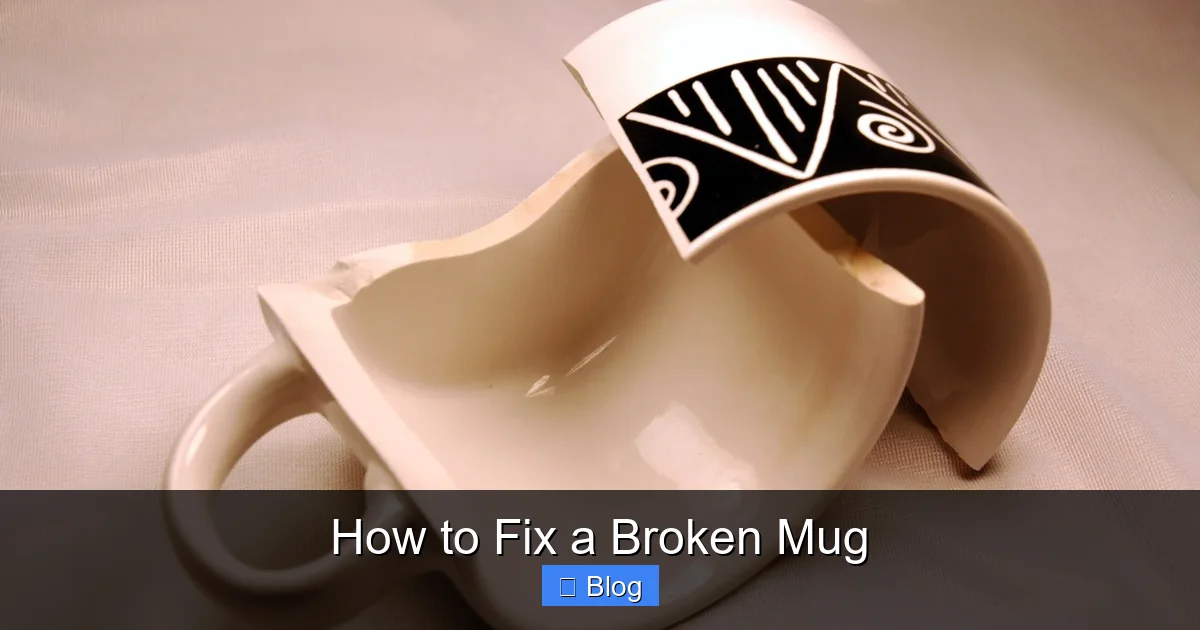
Visual guide about How to Fix a Broken Mug
Image source: s-i.huffpost.com
Identifying the Type of Ceramic
Not all mugs are created equal, and the material dictates your best repair strategy. Feel the broken edge.
- Earthenware: This is the most common, often reddish or tan, and porous. It’s relatively soft and can be more forgiving for gluing but is also more prone to absorbing water if the glaze is compromised. Think of your typical, affordable coffee mug.
- Stoneware: Denser, heavier, and usually vitrified (less porous). It has a more uniform color (grey, tan) and is very durable. Breaks tend to be cleaner. This is common for higher-quality dishware.
- Porcelain: Fine, white, and often translucent when held to light. It’s delicate and brittle. Breaks can be incredibly sharp and precise, like glass. Repairing porcelain requires a very steady hand and a clear-drying adhesive.
- Bone China: Similar to porcelain but with bone ash, making it even more delicate and luminous. Repairs are possible but require extreme precision.
Pro Tip: If the mug has a metallic trim (gold, silver), this is crucial! Standard epoxy or cyanoacrylate (super glue) can react poorly with metals, causing discoloration or weakening the bond. You’ll need a specialized adhesive.
Evaluating the Damage
Lay out all the pieces on a clean, well-lit surface. Ask yourself these questions:
- Is it a clean break? One or two large pieces that fit together like a puzzle? This is your best-case scenario.
- Is it a hairline crack? A single, thin fracture that doesn’t compromise structure? This is often the easiest to stabilize and hide.
- Is it a shatter? Dozens of tiny pieces, especially from the rim or base? This is the most challenging and may not be structurally sound even if glued.
- Are important parts missing? A chunk from the rim or base? A repair here will be visible and may affect usability (e.g., a chipped rim might be uncomfortable to drink from).
- Is the glaze intact? If the break is through the ceramic body but the glaze is still on the pieces, you have a chance at an almost invisible repair. If the glaze has flaked off, the repair line will likely be visible.
My most successful repair was a simple, clean break through the body of a stoneware mug. The worst was a porcelain cup that shattered into 20 pieces—we got it back together, but it was forever a display piece, not a daily driver.
Step 2: Gathering Your Arsenal – Essential Tools & Materials
Having the right tools at your workstation makes all the difference between a frustrating mess and a satisfying project. You don’t need a fancy workshop, just a few key items.
Visual guide about How to Fix a Broken Mug
Image source: cdn.pixabay.com
The Adhesive Showdown: Choosing Your Glue
This is the most critical decision. Using the wrong glue guarantees failure. Here’s a breakdown of your main options, from everyday to specialist.
| Adhesive Type | Best For | Drying Time | Food Safe? | Pros | Cons |
|---|---|---|---|---|---|
| Epoxy (2-Part) | Most breaks, structural strength | 5-30 min set, 24h cure | Yes, once fully cured | Extremely strong, gap-filling, water-resistant | Can be messy, slightly visible, not UV stable (may yellow) |
| Cyanoacrylate (Super Glue) | Hairline cracks, non-structural, quick fixes | Seconds to minutes | No (toxic if ingested) | Very precise, dries clear, easy to use | Brittle, poor gap-fill, not for weight-bearing areas |
| Milk Glue (Casein) | Historical/antique repair, non-toxic interest | Hours to days | Yes, natural | Non-toxic, reversible with water, traditional method | Weak, not water-resistant, messy, limited strength |
| Specialty Ceramic/Porcelain Glue | Fine china, decorative pieces, painted surfaces | Varies | Check label | Formulated for ceramics, often paintable | Can be expensive, may not be food-safe |
My Go-To Recommendation: For most functional mugs, a clear, two-part epoxy is your best friend. It provides the necessary strength for a handle or a base. Brands like J-B Weld or Devcon have specific epoxy formulations for ceramics.
The Supporting Cast: Other Necessary Gear
- Surface Protectors: Wax paper or a silicone mat. You do not want to glue your mug to your kitchen counter.
- Clamping/Jointing Tools: Rubber bands, painter’s tape, small clamps, or even a cup filled with rice to apply gentle, even pressure. For complex breaks, you might need to build a small “cradle” from cardboard and tape.
- Cleaning Supplies: Isopropyl alcohol (70% or higher) and lint-free cloths or cotton swabs. Grease and dust are the enemies of adhesion.
- Application Tools: Toothpicks, a fine-tip applicator (often comes with epoxy), or a small piece of stiff cardboard. A small spatula is also handy for mixing epoxy.
- Safety Gear: Nitrile gloves (to protect your skin and keep the mug clean), and safety glasses if dealing with sharp shards.
- Patience: This is the most important, non-physical tool. Rushing ruins repairs.
Step 3: The Epoxy Method – A Step-by-Step Guide to a Strong Repair
Let’s get into the nitty-gritty. We’ll use the two-part epoxy method as our primary example because it’s the most versatile for fixing a broken mug that you actually want to use again. Think of this as building a tiny, permanent bridge between the broken pieces.
Visual guide about How to Fix a Broken Mug
Image source: cdn.pixabay.com
Preparation is 90% of the Battle
This is the non-negotiable, make-or-break phase. Skipping or rushing here leads to a weak bond.
- Isolate the Workspace: Choose a flat, stable, dust-free surface. Cover it with wax paper. Ensure you have good lighting—a desk lamp with a magnifying glass attachment is ideal.
- Fit Test, No Glue: Dry-fit all the major pieces together. Do they align? Is there a gap? If pieces are missing, you need to accept this repair will have a “character” spot. Use this dry-fit to plan your clamping strategy. How will you hold the handle to the body?
- Clean Meticulously: This is paramount. Wipe every broken edge with an alcohol-dampened cloth. The alcohol evaporates quickly and leaves no residue. You are removing every trace of grease, dust, and old coffee film. Let it air-dry completely. Any contamination is a point of failure.
- Prepare the Epoxy: Read your specific epoxy’s instructions. Typically, you mix equal parts resin and hardener on a disposable surface (a piece of cardboard or a paper plate). Mix thoroughly but gently for the full time stated (usually 30-60 seconds). Scrape the edges to ensure a complete mix. Incomplete mixing means it won’t cure properly.
Application and Assembly – The Delicate Dance
- Apply Sparingly: Using a toothpick or applicator, apply a thin bead of mixed epoxy to one of the broken surfaces. Less is more. You want the glue in the joint, not all over the mug. Excess glue will squeeze out and create a messy, hard-to-clean ridge.
- Join and Hold: Carefully bring the pieces together, aligning them perfectly on the first try. Hold them firmly in place. This is where your clamping plan comes in. Use rubber bands around the mug and handle, or tape strategically to maintain constant pressure. The epoxy’s initial set (when it stops being liquid) is your window to adjust. After that, movement creates a weak bond.
- Clean the Squeeze-Out: Immediately after joining, use a cloth dampened with alcohol (or acetone for some epoxies, test first!) to wipe away any epoxy that has oozed out. Do this while it’s still soft. Once cured, it’s much harder to remove.
- Cure Time is Sacred: Do not disturb the mug. Follow the epoxy’s minimum “handle with care” time and its full “cure” time (often 24 hours). Temperature and humidity affect this. Place it somewhere safe, level, and undisturbed. I usually leave mine overnight.
Step 4: Alternative Repair Techniques – For Specific Situations
Epoxy isn’t the only tool in the shed. Depending on the mug and the break, other methods might be more appropriate, especially for non-functional or decorative repairs.
The Kintsugi-Inspired Approach: Embracing the Break
Why hide the repair when you can highlight it? Inspired by the Japanese art of kintsugi (golden joinery), this method uses a lacquer dusted with powdered gold, silver, or bronze to mend pottery, celebrating its history rather than disguising it. While traditional kintsugi uses urushi lacquer (which requires a controlled environment and is toxic in its liquid form), there are modern, safer DIY kits available. The process is similar to epoxy—clean, apply lacquer, dust with metal powder—but the result is a stunning, luminous seam. This is perfect for a decorative bowl or a mug you display, not one you drink from daily. It transforms a flaw into a feature.
The “Good Enough” Fix: Cyanoacrylate for Tiny Flaws
For a single, hairline crack that doesn’t threaten the mug’s integrity, a tiny drop of cyanoacrylate (super glue) can be a quick stabilizer. Apply the glue along the crack using a toothpick. Capillary action will pull it into the fissure. Wipe excess immediately. Hold until set (seconds). Important: This is for cosmetic stabilization only. Do not use a super-glued mug for hot liquids or any significant weight. The bond is too brittle and can fail catastrophically with thermal expansion or stress.
The Historic Method: Milk Glue (Casein)
This is a fascinating, food-safe, and completely reversible method used for centuries. You make it by curdling milk with vinegar or lemon juice, separating the curds, and mixing them with a little lime or baking soda to form a paste. It’s applied like a thick glue and clamps for days as it dries. It’s weak and not water-resistant, so it’s only suitable for very low-stress, non-utilitarian items or for educational purposes. I’ve tried it on a small figurine; it held but was soft and required careful handling. It’s more of a curiosity than a practical solution for a daily mug.
Step 5: Safety, Finishing Touches, and Long-Term Care
Your mug is glued and cured. The job isn’t done yet. How you finish and care for it determines if your repair lasts a year or a decade.
The Final Sanding and Sealing
After the full cure, you’ll likely have a small ridge of dried adhesive. Lightly sand this smooth with very fine-grit sandpaper (400+ grit). Do this dry over a trash can to catch dust. Wear a mask! The goal is to smooth the joint, not sand through the glaze. Once smooth, you have a choice.
- For a Seamless Look: If you used clear epoxy and managed a clean joint, you may be done. Test by running your finger over it. If it’s smooth, great.
- To Camouflage the Seam: You can use a small amount of non-toxic, food-safe paint or ceramic glaze (available in craft stores) to tint the epoxy before the next step. Alternatively, after sanding, you can apply a tiny dab of white, non-sanded grout (food-safe variety) or even a bit of ceramic epoxy touch-up paint to blend it in. This is an art, not a science.
- For Extra Protection: Once the repair is clean and smooth, consider applying a food-safe, waterproof sealant. A thin coat of a clear, food-grade mineral oil or a specific ceramic sealer can help protect the porous ceramic body if the glaze was broken through. Let it soak in and wipe off excess.
Long-Term Care Rules for Your Repaired Mug
Your fixed mug has earned a little TLC. Treat it with respect, and it will serve you well.
- Hand Wash Only: Always. The heat, pressure, and harsh detergents of a dishwasher are the number one killer of repaired ceramics. The thermal cycling and agitation can fatigue the adhesive bond.
- Avoid Extreme Temperatures: Don’t pour boiling water directly into a mug with a fresh repair (wait at least a week after curing). Don’t put it in the microwave. Sudden, extreme temperature changes can cause the ceramic and the adhesive to expand/contract at different rates, leading to failure.
- Inspect Regularly: Before each use, give the repaired area a quick visual and tactile check. If you feel any softness, see any new cracking, or notice the joint separating, retire the mug to a decorative purpose. Safety first.
- No Heavy Impact: This is not a mug for roughhousing or camping. It’s for gentle, mindful use at home.
Step 6: When to Say Goodbye – And Creative Ideas for repurposing
Not every mug can be saved, and that’s okay. Knowing when to stop trying to fix it is a sign of wisdom, not failure. A mug with a shattered base, missing large chunks from the drinking rim, or a repair that compromises its structural integrity is a safety hazard. It’s time to let go.
But “letting go” doesn’t mean a trip to the landfill. A broken mug has a second life full of creative potential. This is where you channel your inner eco-artist.
Signs It’s Time to Retire Your Mug from Beverage Duty
- The break is through the base or a large portion of the wall is missing.
- The repaired joint feels soft, spongy, or gives under slight pressure.
- There are sharp, unfinished ceramic edges that could cut your lip.
- The mug leaks significantly when filled with water.
- You feel a sense of anxiety every time you pick it up, fearing it will fail.
From Broken to Beautiful: Creative Reuse Ideas
Grab safety gloves and safety glasses. We’re going to break it down (safely)!
- Mosaic Magic: Smash the remaining whole pieces into smaller, safe shards (tile nippers help). Use these to create a stunning mosaic picture frame, flowerpot, or tabletop. The original mug’s pattern can become a beautiful fragment in a larger artwork.
- Herb Garden Markers: Use a strong piece (like a chunk of the base) as a natural, ceramic marker for your herb garden. Paint the name of the herb on it with outdoor paint.
- Unique Planter: If the mug is mostly intact but leaks, drill a few extra drainage holes in the bottom (use a carbide-tipped drill bit for ceramic) and use it as a quirky planter for a succulent.
- Jewelry or Key Holder: A solid, interestingly shaped piece can be affixed to a wooden board with hooks to become a rustic key holder. A small, smooth shard can be set in wire to make a pendant.
- Garden Edging: Broken ceramic pieces, when smoothed, make wonderful, unique edging for a flower bed. They’re like little pieces of treasure nestled in the dirt.
I once turned the remains of a chipped, blue-and-white mug into a set of mosaic garden markers. Each one held a little piece of that original pattern, and every time I see them, I remember the mug’s first life. It’s a beautiful form of remembrance.
The Final Sip: Embracing Imperfection and Memory
Learning how to fix a broken mug is about more than just glue and patience. It’s a practice in mindfulness. It forces you to slow down, to examine the damage, to work with your hands, and to accept the outcome—whether it’s a near-invisible repair, a golden kintsugi seam, or a creative second life. The repaired mug carries a new story: the story of the break and the careful act of mending. It becomes an object that has lived, not just existed.
So, the next time you hear that sickening crack, don’t immediately reach for the trash can. Pause. Breathe. Gather the pieces. Assess. You might just find that the process of putting it back together is as healing as the restored object itself. And if the repair isn’t perfect? That’s okay. The best mugs, like the best lives, often have a few well-earned scars. They tell the best stories. Now, go save that cup. Its next chapter is waiting to be written.
Frequently Asked Questions
How do I fix a broken mug?
To fix a broken mug, first clean and dry the pieces thoroughly. Apply a food-safe, waterproof adhesive like epoxy resin or a two-part ceramic glue to the broken edges, press them together firmly, and hold until set. Allow the glue to cure completely, usually 24 hours, before using.
Is it safe to drink from a repaired mug?
It is only safe to drink from a repaired mug if you use a non-toxic, food-safe adhesive specifically labeled for ceramic or dishware repair. Standard superglues are not food-safe and can leach chemicals. Even with proper glue, avoid using the mug for hot liquids or if the repair is on the rim or interior.
What is the best glue to repair a broken mug?
The best glue for a broken mug is a two-part epoxy resin or a specialized ceramic adhesive, as they create a strong, waterproof bond. Avoid using standard superglue (cyanoacrylate) for mugs, as it becomes brittle and is not food-safe. Always ensure the adhesive is fully cured before use.
Can you fix a broken mug with milk?
No, the “milk repair” method is a myth and not a reliable way to fix a broken mug. While the proteins in milk can temporarily seal small cracks as it dries, it does not create a strong or sanitary bond and will fail with washing or heat. For a permanent fix, use a proper ceramic adhesive.
How long does it take for glue to set on a broken mug?
Initial setting time for glue on a broken mug is often 5-30 minutes for handling, but you must allow the adhesive to cure completely. For a strong, water-resistant bond, especially for drinking, let the mug sit undisturbed for at least 24 to 72 hours before washing or using it, per the glue manufacturer’s instructions.
When is it better to just replace a broken mug?
It’s better to replace a broken mug if it’s a low-cost, everyday item or if the break is complex with many small pieces. You should also replace it if the mug holds sentimental or high monetary value, as a professional restoration is safer. A DIY repair is best for simple, clean breaks on non-precious mugs.
