A broken dishwasher soap dispenser doesn’t mean you have to hand-wash your dishes. While the dispenser is designed for timed release, you can safely bypass it using methods like detergent pods, placing powder/gel in the bottom rack, or using a makeshift dispenser. These temporary solutions are highly effective for everyday cleaning, but a permanent repair or replacement is recommended for optimal performance and to prevent detergent residue on your dishes.
You load the dishwasher, press start, and hear that familiar hum… but something’s off. You open it mid-cycle and see your dishes are still coated in bits of food, and the soap tablet you placed in the dispenser is sitting there, completely dry and untouched. Panic sets in. Is it broken? Do I have to hand-wash everything now? Take a deep breath. A broken dishwasher soap dispenser is a common, frustrating problem, but it is not a dishwashing death sentence. In fact, with a few clever tricks and a clear understanding of how your machine works, you can bypass that faulty compartment entirely and get your dishes sparkling clean again, often with better results than you might expect. This guide will walk you through everything you need to know, from quick diagnosis to safe, effective workarounds and your options for a permanent fix.
Key Takeaways
- Safety First: Never use regular dish soap in a dishwasher. Only use detergents specifically labeled for automatic dishwashers to prevent excessive suds and machine damage.
- The Pod Hack is Top-Tier: Placing a dishwasher detergent pod on the bottom rack is the simplest, most mess-free temporary solution for a broken dispenser.
- Powder & Gel Have a Place: If using powder or gel, placing 1-2 tablespoons directly on the bottom rack (not in the silverware basket) works effectively for a standard cycle.
- Timing is Everything: For powder/gel methods, use a normal or heavy cycle. Avoid quick/express cycles, as there’s less water flow to dissolve and distribute the detergent properly.
- Rinse Aid is Still Needed: A broken dispenser doesn’t affect the rinse aid compartment. Keep it filled to prevent water spots and improve drying performance.
- Inspect the Cause: Before committing to a workaround, check if the issue is a simple jam (from old detergent) or a broken latch/spring. A quick clean might fix it.
- Plan for a Permanent Fix: Workarounds are great, but a faulty dispenser reduces efficiency. Research repair part numbers or consider replacement if the machine is otherwise in good shape.
📑 Table of Contents
- Understanding Your Dishwasher’s Soap Dispenser: Why It Matters
- Diagnosing the Problem: Is It Truly Broken?
- The Immediate Workarounds: How to Wash Dishes Without a Dispenser
- Step-by-Step Guide for Each Workaround Method
- Long-Term Solutions: Repair or Replace?
- Maintenance Tips to Prevent Future Dispenser Disasters
- Conclusion: Clean Dishes Are Still Within Reach
Understanding Your Dishwasher’s Soap Dispenser: Why It Matters
Before we dive into solutions, let’s quickly understand what that little door is supposed to do. The soap dispenser isn’t just a cup; it’s a timed-release mechanism. During the wash cycle, a small flap opens at a precise moment—usually after the machine has filled with water and done a preliminary rinse. This timing is crucial. If detergent is released too early, it gets washed away in the initial rinse. If it’s released too late, it doesn’t have enough time to dissolve and work effectively. The dispenser ensures the detergent mixes with hot water at the optimal moment for cleaning power.
The Role of Water Jet Timing
Modern dishwashers use a complex choreography of water jets from the spray arms. The lower spray arm typically handles the bulk of the washing for plates and pots, while the upper arm focuses on glasses and the top rack. The dispenser’s release point is timed so that detergent is introduced directly into the path of these powerful jets, ensuring it’s immediately agitated and distributed throughout the tub. When this timing is disrupted by a dispenser that won’t open, the detergent never meets the water stream at the right time, leading to poor cleaning performance.
Why You Can’t Just Toss Soap In
Your first instinct might be to throw a detergent pod or some powder into the bottom of the tub and hope for the best. While that’s essentially the core of our workaround, it’s important to understand why this works and the nuances involved. Without the timed release, you’re relying on the machine’s initial fill and pre-wash rinse to dissolve and distribute the detergent. This is why the type of detergent and the cycle you choose become critical factors in the success of these methods.
Diagnosing the Problem: Is It Truly Broken?
Before you give up on the dispenser altogether, a quick diagnosis can save you time and money. The issue might be simpler than you think.
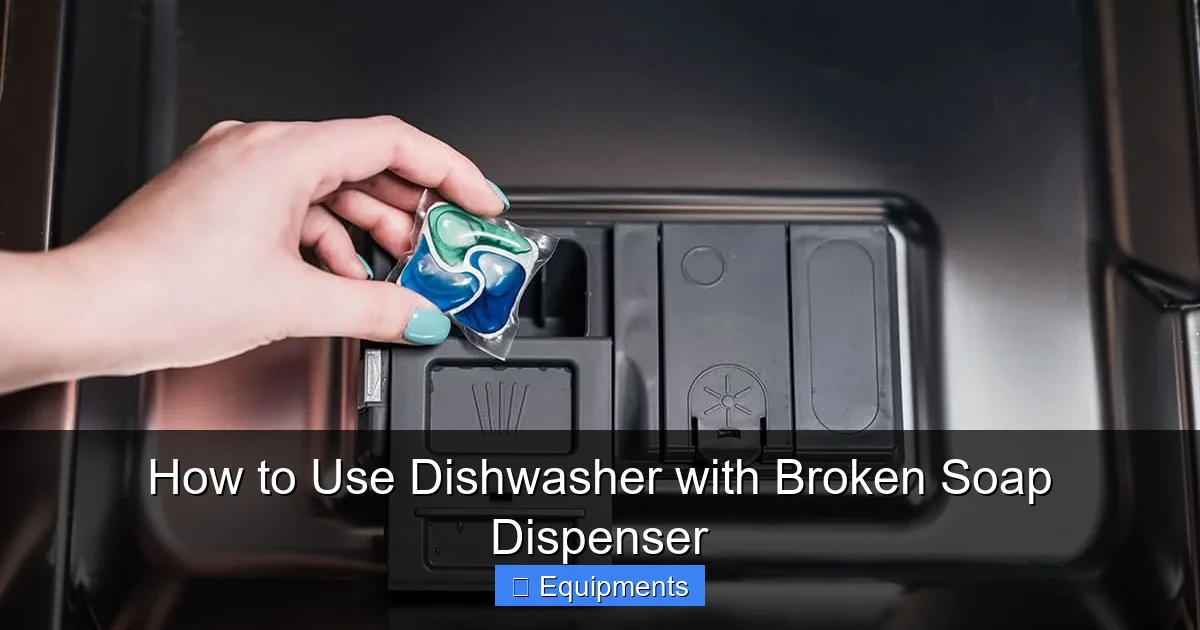
Visual guide about How to Use Dishwasher with Broken Soap Dispenser
Image source: howdykitchen.com
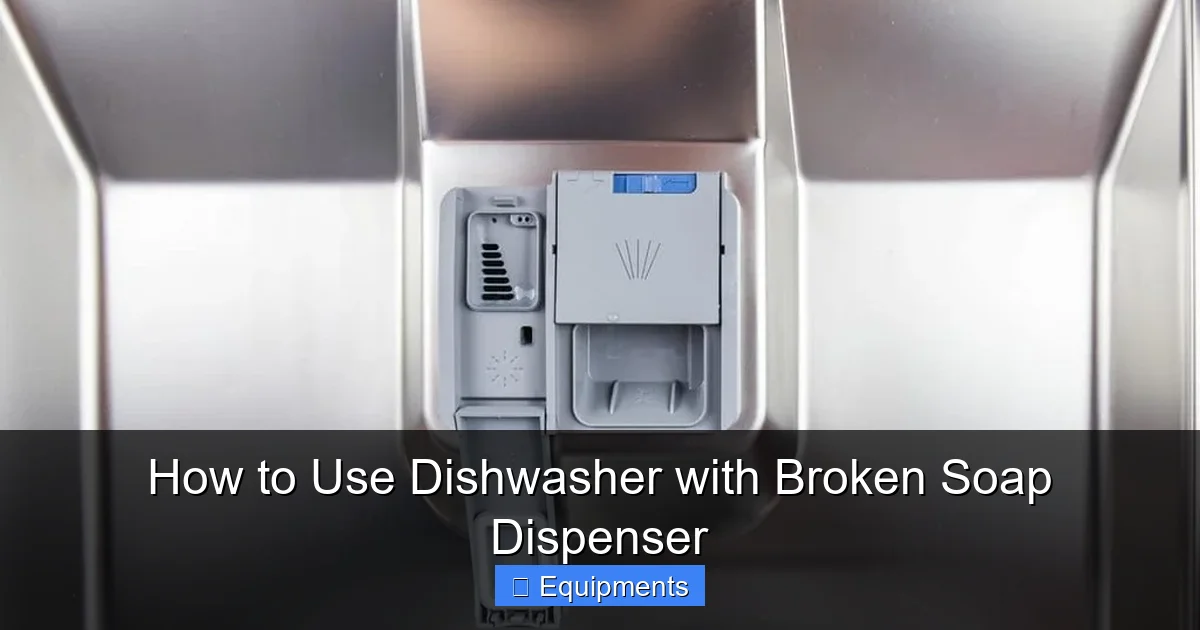
Common Culprits: Jams and Obstructions
The most frequent cause of a dispenser that won’t open is old, caked-on detergent. Over time, powdered detergent can become damp, harden, and glue the door shut. Gel packs can leave a sticky residue. Here’s a simple fix: Remove the dispenser cup (most slide or clip out). Soak it in warm vinegar for 15-20 minutes to dissolve the buildup. Use a soft brush (an old toothbrush is perfect) to scrub away any remaining residue. Check the latch mechanism and the spring (if visible) for gunk. Clean the entire area thoroughly, rinse, and reinstall. Often, this solves the problem completely.
Mechanical Failures: Latches and Springs
If cleaning doesn’t work, the issue is likely mechanical. The dispenser door is held closed by a small plastic latch and tensioned by a spring. Over years of use, these components can crack, warp, or lose tension. The plastic door itself can also warp from repeated hot water exposure, preventing a proper seal and thus preventing the latch from releasing. Visually inspect these parts. If you see a broken piece of plastic or a detached spring, the dispenser is mechanically broken and will need a repair part.
Electronic or Timer Issues
Less commonly, the signal from the dishwasher’s timer or control board that tells the dispenser to open might be faulty. This is a more complex electrical issue. If the dispenser is clean and mechanically intact but still never opens during any cycle, this could be the cause. Diagnosing this usually requires a multimeter and technical knowledge, pointing you toward a professional repair.
The Immediate Workarounds: How to Wash Dishes Without a Dispenser
Assuming the dispenser is truly faulty or you need a quick solution while waiting for a part, these are your proven, safe methods. The golden rule: NEVER use liquid dish soap (like Dawn or Palmolive) meant for hand-washing. It will create a mountain of suds that can overflow, damage your dishwasher’s internal components, and potentially flood your kitchen. Only use detergents explicitly labeled for automatic dishwashers.
Visual guide about How to Use Dishwasher with Broken Soap Dispenser
Image source: howdykitchen.com
Method 1: The Detergent Pod (The Easiest & Cleanest)
This is the undisputed champion of dishwasher dispenser hacks. A pre-measured, sealed detergent pod contains everything needed: detergent, rinse aid, and sometimes a protective coating.
- How to Do It: Simply place one pod on the bottom rack of your dishwasher, preferably in the center or slightly toward the back, away from the spray arm’s direct rotation path to prevent it from being jostled into the heating element.
- Why It Works: The pod’s film dissolves quickly in hot water. As the cycle begins and the tub fills, the pod starts dissolving immediately. The detergent is released into the wash water from the outset, ensuring it’s present throughout the entire cleaning process. It’s mess-free, pre-dosed, and often includes rinse aid, which is a bonus.
- Best For: All cycles, but especially effective on heavy cycles with longer wash times. Pro Tip: For light cycles or if you have very soft water, you can sometimes tear the pod and use half, but be aware the film might not dissolve fully and could leave a residue.
Method 2: Powdered Dishwasher Detergent
If you use bulk powder, this method is highly effective and cost-efficient.
- How to Do It: Measure the correct amount (usually 1-2 tablespoons, check your detergent’s box for load size). Do not put it in the silverware basket. Scatter the powder evenly across the bottom of the dishwasher tub, avoiding the heating element at the base.
- Why It Works: As the tub fills during the pre-wash or main wash, the powder dissolves into the water. The incoming water and the rotation of the lower spray arm will agitate and distribute the detergent solution.
- Critical Cycle Tip: Always use a Normal, Heavy, or Auto cycle with this method. These cycles have longer wash times and more water, ensuring complete dissolution. Avoid Quick, Express, or 1-Hour cycles. They have insufficient water volume and time, leading to undissolved powder deposits on your dishes and in the filter.
Method 3: Gel or Liquid Dishwasher Detergent
Gel detergents can be trickier but work well with the right approach.
- How to Do It: Measure the correct amount (usually the capful or line provided). Pour it directly onto the bottom of the tub, again, away from the heating element. You can also pour it into the detergent cup without closing the lid, but this risks it being washed out in the first rinse if the cup isn’t sealed. The bottom-of-tub method is more reliable.
- Why It Works: Similar to powder, it mixes with the initial fill water. Gel can be advantageous as it often dissolves faster than powder.
- Watch Out For: Some gel formulas can be sticky. Ensure you don’t over-pour, as excess gel might not fully dissolve and could leave a film. A good rinse cycle is key. Like powder, pair this with a longer, hotter cycle.
Method 4: The DIY “Dispenser” (For the Handy)
If you’re feeling creative, you can create a temporary dispenser. Take a small, clean, dishwasher-safe container (like a plastic spice jar or a section of a clean, empty liquid detergent bottle). Fill it with your measured powder or gel. Secure the lid loosely (so it can open under pressure) and place it on the bottom rack, upright. The container will fill with water, the lid may pop off, and the detergent will release gradually, mimicking a real dispenser. This is more experimental but can work for longer cycles.
Step-by-Step Guide for Each Workaround Method
Let’s get practical. Here’s exactly how to implement each method for maximum success.
Visual guide about How to Use Dishwasher with Broken Soap Dispenser
Image source: dishwasherfixer.com
Executing the Pod Method Flawlessly
1. Select Your Pod: Use any high-quality automatic dishwasher pod. Popular brands like Finish, Cascade, and store brands all work well.
2. Positioning is Key: Place the pod on the bottom rack. If your lower spray arm is very close to the rack, place the pod in the corner farthest from the arm’s rotation path to prevent it from being knocked around.
3. Load As Normal: Load your dishes as you usually would. Ensure nothing is blocking the pod’s access to water (e.g., a large baking sheet laid flat on the rack).
4. Select Your Cycle: Any cycle works, but for best results with dried-on or tough food, use a Heavy or Auto cycle. The pod is designed to dissolve fully in the hot water of these cycles.
5. Start and Forget: Run the cycle. You should notice the pod’s film dissolving within the first 5-10 minutes. It’s that simple.
Mastering the Powder Technique
1. Check Your Water: If you have very hard water, you may need to use a little more powder or a specific hard-water detergent. Consult the detergent box.
2. Measure Precisely: Use the cap or scoop provided. Overfilling leads to residue; underfilling leads to poor cleaning. For a full standard load, 1½ to 2 tablespoons is typical.
3. Distribute Evenly: Pour the powder in a thin line or small pile in the center-back of the bottom of the tub. This helps it dissolve without clumping.
4. Cycle Selection: This is non-negotiable. Choose a cycle with a minimum of 2 hours total time (including dry). Look for “Normal Wash,” “Heavy Wash,” or “Auto Sensor Wash.” The extended time and higher water temperature are essential for powder dissolution.
5. Post-Cycle Check: After the cycle, check the filter. You may find some undissolved granules there—this is normal, as some powder will get rinsed out with the final drain. Your dishes should be clean.
Long-Term Solutions: Repair or Replace?
While workarounds are fantastic for a temporary fix, a permanently broken dispenser is inefficient. It uses more water (longer cycles may be needed) and can be unreliable. Here’s how to decide your next step.
Assessing Feasibility of a DIY Repair
If your diagnosis revealed a jam, you’ve already fixed it. If it’s a broken latch or spring, repair might be possible. Search online for your dishwasher’s model number (on a sticker inside the door) plus “soap dispenser repair.” You’ll often find exploded parts diagrams and YouTube tutorials. Common repair parts are the dispenser latch, the entire dispenser door assembly, or the release lever. Costs range from $15 to $50. If you’re comfortable with basic tools and following instructions, this is a viable 30-60 minute project.
Calling a Professional
If the issue seems electrical (control board) or if you’re not comfortable opening the machine, a technician is the way to go. A service call will diagnose the exact problem. They can replace the dispenser assembly. Weigh the cost of repair (part + labor, often $150-$300) against the age and value of your dishwasher. If the machine is over 10-12 years old, investing in a new, energy-efficient model might be more economical in the long run.
Replacing the Dispenser Assembly
This is often the most straightforward “permanent” fix. You order the exact replacement part for your model. The assembly usually bolts or clips into place and connects to a single wire harness. For many models, it’s a very accessible part inside the door panel. If you can remove the inner door panel (usually by removing screws around the edge), you can likely replace it yourself. Always disconnect power to the dishwasher before attempting any internal repair.
Maintenance Tips to Prevent Future Dispenser Disasters
Whether you’re using a workaround or have a fixed dispenser, proper maintenance ensures longevity and performance.
Regular Cleaning is Non-Negotiable
Once a month, remove the dispenser cup and rinse it thoroughly under warm running water. Use a soft brush to scrub the hinge, latch, and the cavity it sits in. This prevents the #1 cause of failure: detergent buildup. Wipe down the door gasket and the edge of the dispenser opening to remove any sticky residue.
Use Fresh, High-Quality Detergent
Old, clumpy powder or separated gel is a recipe for a jam. Store your detergent in a cool, dry place. If your powder has hardened, break it up with a spoon before measuring. Consider switching to pods for convenience and to eliminate the risk of dispenser jams from powder altogether.
Don’t Overfill
It’s tempting to add “extra” detergent for extra dirty dishes. Resist. Modern dishwashers and detergents are formulated for precise amounts. Overfilling the dispenser (even when it works) leads to excess sudsing, residue on dishes, and can actually reduce cleaning performance by creating too many bubbles that cushion the food particles instead of blasting them away.
Check the Rinse Aid Compartment
Even with a broken soap dispenser, your rinse aid compartment likely works perfectly. Rinse aid (a drying agent) is critical for spot-free, dry dishes. Refill it regularly (the indicator window will show the level). A full rinse aid compartment significantly improves drying performance, which is especially important when using bottom-tub detergent methods, as water distribution can be slightly different.
Conclusion: Clean Dishes Are Still Within Reach
A broken dishwasher soap dispenser is an annoyance, not a catastrophe. By understanding the role of the dispenser and the simple physics of water and detergent, you now have a powerful toolkit of temporary solutions. The detergent pod on the bottom rack is your new best friend—it’s simple, effective, and clean. For powder or gel users, the key is pairing the bottom-tub application with a longer, hotter cycle to ensure complete dissolution. These methods are not just “good enough”; for many, they become the preferred, foolproof way to load the dishwasher. However, for long-term efficiency and convenience, diagnosing and addressing the root cause—whether through a simple clean, a $20 part, or a professional repair—is the smart play. Your dishwasher is a hardworking appliance; with a little know-how, you can keep it working hard for you, dispenser or no dispenser. So stop stressing about the broken door, load that pod on the bottom rack, and let your dishwasher do what it does best.
Frequently Asked Questions
Will putting detergent pods on the bottom rack damage my dishwasher?
No, this is a safe and common workaround. The pod is designed to dissolve in water. Placing it on the bottom rack, away from the heating element, prevents it from melting onto the element. The hot water and spray arm agitation will dissolve it effectively during the cycle.
Is it safe to use liquid hand soap in my dishwasher if my dispenser is broken?
Absolutely not. Hand soap is formulated to create suds for hand washing. In a dishwasher, it will produce an uncontrollable avalanche of foam that can overflow, leak through door seals, and potentially damage the pump and internal sensors. Always use detergent specifically labeled for automatic dishwashers.
Why are my dishes still dirty when I use powder detergent in the bottom of the tub?
The most likely reason is that you used a short cycle (Quick/Express). Powder detergent needs a long, hot cycle with plenty of water to fully dissolve. Switch to a Normal or Heavy cycle. Also, ensure you are using the correct, full amount of detergent for your load size and water hardness.
Can I just close the soap dispenser door shut manually and put detergent in it?
No. If the latch mechanism is broken, forcing the door closed will not trigger the release mechanism. The door will likely pop open during the cycle or, worse, the detergent will wash out in the first rinse. The detergent must be placed in the main tub to be exposed to water at the start of the main wash.
Will using the bottom-tub method use more detergent than normal?
It shouldn’t if you use the correct, manufacturer-recommended amount. The goal is to have the same concentration of detergent in the wash water. Using the pod method is pre-dosed and perfect. With powder/gel, simply measure the same amount you would have put in the dispenser. Using more will not clean better and will likely leave residue.
Should I repair or replace a broken dishwasher soap dispenser?
If your dishwasher is less than 10-15 years old and otherwise works well, repairing the dispenser (often a $20-$50 part) is usually cost-effective. If the machine is older, has other issues, or the repair cost exceeds half the value of a new, efficient model, replacement might be the better long-term investment. Start by diagnosing if it’s just a jam (fixable with cleaning) or a broken part.