Sublimating mugs is a straightforward process that transforms plain ceramic drinkware into vibrant, personalized gifts or products. By using specialized sublimation inks, paper, and a heat press, you permanently infuse designs into the mug’s polymer coating. Success hinges on using the right substrates, precise temperature and timing, and proper handling to avoid common issues like ghosting or fading.
Key Takeaways
- Use the Correct Substrates: Only mugs with a special polymer coating (sublimation-ready) will accept the ink. Standard ceramic mugs will not work.
- Invest in a Dedicated Mug Press: While a conventional heat press with mug wraps can work, a dedicated mug press provides even pressure and consistent results, which is crucial for beginners.
- Master Your Press Settings: Temperature (typically 380-405°F / 193-207°C) and time (usually 45-60 seconds) vary by press and mug brand. Always follow manufacturer guidelines and run tests.
- Secure the Transfer Perfectly: Use heat-resistant tape to prevent any shifting (ghosting) during the press. Ensure the design is centered and the paper is tight against the mug.
- Cooling is Part of the Process: Immediately after pressing, place the mug in a room-temperature water bath. Rapid cooling solidifies the ink and prevents cracks or “hot splitting” in the coating.
- Design for the Curve: Account for the mug’s cylindrical shape. Your design software should allow you to wrap and distort artwork to avoid stretching or squishing when applied.
- Safety First: Always use heat-resistant gloves when handling hot mugs. Work in a well-ventilated area, as sublimation releases gases during the heating process.
📑 Table of Contents
- What is Sublimation and Why Mugs?
- The Essential Toolkit: What You Actually Need to Start
- Step-by-Step: The Sublimation Process from Start to Finish
- Troubleshooting: Why Your Sublimation Might Have Failed (And How to Fix It)
- Beyond the Basics: Advanced Tips for Professional Results
- From Hobby to Business: Turning Your Skills into Products
- Conclusion: Your Journey Starts Now
What is Sublimation and Why Mugs?
So, you’ve seen those stunning, full-color mugs with photographs, intricate patterns, or custom logos that look like they’re painted on. You might have even bought one. But have you ever wondered how they’re made? The magic behind those durable, dishwasher-safe designs is a process called dye-sublimation. It’s not painting, it’s not vinyl—it’s a scientific transfer that turns ink from a solid directly into a gas, which then bonds with a special coating on the mug.
Think of it like this: imagine you have a piece of paper printed with your design using special inks. You wrap that paper around a mug and apply intense heat and pressure. The ink on the paper skips the liquid phase entirely, turning into a gas. That gas then penetrates the microscopic pores of the mug’s polymer coating and solidifies inside them. The result? A design that becomes one with the mug surface. It won’t crack, peel, or wash away. It’s permanent.
This guide is your complete roadmap from curious beginner to confident creator. We’ll demystify every step, from the gear you need to the exact technique for a flawless finish. Whether you want to make a one-of-a-kind gift for a friend or start a small business selling custom drinkware, understanding how to sublimation mugs is your essential first step. Let’s dive in.
The Essential Toolkit: What You Actually Need to Start
Before we touch a mug, we need to gather our supplies. The beauty of sublimation is that the process is consistent, but the tools must be specific. Using the wrong paper or ink will lead to faded, blotchy, or non-existent results. Here’s your non-negotiable checklist.
Visual guide about How to Sublimation Mugs
Image source: sublimation-mugs.com
The Core Four: Ink, Paper, Mug, and Heat
- Sublimation Ink: This is not your desktop printer ink. It’s specially formulated to turn into gas under heat. You’ll need a dedicated sublimation printer (like an Epson EcoTank with converted ink) or purchase pre-printed sublimation paper from a supplier. Using regular inkjet printers with sublimation ink is a common starting point for hobbyists.
- Sublimation Paper: This paper has a special coating that releases the gaseous ink efficiently. The quality matters—cheaper paper can cause bleeding or poor transfer. Match the paper type to your ink brand for best results.
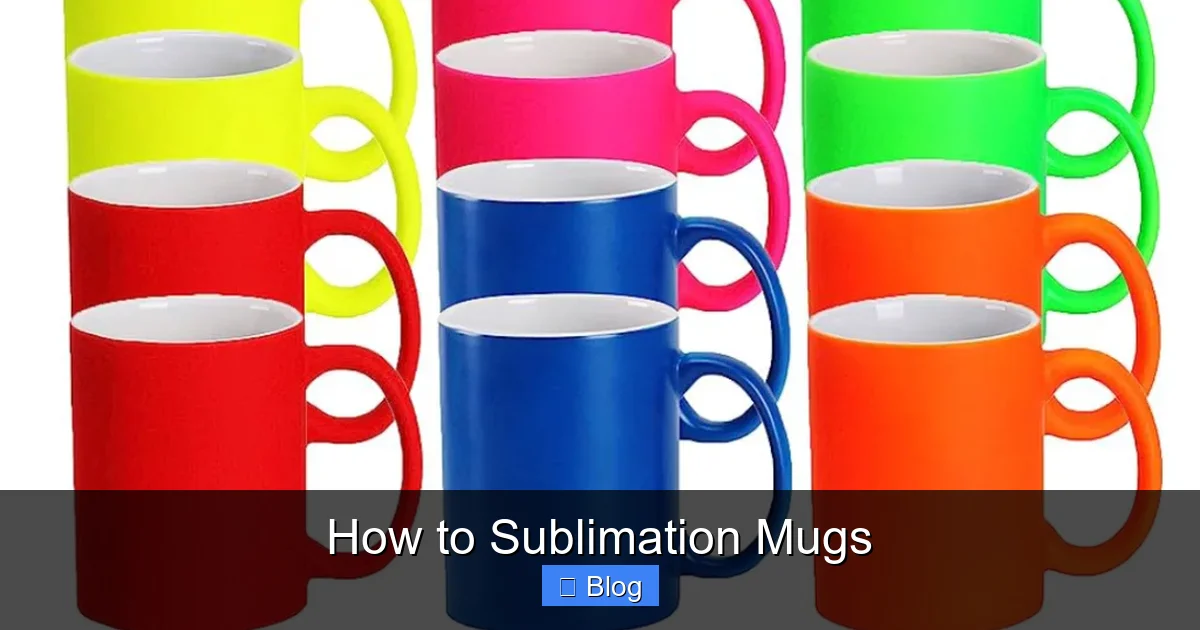
- Sublimation-Ready Mugs: This is the most critical piece. You cannot use a random coffee mug from your cupboard. The mug must have a clear, glossy polymer coating specifically designed for sublimation. These are widely available online in blank white or various colors. The coating is what the gas ink bonds to.
- A Heat Source: This is where the magic happens. You need a heat press designed for mugs (a “mug press”) or a standard flatbed heat press with a compatible mug wrap/attachment. A mug press is highly recommended for beginners as it provides consistent, even pressure around the entire cylinder, which is hard to achieve with wraps.
The Supporting Cast: Tape, Gloves, and Software
Beyond the core four, a few other items make the process smooth and safe. Heat-resistant tape (not standard masking tape!) is essential to secure the transfer paper to the mug and prevent shifting. Heat-resistant gloves are a must for handling the scorching hot mug straight out of the press. You’ll also need design software like Adobe Photoshop, Illustrator, or free alternatives like GIMP or Canva (with a wrap template) to create your artwork. Finally, have a scrub pad and dish soap on hand to thoroughly clean the mug before starting—any oil or residue will block the transfer.
Step-by-Step: The Sublimation Process from Start to Finish
Alright, toolkit assembled. Let’s walk through the actual process, step by meticulous step. Rushing or skipping a step here is the #1 cause of failed projects. Take your time.

Visual guide about How to Sublimation Mugs
Image source: makeuoa.nz
Step 1: Design & Print—The Foundation
Your design sets the tone. For a first-timer, start simple—a bold logo or a single, high-contrast image. Remember, you’re printing on a curved surface. Most design software has a “cylinder wrap” template or you can find free ones online. You must distort your artwork to account for the mug’s curve; otherwise, your image will look stretched or squished when applied. Print a test sheet on regular paper first to check alignment and sizing.
When you’re ready, print your final design in mirror mode (flipped horizontally) onto the sublimation paper using your sublimation printer. The ink needs to be facing the mug. Handle the printed paper by the edges—the ink is sensitive to moisture and oils from your fingers.
Step 2: Mug Prep—The Clean Slate
This is a make-or-break step. Grab your blank sublimation mug. Wash it thoroughly with dish soap and a scrub pad to remove any manufacturing oils, dust, or fingerprints. Rinse well and dry completely with a lint-free towel. Any leftover residue will act as a barrier, causing blank spots or poor ink adhesion. Some pros even wipe it down with isopropyl alcohol (IPA) for an ultra-clean surface. Let it air dry.
Step 3: Wrap & Tape—Securing the Masterpiece
Now, carefully wrap the printed sublimation paper around the mug, with the inked side facing directly against the mug’s surface. The paper should overlap slightly at the seam. The goal is a tight, smooth wrap with no wrinkles or air bubbles. Use your heat-resistant tape to secure it. Place a small piece of tape at the top, bottom, and directly over the seam. The tape itself must be heat-resistant; regular tape will melt and ruin your mug and press. Some users also use a rubber band or a specialized mug wrap sleeve for extra security.
Step 4: The Heat Press—The Transformation
Preheat your mug press to the manufacturer’s recommended temperature for your specific mugs and ink. A common starting point is 400°F (204°C). Place the wrapped mug carefully into the press, ensuring it’s centered and the pressure knob is tightened to a firm, even pressure—not so tight it cracks the mug, but tight enough that the paper is firmly pressed against the surface throughout. Close the press and start the timer. Typical press times range from 45 to 60 seconds.
Pro Tip: Always do a “test press” on a mug you don’t mind sacrificing. Use a scrap piece of sublimation paper. This helps you dial in the perfect temperature and time for your specific setup. Under-pressing means faded ink; over-pressing can scorch the coating or cause a yellow tint.
Step 5: The Cold Shock—Locking in the Ink
When the timer goes off, open the press. Using your heat-resistant gloves, immediately remove the mug. Do not let it sit! The next step is critical. Quickly plunge the entire mug, paper and all, into a basin or sink of room-temperature water. The rapid cooling causes the polymer coating to contract slightly, locking the gaseous ink firmly inside its structure. This step prevents a common failure called “hot splitting,” where the coating cracks and peels away later. Let it sit for about 30 seconds to a minute.
Step 6: Unwrap & Reveal—The Grand Finale
After the cold water bath, remove the mug and gently peel away the tape and sublimation paper. You should see your vibrant design, now permanently infused into the mug. It might look a bit dull at first; this is normal. The full vibrancy often appears once the mug is completely dry. Set it aside to air dry completely before handling or washing. Congratulations! You’ve just sublimated your first mug.
Troubleshooting: Why Your Sublimation Might Have Failed (And How to Fix It)
Even with careful steps, things can go wrong. Don’t get discouraged—sublimation is a science of tiny variables. Here’s a diagnosis guide for the most common issues.

Visual guide about How to Sublimation Mugs
Image source: mecolour.com
Problem: Faded or Dull Design
Likely Causes: Press temperature too low, press time too short, or poor-quality/low-saturation ink. The ink gas didn’t fully penetrate the coating.
Fix: Increase your press temperature by 5-10°F and/or add 5-10 seconds to your press time. Run another test. Ensure you’re using reputable sublimation inks and paper designed to work together.
Problem: Ghosting or Blurry Image
Likely Causes: The sublimation paper shifted during the press. This is the most common issue for beginners.
Fix: Your tape job wasn’t secure enough. Use more heat-resistant tape, especially along the seam and top/bottom edges. Ensure the paper is pulled taut before taping. A dedicated mug press eliminates most ghosting caused by uneven pressure.
Problem: Yellow or Brown Tint
Likely Causes: Press temperature is too high or press time is too long. You’re essentially “cooking” the polymer coating.
Fix: Reduce your press temperature and/or time significantly. This often requires a delicate balance—you need enough heat to transfer but not so much it damages the coating. Test with lower settings.
Problem: Ink Smearing or Bleeding
Likely Causes: The mug wasn’t completely dry before pressing, or the press pressure is too high, forcing ink to spread.
Fix: Ensure the mug is bone dry after cleaning. Check your press pressure; it should be firm but not excessive. Also, verify you’re using the correct side of the sublimation paper (the coated side).
Problem: Design Chips or Washes Off
Likely Causes: This is a catastrophic failure, usually from using a non-sublimation mug (no polymer coating) or skipping the cold water bath.
Fix: Always use verified sublimation blanks. Never skip the immediate cold water shock after pressing. If the design still washes off, the mug coating itself may be defective.
Beyond the Basics: Advanced Tips for Professional Results
Once you’ve mastered the standard full-wrap mug, it’s time to level up. Professional results come from attention to detail and creative techniques.
Designing for the Seam
The seam where the paper overlaps is inevitable. A pro designs *with* it, not against it. Place your most important design elements away from the center-back seam. Use a background color or pattern that camouflages the slight overlap line. Alternatively, design a “seamless” wrap by making the artwork continuous and tolerant of a tiny misalignment.
All-Over Print (AOP) vs. Centered Logo
An AOP covers the entire mug surface. This requires precise design wrapping and often a slightly longer press time to ensure the ink transfers fully around the curve. A centered logo is simpler and more forgiving. For AOP, use a template that shows exactly where the design will land on the 3D form. Print a paper template and test-wrap it on a mug first.
Working with Dark Mugs & Color
Standard sublimation works best on white or light-colored polymer-coated mugs. The ink is translucent, so the white base makes colors pop. For dark mugs, you need a different approach: sublimation on a dark substrate. This involves first sublimating a design onto a special white polyester sheet or using a white sublimation vinyl, then applying that to the dark mug with a heat press. It’s a two-step process but opens up dark color options.
The Importance of a “Wash Test”
Before you consider a batch of mugs ready for sale or gifting, perform a wash test. Put the mug through a full dishwasher cycle (top rack is fine) or wash vigorously by hand with abrasive soap. If the design remains vibrant and intact, you’ve achieved a proper sublimation bond. This is your final quality control checkpoint.
From Hobby to Business: Turning Your Skills into Products
If you’re getting good at this, you might be thinking about sharing your creations. The custom mug market is huge, but success requires more than just a good press.
Finding Your Niche
Don’t just sell “custom mugs.” Sell mugs for specific people: new dog owners (“Best Dog Mom” with a photo slot), gamers (pixel art controller designs), teachers (subject-specific puns), or local businesses (branded merchandise). A niche helps you stand out and market effectively.
Sourcing Supplies at Scale
Buying mugs one or two at a time from craft stores is expensive. For any volume, source blanks from wholesale distributors like Blanks America, Cold Sublimation, or Alibaba (for large orders). Compare prices per mug, coating quality, and shipping costs. Always order a sample batch first to test the coating consistency.
Packaging & Presentation
Your customer’s first touchpoint matters. A simple, sturdy box with tissue paper elevates the experience. Consider including a small care card: “Hand wash recommended for longest vibrancy. Not microwave safe due to metal in the press.” This manages expectations and shows professionalism.
Pricing Your Work
Factor in all costs: blank mug cost, ink/paper per print, electricity, your time, packaging, and platform fees (Etsy, Shopify). A common starting point is 3-5x your material cost. Don’t undervalue your skill! Research what similar items sell for on your chosen platform. Your price should reflect quality, not just cost.
Conclusion: Your Journey Starts Now
Learning how to sublimation mugs is a rewarding blend of art and science. It’s a skill that turns digital creativity into tangible, useful objects that people cherish. We’ve covered the essentials: the unique process, the critical tools, the meticulous step-by-step method, and how to troubleshoot when things don’t go perfectly. Remember, your first few mugs might not be gallery-ready, and that’s okay. Each one is a lesson in temperature, pressure, and timing.
The real joy comes from the experimentation—mixing colors, testing new designs, and finally handing a custom mug to someone and seeing their face light up. Whether you’re making a set for your family, starting a side hustle, or launching a full brand, the fundamentals remain the same: clean surface, secure transfer, precise heat, and immediate cooling. Master these, and you unlock a world of permanent, vibrant creativity. Now, go grab a blank mug and make your first mark. The perfect sip is just a press away.
Frequently Asked Questions
Can I use a regular iron or home iron for mug sublimation?
No, a regular household iron cannot provide the even, high pressure required around a cylinder or reach the consistent, high temperatures (380-405°F) needed. It will result in very poor transfers. You need a dedicated mug heat press or a professional heat press with a mug wrap attachment.
Why does my sublimated mug look great at first but then fades after a few washes?
This usually points to one of two issues: either the mug had a low-quality or incompatible polymer coating that doesn’t bond well with the ink, or the press settings (time/temperature) were insufficient for a full bond. Always use reputable, sublimation-specific blanks and verify your settings with a wash test.
Is sublimation on mugs dishwasher safe?
Yes, properly sublimated designs on high-quality polymer-coated mugs are considered top-rack dishwasher safe. The ink is bonded within the coating, not on the surface. However, for maximum longevity of the vibrancy, hand washing is often recommended by manufacturers, as harsh dishwasher detergents and high heat can slowly degrade any printed surface over many years.
Can I sublimate on any colored mug?
You can only sublimate directly onto white or very light-colored mugs with a clear polymer coating. The sublimation inks are translucent and require a light background to show true colors. For dark mugs, you must use a two-step process: first sublimate your design onto a white polyester sheet or vinyl, then apply that to the mug using a heat press with adhesive.
What’s the biggest mistake beginners make with mug sublimation?
The most common error is inadequate securing of the sublimation paper. If the paper shifts even slightly during the press, it causes “ghosting”—a blurred, double-image effect. Always use sufficient heat-resistant tape to create a tight, immobile wrap. The second biggest mistake is skipping the cold water bath immediately after pressing, which can lead to coating failure later.
How long does a sublimated mug design last?
Under normal use and proper care (avoiding abrasives and extreme temperatures), a sublimated design is considered permanent and can last for many years, often outlasting the mug itself. The ink is embedded within the molecular structure of the coating, making it highly resistant to fading, scratching, and peeling compared to surface-applied decals or prints.