Is your pizza cutter dragging instead of slicing? You don’t need to buy a new one! This guide reveals the simple, safe methods to restore its razor-sharp edge, whether you have a traditional wheel cutter or a mezzaluna blade. We’ll walk you through the exact tools you need, a foolproof step-by-step process, and crucial maintenance tips to keep it cutting smoothly for years. Say goodbye to torn toppings and frustrating cheese pulls forever.
Key Takeaways
- Safety is Paramount: Always secure the cutter and protect your hands. A slipping dull blade is more dangerous than a sharp one when handled correctly.
- Identify Your Cutter Type: The sharpening method differs significantly between a rotating wheel cutter and a fixed blade (mezzaluna). Using the wrong technique can ruin it.
- The Right Tool for the Job: For most home cooks, a fine-grit sharpening stone or even ultra-fine sandpaper is the safest, most effective tool. Avoid electric grinders or improper knife sharpeners.
- Angle is Everything: Maintaining the original factory bevel angle (usually 15-20 degrees) is critical for a sharp, durable edge. Guessing leads to a weak, dull edge.
- Maintenance Prevents Frequent Sharpening: Proper cleaning, immediate drying, and safe storage (like a blade guard) will keep your cutter sharp for months or even years longer.
- Know When to Replace: If the wheel is severely nicked, cracked, or the blade is warped, sharpening is unsafe and ineffective. Replacement is the only option.
- Test Your Work: A properly sharpened cutter should slice cleanly through pizza dough and toppings with minimal pressure, leaving a smooth, even cut.
📑 Table of Contents
- Introduction: When Your Pizza Cutter Stops Slicing
- Understanding Your Weapon: The Anatomy of a Pizza Cutter
- Safety First: Non-Negotiable Prep Work
- Method 1: The Precision Approach – Using a Sharpening Stone
- Method 2: The Hack – Using Sandpaper (For Minor Dulling)
- Method 3: The Professional Touch – When to Seek Help
- Maintenance: The Secret to Long-Lasting Sharpness
- Troubleshooting: Common Problems & Quick Fixes
- Conclusion: Your Pizza, Perfected
Introduction: When Your Pizza Cutter Stops Slicing
There’s a special kind of frustration that comes from wrestling with a pizza cutter that’s lost its edge. You apply more pressure, the cheese stretches defiantly, the toppings skid everywhere, and what should be a clean slice turns into a jagged, toppings-flinging mess. Your delicious homemade or delivered pizza deserves better. Before you toss that trusty tool and buy a new one, take a deep breath. You can almost always sharpen a pizza cutter right in your own kitchen, restoring it to its former slicing glory.
But here’s the crucial thing: pizza cutters aren’t like chef’s knives. They come in two primary designs, and each requires a slightly different approach. The most common is the classic rotating wheel cutter, with a circular blade that spins on an axle. The other is the mezzaluna or rocker blade, a curved, fixed blade you rock back and forth. Using the wrong sharpening technique on either can damage it beyond repair or, worse, lead to an accident. This guide will demystify the process. We’ll cover everything from understanding your tool and gathering the right supplies to executing a safe, precise sharpening and maintaining that edge for the long haul. By the end, you’ll have the knowledge and confidence to make every pizza slice perfect.
Understanding Your Weapon: The Anatomy of a Pizza Cutter
To sharpen something effectively, you first need to understand what you’re working with. Jumping in with a random tool is a recipe for a ruined cutter or a visit to the emergency room. Let’s break down the two main types you’ll encounter in a home kitchen.
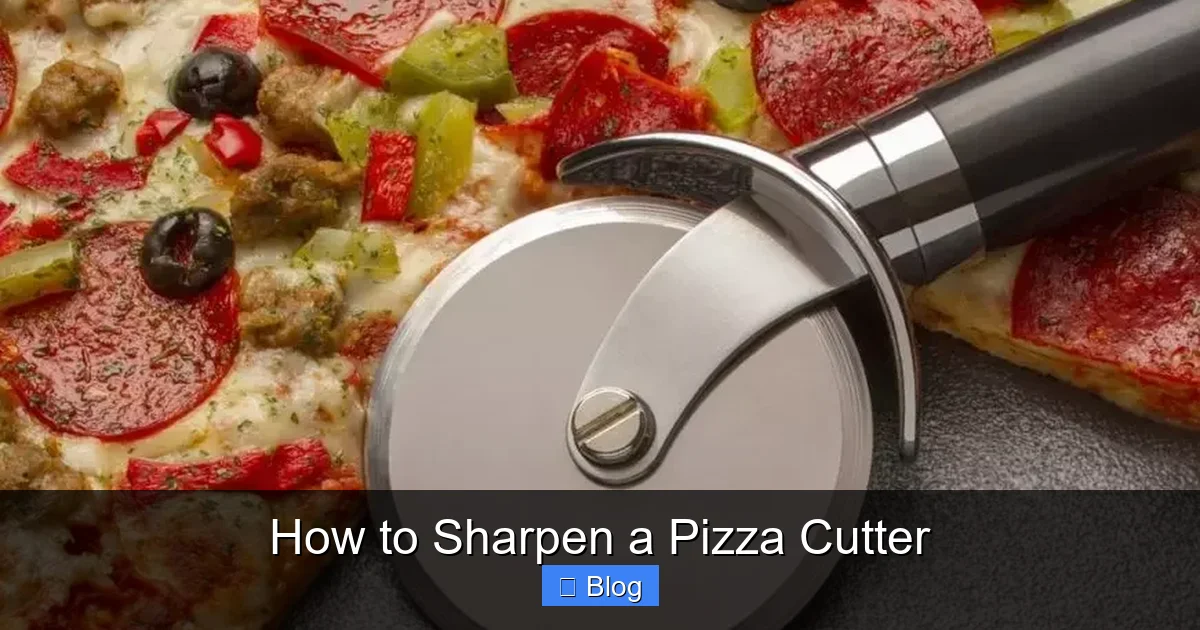
Visual guide about How to Sharpen a Pizza Cutter
Image source: antonio-carluccio.com
The Classic Wheel Cutter: A Spinning Blade
This is the ubiquitous tool found in most homes and pizzerias. It consists of a handle (often plastic or metal), a central axle, and a circular steel blade that rotates freely. The cutting edge is on the perimeter of that wheel. The blade is typically very thin and may have a slight bevel (a ground angle) on one side or sometimes a symmetrical bevel on both. The sharpening goal is to restore that circular perimeter’s edge without unbalancing the wheel or creating flat spots.
The Mezzaluna (Rocker Blade): A Curved Chopper
Named for its “half-moon” shape, this cutter features a single, curved, fixed blade with two handles on either end. You place it over the pizza and rock it back and forth to cut. The cutting edge runs along the entire concave curve of the blade. Sharpening this type is more akin to sharpening a curvy knife blade. You need to maintain the consistent, original bevel along that entire arc.
Why Regular Knife Sharpeners Often Fail
You might be eyeing your pull-through knife sharpener or that honing steel. Stop right there. Most of these tools are designed for straight, rigid knife blades of a specific width and geometry. A pizza wheel’s circular, thin profile doesn’t engage with them correctly. A honing steel (often mistakenly used for “sharpening”) merely realigns a slightly rolled edge; it does not remove metal to create a new edge. Using these on a pizza cutter can round off the delicate edge, damage the wheel’s balance, or even cause it to chip. The correct method involves controlled, manual abrasion on a flat, stable surface.
Safety First: Non-Negotiable Prep Work
Before we touch a sharpening stone to steel, let’s talk safety. A dull cutter requires more force, which increases the chance of slipping. A sharp one, if handled carelessly, can cut deeply. The goal is to create a sharp edge and handle it safely throughout the process.
Visual guide about How to Sharpen a Pizza Cutter
Image source: thepizzacalc.com
Secure Your Work Area and the Cutter
Work on a stable, non-slip surface like a rubber mat or a damp towel laid on your counter. You need the sharpening surface to be absolutely immobile. For a wheel cutter, the biggest challenge is preventing it from spinning freely as you work. The easiest solution is to use a bench vise or a heavy-duty clamp. Gently clamp the handle or the central hub of the cutter (never the blade itself!) so the wheel is held firmly in place. If you don’t have a vise, you can place the cutter handle-down in a heavy bowl or jar filled with uncooked rice or beans for temporary stability, but a vise is far superior and safer.
Gear Up: Your Essential Protective Equipment
- Cut-Resistant Gloves: A pair of gloves like those used for food prep (e.g., cut-resistant polyurethane-coated gloves) are a smart investment. They protect your holding hand from slips.
- Safety Glasses: Always wear them. Metal filings or tiny chips can fly, especially when starting with a very dull edge.
- Thumb Bandage: Have a bandage ready. Even with gloves, a nick on the thumb pad (from the wheel’s edge) is a common oops moment. It’s just a reality of working with sharp objects.
The Golden Rule: Test the Edge Before and After
Always know how sharp your cutter is starting. The universal test? Carefully run your finger perpendicular (sideways) across the edge—never lengthwise. A sharp edge will “bite” slightly. A dull one will feel smooth and rounded. After sharpening, repeat this test (gently!) to confirm your progress. This also helps you avoid over-sharpening.
Method 1: The Precision Approach – Using a Sharpening Stone
This is the gold standard method for restoring a truly sharp, long-lasting edge. It gives you the most control over the angle. You’ll need a fine-grit (1000+ grit) sharpening stone, also called a water stone. A dual-sided stone with a coarse (e.g., 1000 grit) and fine (e.g., 3000+ grit) side is ideal, but for a pizza cutter that’s just dull (not chipped), the fine side alone is often sufficient. You’ll also need a small container of water to keep the stone lubricated.
Visual guide about How to Sharpen a Pizza Cutter
Image source: mashed.com
Step-by-Step for a Wheel Cutter
With your wheel securely clamped, ensure the exposed blade area is clean and dry.
- Find the Bevel: Look closely at the blade’s edge. You’ll usually see a very fine, shiny ground surface—that’s the factory bevel. Your goal is to recreate that angle. It’s typically around 15-20 degrees. If you can’t see it clearly, assume a low angle.
- Lubricate the Stone: Splash water on your fine-grit stone and spread it into a thin, even pool. This carries away metal filings (slurry) and prevents overheating.
- The Angle & Motion: Place the stone flat on the counter. Hold the cutter’s handle so the wheel’s bevel faces you. Imagine a tiny, invisible triangle formed by the bevel and the stone’s surface. You need to maintain that triangle’s angle. Gently place the beveled edge flat against the stone. You are not grinding the side of the wheel; you are honing the very perimeter.
- Sharpen: With light, even pressure, push the wheel forward and slightly down across the stone in a tiny arc, as if you’re trying to roll a microscopic bit of metal off the edge. The motion is a small, controlled “chop” or push. Lift, reposition to the starting point, and repeat. Work your way around the entire circumference of the wheel. Count your strokes—aim for 5-10 consistent passes per section, rotating the wheel slightly each time to cover the full circle evenly.
- Check Your Progress: Wipe the wheel clean with a damp cloth and perform the thumb test. You should feel a definite, consistent “bite” all around.
- Strop (Optional but Recommended): For a mirror finish and ultimate sharpness, finish on a leather strop charged with a fine abrasive compound (or even the clean, dry bottom of your ceramic coffee mug). This polish removes the microscopic burr left by the stone.
Step-by-Step for a Mezzaluna Blade
Clamping a mezzaluna is trickier. You can sometimes clamp one handle in a vise, leaving the blade free, or have a friend hold the other handle firmly and steadily. The principle is the same but applied to a curve.
- Identify the Bevel: This is almost always on the concave (inner) side of the curve. That’s the side you’ll sharpen.
- Work in Sections: Don’t try to do the whole curve at once. Start at one tip. Place the beveled edge flat against the stone.
- Motion: Using a pushing motion, draw the blade along the curve from the tip toward the center, maintaining that constant bevel angle. It’s a long, sweeping stroke. Lift, return to the tip, and repeat 5-10 times.
- Move Down the Blade: Shift your focus to the next 1-2 inch section of the curve and repeat the process. Work your way from one tip to the other, ensuring you cover the entire concave edge evenly.
- Test and Polish: Clean and test. A properly sharpened mezzaluna will rock smoothly and cut cleanly from tip to tip.
Method 2: The Hack – Using Sandpaper (For Minor Dulling)
If your cutter is only slightly dull and you don’t have a sharpening stone, a very fine-grit sandpaper can work in a pinch. This is more of a honing method than a full sharpening, best for maintaining an edge rather than restoring a truly blunt one.
What You Need
You’ll need 600-grit or higher (800-1000 grit is better) wet/dry sandpaper and a perfectly flat surface. A piece of glass (like from a picture frame), a ceramic tile, or the flat side of a fine sharpening stone works perfectly. You’ll also need water as a lubricant.
The Process: A Gentle Abrasion
The technique mirrors the stone method but is even more delicate.
- Prepare Your Surface: Lay the sandpaper gritty-side up on your flat glass or stone surface. Wet it thoroughly with a few drops of water.
- Secure the Cutter: Clamp your wheel or mezzaluna as described before.
- Light Passes: Using extremely light pressure, place the beveled edge on the sandpaper. For a wheel, make tiny, controlled pushing arcs around the circumference. For a mezzaluna, use long, sweeping strokes along the curve. The goal is to feel a slight, consistent drag—that’s the abrasive working.
- Frequent Checks: Check your progress every few strokes. Wipe clean and test. This method removes metal very slowly. Be patient; rushing creates heat and can ruin the temper of the steel, making it soft and dull quickly.
- Finish: Once sharp, you can move to an even finer grit (like 1000+ grit sandpaper) for a few final passes to polish the edge.
Method 3: The Professional Touch – When to Seek Help
Sometimes, the best tool for the job is someone else’s expertise. There are clear scenarios where DIY sharpening is not advisable.
Signs Your Cutter Needs a Pro (or Replacement)
- Deep Nicks or Chips: If you can see or feel a noticeable chunk missing from the wheel’s edge or the blade’s curve, a home sharpening won’t fix it. A pro might be able to grind it out, but it’s often a sign the tool is near the end of its life.
- Severe Warping: If the wheel wobbles visibly as it spins or the mezzaluna blade doesn’t rock evenly on a flat surface, the metal is deformed. Attempting to sharpen a warped blade will only create an uneven, ineffective edge and is unsafe.
- Rust Pitting: Surface rust can be removed. Deep pitting from corrosion means the metal’s integrity is compromised. A pitted edge will never be truly sharp or smooth.
- You’re Uncomfortable: If the idea of handling a sharp blade and a clamp makes you nervous, that’s a valid reason to stop. A local sharpening service (often found at cutlery shops or some hardware stores) can usually sharpen a pizza cutter for a small fee, often $5-$15. It’s a safe, affordable option.
Maintenance: The Secret to Long-Lasting Sharpness
Sharpening is fixing a problem. Maintenance is preventing the problem. With a little habit change, you can go months or even years between sharpenings.
The Post-Pizza Cleanup Ritual
This is the single most important habit. Never, ever let your pizza cutter air-dry in the sink or on a damp dishcloth. Pizza sauce, cheese residue, and moisture are a perfect storm for corrosion and edge degradation. Immediately after use:
- Rinse: Give it a quick rinse under warm water to remove food debris.
- Wash: Use a soft sponge and a drop of dish soap. Avoid the abrasive side of sponges.
- Dry Instantly: This is non-negotiable. Immediately hand-dry the entire cutter with a clean, dry towel. Pay special attention to the wheel’s hub and the blade’s edge. No air-drying.
Smart Storage Solutions
How you store your cutter protects the edge from knocks and moisture.
- Use a Blade Guard: Most new cutters come with a plastic sleeve that covers the wheel or blade. If yours didn’t, buy one. It’s the cheapest insurance policy.
- The Drawer Rule: If storing in a utensil drawer, place the cutter in its own compartment or sleeve, never tossed in with other metal utensils that can nick the edge.
- Magnetic Strip: For a mezzaluna, hanging it on a magnetic knife strip on the wall is an excellent, safe option that keeps the edge protected and accessible.
Honking vs. Sharpening: Know the Difference
Sometimes, your cutter isn’t truly dull; the edge is just misaligned (rolled to one side) from use. This is where a honing steel (or the unglazed rim of a ceramic mug) can help before it gets truly dull. For a wheel cutter, this is less effective, but for a mezzaluna, you can carefully run the concave edge along a honing steel at the correct angle to realign it. This is a quick, 30-second maintenance task you can do weekly. If honing doesn’t restore the bite, then it’s time for true sharpening.
Troubleshooting: Common Problems & Quick Fixes
Even with careful sharpening, you might encounter a hiccup. Here’s how to diagnose and fix the most common issues.
“It’s Still Not Sharp!”
Cause: You likely didn’t maintain a consistent angle, or you were working on a warped sharpening surface.
Fix: Check your stone for flatness by sighting across it. If it’s dish-shaped from use, it needs flattening (use a flattening stone or 120-grit sandpaper on glass). Then, restart, focusing on a consistent, low angle. Use a visual guide: imagine a tiny wedge of cheese under the blade.
“The Wheel Wobbles After Sharpening”
Cause: You applied uneven pressure around the wheel’s circumference, creating a flat spot or an out-of-round shape.
Fix: This is tough to correct at home. You may need to take it to a pro with a grinding jig. Prevention is key: use light, even pressure and rotate the wheel constantly during sharpening.
“It Cuts, But Tears the Crust”
Cause: The edge is sharp but has a small burr (a folded-over flap of metal) or is slightly jagged.
Fix: You need to strop. After your final sharpening pass, use a clean, dry leather strip (even a clean belt works) or the bottom of a ceramic mug. Pull the cutter’s edge backwards (edge trailing) across the leather with zero pressure, 5-10 times per side. This polishes off the burr and aligns the edge molecules.
Conclusion: Your Pizza, Perfected
Sharpening a pizza cutter isn’t a mysterious art reserved for professional pizzaiolos. It’s a practical, empowering kitchen skill that saves money, reduces waste, and dramatically improves your pizza experience. The core principle is simple: identify your tool, secure it safely, use the correct abrasive (a fine stone is best), maintain a consistent low angle, and test your work.
Remember, a sharp tool is a safe and efficient tool. The frustration of a dull cutter is avoidable. Combine the sharpening techniques in this guide with the maintenance rituals of immediate drying and proper storage, and your pizza cutter will serve you faithfully for countless slices to come. The next time you pull a perfectly sharp cutter from the drawer and watch it glide effortlessly through a bubbly, cheesy masterpiece, you’ll feel a quiet satisfaction. That’s the reward of a job done right—both in the sharpening and in the slicing. Now, go enjoy that perfectly cut pizza. You’ve earned it.
Frequently Asked Questions
Can I use a knife sharpener or electric grinder on my pizza cutter?
Generally, no. Pull-through knife sharpeners are designed for straight blades and will damage the wheel’s circular edge or the mezzaluna’s curve. Electric grinders remove metal too aggressively and can easily overheat and ruin the blade’s temper, making it soft and dull quickly. Stick to manual methods with a stone or sandpaper for control and safety.
How often should I sharpen my pizza cutter?
It depends on use and maintenance. With proper cleaning, drying, and storage, a good quality wheel cutter can go 6-12 months or longer between sharpenings. A mezzaluna might need it more often. Sharpen it when you notice it requiring excessive pressure, tearing the crust, or when the thumb test reveals a smooth, rounded edge instead of a sharp “bite.”
What’s the safest way to hold a pizza cutter while sharpening?
The safest way is to never hold the blade with your bare hand. Always secure the handle or hub of the cutter in a bench vise or with a heavy-duty clamp. Your hands should only be used to guide the sharpening tool (the stone) and make adjustments to the clamp. Wear cut-resistant gloves for an extra layer of protection.
My wheel cutter has a plastic hub. Can I still clamp it?
Yes, but with extreme caution. Clamp only on the solid, central metal axle if possible. If you must clamp the plastic handle, use soft jaws (wood blocks or rubber pads) in the vise to prevent crushing the plastic. Apply just enough pressure to prevent spinning—overtightening can crack the handle. Alternatively, the rice/bean bowl method can be used for light honing, but it’s less secure for full sharpening.
Is there a way to sharpen it without any special tools?
The sandpaper method described (using fine-grit sandpaper on a flat surface like glass) is the most effective “no-special-tools” hack. You can also carefully use the unglazed, fine ceramic rim of a coffee mug or a piece of sandstone from your yard, but these are less predictable and offer less control, increasing the risk of creating a poor edge. For best results, a dedicated sharpening stone is worth the small investment.
How do I know if my pizza cutter is too damaged to sharpen?
Look for these signs: a wheel that is visibly cracked, severely chipped, or wobbles when spun; a mezzaluna blade that is bent, warped, or has deep rust pits; or an edge that is so damaged you can’t identify the original bevel angle. In these cases, sharpening is unsafe and ineffective. The cost of a new, good-quality cutter is often less than a professional sharpening fee for such damage.
