A sharp fillet knife is essential for clean, efficient fish preparation and safety. This guide demystifies the sharpening process, teaching you the correct tools, angles, and techniques for both manual and powered methods. You’ll learn how to achieve a consistently razor-sharp edge, maintain it between sharpenings, and avoid common mistakes that damage your blade. Mastering these skills ensures precision filleting, less waste, and a more enjoyable time on the water or in the kitchen.
Key Takeaways
- Sharpening restores performance: A dull knife is dangerous and inefficient; sharpening removes metal to recreate a precise, sharp edge for clean cuts.
- Angle is everything: Maintaining a consistent bevel angle (typically 12-17 degrees per side) is the single most critical factor for a successful sharpening.
- Choose your tool: From traditional whetstones to pull-through sharpeners and electric systems, select a method that fits your skill level, budget, and knife type.
- Honing is not sharpening: Regular honing with a steel or ceramic rod aligns the microscopic edge between full sharpenings, maintaining sharpness daily.
- Test your work: Use the paper test or thumb pressure test to reliably confirm a sharp edge before you start filleting.
- Practice makes perfect: Sharpening is a skill; start with inexpensive knives or practice rods to build muscle memory before touching your prized fillet knife.
📑 Table of Contents
- Why a Sharp Fillet Knife is Non-Negotiable
- Understanding Your Knife and the Sharpening Fundamentals
- Choosing Your Sharpening Tools: A Method for Every Person and Pocket
- The Step-by-Step Guide: Sharpening with a Whetstone (The Master Method)
- Alternative Methods: Quick and Effective Solutions
- Common Mistakes That Ruin a Fillet Knife (And How to Avoid Them)
- Beyond Sharpening: Long-Term Care for Your Fillet Knife
- Conclusion: The Satisfaction of a Perfect Edge
Why a Sharp Fillet Knife is Non-Negotiable
Let’s be honest: a dull fillet knife is more than just frustrating—it’s a genuine tool for failure. Whether you’re on a boat cleaning your day’s catch or in your kitchen prepping dinner, a razor-sharp edge is your best friend. It glides through flesh, separates skin from meat with surgical precision, and minimizes waste. A dull blade, conversely, mashes and tears. It crushes delicate fibers, leaving ragged edges and precious meat on the bone. It requires more force, increasing the risk of the knife slipping and causing a painful accident. Think of it this way: you’re not just sharpening a knife; you’re restoring control, efficiency, and safety to a fundamental task. The satisfying shhhick sound of a perfect fillet separating from the skin? That’s the sound of a sharp knife doing its job right. That’s the goal.
But here’s the secret many anglers and cooks miss: sharpening isn’t some dark art reserved for blacksmiths. With a little knowledge and practice, anyone can learn how to sharpen a fillet knife effectively. It’s less about brute strength and more about understanding geometry, consistency, and feeling the metal. This guide will walk you through every step, from selecting the right tools to mastering the technique, so you can turn that frustrating chore into a quick, rewarding part of your routine.
Understanding Your Knife and the Sharpening Fundamentals
Before you touch a stone or steel, you need to understand what you’re working with. Fillet knives are specialized tools. They feature long, flexible blades (usually 6-10 inches) made from flexible steel, designed to bend slightly against the contours of a fish’s backbone. This flexibility is key but also means the steel is often thinner and can be more prone to damage if sharpened incorrectly.

Visual guide about How to Sharpen a Fillet Knife
Image source: kitchenaim.com
The All-Important Bevel Angle
The edge of your knife is formed by two ground surfaces meeting at a precise angle, called the bevel. On most factory-sharpened fillet knives, this angle is between 12 and 17 degrees per side. This is a relatively acute angle, which contributes to its exceptional sharpness but also means it’s more fragile than, say, a heavy-duty chopping knife with a 20-25 degree angle. Your primary goal in sharpening is to recreate this original factory angle. Changing the angle dramatically will weaken the edge or make it too thick to slice effectively. Consistency is your north star.
What Actually Happens When You Sharpen
Sharpening is the process of removing a microscopic amount of metal to form a new, sharp edge. As you use your knife, the fine edge rolls over or develops tiny inconsistencies—this is dullness. Sharpening grinds a fresh, conical point onto the blade. The two key actions are grinding (removing metal to set the angle) and honing (aligning the existing edge). We’ll focus on the grinding/sharpening process here, but remember that honing is the maintenance you do in between.
Choosing Your Sharpening Tools: A Method for Every Person and Pocket
The world of knife sharpeners is vast, ranging from ancient stones to high-tech gadgets. For a fillet knife, you want control and precision. Here’s a breakdown of the most effective options, from most recommended to situational.
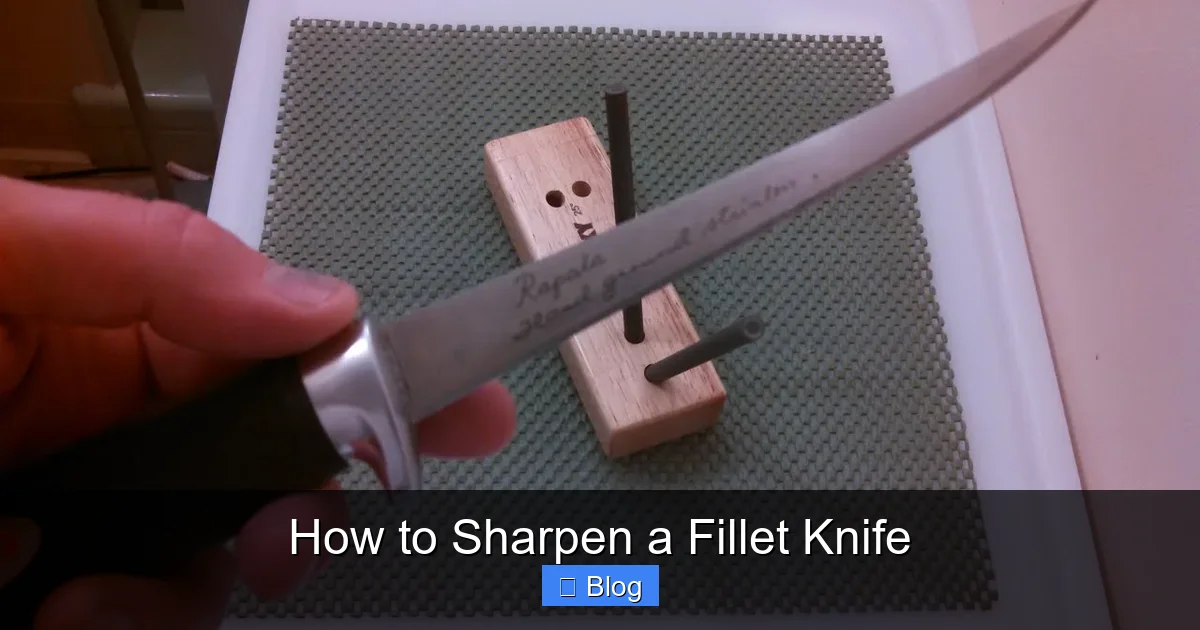
Visual guide about How to Sharpen a Fillet Knife
Image source: i.ytimg.com
1. Whetstones (Waterstones or Oilstones): The Gold Standard
This is the method that offers the most control and teaches you the most about your knife. A quality dual-grit whetstone (e.g., 1000-grit for sharpening, 3000-6000-grit for polishing) is a lifelong investment.
- Pros: Unmatched control over angle and pressure; produces a superior, polished edge; works on any blade shape; teaches true sharpening skill.
- Cons: Steeper learning curve; requires practice; slower than some methods; needs to be kept flat and lubricated.
- Best for: Anyone serious about tool care, those who want the best possible edge, and owners of high-carbon or expensive fillet knives.
Tip: Start with a medium-grit stone (800-1000) and a finishing stone (3000+). Soak waterstones for 10-15 minutes before use.
2. Pull-Through Sharpeners (Manual): The Convenience King
These handheld devices have preset carbide or ceramic rods set at a specific angle. You simply pull the blade through the slot(s).
- Pros: Incredibly fast, easy, and consistent angle; portable; inexpensive; great for quick touch-ups on the boat.
- Cons: Removes more metal than necessary over time; limited to one angle; can create a wire edge if not used carefully; less finesse than a stone.
- Best for: Beginners, those needing a fast field solution, or as a supplement to stone sharpening for maintenance.
Tip: Look for models with both coarse (for dull blades) and fine (for honing) slots. Use light, even pressure and pull the blade through from heel to tip.
3. Electric Knife Sharpeners: Speed with a Caveat
Plug-in machines with motorized abrasive wheels or belts.
- Pros: Extremely fast and effortless; very consistent angle; great for touching up multiple knives.
- Cons: Can generate heat that ruins the blade’s temper (softening the steel); often removes excessive metal; generally too aggressive for thin, flexible fillet knife blades.
- Best for: Heavy-duty kitchen knives. Generally not recommended for high-quality fillet knives due to the risk of overheating and over-grinding the thin blade.
4. Sharpening Systems (Guided Systems): The Best of Both Worlds
These use clamps or guides to hold your knife at a fixed angle while you move a sharpening rod or stone along the blade (e.g., Lansky, Edge Pro).
- Pros: Perfect angle control every time; easy to learn; excellent results; great for maintaining a precise angle on flexible blades.
- Cons: Can be bulky; initial cost higher than a simple stone; setup time.
- Best for: The enthusiast who wants professional results without the years of stone-practice muscle memory.
The Step-by-Step Guide: Sharpening with a Whetstone (The Master Method)
Let’s dive into the most respected technique. This method gives you complete control and produces an edge that’s second to none. Grab your stone, a cup of water (for a waterstone), and your knife.
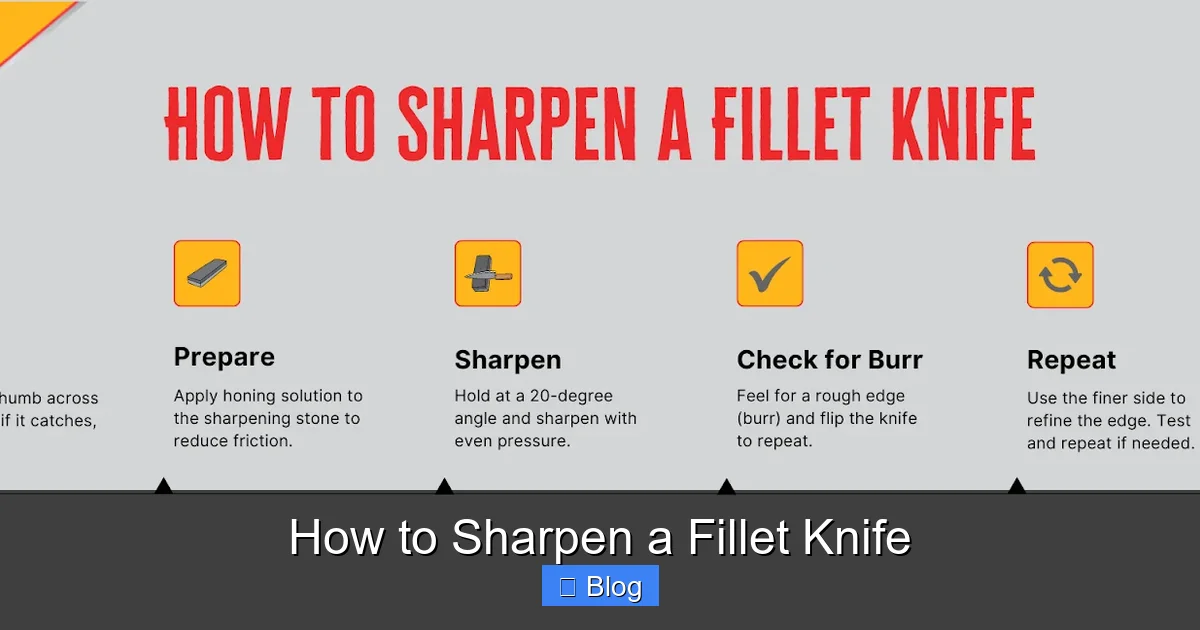
Visual guide about How to Sharpen a Fillet Knife
Image source: lh7-rt.googleusercontent.com
Step 1: Preparation and Setup
Place your wet stone on a non-slip surface (a damp towel works great). If using a waterstone, soak it until bubbles stop (usually 10-15 mins) and keep a few drops of water on the surface during sharpening to create a slurry, which lubricates and aids polishing. For an oilstone, apply a few drops of honing oil. Determine your bevel angle. If unsure, a safe bet for a fillet knife is about 15 degrees per side. You can use a cheap angle guide or even the nickel trick: place a US nickel (1.95mm thick) on the stone; the angle from the table to the top of the nickel is roughly 17 degrees—close enough to start.
Step 2: Finding Your Grip and Position
Hold the knife handle firmly with your dominant hand. Place your other hand on the blade’s spine (the flat, non-sharp top), with your fingers curled safely away from the edge. This hand is for control and applying gentle, even pressure. Position yourself so you can see the edge you’re creating. The goal is to feel the contact, not just see it.
Step 3: The Sharpening Motion – The Heart of the Process
This is where consistency wins. Imagine you are trying to slice a very thin layer off the top of the stone. You are moving the blade, not the stone.
- Start Position: Place the edge of the knife at the far corner of the stone, heel first, at your chosen angle. The entire bevel should be in contact with the stone.
- The Push (or Pull) Stroke: Push the blade diagonally across the stone, from heel to tip, maintaining that same angle and pressure. Think of drawing a line from the 10 o’clock to the 4 o’clock position (or vice-versa for left-handers). The motion should be smooth and cover the entire length of the stone.
- Complete the Arc: As you push, your wrist and forearm should guide the knife so the tip of the blade also contacts the stone at the end of the stroke. You are essentially sweeping the entire edge along the stone.
- Repeat: Lift the knife, return to the starting position (without grinding on the way back), and repeat. Count your strokes—aim for 5-10 strokes per side before checking.
Critical Tip: Focus on keeping the angle constant. The most common mistake is raising or lowering the handle as you move. A trick is to watch the gap between the blade’s spine and the stone; it should stay nearly constant.
Step 4: Alternating Sides and Building the Edge
Sharpen one side completely (e.g., 10-15 strokes), then flip the knife and do the same on the other side. This creates a symmetrical edge. After completing one round on each side, you may feel a slight burr (a tiny flap of metal) on the opposite side—this is a sign you’re removing metal. Continue alternating sides, reducing the number of strokes per side (e.g., 5 each, then 3 each) to refine the edge and remove the burr.
Step 5: The Fine Polish (Optional but Recommended)
Switch to your finer grit stone (3000+). Repeat the same process with lighter pressure. This polishes the edge, removes any remaining burr, and creates an incredibly keen, mirror-like finish that glides through fish. You can feel a difference: the coarse grit creates a toothy, “grabby” edge, while the fine grit is silky smooth.
Step 6: Cleaning and Testing
Rinse the knife and stone thoroughly. Dry the knife completely. Test the sharpness. The classic paper test: hold a piece of newspaper or printer paper vertically and try to slice down through it. A sharp knife will cut cleanly without tearing. You can also carefully feel for the “bite” by lightly running your thumb perpendicular to the edge (from spine to edge)—a sharp edge will catch firmly. Never run your thumb along the length of the edge!
Alternative Methods: Quick and Effective Solutions
Not every situation calls for a stone and 20 minutes. Here’s how to handle other common scenarios.
Using a Pull-Through Sharpener Correctly
This is ideal for on-the-boat touch-ups. Start with the coarse slot if the knife is truly dull. Insert the blade fully into the slot, ensuring the heel touches the bottom. Apply very light, consistent pressure and pull the knife through completely in one smooth motion, from heel to tip. Do this 3-5 times per side. Switch to the fine slot and repeat 2-3 times per side for honing. The key is lightness; pressing hard creates a jagged edge and wears the sharpener faster. Always finish with the fine slot.
The Honing Steel: Your Daily Maintenance Partner
This is not sharpening! A honing steel (or ceramic rod) realigns the microscopic edge, which rolls over with use. It does not remove metal. Use it before each filleting session. Hold the steel vertically with the tip on a cutting board. Place the knife heel against the steel at your target angle (approx. 15-20 degrees). Sweep the blade down and across the steel, pulling the knife towards you so the entire edge contacts the steel. Alternate sides, 3-4 strokes per side. This takes 10 seconds and dramatically extends the time between full sharpenings.
When to Use a Sharpening System
If you’ve invested in a guided system like a Lansky, setup is key. Clamp the knife securely in the guide at your chosen angle guide (often 15 or 20 degrees for fillet knives). Lubricate the diamond rod or ceramic stone. Place the rod in the guide’s slot and use the same smooth heel-to-tip strokes, alternating sides. The guide ensures perfect angle consistency, making it foolproof for beginners.
Common Mistakes That Ruin a Fillet Knife (And How to Avoid Them)
Even with the best intentions, it’s easy to damage a prized blade. Here are the pitfalls to watch for.
Mistake 1: Using the Wrong Angle
Too steep (e.g., 25 degrees) creates a thick, dull edge. Too shallow (e.g., 10 degrees) is fragile and will roll over quickly. Solution: Stick to 12-17 degrees. Use a guide or the nickel trick until you develop muscle memory.
Mistake 2: Inconsistent Pressure and Angle
This creates a wavy, uneven edge that cuts poorly. Solution: Focus on one thing at a time. First, master the angle with no pressure. Then add consistent, moderate pressure. Your arms, not just your wrists, should move.
Mistake 3: Neglecting the Tip
The tip of a fillet knife is crucial for precision work near bones and skin. Many people only sharpen the middle. Solution: In your sweeping motion, consciously ensure the tip of the blade also contacts the stone at the end of the stroke. You may need to slightly raise your wrist to accommodate the curve.
Mistake 4: Overlooking the Belly
The curved part of the blade (the belly) needs extra attention. Solution: When sharpening, you may need to slightly rock your wrist or adjust the pressure to ensure the entire curved edge makes contact with the stone. Practice on a practice rod first.
Mistake 5: Skipping the Finishing Grit
Stopping at a coarse grit leaves a rough, toothy edge that feels sharp but doesn’t slice cleanly through fish skin. Solution: Always finish with at least a 3000+ grit stone or the fine slot on your pull-through. This refines the edge and removes the burr.
Mistake 6: Using a Dull or Improper Stone
A stone that’s glazed over (no longer cuts) or unevenly worn will not sharpen effectively. Solution: Flatten your whetstones regularly with a flattening stone or a piece of wet/dry sandpaper on a flat surface. This ensures a true, flat sharpening surface.
Beyond Sharpening: Long-Term Care for Your Fillet Knife
A sharp knife stays sharp longer with proper care. This extends the life of your edge and your knife.
Cleaning and Drying: The Non-Negotiable First Step
Never, ever leave your fillet knife soaking in water, especially if it has a wooden or composite handle. Carbon steel blades will rust instantly. After use, wash with mild soap and warm water, dry immediately and thoroughly, inside and out. Store it in a knife block, on a magnetic strip, or in a sheath—never loose in a drawer where it can knock against other tools.
The Importance of Regular Honing
As mentioned, a quick pass on a honing steel before each use realigns the edge and can keep it sharp for weeks. Make this as automatic as tying your shoes before a fishing trip.
Proper Storage
Protect the edge. A good sheath is worth it. If storing on a magnetic strip, ensure the blade is fully seated and won’t be knocked. Avoid storing in a sheath that traps moisture.
Knowing When to Seek Professional Help
If your knife has significant chips, is severely warped, or you’ve accidentally ground the edge too thin, it’s time to consult a professional sharpener. They have the tools to reshape the bevel correctly. For routine maintenance, you’ve got this.
Conclusion: The Satisfaction of a Perfect Edge
Learning how to sharpen a fillet knife is one of the most empowering skills for any angler or home cook. It connects you to your tool, gives you deeper respect for the craft of food preparation, and pays immediate dividends in performance and safety. Start simple: grab a decent dual-grit stone and a cheap knife to practice on. Watch the burr form, feel the edge transform from blunt to keen. Embrace the process. The first few times might feel awkward, but the muscle memory will develop quickly. Soon, the ritual of sharpening will be as satisfying as the first perfect fillet it produces. You’ll look at that gleaming, hair-popping edge and know exactly how it got there. That’s the real reward.
Frequently Asked Questions
How often should I sharpen my fillet knife?
It depends on use and steel quality. For regular use (several times a week), you’ll likely need a full sharpening on a stone every 1-3 months. Between sharpenings, use a honing steel before each use to maintain the edge. If you notice the knife tearing fish instead of slicing cleanly, it’s time to sharpen.
What’s the best sharpening tool for a beginner with a fillet knife?
A good quality pull-through sharpener with both coarse and fine slots is the easiest starting point. It provides consistent angle control and is very forgiving. For those wanting to learn the foundational skill, a medium-grit (1000) whetstone is the best long-term investment, though it requires more initial practice.
What angle should I sharpen my fillet knife to?
Aim for an angle between 12 and 17 degrees per side. This acute angle provides the sharpness needed for precision filleting. If you’re unsure, 15 degrees per side is an excellent, safe starting point. Using an angle guide or the “nickel trick” (the angle from a flat surface to the top of a nickel is ~17 degrees) can help you visualize it.
How can I tell if my knife is truly sharp after sharpening?
Use the paper test: hold a piece of newspaper or printer paper vertically and try to slice down through it without applying downward force. A sharp knife will cut cleanly. You can also carefully feel for a “bite” by running your thumb lightly perpendicular to the edge—a sharp edge will catch firmly. A dull knife will slide over the paper or feel slippery against your thumb.
What’s the difference between honing and sharpening?
Sharpening (with a stone, ceramic rod, or pull-through coarse slot) removes metal to create a new, sharp edge. Honing (with a steel or fine ceramic rod) aligns the microscopic edge that has rolled over from use. Honing is a quick, daily maintenance task that extends the time between full sharpenings. You hone a sharp knife; you sharpen a dull one.
Can I sharpen a serrated fillet knife?
Yes, but differently. Serrated blades require a tapered sharpening rod or a dedicated serrated knife sharpener that matches the serration’s diameter. You gently file each individual serration (the concave part) by running the rod through it. It’s more tedious than sharpening a straight edge and often best left to a professional unless you have the specific tool and patience.