Setting the clock on your Samsung stove is essential for using timed cooking functions and ensuring accurate meal prep. The process is straightforward, typically involving the “Clock” or “Settings” button on the electronic control panel. While steps can vary slightly by model series, the universal method involves accessing the clock setting, using the +/- or dial to adjust the time, and confirming your selection. Always consult your specific model’s manual for precise instructions.
You’ve just finished installing your beautiful new Samsung stove, or perhaps the power went out, and now you’re staring at a blank or blinking “12:00” on the sleek control panel. That little digital display isn’t just for looks—it’s the command center for your oven’s smart timed functions. Knowing how to set the clock on a Samsung stove is the first, crucial step to unlocking features like Delay Start, automated shut-off, and perfectly timed baked goods. It can feel a bit daunting with all those buttons and touchscreens, but the process is designed to be intuitive. This comprehensive guide will walk you through every method, for every major Samsung stove series, turning that blinking “12:00” into your most helpful kitchen assistant.
We’ll start with the absolute basics: finding the right button, understanding the control layout, and executing the standard sequence. Then, we’ll dive into the specific quirks of different model lines, from the popular NE series to the premium Chef Collection. We’ll tackle common problems like a locked control panel, a clock that resets after every power flicker, and unresponsive buttons. By the end, you won’t just know how to set the time; you’ll understand why it matters for your cooking safety and convenience, and you’ll be equipped to solve any clock-related hiccup on your Samsung appliance. Let’s get that time set.
Key Takeaways
- Universal Access: The clock setting is almost always found by pressing a dedicated “Clock” button or navigating through a “Settings” or “Tools” menu on the stove’s control panel.
- Model Variations: Steps differ between series (e.g., NE, NX, Chef Collection). Some use +/- buttons, others a central dial/knob, and a few require a sequence like “Clock” + “Set.”
- Power-Up Default: After a power outage or initial installation, the clock will often display “12:00” or “00:00” and must be set manually for timed functions to work.
- Control Lock Interference: If the control panel is locked (often indicated by a lock icon), you must unlock it first before accessing any settings, including the clock.
- Troubleshooting Basics: If the clock won’t set, try a full power reset (turn off at the breaker for 5 minutes). Unresponsive buttons may need a gentle clean. Persistent issues indicate a potential control board fault.
- Not Just for Show: The correct time enables the “Delay Start” and “Auto Shut-Off” safety features, making it a critical setting for both convenience and safety.
- Analog vs. Digital: Some high-end Samsung ranges feature a physical analog clock on the front. This is purely cosmetic and does not require setting; only the digital display clock is functional.
📑 Table of Contents
- Why Setting the Clock is More Important Than You Think
- Universal Preparation: Unlocking Your Stove’s Potential
- Step-by-Step: The Standard Clock Setting Method
- Model-Specific Guides: Navigating Samsung’s Different Lineups
- Troubleshooting: When the Clock Won’t Set or Keeps Resetting
- Advanced Features & Pro Tips for Your Samsung Stove Clock
- Conclusion: Your Stove, Your Time
Why Setting the Clock is More Important Than You Think
Before we press a single button, let’s address the “why.” It’s easy to dismiss the stove clock as a minor cosmetic feature, but on Samsung ranges, it’s the linchpin for several key functions. The most obvious is scheduling. The “Delay Start” feature allows you to load your dish into the oven, set a future start time, and walk away. The oven won’t begin heating until that programmed time, which is perfect for having dinner ready exactly when you are. This function is completely useless if the clock is incorrect or not set.
The Safety Backbone: Auto Shut-Off
Perhaps even more critical is the automatic safety shut-off. Most Samsung electric and gas ranges are equipped with a timer that will automatically turn the oven off after a prolonged period of inactivity or if a cooking cycle completes. This timer is based on the internal clock. An unset clock means this vital safety feature is disarmed, posing a potential fire hazard if you accidentally leave the oven on. Setting the clock correctly ensures this automated safety net is active and accurate.
Smart Home Integration
For those with a smart, Wi-Fi enabled Samsung range (often part of the SmartThings ecosystem), the correct time is essential for remote notifications and scheduling. The appliance communicates with your smartphone app, and timestamps for cooking completion, preheat alerts, and error messages all rely on an accurately set clock. A wrong clock leads to confusing alerts and broken automations.
Universal Preparation: Unlocking Your Stove’s Potential
Before you begin, there’s one universal prerequisite that trips up many users: the control lock. Samsung stoves, especially those with glass touch panels, have a child lock or control lock feature to prevent accidental button presses. This is a fantastic safety feature, but it also blocks access to the clock setting. You’ll typically see a small padlock icon illuminated on the display.
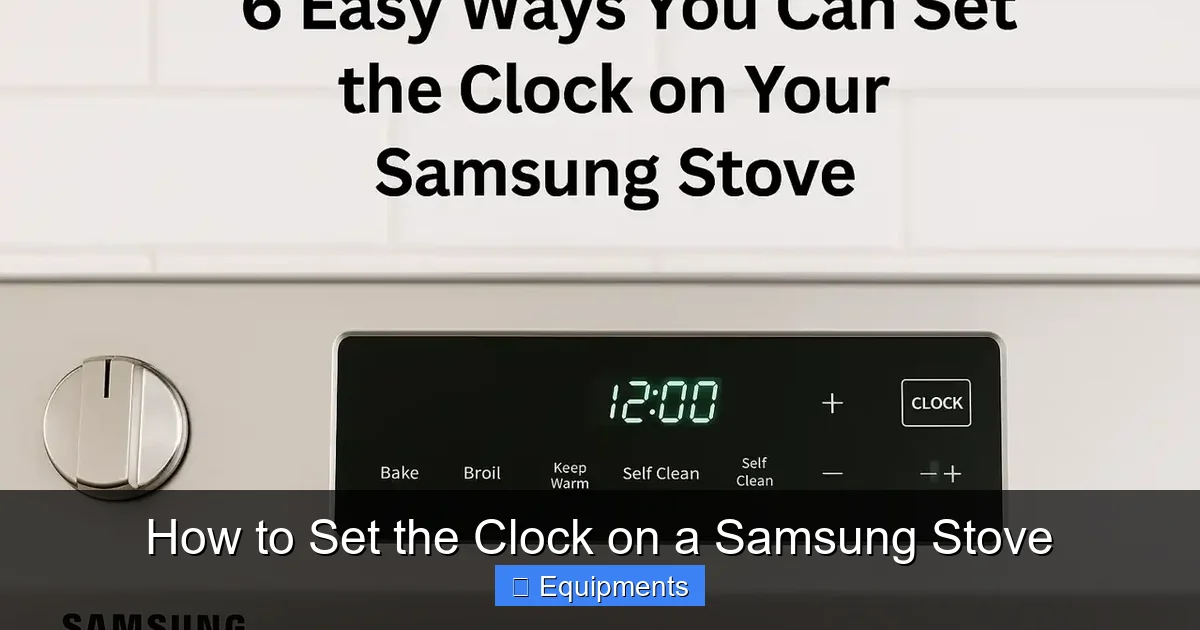
Visual guide about How to Set the Clock on a Samsung Stove
Image source: realcvo.com
How to Disengage the Control Lock
The lock disengage method is almost always a “press and hold” sequence. Look for a button labeled “Lock,” “Child Lock,” or sometimes a dedicated padlock symbol. The standard procedure is to press and hold that button for 3 to 5 seconds. You should hear a beep and see the lock icon disappear from the screen. On some models, you may need to press “Settings” or “Tools” first, then hold “Lock.” If you’re unsure, a quick glance at the “Control Lock” section in your user manual will give you the exact sequence for your model number.
Pro Tip: If you can’t find a dedicated lock button, check the “Settings” or “Options” menu. The lock function is often nested there. Also, ensure your hands are completely dry; moisture on the touch panel can cause it to register inputs incorrectly and appear “locked.”
Step-by-Step: The Standard Clock Setting Method
With the panel unlocked, we move to the core process. While Samsung uses different control interfaces, the logic is consistent: enter a setup mode, adjust the hours and minutes, and confirm. Here is the most common method that works for the majority of Samsung electric and gas ranges, including the popular NE and NX series.
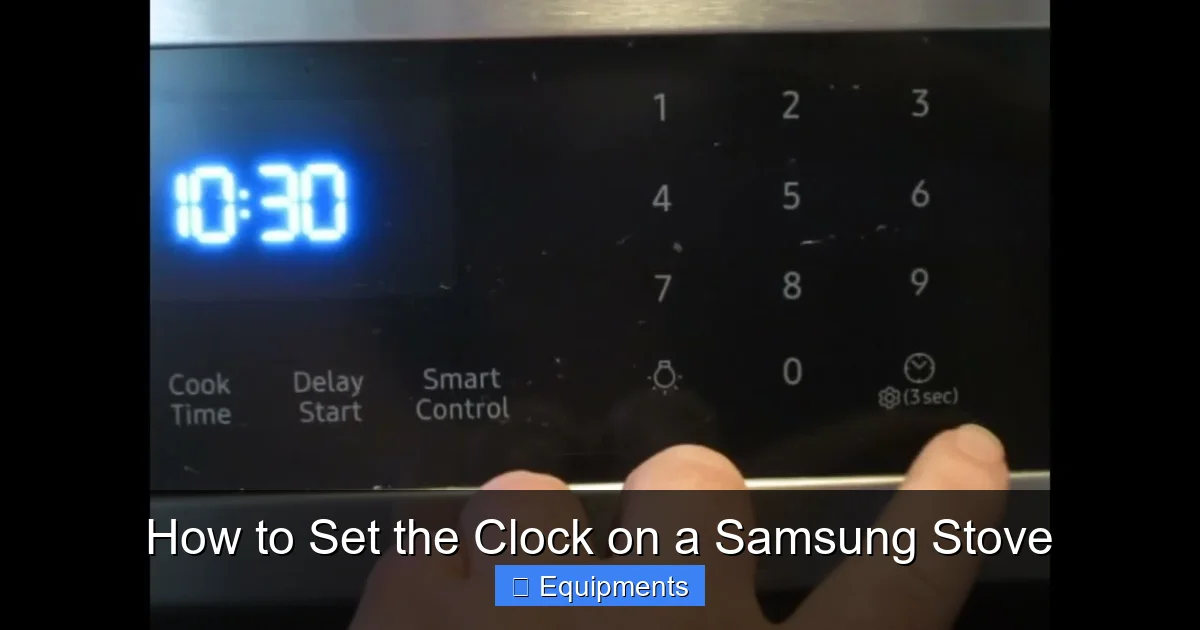
Visual guide about How to Set the Clock on a Samsung Stove
Image source: i.ytimg.com
The “Clock” Button Method (Most Common)
1. Locate the “Clock” Button: Scan your control panel. There is almost always a button explicitly labeled “Clock,” “Time,” or a clock icon. On touch panels, it may be a soft key. On models with knobs, one of the knobs might double as a selector when pressed in.
2. Enter Clock Mode: Press the “Clock” button once. The display will likely change, showing the current time (probably 12:00) with either the hours or minutes flashing, or with an underline. This flashing indicates the active field you can change.
3. Adjust the Hours: Use the “+” (up) and “-” (down) arrow buttons, or rotate the central knob, to change the hour. Pay attention to AM/PM if your model displays it. Many Samsung models use a 24-hour format (military time), so 1 PM would be 13:00. If you’re unsure, set it to the correct 12-hour time and see if an AM/PM indicator appears.
4. Switch to Minutes: After setting the hour, press the “Clock” button again, or press the “Set” or “Enter” button if present. This should switch the flashing indicator to the minutes field.
5. Adjust the Minutes: Use the same +/- buttons or knob to set the correct minutes.
6. Confirm and Exit: Press the “Clock” button one final time, or press “Set”/”Enter.” The flashing should stop, and the correct, steady time will be displayed. You’ve done it! The oven’s internal timer is now synchronized.
Model-Specific Guides: Navigating Samsung’s Different Lineups
Samsung has several stove series with distinct control systems. If the universal method above didn’t work, your model likely belongs to one of these families. Identifying your exact model number (usually on a sticker inside the oven door or on the back) is the best practice, but these guides will cover the vast majority of cases.
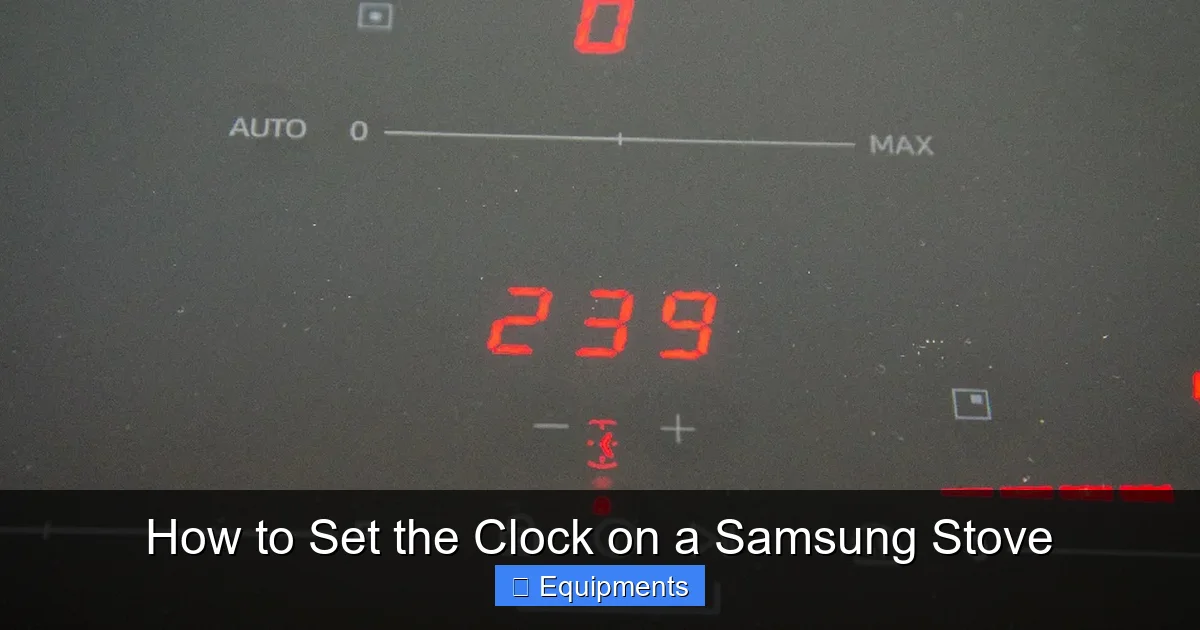
Visual guide about How to Set the Clock on a Samsung Stove
Image source: thekitchenix.com
The Samsung NE Series (Touch Panel with Knob)
This is one of the most common designs. It features a large glass touch panel with a central, protruding knob that can be pressed and rotated.
- Step 1: Ensure the control is unlocked. Press and hold the Lock button (often has a padlock icon) for 3 seconds.
- Step 2: Press the Clock button on the touch panel. The display will show the time with hours flashing.
- Step 3: Rotate the central knob to change the hour. Press the knob in to confirm the hour and switch to minutes.
- Step 4: Rotate the knob to change the minutes. Press the knob in one last time to set and exit.
Example: On a Samsung NE63T8750SS, this exact knob-press-rotate sequence is the standard. The knob provides a satisfying, precise feel for adjustments.
The Samsung NX Series (Fully Flat Touch Panel)
These models have a completely flat, seamless glass surface with no physical knobs. All inputs are via soft-touch keys.
- Step 1: Unlock the panel via the Lock button (hold 3 sec).
- Step 2: Tap the Clock icon/button. Hours will flash.
- Step 3: Tap the + or – arrows to adjust the hour.
- Step 4: Tap the Clock button again to move to minutes. Adjust with +/-.
- Step 5: Tap Clock or Start/Enter to confirm.
Note: On some NX models, the “Clock” button might be within a “Settings” (gear icon) menu. You’ll need to tap “Settings,” then find and tap “Clock.”
Samsung Chef Collection (Premium Models)
The high-end Chef Collection ranges (like the Chef Collection Slide-in) often have a more complex interface with a full-color LCD screen. The clock setting is usually within a deeper menu system.
- Step 1: Unlock the panel.
- Step 2: Press the Menu or Settings button.
- Step 3: Use the navigation arrows or touch screen to scroll to an option like “Time” or “Clock” and select it.
- Step 4: The time screen will appear. You may use a keypad that pops up on the screen to directly enter the time (e.g., tap “1,” “2,” “3,” “0” for 12:30), or you may still use +/- arrows.
- Step 5: Select “Save” or “Enter” to confirm.
Key Difference: These models often allow direct numeric entry via an on-screen keypad, which is faster than incrementally pressing +/-.
Troubleshooting: When the Clock Won’t Set or Keeps Resetting
You followed the steps, but the time either won’t change, or it reverts to 12:00 after a short time or a minor power fluctuation. Don’t panic. This is a common issue with a few likely culprits.
The Culprit: A Faulty or Dead Backup Battery
This is the #1 reason for a clock that won’t hold its setting. Most electronic ranges have a small, internal lithium battery (like a coin cell) that provides a tiny amount of power to the clock and memory circuits when the stove is unplugged or the breaker is off. This battery lasts for years, but it is not replaceable by the user in most models. If it dies, the clock resets every time the appliance loses main power.
- Symptom: You set the clock perfectly. It works. Then you turn the stove off at the wall or a breaker trips. When power is restored, the clock is back to 12:00.
- Solution: This requires a service call from a qualified appliance technician. They will need to locate and replace the internal memory backup battery. This is not a DIY fix for most homeowners due to the need to disassemble part of the stove and handle electronic components.
The Culprit: A Persistent Control Lock or Glitch
Sometimes, the control board can get into a strange state, especially after a power surge. The lock icon might be off, but a software glitch prevents the clock setting from being saved.
- Symptom: You can change the time, it shows correctly, but after 10 seconds or when you press another button, it snaps back to 12:00.
- Solution: Perform a hard reset. Turn the stove off at the dedicated circuit breaker in your home’s electrical panel. Leave it off for a full 5 minutes. This drains all residual power from the control board’s capacitors, forcing a full reboot. Turn the breaker back on. The display will likely show 12:00 again. Now, immediately go through the clock setting process again. This often resolves temporary software glitches.
The Culprit: Dirty or Faulty Buttons
Spills, grease, and grime can seep into the control panel, making buttons sticky or unresponsive. A button that doesn’t register a press will make it seem like the clock won’t advance.
- Symptom: You press “+” but the number doesn’t change, or you have to press extremely hard.
- Solution: With the stove powered off, gently clean the control panel with a soft, slightly damp microfiber cloth. For stuck buttons, you can use a cotton swab dipped in a tiny amount of isopropyl alcohol (90% or less) to clean around the button edges. Never spray liquid directly onto the panel. If cleaning doesn’t work, a specific button may be faulty and need replacement by a technician.
Advanced Features & Pro Tips for Your Samsung Stove Clock
Once your clock is set, a world of convenience opens up. Understanding these related features will help you use your stove to its fullest potential.
Synchronizing with Daylight Saving Time
Do you need to change the clock twice a year? It depends on your model. Some newer Samsung ranges with Wi-Fi connectivity can automatically update the time if they are connected to your home network and the SmartThings app. Check your stove’s “Settings” or “Network” menu for an option like “Auto Time Update” or “Sync with Network.” If your model isn’t connected or lacks this feature, you’ll need to adjust it manually using the same steps described above. Make it a habit to check it when you change your wall clocks.
The Timer vs. The Clock: Don’t Confuse Them!
This is a critical distinction. The Clock is the permanent, current time of day. The Timer (often a separate button or function) is a countdown clock you set for a specific cooking duration (e.g., 45 minutes). The Timer does not affect the Clock. If your oven turns off after a set time, you’ve used the Timer function. If you schedule the oven to start at 6 PM, you’ve used the Clock in conjunction with the Delay Start feature. They work together but are separate settings.
Using Delay Start with Your Newly Set Clock
Now for the payoff! With the clock accurate, you can use Delay Start. Here’s how:
- Place your food in the oven and close the door.
- Select your cooking mode (Bake, Convection Bake, Roast, etc.) and set the desired cooking temperature.
- Instead of pressing “Start,” look for a button labeled “Delay Start” or a clock icon with a “+” sign.
- Press it. The display will prompt you to enter a start time. Use the +/- or knob to set the future time you want the oven to begin (e.g., 5:30 PM).
- Press “Start” or “Enter.” The display will now show the current time and a message like “Delay Start 5:30” or simply count down to the start time. The oven will remain off until that time.
Important Safety Note: Do not use Delay Start for foods that require refrigeration (like meat or poultry) as they will sit at room temperature for hours before cooking, posing a food safety risk. Use it only for dry goods, baked items, or pre-chilled foods that can safely wait.
Conclusion: Your Stove, Your Time
Setting the clock on your Samsung stove is a foundational skill that transforms your appliance from a simple heater into a smart, automated kitchen tool. We’ve journeyed from the universal “press Clock, adjust, confirm” method to the specific nuances of NE, NX, and Chef Collection models. We’ve armed you with troubleshooting steps for that frustrating clock that won’t stay set, pointing to the likely culprit—a dead internal backup battery—and the solution: a professional service call. Remember, that little display is the heartbeat of your oven’s timed and safety features.
So, take a moment now. Find that “Clock” button, ensure your control is unlocked, and set the correct time. Then, experiment. Set a Delay Start for a batch of cookies tomorrow morning. Trust the automatic shut-off. Integrate it with your SmartThings routine if you have a connected model. Mastering this simple setting brings a layer of precision, safety, and convenience to your cooking that you’ll appreciate every single day. Your Samsung stove is built to work for you—setting the clock is the first, most important step in making that happen.
Frequently Asked Questions
Why does my Samsung stove clock keep resetting to 12:00 after a power outage?
This is almost always caused by a failed internal backup battery. This small battery maintains power to the clock’s memory when the main power is disconnected. If it’s dead, the clock resets every time. This requires a service technician to replace the battery inside the control panel.
My stove has a physical analog clock on the front. Do I need to set that?
No. The analog clock on the front of some Samsung ranges is purely decorative and cosmetic. It is not connected to the oven’s electronics. Only the digital clock display on the control panel is functional and needs to be set for timed features to work.
I don’t see a “Clock” button on my control panel. Where else could it be?
It may be hidden within a “Settings,” “Tools,” or “Menu” (gear icon) submenu. Navigate into that menu and look for “Time,” “Clock,” or “Set Time.” On some models with a central knob, pressing the knob inward might bring up a clock setting option on the display.
What should I do if the “+” and “-” buttons don’t respond when I try to set the time?
First, ensure the control panel is completely unlocked. Then, try a hard reset: turn off the stove at your home’s circuit breaker for 5 minutes to fully power down the control board. Turn it back on and try again. If buttons remain unresponsive, the control panel may have a fault or be dirty and require professional cleaning or repair.
Can I set the clock using the SmartThings app on my phone?
If your Samsung stove is Wi-Fi enabled and connected to the SmartThings app, you can often view the current clock time in the app. However, for security and safety reasons, the ability to *change* the stove’s internal clock time is typically restricted to the physical control panel on the appliance itself. The app syncs to the stove’s clock, not the other way around.
Is there a difference between setting the clock on a gas vs. electric Samsung stove?
No. The process for setting the clock is identical between gas and electric models within the same series (e.g., an NE gas range and an NE electric range will have the same clock-setting procedure). The difference lies solely in the control panel design and model series, not the power source.