You don’t have to live with builder-grade brown forever. This guide reveals simple, smart methods to visualize and achieve a new cabinet color, from no-commitment digital tools to weekend DIY projects. Discover how temporary films, professional reglazing, and strategic painting can completely refresh your kitchen’s look with minimal cost and disruption.
Let’s be honest. That sea of oak, honey maple, or dark cherry that came with your house has lost its sparkle. You dream of crisp white, moody navy, or a warm sage green. But the thought of a full cabinet replacement—the dust, the cost, the weeks of disruption—makes you want to hide under that old, Formica countertop. What if I told you you can see your kitchen cabinets in a completely different color without a sledgehammer, a massive budget, or even a permanent commitment? You absolutely can. The journey from “how do I live with this?” to “I love my kitchen!” starts not with demolition, but with imagination and the right tools. This is your complete roadmap to visualizing and achieving a new cabinet color, tailored to your budget, skill level, and whether you own or rent.
Key Takeaways
- Virtual visualization tools are your first step: Use smartphone apps and online software to “try on” hundreds of cabinet colors risk-free before buying a single supply.
- Temporary solutions are perfect for renters and the commitment-averse: Peel-and-stick films and chalk paint offer stunning, reversible transformations that can be removed in days.
- Professional reglazing is a middle-ground miracle: This process bonds a new, durable finish to your existing cabinet boxes for a factory-like result at a fraction of replacement cost.
- Traditional painting is the most permanent and versatile option: With proper prep (cleaning, sanding, priming) and the right paint (acrylic latex or specifically-formulated cabinet paint), you can achieve any color imaginable.
- Color psychology and trend awareness are key: Consider how cabinet color affects room perception (dark colors cozify, light colors expand) and balance trends with your home’s long-term style.
- Budget dictates your best path: Virtual tools are free, temporary films cost a few hundred dollars, reglazing runs $3,000-$7,000+, and DIY painting is the most economical at $200-$600 for materials.
- Never skip the prep: 90% of a successful cabinet color change is in the surface preparation—clean, de-gloss, and sand thoroughly regardless of your chosen method.
📑 Table of Contents
- Chapter 1: The Magic Mirror – Visualizing Your New Color Before You Start
- Chapter 2: The No-Commitment Glow-Up – Temporary & Reversible Solutions
- Chapter 3: The Pro’s Secret – Cabinet Refacing & Reglazing
- Chapter 4: The Classic DIY – Painting Your Cabinets for Good
- Chapter 5: Beyond Color – The Finishing Touches That Make It Real
- Chapter 6: Making the Decision – A Practical Flowchart
Chapter 1: The Magic Mirror – Visualizing Your New Color Before You Start
You wouldn’t buy a dress or a car without seeing it first, right? The same principle applies to your cabinets. The biggest mistake is falling in love with a paint chip or a photo that looks disastrous in your unique kitchen lighting. This step is non-negotiable and saves you from expensive, heartbreaking mistakes.
Digital & Smartphone Apps: Your Free, Instant Design Studio
Grab your phone. This is the easiest, zero-cost entry point. Several excellent apps use augmented reality (AR) or simple photo editing to drop new colors onto a picture of your actual cabinets.
- Houzz & View in My Room 3D: The Houzz app has a vast product library. Use the “View in My Room 3D” feature on thousands of cabinet paint colors and finishes. Snap a photo, and you can place a virtual cabinet door right in your space. It’s remarkably accurate for gauging tone.
- Paint Tester Apps (by Valspar, Sherwin-Williams, etc.): These are specifically designed for walls but work brilliantly for cabinets. Upload a photo, mask the cabinet area, and paint it with any color from that brand’s lineup. This is crucial for seeing how a specific brand’s “Naval” or “Evergreen Fog” reads in your light.
- Modsy & Room Planner Apps: These offer more comprehensive room redesigns. Upload a picture, and a designer (or AI) can virtually replace your cabinet fronts with new styles and colors, giving you a full-scene context.
Pro Tip: Take your photos on a cloudy day for the most even, true-to-life lighting. Direct sunlight will bleach colors, and yellow-toned bulbs will make everything look warm. Try the same color in multiple apps to see consistency.
The Old-School, Reliable Photo Edit
Not tech-savvy? No problem. Use a simple, free online photo editor like Canva or even your phone’s built-in editing tools.
- Take a clear, well-lit photo of your cabinet front.
- Use the “draw” or “shape” tool to outline the cabinet door frame and panel.
- Fill that shape with a color using a hex code (find these online for any paint brand).
- You can create multiple versions with different colors side-by-side. It’s rudimentary but highly effective for comparing undertones (is that gray actually blue? Is that white actually yellow?).
Chapter 2: The No-Commitment Glow-Up – Temporary & Reversible Solutions
This is the golden path for renters, design-risk-takers, and anyone who wants a dramatic change for under $500 that can be undone. These methods let you see your cabinets in a new color in a weekend, with results that can last years or be removed in an afternoon.
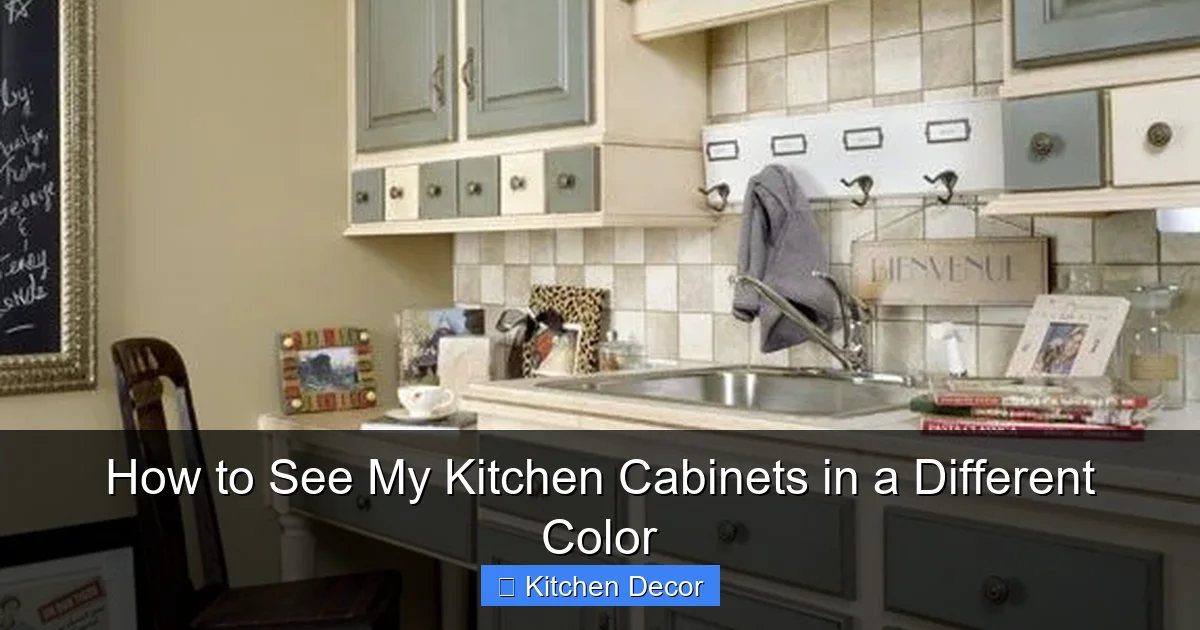
Visual guide about How to See My Kitchen Cabinets in a Different Color
Image source: deckerdecks.com
Peel-and-Stick Vinyl Film: The Chameleon of Cabinet Land
Forget the old, bubbly contact paper. Modern, high-quality cabinet films are a revelation. Brands like Citadel, NuWallpaper, and RoomMates offer thick, textured, and matte/finish films designed specifically for cabinets. They mimic wood grain, high-gloss lacquer, and even shaker-style recessed panels.
- How it works: You clean your cabinets impeccably, measure and cut the film to size, and carefully apply it using a squeegee to remove air bubbles. It adheres to the existing finish.
- Pros: Incredible variety, removable (heat gun helps), protects original finish, DIY-friendly. You can do one bank of cabinets to test, then do the rest.
- Cons: Edges can peel over time with heat/moisture, not as durable as paint or reglaze for heavy-use areas. It’s a surface cover, not a finish.
- Best for: Renters, kitchens with laminate or thermofoil cabinets (which are notoriously hard to paint), and anyone wanting a high-impact, temporary trend like a bold geometric or marble pattern.
Chalk Paint & Milk Paint: The Painter’s Quick-Change Artist
Paints like Annie Sloan Chalk Paint or General Milk Paint are famous for their “no-sand” claim (though a light scuff sand is still recommended). They adhere to almost anything and have a beautiful, matte, vintage feel.
- How it works: Clean cabinets. Apply paint with a brush or roller. For a truly reversible look on a rental, you could even top it with a water-based polyurethane that *might* be removed later. But treat this as a semi-permanent change.
- Pros: Extremely easy application, beautiful soft finish, minimal prep, wide color range. Can be waxed for protection.
- Cons: Not as hard/durable as acrylic latex for a high-traffic kitchen. Can show water rings if not properly sealed. The “no-prep” myth leads to adhesion failure on glossy surfaces.
- Best for: Low-traffic kitchens, guest homes, or achieving a specific rustic/distressed look. It’s a fantastic way to see a color with a unique texture.
Chapter 3: The Pro’s Secret – Cabinet Refacing & Reglazing
If you want a permanent, professional, and durable result but can’t afford full replacement, this is your holy grail. It’s the industry’s best-kept secret for a factory finish on your existing boxes.

Visual guide about How to See My Kitchen Cabinets in a Different Color
Image source: media.angi.com
Understanding Cabinet Reglazing (aka Refinishing)
This is not painting. A professional team comes in, meticulously removes all cabinet doors and drawers, and takes them to a shop. There, they:
- Strip: Chemically or mechanically remove the old finish down to bare wood.
- Repair: Fill any dings, sand smooth.
- Stain or Paint: Apply a new, high-quality stain or, more commonly now, a multiple-coat catalyzed lacquer or water-based acrylic finish in your chosen color. This is sprayed on for a perfectly smooth, hard, and washable surface.
- Reinstall: The finished doors are hung back on your existing cabinet boxes.
The Result: It looks and feels like brand-new cabinets. The finish is far superior to any DIY spray paint job. You can change the color, the sheen (satin, semi-gloss, matte), and even the style (they can add new raised panels or routed details).
- Cost: Typically $3,000 – $7,000+ for an average kitchen, depending on size and finish complexity.
- Timeline: 3-5 days on-site, with doors off-site for 1-2 weeks.
- Best for: Homeowners with quality cabinet boxes (solid wood or plywood) who want a long-term, high-end upgrade without the $15,000+ cost of full replacement.
Partial Refacing: The Hybrid Approach
You can also reglaze *just* the cabinet fronts and leave the boxes as-is. Or, combine it with new hardware and perhaps even new cabinet *doors* (ordered to your specs) while keeping the existing boxes. This allows for a major style shift (e.g., from raised panel to flat shaker) for less cost than full replacement.
Chapter 4: The Classic DIY – Painting Your Cabinets for Good
This is the most common and permanent method. A successful paint job is 100% in the preparation. Rushed prep = peeling, chipping heartbreak.

Visual guide about How to See My Kitchen Cabinets in a Different Color
Image source: newdimensionsinc.com
The Non-Negotiable Prep Sequence
Follow this order religiously. Skipping a step guarantees failure.
- Remove & Label: Take off every door, drawer front, and hardware. Label the back with painter’s tape and a number so you know exactly where it goes.
- Clean: Wash every surface with a TSP substitute or a strong degreaser (like Krud Kutter) to remove all grease, food splatter, and wax. Rinse and let dry completely.
- De-gloss & Sand: This is the critical step for adhesion. Use 120-150 grit sandpaper (a palm sander is a lifesaver) to lightly scuff every surface. You’re not removing the finish, just creating “tooth.” Wipe all dust away with a tack cloth or damp rag.
- Prime: DO NOT SKIP. Use a high-quality, bonding primer. For glossy surfaces or stains, an oil-based or shellac-based primer (like BIN or Cover Stain) is the gold standard. For less stubborn surfaces, a water-based bonding primer (like Gripper or Bulls Eye 1-2-3) works well. One coat, let dry.
- Sand Again: Lightly sand the primer with 220 grit sandpaper for an ultra-smooth base. Clean dust.
Paint Selection & Application
- Paint Type: Use a paint specifically formulated for cabinets, trim, and doors. These are 100% acrylic latex or water-based acrylic urethane paints (like Benjamin Moore Advance, Sherwin-Williams ProClassic, or Behr Urethane Alkyd). They level beautifully, are hard, and clean easily. Do not use wall paint.
- Sheen: Satin or semi-gloss is standard for kitchens. They offer good cleanability and a subtle sheen. Matte is trendy but shows every fingerprint and smear.
- Color: This is where your virtual testing pays off. Get a sample pot and paint a large piece of primed plywood or an inconspicuous cabinet back. Live with it for 2 days, looking at it in morning, noon, and night light.
- Application: Use a high-quality synthetic brush (for water-based) or natural bristle (for oil-based) for edges and a foam roller or spray gun for flat panels. Two thin coats are always better than one thick, drippy coat. Sand lightly between coats with 320 grit. Let cure fully (often 7-14 days for full hardness) before heavy use.
Chapter 5: Beyond Color – The Finishing Touches That Make It Real
The color is the star, but the supporting actors make the show. Hardware, lighting, and surrounding elements determine if your new cabinet color looks like a million bucks or a missed opportunity.
Hardware: The Jewelry of Your Cabinets
Changing hardware is the single fastest way to make painted cabinets look custom and high-end.
- Style Sync: Sleek, long pulls (10-12″) enhance modern, flat-panel painted cabinets. Round knobs or bin pulls complement traditional, raised-panel styles. Mixed metals (brass with black pulls) are on-trend but keep it cohesive.
- Finish Coordination: If you painted your cabinets a warm white, aged brass or oil-rubbed bronze hardware can add warmth. For cool whites, grays, or blues, polished nickel, chrome, or matte black is striking.
- Placement: Consider placement. Upper cabinets often look great with centered pulls. Lower cabinets and drawers can have pulls centered or aligned to the top edge for a cleaner line.
Lighting: The Color’s Best Friend or Worst Enemy
Your cabinet color will look completely different under various lights.
- Natural Light: North-facing light is cool and blue, making warm colors (yellow, red) appear duller and cool colors (blue, green) more vibrant. South-facing light is warm and yellow, brightening all colors.
- Artificial Light: LED bulbs have a color temperature measured in Kelvins (K). 2700K is warm/yellow. 3000K is neutral. 4000K+ is cool/blue. Test your paint color under your actual under-cabinet lights and recessed cans at night.
- The Fix: If your color looks “off,” consider changing your bulb temperature. A warm white cabinet might look dingy under cool 4000K LEDs. Swap to 3000K for a truer, warmer read.
Chapter 6: Making the Decision – A Practical Flowchart
Still overwhelmed? Here’s a simple decision tree based on your primary constraints.
- I am a RENTER / I want ZERO permanent change: Path: Virtual Visualization (to choose) → Peel-and-Stick Vinyl Film. (Budget: $200-$600).
- I own, have a limited budget ($500-$1,000), and love DIY: Path: Virtual Visualization → Chalk/Milk Paint *or* DIY Acrylic Paint (with impeccable prep). (Budget: $200-$600 for materials).
- I own, have a moderate budget ($3,000-$7,000), want a PERMANENT, pro finish, and hate DIY: Path: Virtual Visualization → Hire a Professional Reglazing Company. (Budget: $3,000-$7,000).
- I own, have a flexible budget, and want the ultimate custom, durable result: Path: Virtual Visualization → Hire a professional painter who specializes in cabinets *or* invest the time to master the DIY paint process with premium products. (Budget: $1,500-$4,000+ for pro paint, $200-$600 for DIY).
Remember, the goal is to see it first. The virtual tools are your crystal ball. They remove the guesswork and fear. Once you’ve lived with a color on your screen, you’ll have the confidence to take the next step, whether that’s ordering a roll of film or buying your first gallon of primer. Your kitchen cabinets are the largest surface area in the room. Changing their color isn’t just a cosmetic update; it’s a fundamental shift in your kitchen’s personality. It can make a small kitchen feel larger, a dark kitchen feel brighter, and an outdated kitchen feel current. Don’t let the original finish hold you hostage. Start visualizing today, and take the first, free step toward the kitchen you’ve been dreaming of.
Frequently Asked Questions
Can I just paint over my glossy cabinet finish without sanding?
Technically, you can, but it is a recipe for peeling and failure. The glossy surface is slick and prevents new paint from bonding. A thorough scuff sand with 120-150 grit sandpaper is an absolute must to create a mechanical bond, regardless of the paint or primer you use.
How durable is peel-and-stick cabinet film really?
High-quality cabinet film is surprisingly durable for a temporary solution. It resists water, heat from coffee makers, and everyday wiping. However, its Achilles’ heel is the edges, which can eventually peel if subjected to constant moisture (like near a dishwasher) or direct heat (like from an oven handle). For most homes, it lasts 3-5 years with good care.
Is cabinet reglazing worth the cost compared to just painting them myself?
What’s the biggest mistake people make when trying to see a new cabinet color?
The biggest mistake is only looking at paint chips or online photos in isolation. A color’s undertone (is it a cool gray or a warm gray?) is dramatically affected by your kitchen’s fixed elements: your countertop (which often has strong veins of brown, gray, or green), your flooring, and your existing backsplash. Always hold the paint chip up next to these surfaces in your actual kitchen light.
Can I change my cabinet color if I have oak cabinets with a strong orange/red undertone?
Absolutely, but you must neutralize that undertone first. Painting oak with a standard paint often lets the orange “bleed” through over time. The solution is using a high-quality, pigmented shellac-based primer (like BIN) as your first coat. This seals and blocks the tannins in the oak, preventing discoloration. Then you can paint any color you want on top.
What’s the single best piece of advice for a first-time DIY cabinet painter?
Remove all cabinet doors and drawers and paint them flat on sawhorses or a makeshift table in your garage or a well-ventilated room. Do not try to paint them while hanging on the wall. Painting them flat eliminates drips and runs, allows you to paint all sides easily, and results in a far smoother, more professional finish. Patience with prep and curing time is the other secret.