Tired of digging through a dark cabinet for that one skillet? Organizing your Lazy Susan for pots and pans is a simple, transformative project. By sorting your cookware, using smart dividers, and following the “heavy bottom” rule, you can turn a chaotic corner into your kitchen’s most efficient storage spot. This system saves time, prevents scratches, and makes every pan easy to see and grab. Start with a quick declutter and watch your cooking workflow improve immediately.
Let’s be honest: the corner cabinet with the Lazy Susan is often the black hole of the kitchen. It starts with good intentions—a handy turntable to access those hard-to-reach pots—but quickly devolves into a precarious tower of mismatched pans, lost lids, and a constant clatter every time you spin it. Sound familiar? You’re not alone. That forgotten corner holds massive potential, and learning how to organize a Lazy Susan for pots and pans is the key to unlocking it. This isn’t just about tidiness; it’s about creating a functional, stress-free zone that makes cooking smoother and actually protects your investment in quality cookware. Forget the frustration. With a systematic approach, you can transform that spinning shelf from a nuisance into your kitchen’s secret weapon.
The beauty of a Lazy Susan lies in its simple mechanics: a rotating platform that brings everything to you. But its very nature—a continuous circle—means without structure, items slide, nest, and hide. The goal of organization here is to combat that chaos with intentional zones. Think of it not as just storing pots, but as designing a miniature, efficient warehouse for your culinary tools. We’ll walk through every step, from the initial purge to the final polish, ensuring your organized Susan stays functional for years. Get ready to spin your way to serenity.
Key Takeaways
- Assess before you arrange: Measure your Lazy Susan’s dimensions and weight capacity, then take full inventory of your pots and pans to understand what you’re working with.
- Sort by use and weight: Group cookware by cooking task (e.g., boiling, baking) and always place the heaviest items (cast iron, stockpots) on the bottom tier for stability and safety.
- Use dedicated organizers: Invest in adjustable dividers, tiered racks, and non-slip mats to create separate, secure zones that prevent items from sliding or nesting awkwardly.
- Solve the lid problem: Store lids vertically on the side of the Susan using a rack, or nest them inside their matching pots to free up precious turntable real estate.
- Maintain for longevity: Regularly wipe down the turntable bearing and check for wear. Reassess your layout seasonally as your cookware collection evolves to maintain optimal efficiency.
📑 Table of Contents
- The Magic of the Lazy Susan: Why It’s a Game-Changer for Cookware
- Step 1: Assessing Your Space and Cookware Collection
- Step 2: Sorting and Decluttering Your Cookware
- Step 3: Choosing the Right Organizers for Your Lazy Susan
- Step 4: Installing and Arranging for Peak Efficiency
- Step 5: Maintenance and Long-Term Care
- Advanced Techniques for Large or Awkward Collections
The Magic of the Lazy Susan: Why It’s a Game-Changer for Cookware
Before we dive into the “how,” let’s appreciate the “why.” A Lazy Susan in a corner cabinet is more than just storage; it’s a space-maximizing marvel. Standard deep cabinets force you to reach into the abyss, often leaving items at the back permanently forgotten. The rotating design eliminates that dead space entirely. Every pot, every pan, every Dutch oven is brought to the forefront with a gentle spin. This is especially crucial for bulky, frequently used items like stockpots and large skillets that would otherwise dominate a shelf and be a pain to access.
Space Maximization in Tight Corners
Corner cabinets are notoriously awkward. They’re deep, wide, and create a vast, shadowy interior. A Lazy Susan turns this two-dimensional problem into a three-dimensional solution. By utilizing the full circumference, you effectively create multiple “front” faces. You’re not just using the depth; you’re using the entire circular footprint. This is invaluable for pots and pans, which are often round themselves and fit perfectly on a curved surface, minimizing wasted space between items.
Eliminating the “Back-of-the-Cabinet” Black Hole
How many times have you pulled out the front row of pans only to discover the one you needed was buried in the back? This constant excavation is a major time-waster and a recipe for scratched non-stick surfaces. A well-organized Lazy Susan ensures no pan is ever truly in the back. Everything has its designated spot on the circle, visible and accessible with a turn. This visibility alone is a game-changer for your daily cooking routine.
Streamlining Your Cooking Workflow
When your cookware is organized logically, your workflow improves dramatically. Need a small saucepan for a sauce? It’s in its zone. Reaching for the roasting pan for a chicken? It’s on the bottom, ready to go. You’ll spend less time searching and pulling, and more time actually cooking. This reduction in friction makes the entire process from planning to cleanup more enjoyable. For more on creating an efficient kitchen, explore our guide to general kitchen organization principles that apply beyond just the Lazy Susan.
Step 1: Assessing Your Space and Cookware Collection
You cannot organize what you do not measure and understand. This first, crucial step prevents you from buying the wrong organizers or creating a new kind of chaos. Grab a tape measure, a notepad, and prepare for a full cookware audit.
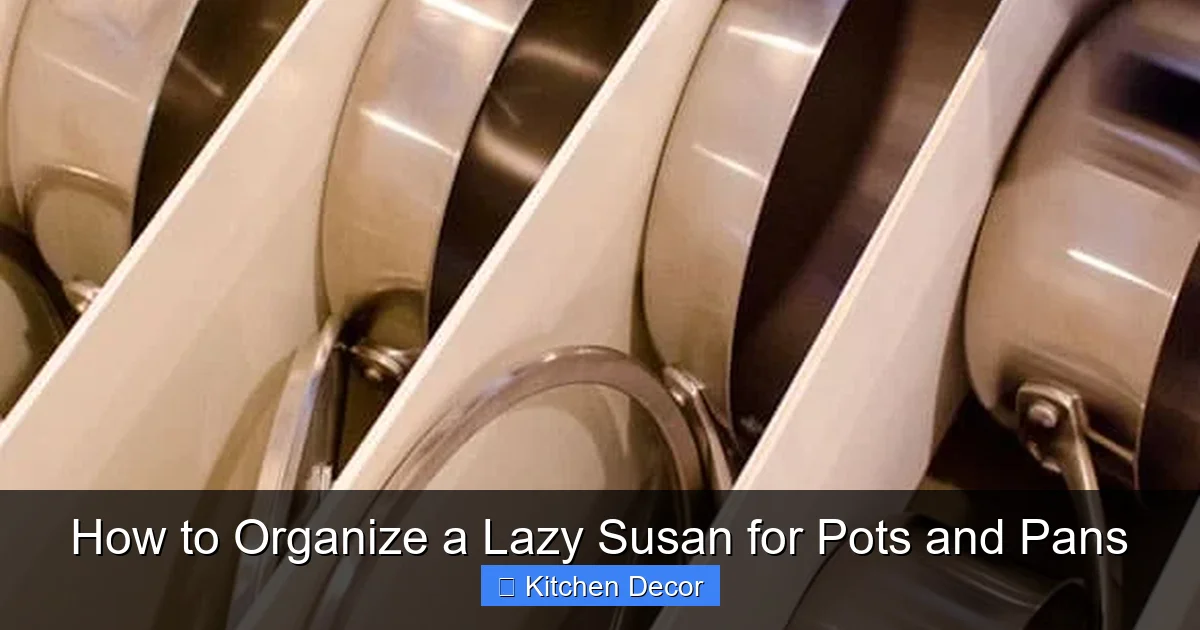
Visual guide about How to Organize a Lazy Susan for Pots and Pans
Image source: organizationobsessed.com
Measuring Your Lazy Susan Accurately
First, determine the exact specifications of your turntable. You need three key measurements: the diameter (across the circle), the depth (from the front edge to the back, which is often the cabinet depth), and the height clearance (from the bottom shelf to the underside of the cabinet door or shelf above). The height is critical—tall stockpots might not fit if the clearance is low. Also, note the weight capacity if listed; overloading can damage the bearing and make spinning stiff or dangerous.
Inventorying Your Pots and Pans: The “Keep, Toss, Donate” Method
Take every pot and pan from your kitchen and lay them out. Be ruthless. Ask yourself: Do I use this? Is it in good condition (no warped bottoms, loose handles, flaking coating)? Does it have a matching lid? Create three piles:
- Keep: Your daily drivers: good-quality saucepans, a reliable skillet, a stockpot, a sauté pan.
- Toss: Anything bent, warped, severely scratched, or with broken parts. These are unsafe and inefficient.
- Donate/Sell: Duplicates you don’t need, pieces that don’t fit your cooking style, or items you simply hate using.
This purge is non-negotiable. Organizing junk just creates organized junk. You’re making decisions now to save time and space later.
Identifying Heavyweights vs. Lightweights
As you sort, mentally (or physically) group items by weight. Your heavyweights are cast iron skillets, enameled Dutch ovens, and large stainless steel stockpots. Your lightweights are non-stick fry pans, small saucepans, and aluminum steamers. This classification will directly dictate their final placement on the Susan. Safety and stability are paramount, so the heaviest items must go on the lowest, most central part of the turntable.
Step 2: Sorting and Decluttering Your Cookware
With your measured space and pared-down collection, it’s time for logical sorting. The goal is to create intuitive “zones” so you can find anything without thinking.
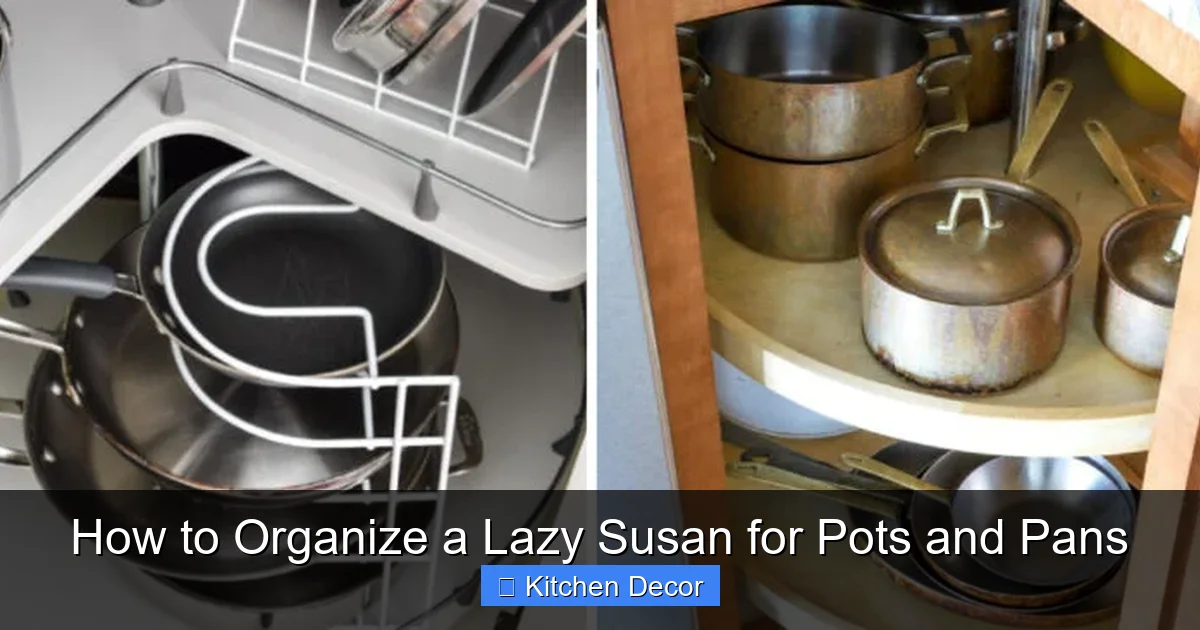
Visual guide about How to Organize a Lazy Susan for Pots and Pans
Image source: thekitchenix.com
Grouping by Use: Baking, Sautéing, Boiling
Think about your cooking tasks. Do you often bake? Group your baking sheets, cake pans, and loaf pans together. Are you a soup enthusiast? Keep your stockpot and soup pot near each other. A sauté pan and a frying pan often serve similar purposes and can be grouped. This functional grouping means if you’re making a one-pot pasta, you’ll find your large saucepan and stockpot in the same general area, reducing the need for multiple spins.
Nesting vs. Stacking: What Works Best on a Turntable?
Nesting (fitting smaller pots inside larger ones) is a classic space-saver, but it has a major drawback on a Lazy Susan: it creates a monolithic, hard-to-move tower. If you need the small pot at the bottom, you have to lift everything off. For a Lazy Susan, stacking without nesting is often better. Use a tiered rack (more on this next) to create separate levels. However, for very stable, flat-bottomed sets like a nested mixing bowl set, careful nesting can work if the set stays together as a single unit and is placed on a non-slip mat.
Dealing with Lids: The Eternal Problem
Lids are the arch-nemesis of an organized Lazy Susan. They’re awkward, clattery, and seem to multiply. You have three main solutions:
- Vertical Lid Rack: A narrow rack that holds lids upright on their edges, usually against the back or side of the Susan. This is highly visible and accessible.
- Store Inside the Pot: If the lid fits snugly and securely inside its pot, this is the simplest solution. It keeps the pair together and uses zero extra space.
- Dedicated Lid Basket/Bin: A small bin or basket on the Susan for all lids. This works if you have many mismatched lids but can become a jumbled mess without dividers.
For most, the vertical rack or storing inside are the winners. Choose based on your lid types and available space.
Step 3: Choosing the Right Organizers for Your Lazy Susan
This is where you customize the blank canvas. The right tools turn a flat circle into a multi-level, categorized masterpiece. You don’t need expensive custom solutions; simple, adjustable kitchen organizers work wonders.
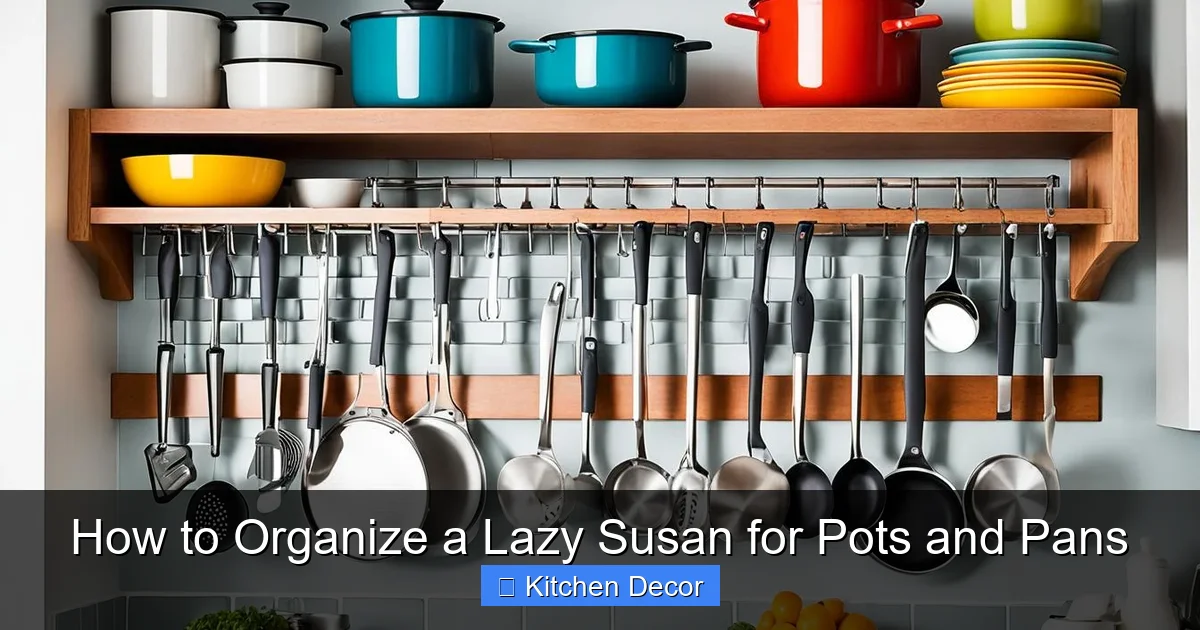
Visual guide about How to Organize a Lazy Susan for Pots and Pans
Image source: maisonlyinteriordesign.com
Adjustable Dividers and Bins: Customizable Solutions
Look for cutlery or utensil organizers made of plastic or bamboo, but use them horizontally to create separated bins on your Susan. You can store a skillet in one bin, a saucepan in another, and a set of mixing bowls in a third. The key is to get adjustable dividers so you can configure the compartments to fit your specific pot widths. This prevents items from rolling into each other when you spin. A simple rectangular bin can hold all your baking sheets upright, turning a floppy item into a neat, vertical file.
Tiered and Stacking Racks: Creating Vertical Layers
This is the holy grail for Lazy Susan organization. A tiered rack (often sold as a “countertop organizer” or “spice rack tier”) has stepped platforms. You place it on your Susan, and it instantly gives you two or three levels of storage. The bottom level holds your heaviest, tallest items (stockpots). The middle level holds your medium skillets and saucepans. The top level is perfect for lids, small pans, or baking dishes. This dramatically increases your usable square footage without requiring a larger cabinet. Ensure the rack itself is sturdy and its weight, combined with your cookware, does not exceed your Susan’s capacity.
Non-Slip Mats and Liners: The Unsung Heroes
Never underestimate the power of a good non-slip cabinet liner. Cut a circle to fit your Lazy Susan’s surface and lay it down. This does three vital jobs: it keeps pans from sliding and crashing into each other when you spin; it muffles noise; and it protects the finish of both your Susan and your cookware from scratches. For extra grip on smooth-bottomed pans, consider a thicker, textured mat. This is a cheap, easy upgrade that makes a massive difference in daily use.
Step 4: Installing and Arranging for Peak Efficiency
Now for the fun part: putting it all together. This is where strategy meets execution. Follow these golden rules for an arrangement that is both safe and supremely functional.
The “Golden Rule”: Heavy Items on the Bottom, Light on Top
This is non-negotiable for safety and stability. Your heaviest cookware—cast iron, ceramic Dutch ovens, large stainless stockpots—must reside on the lowest tier of your setup, closest to the turntable’s central spindle. This keeps the center of gravity low, preventing the entire assembly from tipping or wobbling dangerously when you spin. Medium-weight items (saucepan sets, sauté pans) go on the middle tier. Your lightest items (non-stick fry pans, small saucepans, lids) belong on the top tier or in the outer bins of a divider. Think of it like building a pyramid: wide, heavy base; lighter top.
Frequency-Based Placement: Everyday vs. Occasionally Used
Within your weight-based zones, arrange by frequency of use. Your most-used skillet and saucepan should be the easiest to grab—typically on the outer edge of a middle tier or in a front bin. Items you only pull out for holidays or special occasions (the giant roasting pan, the fancy fondue pot) can be placed toward the center back or on a higher, less accessible tier. This “front-stage, back-stage” philosophy means your daily cooking tools are always at your fingertips.
Creating “Zones” for Intuitive Access
Use your dividers and bins to create clear zones. Label them if it helps! A typical layout might be:
- Zone 1 (Front Left): Everyday skillets and frying pans.
- Zone 2 (Front Right): Saucepan set (1-qt, 2-qt, 3-qt).
- Zone 3 (Center Back): Large stockpot and Dutch oven (heavy, on bottom tier).
- Zone 4 (Side Bin): Baking sheets and roasting pans, stored vertically.
- Zone 5 (Top Tier): Lids, steamer inserts, and rarely-used grill pans.
Consistency is key. Once you establish a zone, always return items to their home. This habit is what keeps the system from breaking down.
Step 5: Maintenance and Long-Term Care
An organized Lazy Susan is a happy Lazy Susan. A little regular maintenance ensures smooth spinning for years and prevents the slow creep back into chaos.
Regular Cleaning Routines for Smooth Spinning
Every few months, give your Susan a proper clean. Remove all cookware and organizers. Wipe down the turntable surface and the cabinet shelf beneath it with a damp cloth and mild cleaner. The most important part is the bearing (the mechanism in the center that allows rotation). Dust and grime can accumulate here, causing stiffness or squeaking. Use a cotton swab or old toothbrush to gently clean around the bearing post. A tiny drop of food-safe silicone spray can keep it spinning silently, but avoid WD-40 as it can attract dust. Always check the manufacturer’s guidelines, which are often detailed in the product terms and conditions.
Checking for Wear and Tear: Bearings and Hardware
As you clean, inspect. Is the bearing wobbly or does it have excessive play? Does the Susan spin freely but stop abruptly, or is it stiff? Are the screws holding it to the cabinet shelf tight? A loose Susan is a safety hazard. Tighten any loose screws immediately. If the bearing is failing, replacement parts are often available from the manufacturer. Catching these issues early prevents a catastrophic collapse of your carefully arranged cookware.
Seasonal Reassessment: When Your Cookware Collection Changes
Your kitchen is dynamic. You might get a new Instant Pot, inherit a set of pans, or finally retire that scratched non-stick skillet. Twice a year (spring and fall are good markers), do a quick audit. Is everything still in its zone? Does the new item have a logical home? Does the weight distribution still feel safe? This 10-minute check-in prevents the system from degrading and allows you to adapt to your changing needs, keeping your organization fresh and functional.
Advanced Techniques for Large or Awkward Collections
What if your cookware collection is extensive, or you have uniquely shaped items like a wok or a massive paella pan? Don’t despair. With some creativity, even the most challenging collections can be accommodated.
Using Multiple Lazy Susans in One Cabinet
For very deep corner cabinets, you might have a double-tier Lazy Susan (two tiers stacked). Treat each tier as its own organized unit. The bottom tier can hold your heaviest, most-used items (everyday pots). The upper tier can hold lighter, less-frequent items (baking dishes, specialty pans). This effectively doubles your organized space. Ensure the upper tier’s weight load is within the overall system’s capacity.
Incorporating Pull-Out Trays Alongside Your Susan
If your corner cabinet has adjacent space, consider installing a shallow pull-out tray or drawer next to the Lazy Susan. Use this for items that don’t fit well on a circle, like long-handled spatulas, baking molds, or sheet pans that are better stored flat. This hybrid approach gives you the best of both worlds: the circular accessibility of the Susan and the flat, linear storage of a tray.
Custom Solutions for Oversized or Specialty Cookware
That 16-inch cast iron griddle or your giant stockpot might not fit on the main Susan with everything else. Have a plan. You can:
- Dedicate an entire Susan zone to one large item, placing it on the bottom tier center.
- Store it on the floor of the cabinet *behind* the Susan if there’s depth, pulling it out when needed.
- Use a wall-mounted pot rack for your 1-2 most-used oversized pieces, freeing up Susan space for the rest.
The principle is to give bulky items their own dedicated, stable space rather than forcing them into an overcrowded circle.
Organizing a Lazy Susan for pots and pans is one of the most satisfying kitchen projects you can undertake. The transformation from a cluttered, noisy mess to a silent, spin-and-grab system is immediate and profound. It protects your cookware from dents and scratches, saves you countless minutes of searching, and brings a sense of calm to your cooking routine. Remember the core pillars: measure and purge, sort by weight and use, invest in tiered organizers and non-slip mats, and maintain regularly. Start with your most-used corner cabinet today. That spin will never feel the same again—it’ll feel like victory.
Frequently Asked Questions
What is the safest weight limit for a Lazy Susan storing pots and pans?
Always check your specific Lazy Susan’s manufacturer specifications, as weight limits vary by design and installation. As a general rule, distribute weight evenly and place the heaviest items (like cast iron) on the lowest tier closest to the center spindle to maintain a low center of gravity and prevent tipping.
How do I clean a sticky or noisy Lazy Susan bearing?
First, remove all items and the turntable shelf if possible. Wipe the bearing and spindle with a damp cloth. Use a cotton swab to remove any built-up dust or grime. A single drop of food-grade silicone lubricant can help, but avoid petroleum-based products like WD-40. If noise persists, the bearing may need replacement.
Can I use a Lazy Susan in a cabinet with a door that opens inward?
Yes, but you must ensure there is adequate clearance. Measure the distance from the Lazy Susan’s outer edge to the cabinet door when the door is fully open. The door must clear the outermost pans without hitting them. Using shorter organizers on the outer rim can help prevent contact.
Are Lazy Susans safe for storing heavy cast iron skillets?
They can be, provided you follow safety guidelines. Always store cast iron on the lowest tier, centered as much as possible. Ensure the total weight of all items does not exceed the Susan’s rated capacity. Check that the Susan is securely screwed into the cabinet shelf and that the bearing is in good condition to handle the static load without wobbling.
What material is best for Lazy Susan organizers—plastic, bamboo, or metal?
All can work well. Plastic is lightweight, affordable, and often dishwasher safe. Bamboo is sturdy, attractive, and eco-friendly but can be susceptible to moisture over time. Coated metal (like chrome or powder-coated steel) is very durable and stable. Choose based on your cabinet’s aesthetic, weight considerations, and whether moisture resistance is a priority.
Should I remove lids from pots before storing them on a Lazy Susan?
It depends. If a lid fits snugly and securely inside its pot, storing them together saves space and keeps the pair unified. However, if the lid is loose, rattly, or sits awkwardly on top, it’s better to store it separately—ideally in a vertical lid rack on the Susan or on a top tier—to prevent noise and potential chipping during spins.