Seasoning your wok in the oven is the most controlled, effective method to build a pristine, polymerized non-stick layer. Unlike stovetop methods, the oven’s even heat ensures the oil fully carbonizes into a smooth, black patina without sticky residue. This guide provides the exact steps, from choosing the right oil to troubleshooting common issues, so you can transform your raw carbon steel or cast iron wok into a legendary cooking surface.
Key Takeaways
- Oven seasoning is superior for control: The enclosed, even heat of an oven prevents hotspots and allows oil to fully polymerize into a hard, smooth layer, unlike the stovetop’s uneven flame.
- Oil choice is critical: Use high smoke-point oils rich in polyunsaturated fats like flaxseed, grapeseed, or sunflower oil. These polymerize best. Avoid low-smoke point oils like olive oil or butter for initial seasoning.
- Thin, even layers are everything: The #1 rule is “less is more.” Wipe all excess oil off until the wok looks dry. Thick oil pools will become a sticky, gummy mess.
- Patience during cooling is mandatory: Let the wok cool completely inside the turned-off oven. Rapid cooling can shock the metal and compromise the new patina.
- Maintenance is simpler than re-seasoning: A well-seasoned wok only needs a hot water rinse and immediate drying. Occasional light re-seasoning maintains the layer, but heavy scrubbing or soap removes it.
- Rust is a sign, not a failure: A small rust spot means the protective oil layer was compromised. It’s easily fixed by scrubbing, re-seasoning, and understanding proper storage.
- The goal is a natural patina: Don’t expect a factory-black finish overnight. A great wok’s seasoning develops over years of use, becoming a unique, non-stick surface that improves with every cook.
📑 Table of Contents
- Why Seasoning a Wok Isn’t Optional—It’s Essential
- Understanding the Science: What Does “Seasoning” Actually Do?
- Your Essential Toolkit: Materials You’ll Need
- The Step-by-Step Oven Seasoning Process
- Troubleshooting: When Good Woks Go Bad
- From Seasoned Surface to Cooking Mastery: First Use & Long-Term Care
- Conclusion: Your Wok’s Journey Has Just Begun
Why Seasoning a Wok Isn’t Optional—It’s Essential
You’ve just unboxed a beautiful, bare carbon steel wok. It gleams with a raw, metallic silver. It’s also completely useless for stir-frying. Without seasoning, food will weld itself to the surface, and the wok will rust at the first encounter with water. Seasoning is the sacred ritual that transforms inert metal into a living, breathing cooking tool. It creates a layer of polymerized oil—a hard, slick, black patina that is the ultimate natural non-stick surface. This layer protects the wok from rust, improves heat conductivity, and, with time and care, develops a flavor history unique to your kitchen.
Many guides focus on the stovetop method, which works but has drawbacks. Flames can cause uneven heating, leading to patchy seasoning. The oven method, however, is a game-changer. It uses dry, radiant heat to bake the oil onto the metal in a controlled environment. The result is a more uniform, durable, and consistently black initial layer. Think of it as the difference between hand-painting a wall and using a spray gun for an even coat. For a foundational layer that will last for decades, starting in the oven is the professional’s choice.
Understanding the Science: What Does “Seasoning” Actually Do?
The Magic of Polymerization
Seasoning isn’t just “oiling up” your wok. It’s a chemical process called polymerization. When you apply a thin layer of oil and heat it past its smoke point, the oil molecules break down and cross-link, bonding to the metal and to each other. This creates a hardened, plastic-like matrix that is chemically bonded to the wok’s surface. This polymer layer is what gives the wok its non-stick properties and its resistance to corrosion. The black color comes from carbonized oil—a sign of a successful polymerization.
Visual guide about How to Season a Wok in the Oven
Image source: res.cloudinary.com
Why Carbon Steel and Cast Iron?
This process only works on reactive metals: carbon steel and cast iron. Their porous, rough surface provides microscopic anchors for the polymerized oil to grip. Stainless steel and non-stick coated pans cannot be seasoned in this way. The seasoning layer becomes part of the wok’s very structure. Scrape it off with a metal spatula during cooking, and you’re not damaging it—you’re maintaining it, removing old food particles and encouraging a thinner, more even layer to rebuild. This is why a wok gets better with age; each cook refines the patina.
Your Essential Toolkit: Materials You’ll Need
Success starts with the right tools. Using the wrong oil or a filthy cloth can doom your first seasoning attempt. Gather these items before you begin.
Visual guide about How to Season a Wok in the Oven
Image source: i.pinimg.com
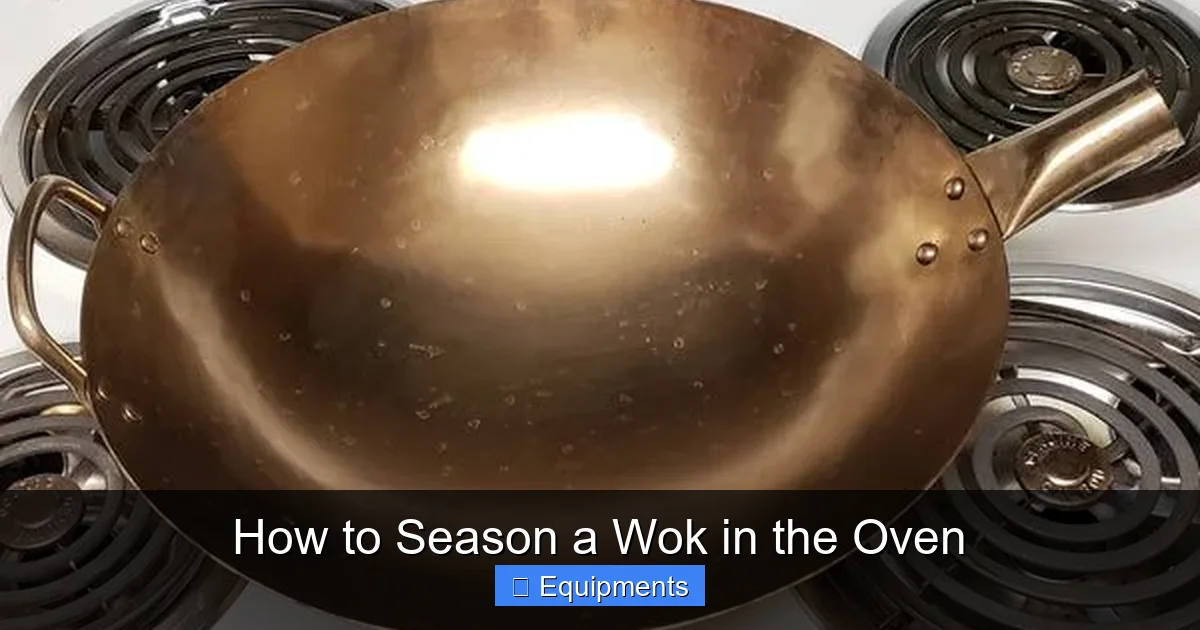
- A Clean, Bare Wok: This seems obvious, but it’s crucial. Your wok must be completely free of any factory coating (often a thin wax or oil), stickers, and rust. Scrub it vigorously with hot soapy water and a steel wool pad or abrasive scrubber. Rinse and dry thoroughly. Any residue will prevent the new seasoning from bonding.
- The Right Oil: This is your most important decision. You need an oil with a high smoke point (450°F/230°C or higher) that is high in polyunsaturated fats. These fats polymerize most effectively. Flaxseed oil is the gold standard among enthusiasts for its exceptional polymerization, though it’s expensive and can have a strong smell. Excellent, more affordable alternatives are grapeseed oil, sunflower oil, or avocado oil. Do not use olive oil (low smoke point), butter (contains solids that burn), or generic “vegetable oil” (often a blend that may not polymerize well).
- Paper Towels or a Lint-Free Cloth: For applying and, more importantly, removing all excess oil. You want the wok to look completely dry after wiping.
- Oven Mitts: You will be handling a screaming-hot wok. Protect your hands.
- Aluminum Foil or a Baking Sheet: To catch any potential oil drips and protect your oven bottom. Line the lower rack.
- Your Oven: A standard kitchen oven. You need a setting that can reach at least 450°F (230°C). Check your wok’s handle! If it’s wood or plastic, you must remove it. Most traditional wok handles are metal or are designed to be removed. If the handle is permanently attached and not oven-safe, you must use the stovetop method instead.
The Step-by-Step Oven Seasoning Process
Step 1: The Pre-Heat and Clean (The Non-Negotiable Prep)
Place your scrubbed, rinsed, and immediately dried wok on the stovetop. Turn the burner to high and heat the wok until it’s very hot to the touch, about 5 minutes. This drives off any last trace of moisture. Using oven mitts, carefully take the hot wok to your work area. Immediately apply a tiny amount of your chosen oil to a wad of paper towels held with tongs or pliers. Rub the oil over the entire interior surface of the wok, including the sides. Now, here is the critical step: take a clean paper towel and buff and wipe the wok until it appears completely dry and has no visible oil sheen. You should not be able to see any oil. This thinness is what prevents stickiness. Repeat for the exterior if you wish, though the interior is the priority.
Visual guide about How to Season a Wok in the Oven
Image source: howdykitchen.com
Step 2: Into the Oven (The Baking Phase)
Place a sheet of aluminum foil on the lower oven rack to catch drips. Position your wok upside down on the middle rack. This allows any excess oil to drip off and prevents pooling. Set your oven to 450°F (230°C) or its highest setting. Once preheated, bake the wok for 1 hour. You will see smoke. This is normal and expected—it’s the oil polymerizing. Turn on your kitchen exhaust fan and open a window. Do not open the oven door during this time.
Step 3: The Crucial Cool-Down
After one hour, turn off the oven. Do not remove the wok. Let it cool completely inside the oven. This can take 2-3 hours. This slow cooling is vital. Rapid cooling (like taking it out and running it under water) can create thermal shock, potentially warping thin woks and making the new seasoning layer brittle and prone to flaking. Patience here builds a stronger foundation.
Step 4: Inspection and Repeat
Once the wok is room temperature, remove it. You should see a dull, matte, greyish-black or dark brown layer. It will not be a perfect, glossy black—that comes with use. If you see shiny, oily spots, you applied too much oil. If it’s mostly bare metal, you applied too little or the oil didn’t polymerize fully. For a robust initial layer, the standard recommendation is to repeat this entire process (Steps 1-3) 2-3 times total. Each layer builds upon the last. After the final cycle, your wok is ready for its first cook.
Troubleshooting: When Good Woks Go Bad
The Sticky, Gummy Residue
Symptom: Your wok feels tacky or has a thick, rubbery coating.
Cause: The #1 culprit is applying oil too thickly. The oil couldn’t fully carbonize and instead formed a sticky polymer.
Fix: You must strip it. Place the wok back in the oven at 500°F (260°C) for 1 hour. The high heat will often burn off the sticky layer, leaving a dry, cured patina underneath. If that fails, you’ll need to return to bare metal: scrub vigorously with steel wool and hot, soapy water, rinse, dry, and start the seasoning process over, remembering the “less is more” rule.
Rust Spots
Symptom: Orange or brown spots appear, often in a pattern where water pooled.
Cause: The seasoning layer was compromised. This can happen from soaking, using soap initially, or from a thin spot in the layer where moisture reached the bare metal.
Fix: Scrub the rust away with steel wool until you see clean metal. Dry the wok thoroughly. Apply a micro-thin layer of oil to the affected area and spot-season: heat the wok on the stovetop until smoking hot, let it cool, and wipe. For extensive rust, a full oven re-seasoning cycle is best.
Uneven or Patchy Color
Symptom: The wok is a mix of dark patches and light, bare metal.
Cause: Often from the stovetop method’s uneven heat. With oven seasoning, this usually means the oil wasn’t spread evenly in the first thin layer.
Fix: Don’t panic. This is the most common starting point. The patina will even out dramatically with the first few uses. As you cook, the metal spatula will scrape high spots and build up low spots. Simply continue to cook with care, using ample oil, and the layer will homogenize.
From Seasoned Surface to Cooking Mastery: First Use & Long-Term Care
Your First Cook: The Ritual
Your wok is now preseasoned and ready. For the first 5-10 cooks, you are building the final, cooking-specific layer. Heat the wok over high heat until a drop of water sizzles and evaporates instantly. Add a high smoke-point oil (like avocado or peanut) and swirl to coat. Add your ingredients. Use a metal wok spatula and scrape the surface constantly. This action is part of the seasoning process. After cooking, do not use soap initially. Pour out any food, add very hot water, and use a soft brush or non-metal scrubber to loosen bits. Rinse with hot water, dry immediately on a warm burner or with a towel, and apply a whisper-thin coat of oil while still warm. Store in a dry place.
The Daily Maintenance Routine
A properly maintained wok is astonishingly simple. After cooking, let it cool slightly. Scrape out any food residue with your spatula. Rinse under very hot running water using a bamboo brush or soft sponge. No soap. The hot water and scraping action are sufficient. For stubborn bits, use a paste of coarse salt and a little oil as a gentle abrasive. Rinse. Dry immediately and completely. The easiest way is to place the wok on a stove burner set to low for 2-3 minutes. This evaporates all traces of moisture. Once cool, store in a dry cabinet. A light coating of oil is optional for long storage but not needed for frequent use.
When to Re-Season
You’ll know it’s time when food starts to stick more than usual, or the surface looks dull and grey instead of black and slick. A full re-seasoning is also needed if you ever use soap, leave it wet, or notice rust. For routine maintenance, a “top-up” is enough: after your normal hot-water wash and dry, heat the wok on high, add a drop of oil, swirl to coat, and let it smoke for a minute. Cool and wipe. This quick process every month or so keeps the patina in peak condition.
Conclusion: Your Wok’s Journey Has Just Begun
Seasoning a wok in the oven is an investment of time that pays dividends for a lifetime. That beautiful, black, mirror-like surface you see on a chef’s well-loved wok wasn’t bought—it was earned, one thin layer of polymerized oil at a time. The oven method gives you the best possible start, creating a solid, even foundation. From here, the true magic happens on your burner. Every stir-fry, every sear, every deglaze adds a new chapter to your wok’s story. The seasoning becomes infused with the flavors of the foods you cook, creating a unique culinary artifact. It will warp slightly, develop a proud convex bottom from the heat, and become perfectly tailored to your stove and your cooking style. Treat it with respect—clean it with care, dry it thoroughly, and cook on it often. In return, it will provide you with unparalleled cooking performance, a natural non-stick surface that requires no chemicals, and a piece of cookware that will genuinely become an heirloom. Now, go heat up that wok. It’s time to cook.
Frequently Asked Questions
Can I season a wok with a wooden handle in the oven?
No. The oven’s high heat will char, crack, or even ignite a wooden handle. If your wok has a wooden handle, it is likely designed to be removed. Check if it’s a screw-on type. If it is permanently attached and non-metal, you must use the stovetop seasoning method, taking care to keep the flame away from the handle as much as possible.
What if my wok has a non-stick coating from the factory?
You cannot and should not season a non-stick coated wok. The coating is a synthetic surface that will be damaged by the high heat of seasoning, releasing toxic fumes. If your wok is marketed as “pre-seasoned” but has a synthetic non-stick feel, it’s not a true carbon steel seasoning. For a carbon steel wok, any factory coating must be completely stripped off with hot, soapy water and steel wool before you begin the seasoning process.
Why is my wok smoking so much during the first few uses?
This is normal, especially with new seasoning. The oil is still stabilizing and burning off any residual impurities. Ensure you’re using oils with a high smoke point. The smoking should significantly decrease after 3-5 uses as the layer cures and becomes more stable. Always use your vent fan during this initial period.
Can I use soap on my seasoned wok?
For routine cleaning, avoid soap. Hot water and a scrub brush are sufficient and preserve the seasoning layer. However, if you absolutely must use a tiny drop of mild dish soap to remove a particularly greasy residue, it’s not a disaster. Rinse extremely well, dry immediately on a hot burner, and apply a light coat of oil. Frequent soap use will eventually degrade the seasoning, requiring a full re-seasoning.
How do I know when my wok is properly seasoned?
A properly seasoned wok will have a uniform, dark brown to black, matte finish. It will not be sticky or gummy. The true test is cooking: a fried egg should slide around with minimal oil, and food should not adhere stubbornly. The surface should have a slight texture, not be a perfectly smooth, glossy plastic-like coating. Remember, a perfect, even black color is a journey that takes years of regular use.
My wok has a small rust spot. Can I just season over it?
No. You must remove the rust first. Seasoning over rust traps moisture and the rust will continue to spread underneath the new layer. Use steel wool or a abrasive scrubber to scrub the spot until you see clean, bare metal again. Rinse, dry thoroughly, and then apply a tiny drop of oil directly to that spot. Heat the wok on the stove until the oil smokes, let it cool, and wipe. For larger rust areas, a full re-seasoning cycle is recommended.
Pingback: Calories in a Sweet Potato - kitchenandhouseware.com