Sealing a wood-burned cutting board is a critical final step to protect your artwork, prevent cracking, and ensure the board is safe for food use. You must use a food-grade sealant like mineral oil, beeswax, or a specialized board finish, applying it in thin, even coats after properly sanding and cleaning the burned surface. Proper sealing locks in the design, creates a moisture-resistant barrier, and requires periodic reapplication to maintain the board’s beauty and functionality for years.
You’ve just carefully burned a beautiful design into a piece of maple or walnut. The contrast is stunning, the lines are crisp, and you can already picture it on your kitchen counter, holding a loaf of fresh bread or a block of cheese. But before you slice that first tomato, there’s one absolutely non-negotiable step: sealing. A wood-burned cutting board without a proper seal is like a beautiful car without paint—exposed to the elements and destined for rapid deterioration. Sealing transforms your artistic project into a functional, durable, and safe kitchen tool. This guide will walk you through every single step, from choosing the right product to applying it like a pro, ensuring your hard work lasts for decades.
Key Takeaways
- Sealing is Essential: It protects the wood from moisture, warping, and bacterial growth while preserving the burned design’s contrast and detail.
- Food-Safe Only: Always use sealants specifically labeled as food-safe or food-grade. Never use standard wood finishes like polyurethane or varnish on a cutting board.
- Prep is Half the Battle: Thoroughly sanding with fine-grit paper and removing all soot/debris creates the ideal surface for the sealant to penetrate and adhere.
- Thin Coats Win: Apply sealant in 2-3 very thin, even coats, allowing proper drying/curing time between each, rather than one thick, sticky layer.
- Maintenance is Key: Even the best sealant wears off. Reapply your chosen oil or wax monthly or when the wood looks dry to maintain protection.
- Curing ≠ Drying: “Drying” means the surface is touch-dry; “curing” means the sealant has fully hardened. Respect full cure times (often 24-72 hours) before using the board heavily.
📑 Table of Contents
- Why Sealing a Wood-Burned Board is Absolutely Non-Negotiable
- Choosing the Right Sealant: Food-Safe Options Explained
- The Step-by-Step Sealing Process: From Burned Board to Beautiful Tool
- Common Mistakes That Ruin a Good Burn (And How to Avoid Them)
- Long-Term Care: Keeping Your Board Beautiful for Years
- Advanced Tips for the Perfectionist: Enhancing the Burn and Finish
- Conclusion: Your Art, Protected
Why Sealing a Wood-Burned Board is Absolutely Non-Negotiable
Let’s start with the “why.” Wood burning, or pyrography, creates a beautiful design by essentially charring the top layer of wood fibers. This charred layer is delicate and porous. Without a sealant, three main things will happen very quickly. First, the board will absorb moisture from food, washing, and humidity. This causes the wood to swell, shrink, and eventually warp or crack. Second, food particles, juices, and bacteria will penetrate deep into the burned grooves and the porous wood, making sanitization nearly impossible. Third, the beautiful dark burn lines will fade and blur as oils and moisture stain the surrounding wood, ruining the contrast you worked so hard to achieve. Sealing fills these pores and coats the surface, creating a protective barrier against all three threats. It locks in the design’s vibrancy and makes the board hygienic for its intended use.
The Difference Between Sealing, Oiling, and Finishing
You’ll hear these terms used interchangeably, and that’s okay for our purposes, but there’s a subtle distinction. “Oiling” typically refers to using a penetrating oil like mineral oil or tung oil that soaks into the wood fibers. “Waxing” creates a surface-level protective film. “Finishing” often implies a film-forming product like a varnish. For cutting boards, we almost always use a combination: a penetrating oil to condition the wood from within, sometimes followed or combined with a wax for a slightly more water-resistant top layer. We avoid true film-forming finishes because they can chip and flake into food, which is a major safety hazard.
Choosing the Right Sealant: Food-Safe Options Explained
This is the most important decision you’ll make. The rule is simple: if it’s not explicitly labeled food-safe or food-grade, it does not belong on a cutting board. Your skin will contact it, and food will be sliced on it. Here are your best and safest options, ranked from most common to most specialized.

Visual guide about How to Seal Cutting Board After Wood Burning
Image source: thekitchenix.com
1. Mineral Oil (The Gold Standard)
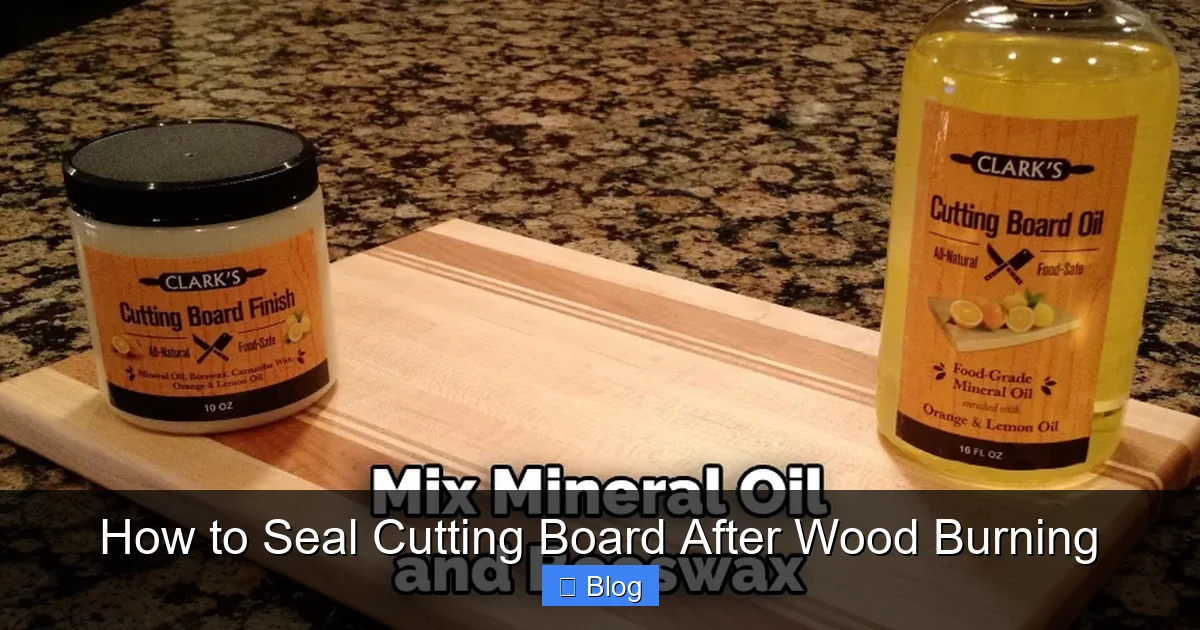
Pure, odorless, food-grade mineral oil is the undisputed champion for cutting board maintenance. It’s a non-drying, penetrating oil that doesn’t go rancid (unlike vegetable oils), is completely inert, and is FDA-approved for food contact. It won’t create a hard surface film; instead, it displaces water in the wood cells, keeping the wood supple and preventing cracking. It’s the foundation of almost every cutting board care routine. Brands like Howard Products’ Butcher Block Conditioner (which is mineral oil with some wax) or simple USP-grade mineral oil from a pharmacy are perfect.
2. Beeswax & Carnauba Wax Blends
These are often sold as “board wax” or “butcher block wax.” They are typically a blend of food-grade beeswax and carnauba wax (a harder, plant-based wax) suspended in a solvent like mineral oil. You apply it to a clean, dry board, let it sit, and buff it to a soft sheen. The wax fills the surface pores and provides a slight, sacrificial water-resistant layer. It’s excellent for a final polish after oiling or as a standalone maintenance step. It gives the board a beautiful, subtle glow and a slightly slicker feel than oil alone.
3. Walnut Oil & Other Food-Grade Oils (Use with Caution)
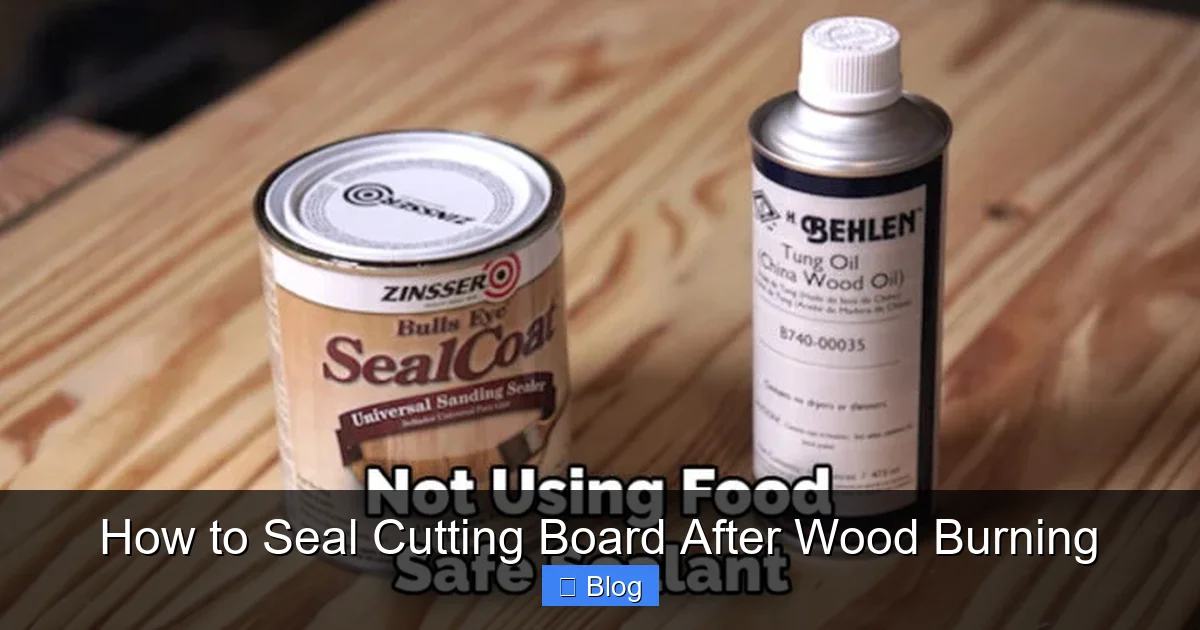
Pure, food-grade walnut oil is a good penetrating oil that polymerizes (hardens slightly) over time, offering a bit more surface protection than mineral oil. However, it can eventually go rancid, though very slowly. Other oils like pure tung oil (must be 100% pure, not “tung oil finish”) or linseed oil (must be food-grade “polymerized” or “raw”) are also used. Critical Warning: Never use cooking oils (olive, vegetable, canola). They will become sticky, attract dust, and absolutely will go rancid, ruining the board’s smell and taste. Always verify the product is specifically sold for cutting board use.
4. Commercial Cutting Board Finishes
Products like Howard Products’ Cutting Board Oil or Blue River Butchers Block Oil are specifically formulated blends, usually of mineral oil and other food-safe conditioners. They are convenient, effective, and take the guesswork out of mixing. They are a fantastic, foolproof choice for beginners.
What to AVOID at All Costs
Standard polyurethane, lacquer, shellac, varnish, and even “food-safe” epoxy resins (unless specifically designed for cutting boards and fully cured) are not suitable. These create a hard, plastic-like film. When your knife cuts into this film, it will score and eventually chip, meaning plastic particles could end up in your food. They also prevent the wood from “breathing,” which can trap moisture inside and cause the board to warp from the inside out. Stick to penetrating oils and waxes.
The Step-by-Step Sealing Process: From Burned Board to Beautiful Tool
Now, let’s get our hands dirty. This process assumes your board is already wood-burned and any ash/soot has been lightly brushed off. We will start from that point.
Visual guide about How to Seal Cutting Board After Wood Burning
Image source: thekitchenix.com
Step 1: The Critical Prep – Sanding and Cleaning
This step cannot be skipped. The burned surface will have a layer of loose carbon and potentially uneven char. You need to create a uniformly smooth surface for the sealant to work on.
- Sand: Start with 220-grit sandpaper, moving to 320-grit for a final silky-smooth feel. Always sand with the grain of the wood. For intricate burned areas, you can use a small piece of sandpaper or a sanding sponge to get into crevices. The goal is to remove the loose, flaky top layer of the burn without sanding away all your design. You’ll see the wood dust turn from black to the natural wood color—that’s your cue you’ve removed the loose char.
- Clean: After sanding, the board will be covered in fine, dark dust. Use a vacuum with a brush attachment to remove all dust from the surface and, crucially, from the burned lines. Follow with a slightly damp (not wet) cloth and wipe the entire board. Let it dry completely. Any moisture trapped under the sealant will cause problems.
Step 2: Applying the First Coat of Sealant (Oil)
For this guide, we’ll use pure mineral oil as our base. It’s the most foolproof and universal.
- Pour a generous amount of oil onto the board. You can’t use too much at this stage.
- Using a clean, lint-free cloth (an old t-shirt works great) or your fingers, rub the oil vigorously into the wood. Pay special attention to the burned lines—massage the oil into every crevice. The wood will absorb the oil greedily. Don’t be shy.
- Let the oil soak in for at least 30 minutes, or even a few hours. You’ll see some areas look drier than others; those spots need more oil.
- Take a fresh, dry cloth and buff off any excess oil that hasn’t been absorbed. The board should look slightly damp, not swimming in oil.
Step 3: The Curing Wait (The Hardest Part)
Place the board in a well-ventilated, dust-free area. Let it sit. For mineral oil, “curing” is mostly about the solvent (if any) evaporating and the oil settling. You can often handle it in a few hours, but for maximum penetration, 12-24 hours is ideal. If you’re using a product that includes wax or a drying oil, follow the manufacturer’s specific cure time (often 24-72 hours). Do not stack things on it or use it during this time.
Step 4: Optional Wax Topcoat for Extra Protection
Once the oil is fully cured (the board feels dry to the touch), you can apply a wax for a slightly more water-resistant surface and a beautiful sheen.
- Use a soft cloth to apply a small amount of board wax or a beeswax/carnauba blend.
- Rub it in using small, circular motions, covering the entire surface and edges.
- Let it haze over for 10-15 minutes.
- Buff vigorously with a clean microfiber cloth. The friction will melt the wax and create a smooth, glossy finish. You should be able to see your reflection faintly in a well-buffed board.
Step 5: The Final Test and First Use
After the final cure, do a water test. Place a few drops of water on the board. If they bead up and sit on top, your seal is good. If they soak in immediately, you need another coat of oil. For the first week or so, avoid submerging the board in water or running it through the dishwasher. Hand wash only with mild soap, dry immediately, and stand it on its edge to air dry completely.
Common Mistakes That Ruin a Good Burn (And How to Avoid Them)
Even with the right products, mistakes happen. Here are the most frequent pitfalls and how to sidestep them.
Visual guide about How to Seal Cutting Board After Wood Burning
Image source: thekitchenix.com
Mistake 1: Skipping the Sanding Step
You think the burned surface is “fine” as-is. This is the #1 error. The loose soot will mix with your sealant, creating a dirty, gritty paste that never cures properly and will rub off onto your food. Always sand. Always clean.
Mistake 2: Using the Wrong “Food-Safe” Product
You grab “food-safe mineral oil” from a hardware store, but it’s in a spray bottle with propellants and other chemicals. Or you use “food-grade tung oil” that is actually a blend with varnish. Always read the label. It should say something like “100% pure food-grade mineral oil” or “safe for food contact surfaces.” When in doubt, buy from a kitchenware or woodworking store that specializes in board care.
Mistake 3: Applying Thick, Goopy Coats
More is not better. A thick coat of oil or wax will never cure properly. It will stay sticky, attract dust, and feel gross. The magic is in multiple thin coats. If it feels like you’re applying lotion to very dry skin, you’re doing it right. The wood will tell you when it’s had enough by refusing to absorb more.
Mistake 4: Rushing the Curing Process
You oil the board in the morning and want to use it for dinner that night. Impatience leads to a tacky surface that will scratch easily and transfer oil to food. Respect the cure time. For a board that will see heavy, daily use, waiting a full 72 hours after the final coat is the professional standard.
Mistake 5: Neglecting the Edges and End Grain
You only oil the flat top surface. The edges and especially the end grain (the exposed circles at the ends of the board) are the most vulnerable to moisture absorption because the wood fibers are open there. These areas absorb liquid like a sponge. Be sure to liberally apply sealant to every surface, including the sides and ends. The end grain may require an extra coat.
Long-Term Care: Keeping Your Board Beautiful for Years
Sealing isn’t a one-and-done event. It’s a maintenance ritual.
The Monthly Refresh
Every 3-4 weeks (or whenever the board looks dry or feels rough), give it a quick refresh. Wash it with mild soap, dry it thoroughly, and apply a fresh thin coat of mineral oil. Let it soak in overnight. This simple habit prevents the wood from ever becoming parched and cracked.
Deep Cleaning and Re-Sealing
If your board gets really smelly (from garlic, onions, etc.) or stained, you can do a deep clean. Make a paste of coarse salt and lemon, scrub it in, rinse, and dry. Then, sand the entire surface lightly with 320-grit paper to remove the top layer of stained wood and open the pores again. Clean the dust and proceed with the full sealing process (2-3 coats of oil). This will essentially give you a fresh start.
Storage: The Often-Forgotten Factor
Never store a cutting board flat on a counter or in a drawer where air can’t circulate. Store it on its edge or in a rack. This allows air to flow around all surfaces, preventing moisture buildup and warping. Keep it out of direct sunlight or near the stove/dishwasher, where heat and steam are constant.
Advanced Tips for the Perfectionist: Enhancing the Burn and Finish
Once you’ve mastered the basics, these tips will elevate your work.
Pre-Staining the Wood Before Burning
For a dramatic effect, apply a very light coat of a natural, food-safe wood stain or even a diluted coffee or tea solution to the board *before* you burn. The burned areas will turn a deep, rich black, while the unstained wood will be a warm golden brown, creating incredible depth. Test this on a scrap piece first! Ensure any pre-stain is completely dry before burning.
Layering Sealants for Maximum Protection
For a board that will see heavy, wet use (like for meat or next to the sink), consider this pro method: Apply 2-3 coats of pure mineral oil, allowing each to fully cure. Then, apply 1-2 thin coats of a dedicated board wax or a beeswax/mineral oil blend. The oil penetrates and conditions; the wax forms a slick, sacrificial top layer that is easier to wipe clean and provides a first defense against spills. Re-wax the top layer monthly, and re-oil the board quarterly.
Troubleshooting: A Sticky or Tacky Board
If your board feels sticky after curing, you applied too much product, or it didn’t cure in a dust-free, warm environment. The solution is often to just wait longer—some oils take up to a week to fully harden. If it’s still tacky after a week, you may need to lightly sand the surface with 320-grit paper to remove the uncured film, clean the dust, and re-apply a much thinner coat.
Conclusion: Your Art, Protected
Sealing your wood-burned cutting board isn’t an afterthought; it’s the final, vital act of turning a piece of art into a functional heirloom. By choosing the right food-safe products, committing to proper preparation, and embracing the patience required for thin coats and full curing, you create a barrier that will let your burned design shine for years of chopping, serving, and displaying. Remember, the care you give it after the burn is just as important as the burn itself. A well-maintained board tells a story—of craftsmanship in the fire and dedication in the finish. Now, go forth, seal with confidence, and slice away.
Frequently Asked Questions
Can I use olive oil or vegetable oil to seal my cutting board?
No. While food-grade, cooking oils like olive or canola oil will eventually turn rancid, developing an unpleasant odor and taste that will permeate your board. They also tend to be sticky and attract dust. Always use non-drying, food-grade mineral oil or a product specifically formulated for cutting boards.
How often should I re-oil my wood-burned cutting board?
As a general rule, apply a maintenance coat of mineral oil every 3-4 weeks. If the board looks dry, feels rough, or you notice water no longer beading on the surface, it’s time to oil it immediately. Boards used daily for wet foods may need oiling more frequently.
What’s the difference between mineral oil and cutting board wax?
Mineral oil is a penetrating oil that soaks into the wood fibers, conditioning it from within and preventing drying/cracking. Cutting board wax (usually a beeswax/carnauba blend) sits on the surface, creating a slightly more water-resistant, glossy film. For best results, many people use oil as a base conditioner and then apply a wax topcoat for extra surface protection and sheen.
Do I need to sand the board before sealing if it’s already smooth from burning?
Yes, absolutely. The burning process creates a layer of loose, flaky charcoal and soot. You must sand with fine-grit paper (220-320) to remove this unstable layer and create a uniformly smooth, clean surface. Sealing over loose debris will result in a gritty, flaking finish.
Can I use regular polyurethane or varnish on my cutting board?
Absolutely not. These are film-forming finishes that create a hard, plastic-like coating. Knife cuts will score and eventually chip this film, potentially sending plastic particles into your food. They also trap moisture inside the wood, leading to warping. Only use penetrating oils and food-safe waxes on cutting boards.
How long do I need to wait before using the board after sealing?
For a board sealed with just mineral oil, you can often use it lightly after 12-24 hours. For best results, especially with a wax topcoat or a blended finish, wait a full 72 hours before subjecting it to heavy chopping, wet foods, or washing. This ensures the product has fully cured and is at its most durable.