Rising bread in your oven is a simple yet powerful technique to create the perfect environment for yeast to work its magic. By controlling a warm, draft-free space with optimal humidity, you eliminate guesswork and achieve consistent, beautiful loaves. The key is precise temperature (typically 80-90°F), gentle steam, and knowing exactly when your dough has finished its final rise. Avoid common pitfalls like over-proofing or a dry crust by following a few essential steps, and transform your homemade bread from good to extraordinary.
There’s a moment every home baker dreams of: sliding a perfectly risen, beautifully domed loaf of bread into a blazing hot oven, watching it spring upward with glorious oven spring, and pulling from the heat a golden, crackly-crusted masterpiece. The secret to that moment? It often happens long before the oven ever gets hot. Learning how to rise bread in oven is the single most transformative skill you can add to your baking repertoire. It’s the difference between a dense, flat hockey puck and a light, airy, bakery-style boule. Forget unpredictable room temperatures and drafts. Your oven can be turned into a professional-grade proofing chamber with just a little know-how. This guide will walk you through every detail, from the science of fermentation to the foolproof steps for achieving that perfect final rise, every single time.
Key Takeaways
- Your oven is a proofing cabinet: Turning your oven OFF and using just the oven light or a separate low-heat source creates a perfectly stable, warm, and draft-free environment ideal for dough fermentation.
- Temperature is non-negotiable: Aim for a consistent 80-90°F (27-32°C). Too hot kills yeast; too cold slows it down. Use an oven thermometer—don’t trust the dial.
- Humidity is the secret weapon: A steamy environment prevents the dough surface from drying out and forming a tough “skin,” allowing for maximum oven spring. A pan of hot water is the easiest method.
- Visual and tactile cues over the clock: Learn to recognize a properly proofed loaf: it should look puffy, feel airy and jiggly, and pass the “finger test” (a gentle poke should slowly spring back).
- Preheat for baking, not proofing: Never preheat the oven *with* the dough inside for the final rise. The rising happens in a cold or very low-heat oven, then you bake in a fully preheated oven.
- Different doughs need different timelines: Enriched doughs (with butter, eggs) rise faster than lean doughs (just flour, water, yeast, salt). High-hydration artisan loaves are more delicate and require closer monitoring.
- Patience prevents collapse: An over-proofed dough has overstretched its gluten network and will collapse in the oven. When in doubt, slightly under-proofed is better than over-proofed.
📑 Table of Contents
- The Science Behind the Perfect Rise: Why the Oven?
- Step-by-Step: How to Rise Bread in Oven (The Foolproof Method)
- Mastering Temperature and Humidity: The Two Pillars of Success
- Common Pitfalls and How to Avoid Them
- Advanced Techniques and Special Considerations
- From Proof to Plate: The Final Steps and Storage
- Conclusion: Your Oven, Your Secret Weapon
The Science Behind the Perfect Rise: Why the Oven?
Before we talk about the “how,” let’s quickly understand the “why.” Bread rises because of yeast—a living organism that consumes sugars in your dough and produces carbon dioxide gas and alcohol. This gas gets trapped in the gluten network you developed during kneading, causing the dough to expand. This final rise, or “proofing,” is the last chance for your dough to develop flavor, texture, and volume before the heat of the oven sets its structure forever.
The Ideal Environment: Warm, Humid, and Still
Yeast is most active in a specific temperature range, typically between 75°F and 85°F (24°C and 29°C). Below that, it works sluggishly, leading to a long, flat rise. Above 90°F (32°C), the yeast starts to die off, and the dough can become overly alcoholic and sour. Your kitchen counter is rarely this consistent. It might be cool in the morning, drafty by the window, or humid in the afternoon. The oven, with its insulated walls and ability to hold a steady temperature from a single light bulb or a quick burst of heat, provides the perfect sanctuary. Furthermore, adding humidity to this environment is crucial. A dry surface forms a tough skin that restricts expansion. A humid environment keeps the dough’s surface pliable and elastic, allowing it to stretch to its maximum potential as the gases expand.
Step-by-Step: How to Rise Bread in Oven (The Foolproof Method)
Now, for the practical part. Here is a detailed, reliable method for using your oven as a proofing box. This technique works for nearly all yeast-leavened breads, from sandwich loaves to sourdough boules.
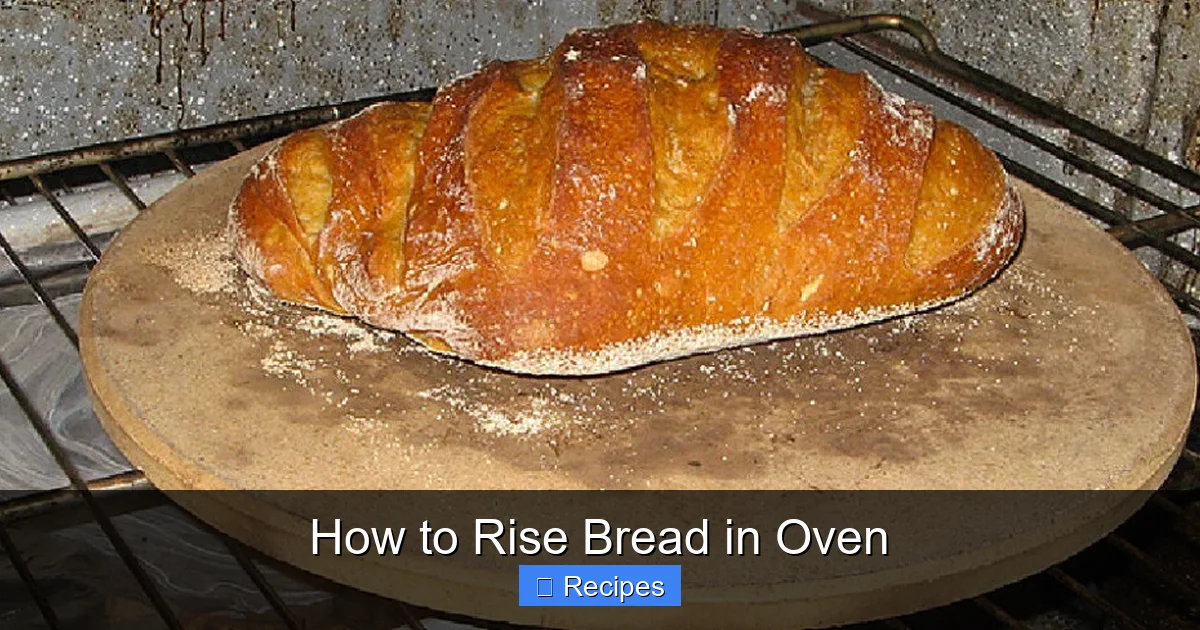
Visual guide about How to Rise Bread in Oven
Image source: thekitchenix.com
Step 1: Prepare Your Dough and Shape It
Complete your recipe’s mixing, kneading, and first rise (bulk fermentation) as directed. After the first rise, gently deflate the dough, shape it into its final form (a boule, batard, loaf pan, etc.), and place it on a piece of parchment paper or into a well-floured proofing basket (banneton). If using a loaf pan, place the shaped dough directly into the greased pan.
Step 2: Create the Oven Proofing Environment
This is the critical step. You have two primary methods, both excellent:
- The Oven Light Method (Most Common & Easiest): Place your shaped dough on the middle rack. On the rack below it, place an empty, oven-safe metal pan or baking sheet. Turn the oven ON to its lowest setting for just 1-2 minutes, then TURN IT OFF. This pre-warms the oven walls slightly. Now, turn the oven light ON and CLOSE THE DOOR. The small incandescent bulb (not LED, which produces little heat) will generate enough gentle warmth to maintain a perfect proofing temperature. This is the most hands-off, consistent method.
- The Hot Water Pan Method: With the oven OFF, place your shaped dough on the middle rack. On a separate rack below it (or on the bottom of the oven), place a sturdy metal pan or cast iron skillet. Carefully pour about 2-3 cups of freshly boiled water into this pan. Quickly close the oven door. The steam from the hot water will both heat the air and create a humid environment. You may need to reheat the water every 45-60 minutes for a long proof.
Pro Tip: Regardless of method, always use an oven thermometer placed inside (on a rack) to verify the actual temperature. Aim for 80-90°F (27-32°C). Adjust by leaving the light on longer for more heat or using less hot water.
Step 3: The Proofing Wait – Monitor, Don’t Just Watch the Clock
Set a timer for half the recommended proofing time from your recipe. Do not constantly open the door, as this lets heat and humidity escape. When the timer goes off, check your dough. It should have visibly increased in size by about 25-50%. The true test is the finger test: Lightly flour your fingertip and gently press about 1/2 inch into the dough’s side. If the indentation springs back slowly and leaves a small dent, it’s perfectly proofed. If it springs back instantly, it needs more time. If it collapses or doesn’t spring back at all, it’s over-proofed and should be baked immediately (it will have less oven spring).
Step 4: The Bake – Preheat Properly
Once your dough is perfectly proofed, carefully remove it from the oven. Now, and only now, preheat your oven to the full baking temperature called for in your recipe (usually 425°F – 475°F / 220°C – 245°C). Place your baking stone or sheet in the oven during preheating if using one. Once preheated, score the loaf if desired, and quickly transfer the dough (on its parchment) to the hot baking surface. Add steam to the oven for the first 10-15 minutes of baking (by throwing a half-cup of water into a pre-heated pan or spraying the walls) to replicate that humid environment and maximize crust development.
Mastering Temperature and Humidity: The Two Pillars of Success
Understanding these two elements will solve 90% of your proofing problems.
Visual guide about How to Rise Bread in Oven
Image source: eu.simply-bread.co
Finding and Maintaining the “Goldilocks Zone”
That sweet spot of 80-90°F is ideal for most doughs. However, there are nuances. Sourdough breads, which often have a longer, colder fermentation, can sometimes benefit from a slightly lower proofing temp (78-82°F) to develop more complex flavor. Enriched doughs with sugar and fat (like brioche) can tolerate and sometimes prefer the higher end of the range (85-90°F) as the sugar feeds the yeast aggressively. Always start with your recipe’s guidance, then use your thermometer and finger test to fine-tune.
Humidity Hacks: From Simple to Pro
The easiest way is the pan of hot water mentioned above. For even more steam, you can:
- Spray the inside of the oven door with a water mist bottle right after placing the dough in.
- Place a cast iron skillet on the bottom rack of the oven during preheating. When you load the dough, throw 3-4 ice cubes into the hot skillet for a burst of steam.
- For a truly professional setup, some bakers place a small, clean kitchen towel on the bottom rack and pour a cup of boiling water over it just before closing the door.
The goal is to create a damp, misty atmosphere, not a swimming pool. Condensation should lightly bead on the oven walls and door.
Common Pitfalls and How to Avoid Them
Even with the perfect setup, things can go wrong. Here’s how to diagnose and fix the most common issues when you rise bread in oven.
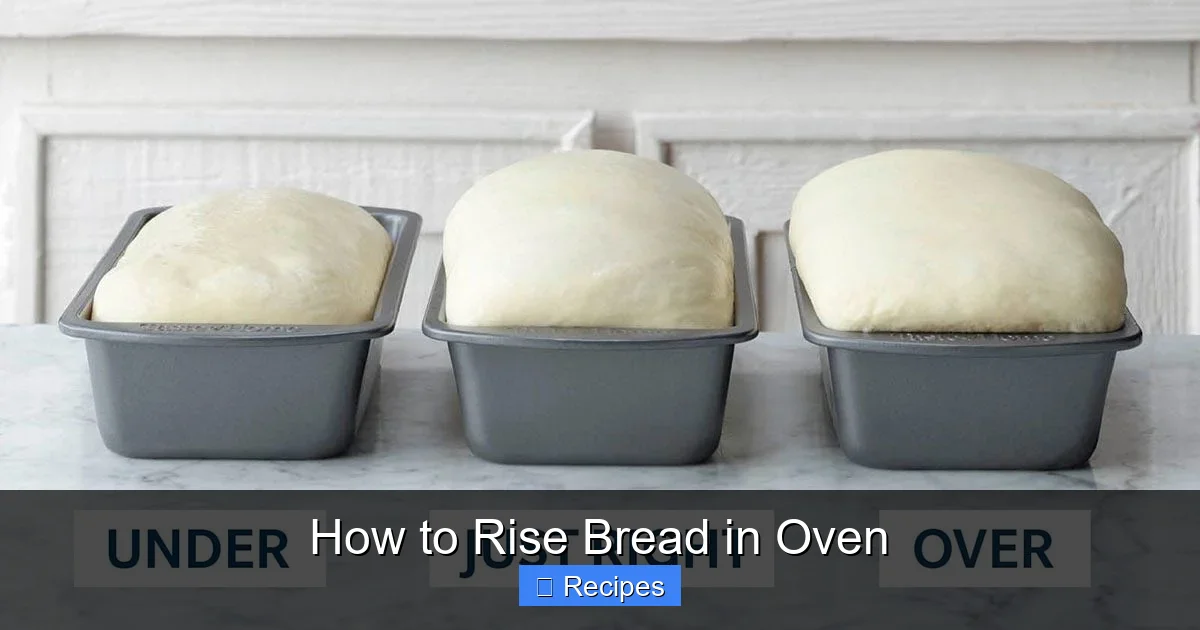
Visual guide about How to Rise Bread in Oven
Image source: tasteofhome.com
Over-Proofing: The #1 Reason for Flat Bread
Symptom: Dough rises dramatically, then collapses in the oven, producing a flat, dense loaf with a tight crumb.
Causes: Proofing for too long, temperature too high (yeast works too fast and exhausts itself), or a very high-hydration dough that’s delicate.
Solution: Check your dough earlier. Use the finger test religiously. If you suspect over-proofing, bake it immediately. To rescue an over-proofed dough, you can sometimes gently reshape it and give it a shorter, second proof, but results are mixed. Prevention is key.
Under-Proofing: Dense and Tight
Symptom: Bread has little oven spring, a dense crumb, and may taste “yeasty.”
Causes: Proofing time too short, temperature too low, or dough was too cold when it went into the oven.
Solution: Ensure your dough is at room temperature before shaping. Verify your oven’s actual temperature with a thermometer. Allow for a full, patient proof. A slightly under-proofed loaf will still spring in the oven, but it won’t reach its full potential.
A Dry, Tough Crust During Proofing
Symptom: The surface of the dough forms a leathery skin that cracks during baking.
Causes: Lack of humidity in the proofing environment.
Solution: This is 100% a humidity issue. Implement one of the steam methods described above. Also, ensure your dough is properly covered if proofing in a basket—a plastic bag or damp towel over the top helps.
Advanced Techniques and Special Considerations
Once you’ve mastered the basics, you can adapt the oven-proofing method for more complex baking.
Cold Proofing (Retardation) in the Refrigerator
Many artisan recipes call for a long, cold proof in the fridge (12-48 hours). This slows fermentation dramatically, developing incredible flavor. You can still use your oven here! Simply place the covered dough in the oven and turn the oven light ON. The light will generate just enough warmth (often 5-10°F above fridge temp) to keep the dough from becoming too sluggish, while the oven itself provides a stable, dark environment. No hot water pan is needed for cold proofing.
Proofing Different Dough Types
High-Hydration Artisan Doughs (75%+ hydration): These are very slack and fragile. Use a well-floured banneton for support. The oven proofing method is ideal as it prevents drafts from deflating your fragile loaf. Handle with extreme care when transferring.
Enriched Doughs (Brioche, Challah): These are richer and often proof faster. Monitor them closely, as they can over-proof quickly. The consistent oven environment is perfect for achieving an even, uniform rise.
Gluten-Free Doughs: These often lack the elastic gluten network. They benefit immensely from a warm, humid proofing environment to maximize gas retention before baking. Be extra gentle when handling.
From Proof to Plate: The Final Steps and Storage
Your dough is perfectly proofed. Now what? The final steps are just as important.
Preheating is not optional. Your oven must be at full temperature before the dough goes in. A hot oven creates immediate “oven spring”—the rapid expansion of gases before the crust sets. Score the top of your loaf with a lame or sharp knife just before baking to control where it expands.
Bake according to your recipe, usually until deeply golden brown and the internal temperature (measured with a thermometer) reaches 190-210°F (88-99°C) depending on the bread type. Remove from the pan and let it cool completely on a rack, at least 2 hours. Slicing too soon traps steam and makes the crust soft and the crumb gummy.
Store fully cooled bread in a paper bag at room temperature for 2-3 days for a crisp crust, or in a plastic bag for a softer crust. For longer storage, slice and freeze in a heavy-duty freezer bag for up to 3 months.
Conclusion: Your Oven, Your Secret Weapon
Learning to rise bread in oven is the cornerstone of reliable, beautiful bread baking at home. It demystifies the process and puts you in complete control. You are no longer at the mercy of your kitchen’s fluctuating temperature. You are providing your dough with the consistent, warm, humid cradle it needs to reach its full potential. Start with the simple oven light method, invest in a $10 oven thermometer, and practice the finger test. Pay attention to the subtle changes in your dough. Soon, you’ll develop an intuitive sense for when it’s “just right.” This one skill will elevate every loaf you bake, turning your kitchen into a miniature artisan bakery. Now go forth, preheat that oven light, and watch your dough rise to glorious new heights.
Frequently Asked Questions
Can I use any oven to rise bread, including a toaster oven?
Yes, you can use a standard full-sized oven or a large toaster oven. The key is that it can hold a stable temperature around 80-90°F and you can control it (i.e., turn it off and leave the light on). Ensure your dough fits comfortably with the door closed. Very small countertop ovens may not maintain temperature as evenly.
What’s the best way to add humidity if I don’t have a metal pan?
You can use any oven-safe dish, like a ceramic baking dish or even a cast iron skillet. The key is that it can hold boiling water safely. A disposable aluminum pan also works well. The goal is simply to have a vessel that can contain several cups of very hot water without risk of breaking or spilling.
What if my oven’s lowest temperature is 170°F? Can I still use it?
No, 170°F is far too hot for proofing and will kill your yeast. For this method, you must turn the oven OFF and rely on the residual heat from the oven light or a pre-warmed oven. If your oven light does not produce enough warmth to reach 80-90°F (check with a thermometer), you may need to turn the oven on to its absolute lowest setting (often 100-150°F) for just 2-3 minutes, then turn it off and immediately add the dough and water pan. Monitor the temperature very closely with your thermometer.
Do I need to cover the dough while it’s rising in the oven?
Yes, absolutely. Even in a humid oven, the top surface of an uncovered dough can dry out and form a skin. If your dough is in a proofing basket, place the entire basket inside a large plastic bag and tie it loosely. If it’s on a baking sheet or in a loaf pan, loosely tent it with plastic wrap or a damp kitchen towel. This keeps the surface supple.
How do I know if my bread is over-proofed versus under-proofed before baking?
The finger test is your best friend. Gently press into the dough with a floured finger. Under-proofed: The dent springs back quickly and completely. Perfectly proofed: The dent springs back slowly, leaving a shallow indentation. Over-proofed: The dent collapses with no spring back, or the dough may deflate when you touch it. An over-proofed dough will often look overly puffy and may have large, fragile bubbles on the surface.
After rising in the oven, my bread still didn’t get much “oven spring.” Why?
This is usually due to one of three factors: 1) The dough was over-proofed before it even went in the oven, so its gluten structure was already exhausted. 2) Your oven was not preheated fully to the correct baking temperature, so the initial heat shock was insufficient. 3) You did not create enough steam in the first 10-15 minutes of baking, causing the crust to set too quickly and prevent expansion. Always preheat thoroughly and ensure strong initial steam.
Pingback: French Bread Baguette Pan - kitchenandhouseware.com