Candying nuts on the stove is a simple, rewarding process that transforms plain nuts into glossy, sweet, and crispy treats. By combining nuts with sugar and a touch of moisture, then carefully heating the mixture, you create a delicious coating that hardens as it cools. This stovetop method offers complete control, is faster than baking, and yields results far superior to most store-bought versions. You can customize flavors easily and make perfect candied nuts for snacking, salads, or desserts in under 30 minutes.
There’s something magical about a perfectly candied nut. That deep, glossy sheen. The audible snap when you bite into it. The initial burst of sweetness followed by the rich, toasty flavor of the nut itself. Whether scattered over a vibrant salad, served with cheese, stirred into oatmeal, or enjoyed by the handful, candied nuts feel like a gourmet luxury. But what if I told you that making them at home is not only easy but also gives you a superior product to almost anything you can buy? And the best part? You don’t need an oven. All you need is your stove, a few simple ingredients, and about 20 minutes of your time.
For years, I relied on the oven method for candied nuts, and while it works, it has its pitfalls—uneven coating, soft centers, or burnt sugar on the baking sheet. Then I discovered the classic stovetop technique, and it was a game-changer. This method, often used for making pralines and brittles, involves cooking the sugar syrup directly with the nuts in a pan. The nuts toast gently in the hot sugar as it caramelizes, resulting in a coating that is inseparable from the nut, incredibly crisp, and beautifully uniform. It’s a technique that feels like a culinary superpower once you master it. So, let’s roll up our sleeves and learn exactly how to candy nuts on stove.
Key Takeaways
- Control is Key: Stovetop candying gives you real-time control over heat and texture, preventing burning and ensuring a perfect, crisp coating.
- Simple Ingredients: You only need nuts, granulated sugar, and water (or another liquid like maple syrup). A pinch of salt or spice elevates the flavor.
- The Right Pan Matters: Use a heavy-bottomed, light-colored saucepan (like stainless steel or enameled) for even heat distribution and to easily monitor sugar color.
- Temperature is Everything: The sugar syrup must reach the hard-crack stage (300°F/149°C) for nuts that are coated and crisp, not sticky. A candy thermometer is highly recommended.
- Proper Cooling is Crucial: Spread the hot nuts on a parchment-lined baking sheet immediately after cooking. Let them cool completely undisturbed to achieve maximum crispness.
- Storage for Longevity: Store fully cooled candied nuts in an airtight container at room temperature for up to 2 weeks. Humidity is their enemy.
- Endless Customization: Experiment with different nuts (pecans, almonds, walnuts), spices (cinnamon, cayenne), or extracts (vanilla, almond) for unique flavor profiles.
📑 Table of Contents
Why Choose the Stovetop Method?
Before we dive into the recipe, let’s talk about why the stovetop is often the superior choice for candying nuts. Understanding the “why” makes the “how” much clearer and helps you troubleshoot.
Unmatched Control and Precision
When you candy nuts in the oven, you’re essentially baking a sugar syrup onto the nuts. The heat is indirect and can be uneven, leading to some nuts being perfectly crisp while others are chewy or even burnt in spots. On the stovetop, you are in direct command. You can see the sugar melt, bubble, and change color in real-time. You can move the pan around the burner to eliminate hot spots. You can instantly adjust the heat if things are moving too fast. This control is invaluable, especially when working with sugar, which can go from perfect to ruined in seconds.
A Superior, Integrated Coating
In the stovetop method, the nuts are actively stirred and coated in the bubbling sugar syrup. This means the sugar penetrates the nooks and crannies of each nut, creating a shell that is fused to the nut’s surface. The result is a coating that doesn’t flake off or feel like a separate sugary layer. It becomes one with the nut. Oven-baked versions often have a sugar layer that can be slightly granular and separate from the nut after cooling.
Speed and Efficiency
Candying nuts on the stove is remarkably fast. From start to finish, you’re looking at 15-25 minutes, including cooling time. There’s no preheating an oven, no waiting for it to come to temperature, and no long bake time. The process is contained entirely in one pan, minimizing cleanup. For a last-minute gift or a spontaneous dessert topping, this speed is a huge advantage.
Versatility and Flavor Infusion
Cooking the nuts directly in the syrup allows for incredible flavor infusion. You can easily add spices like cinnamon, cardamom, or smoked paprika to the sugar at the beginning. A splash of vanilla extract, bourbon, or maple syrup can be stirred in at the end for a different dimension. The hot sugar acts as a vehicle, coating every surface with your chosen flavor.
Essential Ingredients and Equipment
The beauty of this recipe is its simplicity. You likely have everything you need in your kitchen right now. Using the right tools, however, will make the process smoother and more successful.
Visual guide about How to Candy Nuts on Stove
Image source: bebreak.com
The Core Ingredients: Nuts and Sugar
Nuts: You can candy almost any nut! The most popular choices are:
- Pecans: The classic for pralines. Their rich, buttery flavor and flat shape make them ideal.
- Almonds: Hold their shape well and have a firm, satisfying crunch.
- Walnuts: Their slightly bitter edge balances the sweetness beautifully.
- Pistachios: Create stunning, colorful candied nuts (use shelled, unsalted).
- Peanuts: For a homemade peanut brittle experience.
Always use raw or lightly toasted, unsalted nuts. Pre-roasted and salted nuts will interfere with the sugar syrup’s chemistry and make the final product too salty. If your nuts are raw, you can give them a quick toast in a dry pan or the oven (350°F for 8-10 minutes) before starting. This enhances their flavor but is not strictly necessary.
Sugar: Granulated white sugar is the standard. It creates a clean, sweet, and crisp coating. For a deeper, more complex caramel flavor, you can substitute up to half of the white sugar with light or dark brown sugar. Keep in mind that brown sugar contains moisture, which can slightly affect the final crispness.
Liquid: A small amount of water is needed to dissolve the sugar and create a syrup. The classic ratio is 1 cup sugar to ¼ cup water. For extra flavor, you can substitute all or part of the water with pure maple syrup, honey, or even bourbon. If using a viscous liquid like honey, you may need to add a tablespoon of water to prevent too-rapid caramelization.
Salt: A tiny pinch of fine sea salt (about 1/8 teaspoon) is not optional in my book. It doesn’t make the nuts salty; it actually heightens the sweetness and rounds out all the flavors. It’s the secret ingredient that makes professional-tasting candied nuts.
Critical Equipment
Heavy-Bottomed Saucepan: This is the most important tool. A pan with a thick, heavy base (like stainless steel or enameled cast iron) distributes heat evenly and prevents hot spots that cause sugar to burn in one area while remaining uncooked in another. A light-colored interior (stainless steel is perfect) allows you to clearly see the color change of the sugar as it caramelizes.
Candy Thermometer: While not absolutely mandatory, a candy thermometer takes the guesswork out of the process and guarantees success, especially for your first few tries. Sugar goes through precise temperature stages. For candied nuts, we need the syrup to reach the hard-crack stage (300°F / 149°C). At this temperature, a drop of syrup in cold water will break with a crisp snap. Without a thermometer, you must rely on visual cues (deep amber color, thick smoke-like bubbles), which can be tricky. I strongly recommend using one.
Silicone Spatula: A heat-resistant silicone spatula is essential for stirring the nuts and scraping the sides of the pan. Wooden spoons can retain moisture and cause sugar to seize.
Baking Sheet & Parchment Paper: You’ll need a rimmed baking sheet (a jelly roll pan) lined with parchment paper or a silicone baking mat. This is where the hot, sticky nuts will be dumped to cool. Do not use wax paper, as it can melt.
Heat-Resistant Bowl: Have a medium bowl ready to hold the nuts after they’re coated, if you prefer to transfer them from the pan before spreading.
Step-by-Step: The Stovetop Candying Process
Now, for the main event. Follow these steps closely for foolproof results. Read through them once before you start, as once the sugar is heating, there’s no time to hunt for tools.
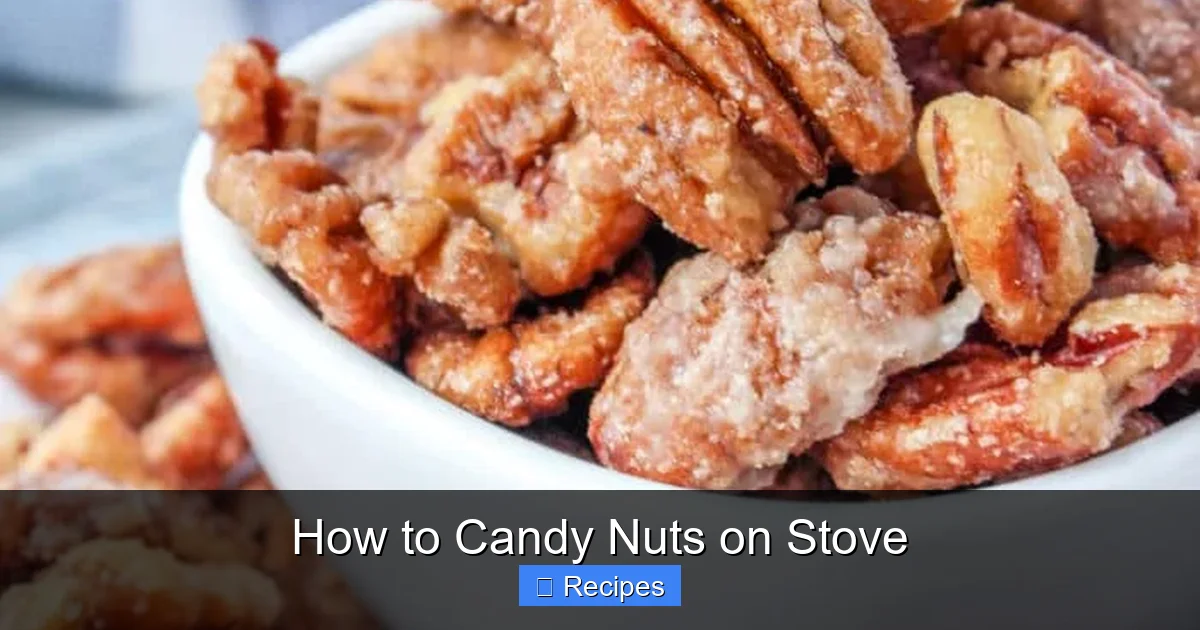
Visual guide about How to Candy Nuts on Stove
Image source: temeculablogs.com
Step 1: Prep Everything (Mise en Place)
This is non-negotiable. The cooking phase is fast and you cannot leave the stove. Before you turn on the heat:
- Measure your sugar and liquid (water, maple syrup, etc.) into the saucepan.
- Add the pinch of salt and any ground spices (like cinnamon or ginger) to the dry sugar so they dissolve evenly.
- Have your nuts measured and ready in a bowl next to the stove.
- Place your candy thermometer in the pan, ensuring the tip is submerged but not touching the bottom.
- Line your baking sheet with parchment paper.
- Clear the area around the stove of any flammable items (towels, paper).
Step 2: Dissolve the Sugar
Place the saucepan over medium heat. Stir gently with your silicone spatula just until the sugar is completely dissolved in the liquid. You’ll see the mixture become clear. Do not stir after the sugar has dissolved. Once it comes to a simmer and you’re sure all granules are gone, stop stirring. Stirring after this point can cause the sugar to crystallize back into a grainy, unusable state. Instead, you may gently swirl the pan to ensure even cooking.
Step 3: Bring to a Boil and Monitor
Allow the syrup to come to a full, rolling boil. It will bubble vigorously. You will see it begin to thicken and turn a light, golden color. This is the stage where you watch the thermometer like a hawk. The temperature will climb relatively slowly at first, then more rapidly as the water evaporates and the sugar concentration increases.
Step 4: Add the Nuts at the Perfect Moment
This is the critical step. You have two options, both effective:
- The Temperature Method (Most Reliable): When the syrup reaches 250°F (121°C, the soft-ball stage), quickly and carefully add all your prepared nuts to the pan. The syrup will bubble up dramatically—this is normal. Immediately begin stirring vigorously with your spatula to coat every nut.
- The Color/Time Method: If you don’t have a thermometer, wait until the syrup is a deep amber color (like honey or light maple syrup) and has thickened enough that the bubbles are large, slow, and smoke-like. This usually takes about 8-12 minutes on medium heat. Then, add the nuts and stir like crazy.
Why add at 250°F? Adding the nuts at this slightly lower temperature gives them a moment to toast gently in the syrup before the final push to the hard-crack stage. It helps prevent the nuts from burning during the final temperature rise.
Step 5: Cook to Hard-Crack Stage
Once the nuts are in, continue cooking and stirring constantly. The syrup will bubble intensely. The temperature will rise quickly now, from 250°F to 300°F. Keep stirring to ensure even coating and to prevent the nuts from settling and burning on the pan’s bottom. You’ll see the syrup darken further to a rich, caramel brown. When the thermometer hits 300°F (149°C), it’s go time. The mixture will be very thick, glossy, and dark amber.
Step 6: The Grand Finale: Dump and Spread
Immediately remove the pan from the heat. Working quickly but carefully (the sugar is dangerously hot), pour the entire contents of the pan onto your prepared parchment-lined baking sheet. Use the back of your spatula to gently spread the nuts into a single, even layer. They will be sticking together in clumps at first; spreading them now ensures they cool as separate, individual nuts rather than one giant, unbreakable sheet.
Step 7: Cool Completely
Let the nuts sit at room temperature, undisturbed, for at least 30-45 minutes until they are completely cool and hard. Do not try to break them apart while warm; they will be soft and sticky. Once cool, you can break apart any large clumps with your hands. The nuts should have a deep, resonant snap when broken or bitten.
Common Pitfalls and Troubleshooting
Even with a simple recipe, things can go wrong. Here’s how to identify and fix the most common issues.
Visual guide about How to Candy Nuts on Stove
Image source: i.machineryhost.com
The Sugar Crystallized (Became Grainy)
Symptom: The sugar in the pan suddenly turns opaque, cloudy, and grainy instead of clear and syrupy. It looks like wet sand.
Cause: A foreign sugar crystal (often from the side of the pan or a stirring spoon) introduced after the syrup started boiling. Stirring after the sugar has dissolved can also cause this.
Fix: Unfortunately, once crystallized, it’s very hard to salvage for a smooth coating. Your best bet is to add a splash of water, return it to low heat, and stir until the sugar dissolves completely again. Then restart the boiling process. To prevent it, ensure all sugar is dissolved before boiling, use a clean, dry spatula, and never stir once it’s boiling—just swirl the pan.
The Nuts are Sticky, Not Crisp
Symptom: After cooling, the nuts are chewy and stick to your teeth.
Cause: The sugar syrup did not reach the hard-crack stage (300°F). It likely stopped at the soft-crack or hard-ball stage (270-290°F). Humidity can also cause stored nuts to become sticky.
Fix: You must cook it hotter next time. Use a thermometer. If the nuts are already sticky, you can try re-crisping them. Spread them on a baking sheet and place in a 250°F oven for 15-20 minutes, then let cool completely on the sheet. This can drive off excess moisture.
The Nuts Burned
Symptom: Dark, bitter, blackened spots on the nuts or in the pan.
Cause: Heat was too high, or the pan was left unattended. Sugar burns quickly once it caramelizes.
The Coating is Thin or Patchy
Symptom: Some nuts have a beautiful coat, others are barely coated or bare.
Cause: Not enough syrup for the amount of nuts, or nuts were added to syrup that wasn’t hot enough, causing it to thicken too fast and clump.
Fix: Ensure you are using the correct nut-to-sugar ratio (about 3 cups nuts to 1 cup sugar). When adding nuts, make sure the syrup is at a full, rolling boil and at the correct temperature (250°F). Stir immediately and thoroughly to coat every nut.
Flavor Variations and Creative Twists
Once you’ve mastered the basic technique, the world of flavor is your oyster. Here are some fantastic ways to customize your candied nuts.
Spiced and Warm
Add 1 teaspoon of ground cinnamon, ¼ teaspoon of ground ginger, a pinch of ground cloves, or ½ teaspoon of pumpkin pie spice to the sugar at the beginning. For a Mexican twist, add ½ teaspoon of ancho chile powder and ½ teaspoon of cocoa powder with the sugar.
Citrus and Herb
Stir in 1 tablespoon of finely grated orange or lemon zest along with the nuts. A teaspoon of finely chopped fresh rosemary or thyme added in the last minute of cooking creates an elegant, aromatic treat.
Boozy and Rich
Replace 1-2 tablespoons of the water with bourbon, rum, or brandy. For a coffee flavor, add 1 teaspoon of instant espresso powder to the dry sugar. Stir in 1 teaspoon of vanilla extract or ½ teaspoon of almond extract off the heat after the nuts are coated, as high heat can bake out the flavor of extracts.
Maple and Pecan
For an all-natural, deep flavor, replace all the water with pure maple syrup. Use a combination of white and brown sugar. This creates a rich, almost toffee-like coating perfect for pecans.
Salted Caramel
After spreading the nuts on the baking sheet, sprinkle them flaky sea salt (like Maldon) over the top while the coating is still wet and sticky. The salt will adhere beautifully.
Storing and Using Your Candied Nuts
Proper storage is key to maintaining that coveted crispness.
Storage Rules
Ensure your nuts are completely cool before storing. Any residual warmth will create steam and lead to sogginess. Place them in an airtight container—a glass jar with a tight-sealing lid or a zippered plastic bag with as much air squeezed out as possible. Store in a cool, dark, dry pantry. They will keep for 2-3 weeks at their peak crispness. Do not refrigerate, as the cold air can introduce moisture. If you must store them for longer, you can freeze them in an airtight bag for up to 2 months; let them come to room temperature before opening the bag to prevent condensation.
How to Use Them
The possibilities are endless:
- As a Snack: A simple handful is pure bliss.
- On Salads: Add crunch and sweetness to green salads, beet salads, or grain bowls.
- With Cheese: Serve with a cheese board, especially with sharp cheddar, blue cheese, or brie.
- In Baking: Fold into brownie or cookie batter, or use as a topping for muffins and cupcakes.
- For Desserts: Sprinkle over ice cream, yogurt, oatmeal, or porridge.
- As a Gift: Package in a pretty jar or cellophane bag tied with a ribbon. They make a fantastic homemade present.
Conclusion
Candying nuts on the stove is a fundamental kitchen technique that every home cook should have in their repertoire. It’s a testament to the magic that can happen with just a few simple ingredients, a watchful eye, and a hot pan. You’ve learned the importance of control, the science of the sugar stages, and the critical steps to avoid common mistakes. You’re now armed with the knowledge to create glossy, crisp, flavor-packed nuts that will elevate everything from your morning yogurt to your most elegant dinner party dessert.
Don’t be intimidated by sugar. Approach it with respect—use a thermometer, stay present, and prep everything in advance. The first batch might be a practice round, but you’ll be amazed at how quickly you develop an intuitive sense for the perfect color and smell. Soon, you’ll be making these not just for yourself, but for everyone. Because there is no greater compliment than watching someone’s face light up as they hear that first, perfect snap of a candied nut you made yourself. Now go forth and candy!
Frequently Asked Questions
Can I candy nuts without a candy thermometer?
Yes, but it’s trickier. You must rely on visual and auditory cues. After adding the nuts, cook until the syrup is a deep amber color and the bubbles are large, thick, and slow (almost like smoking). The nuts should be sizzling loudly. It takes practice to get the crispness consistent without a thermometer.
My sugar crystallized and became grainy. What happened and can I fix it?
Crystallization is usually caused by stirring after the sugar has dissolved or by a contaminant (like a dirty spoon or sugar crystal from the pan’s side). To fix it, add a tablespoon of water, return to low heat, and stir constantly until the sugar dissolves completely again. Then restart the boiling process. To prevent it, dissolve the sugar fully before boiling, use a clean, dry spatula, and never stir once it boils—just swirl the pan.
Can I use pre-roasted or salted nuts?
It’s not recommended. Pre-roasted nuts can burn more easily in the hot sugar. Salted nuts will make the final product overly salty and can interfere with the sugar’s ability to form a crisp coating. For best results, use raw or only lightly toasted, unsalted nuts.
Why are my finished nuts sticky instead of crisp?
This means the sugar syrup didn’t reach the hard-crack stage (300°F). It likely stopped at a lower temperature. Use a candy thermometer to ensure accuracy. High humidity can also cause stored nuts to become sticky. If they are sticky after cooling, try re-crisping them on a baking sheet in a 250°F oven for 15-20 minutes, then let cool completely.
Can I make this recipe with a sugar substitute like erythritol or monk fruit sweetener?
It’s not recommended. Sugar substitutes behave very differently under heat. They often don’t caramelize, can have a cooling effect, and may not harden into the same crisp, glassy structure that defines a good candied nut. For authentic texture and flavor, stick with real sugar.
My nuts clumped together in one big mass. How do I prevent this?
You must spread them quickly and thoroughly on the parchment-lined sheet as soon as you dump them from the pan. The syrup is very thick and sticky. Use the back of your spatula to press and separate the nuts while the coating is still warm and pliable. If you let the clump sit without spreading, it will harden into one solid, unbreakable piece.
