Reheating a grilled cheese to regain its signature crispy exterior and molten cheese center is absolutely possible, but it requires the right technique to avoid a soggy, greasy result. The key is using dry heat methods like a skillet or oven, which re-crisp the bread while melting the cheese anew. Never rely solely on a microwave, as it steamsoftens the bread. By following specific temperature guidelines and timing for each method—skillet for single servings, oven for batches, and air fryer for speed—you can enjoy a near-fresh grilled cheese any time.
Key Takeaways
- Dry Heat is Essential: Always prioritize skillet, oven, or air fryer methods over the microwave to re-crisp the bread and properly melt the cheese without making it rubbery or greasy.
- The Skillet Method is King: For a single sandwich, a preheated skillet or griddle with a light weight (like a smaller pan) provides the most authentic, restaurant-quality crispness and even browning.
- Oven for Batch Reheating: The oven is ideal for reheating multiple grilled cheeses at once. A wire rack on a baking sheet ensures hot air circulates, preventing a soggy bottom.
- Air Fryer Offers Speed and Crisp: An air fryer reheats quickly and delivers excellent crispiness, but requires close monitoring to prevent burning, especially with thicker sandwiches.
- Microwave is a Last Resort: If you must use a microwave, do so in very short bursts with a paper towel to absorb moisture, but expect a softer, less appealing texture overall.
- Assembly Matters for Reheating: Sandwiches made with sturdy bread (sourdough, Texas toast) and cheeses that melt smoothly (cheddar, gouda, Monterey Jack) reheat far better than delicate breads or pre-shredded cheese with anti-caking agents.
- Resting is a Non-Negotiable Step: Let any reheated grilled cheese rest for 1-2 minutes after cooking. This allows the intense heat to distribute and the cheese to set slightly, preventing a scalding, runny mess when you bite in.
📑 Table of Contents
- Why Reheating Grilled Cheese is a Delicate Dance
- The Champion Method: Reheating on the Stovetop (Skillet or Griddle)
- The Batch Solution: Reheating in the Oven
- The Speedy Alternative: Reheating in an Air Fryer
- The Last Resort: Microwave Reheating (And How to Mitigate the Damage)
- Pro Tips, Troubleshooting, and Creative Twists
Why Reheating Grilled Cheese is a Delicate Dance
Ah, the grilled cheese. That sacred union of buttery, golden-brown bread and molten, velvety cheese is a simple pleasure that transcends age. But what happens when you make too much? Or when your lunchtime craving strikes hours after the perfect sandwich was assembled? Leftover grilled cheese often suffers a tragic fate: a limp, soggy, or greasy shadow of its former self. The bread loses its structural integrity, becoming a floppy carrier for separated oil, while the cheese turns into a rubbery, uneven glob. This isn’t just a matter of taste—it’s a textural and thermal science problem.
Reheating grilled cheese successfully is about reversing the degradation that occurs as it cools. As the sandwich sits, steam from the hot cheese gets trapped, moistening the interior of the bread. The butter or oil used in the initial cooking can also migrate, making the surface greasy. Our goal is to re-evaporate that trapped moisture, re-crisp the bread’s exterior, and gently re-melt the cheese without overheating it to the point of oil separation. This requires a method that applies consistent, dry heat from the outside in. Understanding this fundamental challenge is the first step toward mastering the reheat.
The Champion Method: Reheating on the Stovetop (Skillet or Griddle)
If you’re reheating a single, cherished grilled cheese, your cast-iron skillet or non-stick griddle is your best friend. This method most closely mimics the original cooking process, applying direct, conductive heat that crisps the bread beautifully while warming the cheese through. It gives you unparalleled control, allowing you to adjust heat in real-time and achieve that perfect, uniform golden-brown color.
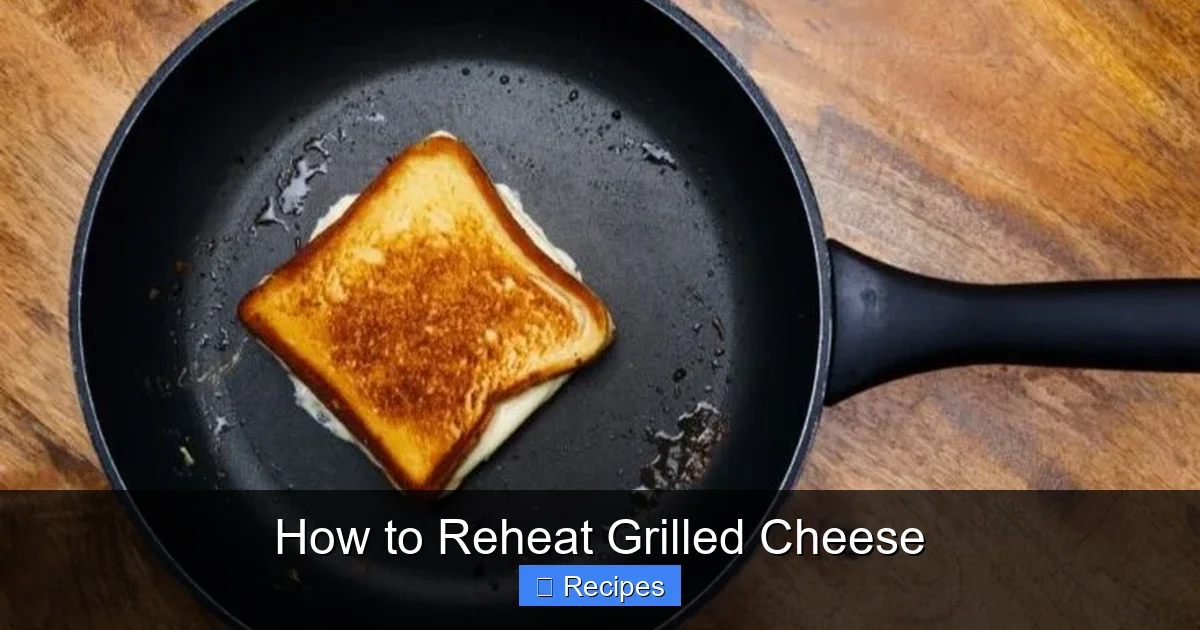
Visual guide about How to Reheat Grilled Cheese
Image source: foodiosity.com
The Step-by-Step Skillet Technique
Start by selecting a skillet that fits your sandwich snugly. A pan that’s too large allows heat to escape; one that’s too small can cause uneven cooking. Place the skillet over low to medium-low heat. This is crucial. Too high, and the bread will char before the cheese melts. While the skillet preheats (about 2-3 minutes), take your leftover grilled cheese straight from the refrigerator. For best results, let it sit on the counter for 5-10 minutes to take the chill off; this promotes more even reheating.
Place the sandwich in the dry skillet. Do not add additional butter or oil. The original cooking fats are still embedded in the bread and will render out as it heats. After 60-90 seconds, carefully flip the sandwich using a spatula. You should see the first side is now crisp and lightly browned. Now, for the pro move: find a smaller, heavy pan (like a small saucepan) or a bacon press and gently place it on top of the sandwich. This weight serves two purposes: it ensures maximum surface contact between bread and skillet for ultimate crispiness, and it gently compresses the sandwich, encouraging the cheese to melt evenly and preventing the bread from puffing up like a balloon. Cook the second side for another 60-90 seconds. If the cheese needs more help melting, reduce the heat to low and cover the skillet loosely with a lid for an additional 30 seconds to trap a small amount of steam. Let it rest for a minute before devouring.
Ideal Breads and Cheeses for Skillet Reheating
This method is forgiving but works best with sturdy breads that can handle the heat and weight without falling apart. Sourdough is a top contender—its firm crumb and tangy flavor hold up exceptionally well. Texas toast or any thick-sliced white bread is also excellent. Avoid very soft, airy breads like brioche or standard sandwich loaves; they will likely become soggy or tear.
Cheese selection is equally important. Opt for cheeses that melt smoothly and have a good oil content. Sharp cheddar is the classic for a reason. Gruyère, gouda, fontina, and Monterey Jack are all fantastic choices. A blend often works best. Critical Note: Avoid pre-shredded cheese. The anti-caking powder (usually cellulose) coated on the shreds prevents them from melting into a cohesive, creamy pool. It will instead melt into a grainy, separated mess. Always use cheese you’ve sliced or grated yourself from a block.
The Batch Solution: Reheating in the Oven
When you need to bring a whole platter of grilled cheeses back to life—perhaps for a crowd or a family movie night—the oven is your workhorse. It provides consistent, ambient heat that crisps all sides at once without requiring constant flipping. The key to oven success is maximizing airflow to prevent steam from pooling and softening the bottom crust.

Visual guide about How to Reheat Grilled Cheese
Image source: foodiosity.com
The Wire Rack Method for Ultimate Crispness
Preheat your oven to 375°F (190°C). This temperature is hot enough to quickly re-crisp the bread but gentle enough to melt the cheese without scorching it. While the oven heats, place a wire rack inside a rimmed baking sheet. The wire rack is non-negotiable for best results; it elevates the sandwiches, allowing hot air to circulate fully underneath, which is where sogginess usually starts. If you don’t have a wire rack, you can place the sandwiches directly on the baking sheet, but flip them halfway through.
Arrange the cooled grilled cheeses on the rack in a single layer with space between them. Crowding them will steam them. Place the baking sheet in the center of the oven. Reheat for 6-10 minutes, depending on thickness. After 5 minutes, check one. The bread should be crisp to the touch and visually golden. The cheese will be visibly melted and may bubble slightly at the edges. If the bread is crisping too fast before the cheese is fully melted, loosely tent the entire tray with aluminum foil for the remaining time. Once done, remove from the oven and let rest for 2 minutes on a cutting board before serving.
Toaster Oven: The Oven’s Compact Cousin
A toaster oven performs the same function as a full-size oven but more efficiently for 1-2 sandwiches. Set it to the “Bake” setting at 375°F. If your toaster oven has a “Reheat” or “Pizza” setting, those are often too gentle and will only warm, not crisp. Use the same wire rack on the baking tray technique if your toaster oven has the space. Monitor closely, as toaster ovens can have hot spots and may cook faster, especially if the heating elements are close to the food. Flip halfway through if not using a rack.
The Speedy Alternative: Reheating in an Air Fryer
The air fryer has become a kitchen hero for reheating all manner of fried and crispy foods, and grilled cheese is no exception. Its powerful convection current of super-heated air rapidly evaporates moisture and creates a fantastically crisp, almost “fried” texture on the bread in a fraction of the time of an oven. It’s perfect for a quick, single-serving reheat with excellent results.

Visual guide about How to Reheat Grilled Cheese
Image source: grilledcheesegrill.com
Air Fryer Protocol for Perfect Results
Preheat your air fryer to 350°F (175°C) for 3 minutes. This step ensures the cooking environment is hot from the start. Place 1-2 grilled cheese sandwiches in the basket in a single layer. Do not overcrowd; air must flow around each sandwich. Cook for 3-4 minutes. At the 2-minute mark, carefully flip the sandwiches using tongs. The cooking time is surprisingly short. Check for doneness at 3 minutes: the bread should be deeply golden and crisp to the touch. The cheese will be melted and likely bubbling from the edges. If more browning is needed, cook for another 30-60 seconds. Be vigilant—air fryers can burn food quickly once the Maillard reaction (browning) kicks in. Let rest for 1 minute before eating. The result is a sandwich with a shatteringly crisp crust and perfectly gooey cheese.
Pro Tip: For extra insurance against cheese leakage, you can lightly brush the *outside* of the bread with a tiny bit of melted butter or oil before air frying. This enhances browning and crispness.
The Last Resort: Microwave Reheating (And How to Mitigate the Damage)
Let’s be honest: sometimes the microwave is the only tool available—in an office kitchen, a dorm room, or when you’re in a desperate, cheese-deprived hurry. It will never produce a crispy result, but you can minimize the sogginess and rubberiness with a clever trick.
Place the grilled cheese on a microwave-safe plate. Lay a single, dry paper towel over the top and another underneath the sandwich. The paper towels are your moisture-wicking heroes. They absorb the steam that would otherwise saturate the bread. Microwave on 50% power (medium) in 15-20 second bursts. After each burst, check and flip the sandwich. Total time will be 45-70 seconds for a standard sandwich. The goal is to warm the cheese through, not to cook it. You will likely still have a soft exterior, but the paper towels prevent it from being completely soggy. Let it rest for 30 seconds. For a *slightly* improved texture, immediately after microwaving, give it a quick 15-30 second press in a dry skillet on low heat to try to re-crisp the exterior—a hybrid “nuke-and-sizzle” method.
Pro Tips, Troubleshooting, and Creative Twists
Beyond the core methods, a few advanced strategies and warnings can elevate your reheating game from good to flawless.
The Rest Period is Sacred
No matter which method you use, do not cut into the sandwich immediately. The cheese inside will be at its peak temperature and liquidity, meaning it will gush out uncontrollably. More importantly, the intense heat has caused the bread’s structure to contract slightly. Letting it rest for 60-120 seconds allows the heat to redistribute evenly and the cheese to thicken to a perfect, creamy consistency that stays put when you bite. This small wait makes for a much cleaner and more enjoyable eating experience.
Troubleshooting Common Reheating Disasters
- “My bread is still soggy!”: You likely used too low a heat or didn’t use a rack/weight. The moisture didn’t evaporate. Next time, use higher heat for a shorter time (skillet/air fryer) or ensure proper airflow (oven rack).
- “The cheese is oily and separated.”: This happens when cheese is overheated beyond its melting point, causing the fats to leach out. Use lower heat and/or reduce cooking time. High-quality, full-fat cheese is more forgiving.
- “The bread burned but the cheese is cold.”: Your heat was too high. The bread’s exterior charred before heat conducted to the center. Always start with medium-low heat on the stove and 350-375°F in the oven/air fryer. Thicker sandwiches may need a lower temperature for longer.
- “My sandwich fell apart when I flipped it.”: The bread had become too soft from moisture. Ensure your initial cooking was thorough (crisp exterior), and use a wide, flexible spatula for flipping. The weight method in the skillet helps bind the sandwich together.
Creative Reheating Twists: Beyond Basic Crispness
Why stop at a plain reheat? Use the reheating process as an opportunity to upgrade.
- The “Fresh Herb” Boost: In the last 30 seconds of skillet or oven reheating, sprinkle a few finely chopped fresh herbs (chives, thyme, rosemary) over the top. The residual heat will release their aroma without cooking them to death.
- The “Extra Cheese” Edge: Place a thin slice of cheese (or a sprinkle of shredded cheese) on the *outside* of one bread slice before reheating. As it melts, it creates an incredibly crisp, cheesy crust that takes texture to the next level.
- Savory Infusions: Before reheating in the skillet, rub the *outside* of the bread with a cut clove of garlic or a slice of onion. The heat will impart a subtle, wonderful flavor.
- Dipping Sauce Prep: While your grilled cheese reheats, quickly whisk together a simple dipping sauce: mayo + sriracha, or honey + Dijon mustard. The contrast of cool, tangy dip with hot, crispy sandwich is divine.
Frequently Asked Questions
What is the absolute best way to reheat a grilled cheese?
For a single sandwich, a preheated skillet or griddle over medium-low heat with a weight on top is the gold standard. It restores maximum crispiness and melts the cheese perfectly. For multiple sandwiches, a 375°F oven with a wire rack is most efficient and effective.
Can I reheat a grilled cheese in the microwave without it getting soggy?
You can minimize sogginess by placing dry paper towels both under and over the sandwich and microwaving in 15-second bursts on 50% power. However, it will never be truly crispy. For best results, use the microwave only if you plan to quickly finish it in a dry skillet afterward.
Why does my reheated grilled cheese have greasy, separated cheese?
This occurs when the cheese is overheated, causing its fat to separate. Use slightly lower heat and/or shorter cooking time. Also, ensure you’re using high-quality, full-fat cheese from a block, not pre-shredded cheese with anti-caking agents.
How long can I store a cooked grilled cheese before reheating?
For best quality, refrigerate leftover grilled cheese in an airtight container for up to 2 days. The longer it sits, the more moisture accumulates and the staler the bread becomes, making perfect reheating more difficult. Consume within 24 hours for optimal results.
Can I reheat a grilled cheese in a panini press?
Yes, a panini press is an excellent tool. Preheat it to medium heat. Place the sandwich inside and close the lid. The pressure and direct contact from the ridged plates will re-crisp the bread beautifully and melt the cheese in about 3-5 minutes. Watch closely to prevent burning.
What type of bread and cheese reheats the best?
Sturdy, thick breads like sourdough, Texas toast, or a hearty rye hold up best. For cheese, choose smooth-melting varieties with good fat content: sharp cheddar, gouda, fontina, or a blend. Always use block cheese you slice or grate yourself for the cleanest melt.