You can temporarily transform your stainless steel pan into a non-stick surface through a process called “seasoning.” This involves creating a polymerized layer of oil on the pan’s surface. It requires the correct oil, proper heat management, and patience. This layer is not permanent like cast iron and will wear off, needing reapplication. Mastering this technique allows for effortless cooking of eggs, pancakes, and delicate foods without sticking, combining stainless steel’s durability with temporary non-stick convenience.
You love your stainless steel pans. You love their durability, their even heating, their resistance to rust and reactivity with acidic foods. But let’s be honest, there’s a moment of dread when you crack an egg into a hot, pristine pan and watch it sizzle with a terrifying, immediate bond. That beautiful, mirror-like surface can feel like a curse when you’re trying to flip a fragile omelet. What if I told you that with a simple, 15-minute process, you can coax that same stainless steel into behaving like a non-stick surface? It’s not magic; it’s science, and it’s called seasoning.
The idea of seasoning stainless steel often raises eyebrows. We associate seasoning with cast iron and carbon steel. Stainless steel, by its very name, is supposed to be “stainless,” resistant to corrosion and sticking. But the key word in “non-stick” is “stick.” Food sticks because of a chemical reaction between the proteins in the food and the metal surface when there’s an insufficient barrier of fat. Seasoning creates that barrier—a microscopic, polymerized layer of oil that fills the pan’s inherent microscopic pores and provides a slick surface for food to glide on. This guide will walk you through exactly how to make your stainless steel pans non stick, from the science behind it to the precise steps, the best oils to use, and how to make it last.
Key Takeaways
- Seasoning is Temporary: The polymerized oil layer on stainless steel is fragile and will degrade with use and washing, requiring regular reapplication for consistent non-stick performance.
- Oil Choice is Critical: Use oils with a high smoke point (like grapeseed, avocado, or refined peanut oil). Avoid extra virgin olive oil or butter for the initial seasoning process.
- Heat Control is Everything: You must heat the pan until the oil just begins to smoke (reaches its smoke point) to create the polymerization bond. Too low, and it won’t form; too high, and it will burn.
- Cool Completely Before Use: After seasoning, let the pan cool down entirely on the stovetop. Rushing this step disrupts the formation of the durable, non-stick layer.
- Proper Maintenance Extends Life: After cooking with your seasoned pan, clean it with hot water and a gentle brush or sponge. Avoid abrasive scrubbers and dish soap initially to preserve the seasoning layer.
- It’s for Specific Foods: This technique is ideal for eggs, pancakes, crepes, and delicate fish. It is not a substitute for a permanent non-stick pan for high-heat searing or heavy-duty use.
- Safety First: Always work in a well-ventilated kitchen when heating oil to its smoke point. Have a lid nearby to smother any potential flare-up, and never leave a heating pan unattended.
📑 Table of Contents
- Understanding the “Why”: The Science of Seasoning Stainless Steel
- The Step-by-Step Guide to Seasoning Your Pan
- Choosing the Right Oil: Smoke Point is King
- Common Mistakes That Ruin Your Seasoning
- Maintenance and Reapplication: Keeping the Slick Surface
- Limitations and Safety: What This Technique Can and Can’t Do
Understanding the “Why”: The Science of Seasoning Stainless Steel
Before we dive into the “how,” let’s quickly demystify the “why.” Stainless steel is an alloy, typically made of iron, chromium, and nickel. The chromium forms a passive, protective layer of chromium oxide on the surface, which prevents rust and gives stainless its “stainless” property. This layer is incredibly hard and non-reactive, which is great for cooking, but it’s also microscopically rough and porous.
The Polymerization Process
When you apply a thin layer of oil to your pan and heat it to the oil’s smoke point, a chemical reaction called polymerization occurs. The oil molecules break down and cross-link, forming a hard, plastic-like film that bonds to the metal surface. This film is what creates the non-stick property. It’s not a thick coating; it’s a microscopically thin, durable layer that fills in the valleys and pores of the steel, creating a smoother surface. Think of it like sealing a rough wooden countertop with varnish. The varnish (our polymerized oil) fills the wood grain, creating a smooth, wipeable surface.
Why Stainless Steel vs. Cast Iron is Different
With cast iron, the seasoning layer becomes part of the pan’s identity, building up over time into a thick, black, durable patina. Stainless steel is non-porous and non-reactive on a macro level. The polymerized layer on stainless is much thinner, more fragile, and sits *on top* of the existing surface rather than soaking in. It’s more like a temporary, high-performance coating than a built-up patina. This fundamental difference means your stainless steel seasoning will need more frequent touch-ups, but it also means you can strip it back to the factory finish with a good scrub if needed, which you can’t easily do with a cherished cast iron skillet.
The Step-by-Step Guide to Seasoning Your Pan
Now for the practical part. This process takes about 15 minutes of active time, plus cooling time. Do this on a day you’re not in a rush. You only need to fully season a pan once to establish a base layer. After that, you’ll be doing lighter “touch-up” seasonings.
Visual guide about How to Make Stainless Steel Pans Non Stick
Image source: mashed.com
Step 1: Deep Clean the Pan
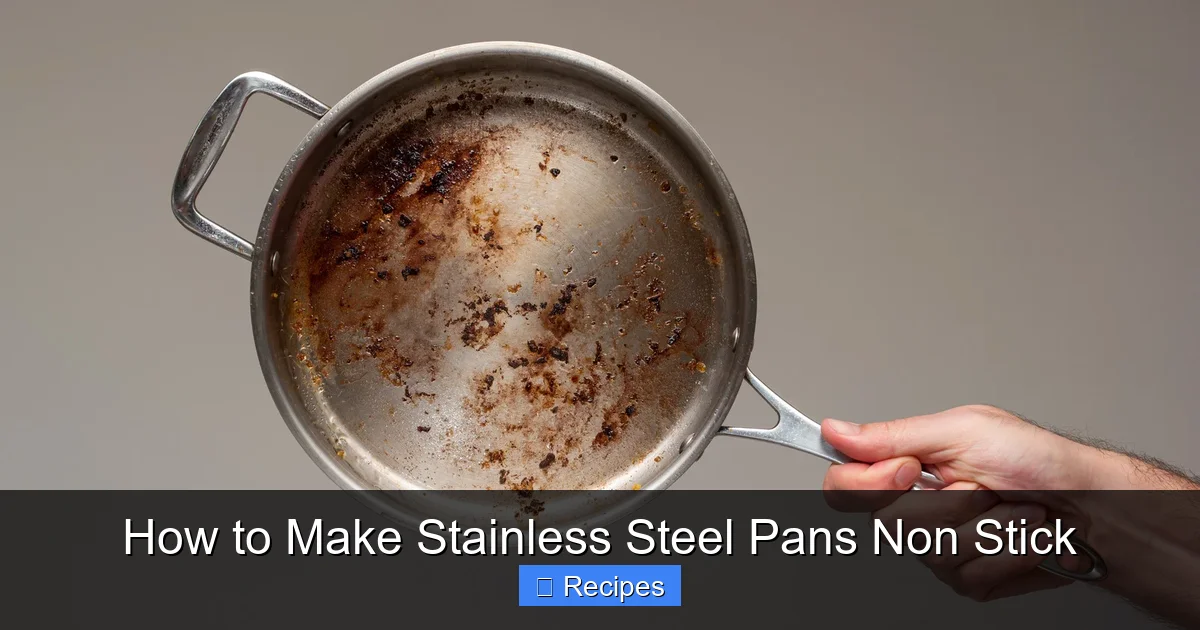
Your pan must be completely free of any factory residue, old food particles, or detergent film. Use a little dish soap and a non-abrasive scrubber (like a blue Scotch-Brite pad) to wash the pan thoroughly. Rinse with hot water and dry it completely with a towel. Any leftover film will prevent the oil from bonding properly to the metal. For very new or grimy pans, you can simmer a solution of 1 part vinegar to 4 parts water for 10 minutes to remove any mineral deposits or manufacturing oils, then wash and dry as usual.
Step 2: Apply a Microscopic Layer of Oil
Place the pan on your stovetop. Pour about 1 teaspoon of a high-smoke-point oil (see our next section for favorites) into the center. Using a clean paper towel held with tongs or pliers, rub the oil all over the interior surface of the pan—bottom and sides. You want a layer so thin you can barely see it. Wipe away any excess. The pan should look dry, not glossy. This is the most critical step. Too much oil will leave a sticky, gummy residue instead of a slick, hard surface.
Step 3: Heat to the Smoke Point
Turn your burner to medium-high or high heat. Let the pan heat for 4-6 minutes. You’ll see the oil begin to shimmer and then emit a thin, blueish-tinged smoke. This is the smoke point. Once you see a steady stream of light smoke (not a billowing, angry plume), let it smoke for 1-2 minutes. You may see the oil darken slightly and form a hazy, rainbow-like pattern (this is the polymerizing oil). Do not walk away during this step. Watch it carefully.
Step 4: Cool Completely
Turn off the heat. Do not touch the pan. Let it cool down on the burner until it reaches room temperature. This cooling period is when the polymerization reaction completes and the layer fully hardens and bonds. Rushing this by running it under cold water or wiping it while hot will ruin the layer. This can take 1-2 hours. Once cool, you’ll notice the interior has a subtle, dark, almost pewter-like sheen, not the original mirror finish. That’s your seasoning layer.
Choosing the Right Oil: Smoke Point is King
Not all oils are created equal for seasoning. The single most important factor is the oil’s smoke point. You need an oil that can withstand high heat without breaking down prematurely. Using an oil with a low smoke point, like extra virgin olive oil or butter, will lead to burnt, sticky residue instead of a clean, hard polymerized layer.
Visual guide about How to Make Stainless Steel Pans Non Stick
Image source: popsci.com
Top Tier Oils for Seasoning
- Avocado Oil: The champion. Has an extremely high smoke point (~520°F/271°C), is neutral in flavor, and creates a very durable layer.
- Refined Peanut Oil: A classic for high-heat cooking. Smoke point around 450°F (232°C). Ensure you use *refined*, not unrefined.
- Grapeseed Oil: A fantastic, readily available option with a smoke point of ~420°F (216°C). It’s neutral and reliable.
- Refined Safflower or Sunflower Oil: High smoke points (450-470°F), neutral flavor, and inexpensive.
- Canola Oil: A good, budget-friendly workhorse with a smoke point of ~400°F (204°C). Ensure it’s plain, not “extra virgin.”
Oils to Avoid for Initial Seasoning
Steer clear of extra virgin olive oil, sesame oil, unrefined oils, and flaxseed oil (despite its popularity online, it can become brittle and flake). Butter is also a no-go for the initial seasoning due to its milk solids that burn. You can certainly use butter for cooking *after* your pan is seasoned, but not for building the layer.
Common Mistakes That Ruin Your Seasoning
Even with the right steps, a few pitfalls can lead to a sticky, ineffective pan. Knowing these in advance will save you frustration.
Visual guide about How to Make Stainless Steel Pans Non Stick
Image source: thumbs.dreamstime.com
Using Too Much Oil
This is the #1 culprit. A thick layer of oil will not polymerize correctly. It will remain sticky and gummy, attracting food and turning into a mess. Always aim for a layer so thin it’s invisible. If in doubt, wipe more away.
Heating Too Fast or Too Slow
Putting the pan on high heat from cold can cause the oil to scorch before it evenly coats the surface. Medium-high is usually the sweet spot. Conversely, heating too slowly may not bring the oil to its true smoke point, resulting in a weak, incomplete polymerization. You need that steady, visible smoke.
Washing with Soap and Abrasives After Seasoning
Once you’ve built your layer, treat it gently. For the first few uses, clean with just hot water and a soft brush or non-scratch sponge. Dish soap can cut through the oil layer. If you must use soap, use a tiny amount and a soft sponge. Never use steel wool or harsh scrubbers, which will instantly strip your hard-earned seasoning.
Cooking the Wrong Foods First
After seasoning, don’t test it with something sticky like sugary sauces or cheese right away. Start with high-fat foods: cook some bacon, fry an egg in plenty of butter, or sauté ground meat. The additional fat helps reinforce the seasoning layer and gives you a successful, non-stick experience that builds confidence.
Maintenance and Reapplication: Keeping the Slick Surface
Your newly seasoned pan will perform beautifully for a few cooks. But every time you wash it, a tiny bit of that polymerized layer will be worn away. To maintain it, you need a simple maintenance routine.
The Post-Cook Cleanup
Let the pan cool slightly (not cold, but not piping hot). Pour out any excess fat. Add a few tablespoons of warm water to the hot pan and use a non-metal scraper or stiff brush to loosen any bits. For most residues, this is enough. If needed, use a dab of salt as a gentle abrasive. Rinse with warm water and dry immediately with a towel. For a deeper clean after particularly messy meals, you can use a tiny drop of dish soap and a soft sponge, but this will require a light re-seasoning afterward.
The “Touch-Up” Seasoning
You’ll know it’s time when food starts to stick again, or the pan looks dull. The touch-up is a faster, lighter version of the full process. Simply wash and dry the pan. Apply a barely-there coat of oil with a paper towel. Heat it on medium until it just begins to smoke, then turn off the heat and let it cool. This 5-minute process is all you need to refresh the layer between major uses. You can even do this in the oven: preheat to 450°F, apply a thin oil coat, place upside down in the oven for 1 hour, then let cool in the oven.
Limitations and Safety: What This Technique Can and Can’t Do
It’s important to have realistic expectations. Seasoning stainless steel is a fantastic trick, but it’s not a miracle cure-all. Understanding its limits will make you a more effective cook.
It’s Not a Replacement for True Non-Stick
A Teflon or ceramic non-stick pan offers consistent, effortless release for everything from eggs to grilled cheese. A seasoned stainless pan will still require a bit of fat and proper heat management. It’s best for foods that naturally release (like a well-browned steak) or for dishes where you use ample oil or butter (like sautéing vegetables or frying eggs). It won’t give you the “slide-right-out” performance of a dedicated non-stick for things like scrambled eggs or delicate crepes unless the seasoning is perfect and fresh.
The Heat Ceiling
Your polymerized oil layer has a temperature limit—its smoke point. If you sear a steak on high heat, you will likely exceed the smoke point of your seasoning oil, causing it to burn and break down, leading to sticking. Seasoning is best for medium-heat cooking. For high-heat searing, you’re better off using a lot of oil and accepting some initial sticking, which will release once a fond (the browned bits) forms.
Safety During the Process
Heating any oil to its smoke point produces smoke and, if overheated, can ignite. Always:
- Turn on your vent hood or open a window.
- Never leave a heating pan unattended.
- Keep a lid nearby to smother flames if they occur (do not use water).
- Use long sleeves and keep pot handles turned inward.
The smoke is a sign the process is working, but it can be dense. Ensure your kitchen is ventilated.
So, go ahead. Grab that neglected stainless skillet, give it a deep clean, and follow these steps. The first time you crack an egg into your newly seasoned pan and watch it set without a single stubborn cling, you’ll feel a genuine sense of accomplishment. You’ve unlocked a new level of performance from a classic kitchen tool. It’s not a permanent fix, but a renewable skill—a little ritual that makes your reliable stainless steel pans even more versatile and a joy to cook with every single day. Happy seasoning!
Frequently Asked Questions
How long does the non-stick effect last on a seasoned stainless steel pan?
The effect is temporary and varies based on use and care. With gentle cleaning and regular “touch-up” seasonings, it can last for 5-10 cooks before needing a refresh. Heavy use, abrasive cleaning, or cooking acidic foods will shorten its lifespan.
Can I use butter or olive oil for the seasoning process?
No. Butter contains milk solids that burn, and extra virgin olive oil has a low smoke point. Both will create a sticky, burnt residue instead of a clean, polymerized layer. Use a high-smoke-point, neutral oil like avocado, grapeseed, or refined peanut oil for the initial seasoning.
Will seasoning my stainless steel pan change its appearance permanently?
Yes, it will develop a permanent, subtle darkening or a pewter-like sheen on the cooking surface. This is the polymerized oil layer. You can strip it back to the original mirror finish by using a strong abrasive cleaner like Bar Keepers Friend, but that also removes the seasoning benefit.
Is it safe to use dish soap on my seasoned stainless steel pan?
For routine cleaning after cooking, it’s best to avoid dish soap initially to preserve the seasoning layer. Use hot water and a soft brush or sponge. If you need soap for a messy cleanup, use a tiny drop and a non-scratch sponge, but be aware it will slightly degrade the layer, requiring a quicker touch-up seasoning.
Can I put my seasoned stainless steel pan in the dishwasher?
Absolutely not. The harsh detergents and high-pressure water jets of a dishwasher will completely strip away the seasoning layer in one cycle and could also damage the pan’s finish. Always hand wash seasoned stainless steel cookware.
Why is my pan still sticking after I seasoned it?
Common reasons include: using too much oil during seasoning (leaving a sticky residue), not heating the pan to the oil’s true smoke point, not letting it cool completely, or using the pan for high-heat searing that exceeded the seasoning oil’s smoke point. Re-season following the precise steps with a minimal amount of oil.
Pingback: Titanium Pans - kitchenandhouseware.com