Making mug rugs is a fantastic, beginner-friendly sewing project that combines utility with endless creative potential. These small, absorbent fabric mats protect your surfaces from hot mugs and condensation while adding a pop of personality to your kitchen or desk. This guide walks you through every step, from selecting the perfect fabrics and tools to mastering basic quilting and binding techniques, ensuring you create beautiful, durable mug rugs you’ll love to use and gift.
Have you ever set a steamy mug down on a wooden table or a delicate coaster and wished for just a little more protection? Or maybe you’re looking for a quick, satisfying sewing project that yields a useful and beautiful gift? If so, you are in the right place. Learning how to make mug rugs is one of the most rewarding entry points into the world of sewing and quilting. These little fabric islands are more than just coasters; they are a hug for your table, a splash of color for your morning routine, and a perfect way to use up fabric scraps.
Think of a mug rug as a tiny quilt. It’s a small, layered square of fabric designed to sit under your coffee cup, tea mug, or even a small plant. Its job is to absorb condensation, catch drips, and shield your furniture from heat marks. But its real superpower is its simplicity and the joy of creation. In this comprehensive guide, we will demystify every single step. From gathering your materials to executing your first stitches and applying a flawless binding, you will gain the confidence and knowledge to make mug rug after mug rug. We’ll explore different styles, from sleek and modern to rustic and cozy, and share pro tips that will make your projects look store-bought. So, clear a small space on your sewing table, and let’s get started on this delightful craft.
Key Takeaways
- Beginner-Friendly Project: Mug rugs are an ideal first sewing or quilting project due to their small size, simple construction, and quick completion time.
- Fabric is Key: Choose 100% cotton for the top and backing for durability and ease of sewing; consider absorbent fabrics like flannel or terry cloth for the batting layer.
- Layered Construction: A mug rug is essentially a quilt “sandwich” made of a top fabric, insulating batting (often cotton or flannel), and a backing fabric, all stitched together.
- Binding Finishes It: The binding is the edge finish that encases the raw edges of your quilt sandwich; the most common method for mug rugs is the continuous binding strip.
- Personalize Freely: Mug rugs are a perfect canvas for embroidery, appliqué, decorative stitches, and fabric combinations to match any decor or season.
- Pre-Wash Fabrics: Always pre-wash your cotton fabrics to prevent later shrinkage that would cause your finished mug rug to pucker or bubble.
- Practice Makes Perfect: Focus on consistent ¼-inch seam allowances and thorough pressing at each step for a professional-looking, flat finished rug.
📑 Table of Contents
Gathering Your Materials and Tools
Before you can dive into stitching, you need to assemble your toolkit. The beautiful thing about how to make mug rugs is that the required supplies are minimal and inexpensive, especially if you already have basic sewing items. We’ll break it down into essential tools and then discuss the star of the show: the fabric.
Essential Tools for the Task
You don’t need a fancy, industrial sewing machine. A reliable home sewing machine that can handle a straight stitch is perfect. Here is your core checklist:
- Sewing Machine & Thread: Use a good-quality all-purpose polyester thread. It’s strong, has a bit of stretch, and works well with cotton. A universal needle (size 80/12 or 90/14) is your best bet for woven cottons.
- Rotary Cutter, Mat, and Ruler: This trio is a game-changer for accuracy. A rotary cutter allows for perfectly straight, clean cuts through multiple layers of fabric. The self-healing mat protects your surfaces, and a clear acrylic ruler (at least 6″ x 24″) ensures your measurements are precise.
- Scissors: Have a dedicated pair of sharp fabric scissors for trimming threads and cutting batting. Never use your good fabric scissors on paper!
- Pressing Tools: An iron and a pressing mat or thick towel are non-negotiable. Pressing your seams and blocks as you go is the single most important factor in achieving a crisp, professional finish. A seam roller can also be helpful for pressing open seams without distorting the fabric.
- Pins and Wonder Clips: Straight pins work fine, but wonder clips are fantastic for holding the layers of your quilt sandwich together without piercing the fabric. They are especially useful when working with batting.
- Basic Measuring Tools: A seam gauge for checking and marking consistent ¼-inch seams and a flexible tape measure for checking finished sizes.
Choosing the Perfect Fabrics
Your fabric choices will define the look, feel, and function of your mug rug. The standard construction is a three-layer sandwich: top, batting, and backing.
- The Quilt Top: This is where your creativity shines. 100% cotton is the gold standard because it is stable, easy to sew, and holds its shape. You can use a single fabric, patchwork pieces, or even pre-printed panels. Consider the scale of any prints; very large prints can get lost on a small mug rug.
- The Batting (Insulation): This is the middle layer that provides absorbency and slight cushioning. For mug rugs, you want a batting that is not too thick (it can make the rug bulky) but provides good absorbency.
- Cotton Batting: The classic choice. It’s thin, breathable, and washes well. Look for “needle-punched” or “scrim” batting for better stability.
- Flannel or Terry Cloth: For maximum absorbency, a layer of flannel or even a thin terry cloth towel (repurposed!) works wonderfully as the batting layer. It makes for a very cozy, rustic rug.
- Fusible Fleece: This has a heat-activated adhesive on one side. You can fuse it to the wrong side of your top fabric, eliminating the need to quilt through all three layers if you prefer a simpler finish. However, it can make the rug stiffer.
- The Backing Fabric: This should complement your top. Often, a solid cotton works beautifully to frame the design. Like the top, it should be pre-washed. The backing fabric will be the underside, so its color/print matters less unless you plan to use the rug reversibly.
A crucial pro tip: Always pre-wash and dry your cotton fabrics using the same method you will use for the finished mug rug (usually machine wash warm, tumble dry low). Fabrics shrink at different rates, and pre-washing ensures your finished rug won’t pucker or bubble after its first wash.
Designing and Cutting Your Quilt Top
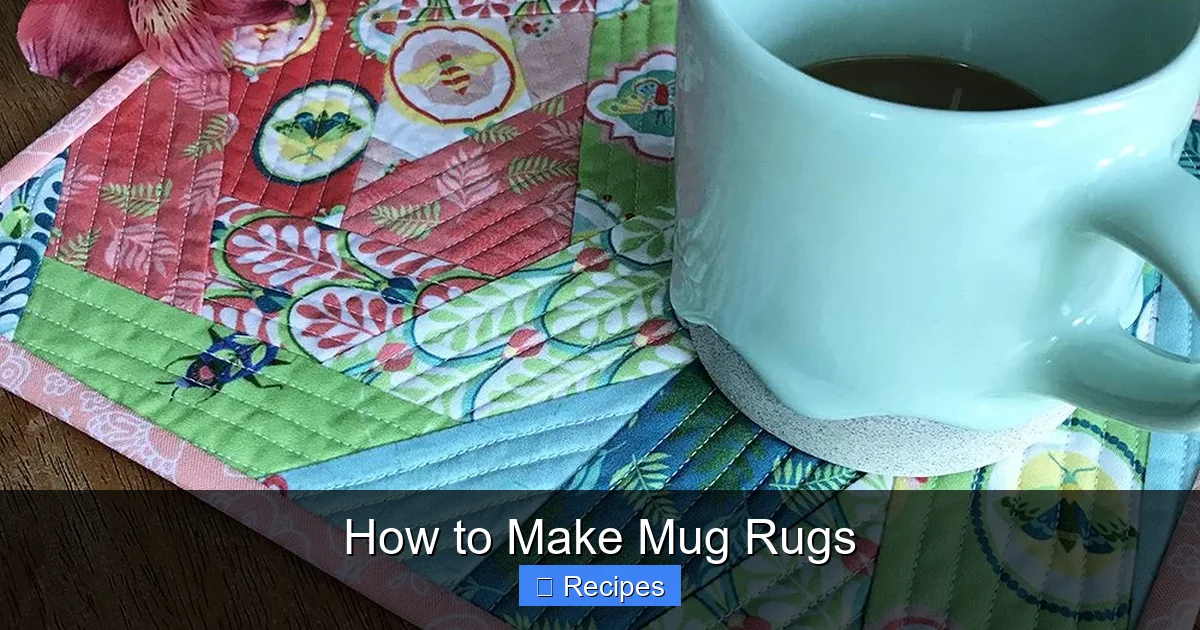
Now for the fun part! This is where your personal style takes the lead. The standard size for a mug rug is between 8″ x 10″ and 10″ x 12″ finished. This gives plenty of room for a large mug and a few droplets. Let’s explore design options and the critical step of accurate cutting.
Visual guide about How to Make Mug Rugs
Image source: i.pinimg.com
Starting Simple: The Single-Fabric Rug
The absolute easiest how to make mug rugs project is a single piece of fabric for the top. It’s perfect for a first project. Choose a fabric you love. To calculate your cutting size, you must account for the seam allowance and the batting/backing layers. A standard seam allowance in quilting is ¼ inch. You will sew all three layers together, so you need extra fabric on all sides.
The Formula: Desired Finished Size + (Seam Allowance x 2) + (A Little Extra for Ease). For a 9″ x 12″ finished rug, cut your top, batting, and backing to 10″ x 13″. The extra 1″ total (½” per side) gives you room to handle the layers and ensures your finished size is accurate after the binding is attached.
Exploring Patchwork and Patterns
Once you’re comfortable with the single-fabric method, try a simple patchwork top. A classic and effective design is the “Nine-Patch” block scaled down. For a 9″ finished mug rug, you could make a Nine-Patch block that finishes at 7.5″ x 7.5″ and add borders to bring it to your final size. Another popular idea is strip piecing: sew several strips of fabric together, then cut a segment from that strip-set to create a vibrant, linear design.
When designing, think about scale. A tiny print on a large block can look like a solid color from a distance. A bold, large-scale print might only show a small fragment of its pattern. Sketch your idea on graph paper, where each square can represent 1 inch. This helps you visualize the finished product and calculate fabric requirements.
Precision Cutting: The Foundation of Success
Here is the step where accuracy pays off. Using your rotary cutter, mat, and ruler:
- Fold your fabric right sides together (if using a single piece) or press your patchwork block flat.
- Align the ruler’s measurement line with the raw edge of the fabric.
- Hold the ruler firmly with your non-dominant hand. Place the rotary cutter against the ruler’s edge and apply even pressure, rolling the cutter away from your body in a smooth motion. Never pull the cutter towards yourself.
- Make one continuous cut; don’t lift and reposition the cutter mid-cut for a straight edge.
- Cut all three layers (top, batting, backing) to the same, larger-than-finished size. It’s often easiest to cut the batting last, using the cut fabric as a template.
Label your pieces with a small piece of removable tape if you are making multiple rugs. Organization prevents costly mistakes.
Assembling the Quilt Sandwich and Basting
You have your beautifully cut layers. Now you must create the “quilt sandwich” and secure it so the layers don’t shift during sewing. This process is called basting.
Visual guide about How to Make Mug Rugs
Image source: i2.wp.com
Creating the Perfect Sandwich
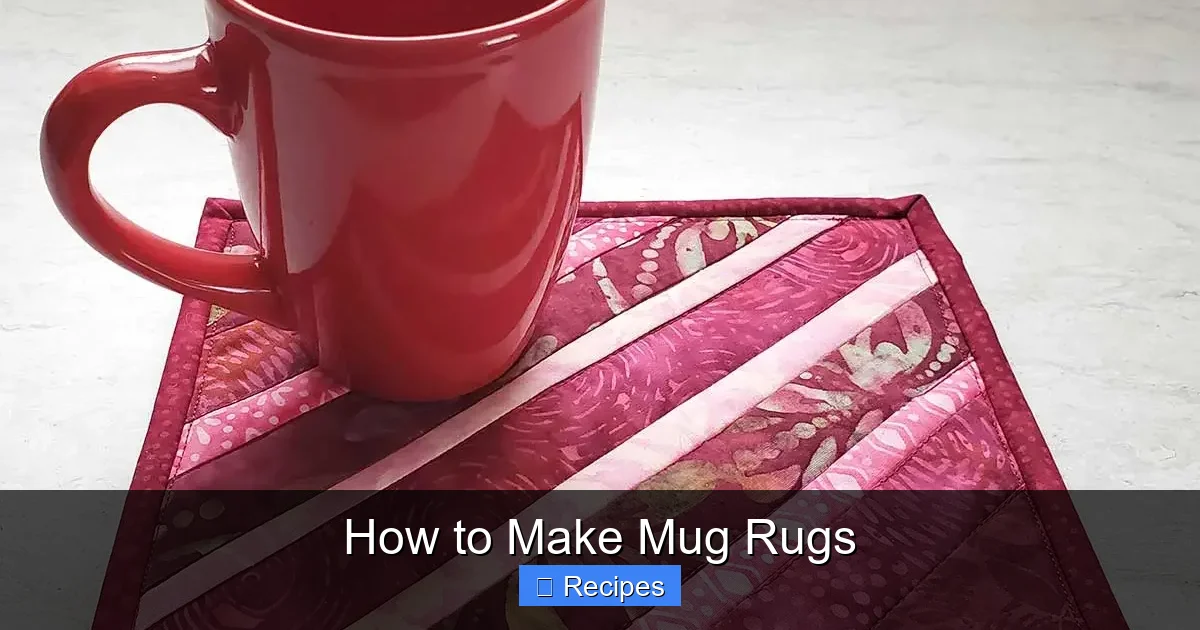
Lay your backing fabric right side down on your work surface. It’s helpful to tape the corners lightly to the floor or a large table to keep it taut. Place the batting on top of the backing, smoothing out any wrinkles from the center outward. Finally, place your quilt top right side up on the batting, aligning all edges as best as you can. The right side of your top fabric should be facing you, the right side of the backing should be facing down, with the batting in the middle.
Basting Methods: Securing the Layers
You must temporarily hold these three layers together. You have three main options:
- Safety Pins: The traditional and most reliable method for hand or machine quilting. Use curved safety pins (quilter’s pins). Starting in the center, pin outwards in a grid pattern, about 3-4 inches apart. The pins should be perpendicular to the surface. This is the best method for beginners as it allows for easy repositioning.
- Spray Basting: A temporary adhesive spray (like 505 Spray) is fast and eliminates pin holes. Work in a well-ventilated area. Spray a light, even coat on the wrong side of the batting, then carefully lay your top on it, smoothing from the center. Repeat for the backing side. It’s great for smaller projects like mug rugs but can be messy.
- Hand Basting: Using a long, heavy-duty needle and contrasting basting thread, sew large, loose stitches in a grid across the sandwich. It’s time-consuming but very secure and leaves no marks.
For your first mug rug, use safety pins. They give you the most control. Once basted, your sandwich should feel like one cohesive unit, with no shifting or bubbling when you gently lift it.
Quilting: Stitching the Layers Together
Quilting is the decorative and functional stitching that holds the three layers permanently together. For a mug rug, you don’t need elaborate, intricate designs. The goal is to secure the layers and add visual interest. This is the heart of learning how to make mug rugs.
Visual guide about How to Make Mug Rugs
Image source: i.pinimg.com
Basic Quilting Techniques for Beginners
Lower your sewing machine’s presser foot pressure slightly if you can; this helps the thick sandwich feed smoothly. Here are three foolproof methods:
- Stitch-in-the-Ditch: This is the most subtle technique. You sew your stitches exactly in the seam lines of your patchwork top (if you have seams) or in a grid pattern you’ve marked on the top. The stitches should sink into the seam, becoming nearly invisible on the top but visible on the backing. It’s a fantastic, professional-looking technique for beginners.
- Echo Quilting: Perfect for a single-fabric top or a large appliqué. You quilt parallel lines at a consistent distance (e.g., ½” or 1″) from the edge of your fabric block or around an appliqué shape. It creates a beautiful, framed effect and adds great texture.
- All-Over Meander or Wavy Lines: Simply set your machine to a straight stitch and sew gentle, wavy lines or a loose meander pattern across the entire surface. This is fast, forgiving, and adds wonderful texture. Just try to keep your lines an even distance apart and avoid sharp corners.
Marking Your Quilt Top (Optional but Helpful)
If you are new to free-motion quilting (moving the fabric freely under the needle), a little guidance helps. Use a water-soluble marking pen or a Hera marker (which creates a crease) to draw light lines on your top fabric. You can mark a grid, concentric squares, or simple curves to follow. Remember, these marks will disappear with a light spritz of water after quilting.
Key Tip: Always start and stop your quilting stitches a few stitches away from the edge of your sandwich. You will trim the excess later. Quilt from the center outward if possible to prevent shifting.
Trimming and Adding the Binding
Your quilt sandwich is now beautifully and securely quilted. The next steps transform it from a quilted square into a finished, durable mug rug. This involves trimming the excess and encasing the raw edges with binding.
Trimming to Perfection
Place your quilted sandwich on your cutting mat. Using your rotary cutter and a long ruler, carefully trim the layers to your exact desired finished size. If you planned for a 9″ x 12″ finished rug, trim it to exactly that. Take your time here. A square rug with sharp, clean corners is essential for a professional look. Double-check your corners with a square ruler. This is your last chance to fix any wobbly edges before binding.
The Magic of Binding: A Step-by-Step Guide
Binding covers the raw edges of your quilt sandwich, giving it a clean, durable finish. The continuous strip method is the standard. Here’s how to do it for a rectangular mug rug.
- Calculate & Cut Binding Strips: You need strips of fabric 2.5″ wide. For a 9″ x 12″ rug, you need the perimeter plus a few extra inches: (9 + 12) x 2 = 42 inches, plus at least 10″ for joining. So, cut two strips 2.5″ x 22″ and two strips 2.5″ x 25″. (Using the formula: (Length + Width) x 2 + 15″).
- Join the Strips: Place two strips right sides together at a 90-degree angle, forming an “L”. Sew a diagonal line from the outer corner of the “L” to the inner corner. Trim the seam to ¼”, press open, and repeat until all strips are joined into one long strip. Press the entire binding strip in half lengthwise, wrong sides together.
- Attach the Binding to the Front: Open the binding strip. With the raw edges of the binding aligned with the raw edges of the *front* (quilted side) of your mug rug, start sewing about 3 inches from a corner. Use a ¼” seam allowance. Sew straight until you are ¼” away from the first corner. Stop, backstitch, and lift the needle.
- Mitering the Corners (The Crucial Step): To get a perfect 45-degree corner, you must fold the binding. Pull the binding strip up, forming a 45-degree angle away from you. Then, fold it back down over itself, aligning it with the next side of the rug. This creates a neat miter. Lower the needle and continue sewing down the next side. Repeat this process at all four corners.
- Joining the Ends: When you return to your starting point, stop with about 8″ of binding left to go. Overlap the beginning and ending binding tails. Open them and mark where they intersect. Cut the ends at that overlap, leaving a ½” seam allowance. Sew the two ends together right sides together, press the seam open, and finish sewing the binding to the front.
- Wrap to the Back: Now, flip the entire mug rug over. The binding should be covering the raw edges on the front. Fold the binding over to the back, encasing the raw edges. It should lie flat. Hand-stitch the binding to the back using a blind stitch (slip stitch) or a neat whip stitch. This invisible hand-finishing is what gives a handmade item its polished look.
If hand-stitching isn’t your thing, you can “machine bind” by sewing the binding to the back first with a ¼” seam, then folding it over to the front and topstitching it down with a straight or decorative stitch. It’s faster but more visible.
Finishing Touches and Creative Variations
Your mug rug is technically finished, but a few final steps ensure it’s ready for years of use. This is also where you can really let your personality shine through with customizations.
The Final Press and Wash
Give your finished mug rug a final, vigorous press with a hot iron (use a pressing cloth to protect your fabric). This sets the stitches and flattens everything. Then, wash it! Yes, wash it. This is a critical step that softens the batting, removes any markings, and pre-shrinks the entire piece. Machine wash warm with a mild detergent and tumble dry low. The slight crinkling that occurs is part of the homemade charm and adds texture.
Elevate Your Mug Rugs with Personalization
Why stop at plain? Here are ideas to make each mug rug unique:
- Appliqué: Cut a simple shape—a coffee cup, a heart, a star—from a contrasting fabric. Fuse it to your top with fusible web, then stitch around the edge with a tight zigzag or a decorative stitch.
- Embroidery: Add a hand-stitched or machine-embroidered initial, a fun phrase (“But First, Coffee”), or a small motif before assembling your sandwich.
- Fussy Cutting: Instead of random scraps, deliberately cut your top pieces to showcase a specific part of a print—a flower, a bird, a word.
- Non-Traditional Shapes: Break the rectangle! Cut your quilt sandwich into a circle, a hexagon, or a fun free-form shape before binding. Binding curves requires a bit more practice but is very rewarding.
- Textured Batting: For an ultra-plush rug, use two layers of thin flannel batting or a wool batting. It creates a wonderfully thick, absorbent pad.
Caring for Your Handmade Mug Rugs
To ensure your labor of love lasts for years of coffee spills and tea splashes, proper care is essential. The care instructions are simple because you used quality, natural materials.
- Washing: Machine wash in warm water with like colors. Use a mild detergent. The pre-washing you did means they are colorfast, but it’s still good practice to wash new, brightly colored rugs separately the first time.
- Drying: Tumble dry on a low or medium heat setting. Remove promptly to prevent excessive wrinkling. A warm iron can be used to press out any major creases.
- Longevity: The binding is the most vulnerable part. Avoid excessive pulling on the edges. If a corner starts to fray, a quick hand-stitch repair will solve it. With good construction, these rugs are incredibly durable and will only get softer and more loved with each wash.
You have now completed the full cycle of how to make mug rugs, from a pile of fabric to a cherished, functional item in your home. The skills you’ve practiced—accurate cutting, basting, quilting, and binding—are the foundational skills of all quilting. A mug rug is your perfect practice canvas. Make a dozen in different fabrics for every season, as gifts for friends, or simply for the pure satisfaction of creating something beautiful and useful with your own two hands.
Frequently Asked Questions
What size should I make my mug rug?
The most popular and functional size is between 8″ x 10″ and 10″ x 12″ finished. This accommodates most mugs plus a little drip zone. You can make them smaller for espresso cups or larger for big travel mugs. The size is completely customizable to your needs.
Can I use any fabric for the top?
For best results, use 100% woven cotton. It’s stable, easy to sew, and durable. Avoid very stretchy knits or slippery silks for your first projects, as they can be tricky to handle. Pre-washed quilting cotton is ideal. Feel free to mix cotton with other stable fabrics like linen or canvas for texture.
Do I need to wash my mug rug before using it?
Yes, it’s highly recommended. After you finish the binding, give it a full machine wash and dry cycle. This removes any fabric markings, softens the batting, and pre-shrinks the entire piece. It’s the final step that makes it truly ready for daily use.
What’s the easiest binding method for a beginner?
The continuous straight-grain binding method described in the guide is the standard and most straightforward. The key is to master the 45-degree mitered corner. Practice on a small scrap sandwich first. Machine-stitching the binding to the front and then hand-stitching it to the back gives the cleanest, most professional finish.
Can I make a mug rug without a sewing machine?
Yes, you can! You can hand-sew the entire process. For the quilting, you can use a simple running stitch or a more decorative hand-quilting stitch. For the binding, you would hand-stitch it entirely. It’s more time-consuming but very portable and meditative.
How long does it take to make a mug rug?
For a beginner, allow 2-4 hours for the first mug rug, including cutting, assembly, quilting, and binding. Once you get the rhythm, you can easily make one in 60-90 minutes. The small size means you get a finished project quickly, which is very rewarding!