Laying out recessed lighting in your kitchen is a precise science that blends task, ambient, and accent lighting to eliminate shadows and create a welcoming space. It starts with understanding your kitchen’s layout, measuring ceiling height, and strategically placing fixtures in key zones like countertops, islands, and sinks. By following a calculated plan—typically spacing lights 3-4 feet apart for 8-9 foot ceilings—you can achieve professional-grade results that enhance both safety and style.
Think of your kitchen’s recessed lighting not as an afterthought, but as the silent conductor of your culinary orchestra. It sets the mood for morning coffee, illuminates intricate knife work for dinner, and makes that beautiful backsplash pop. Yet, a poorly planned layout can leave you chopping vegetables in your own shadow or creating a harsh, clinical atmosphere. Getting the layout right is the single most important factor in determining whether your recessed lights become a seamless, functional part of your home or a constant source of frustration. This guide will walk you through every step, from initial sketch to final switch flip, ensuring your kitchen is brilliantly and beautifully lit.
Key Takeaways
- Plan by Zone: Divide your kitchen into task (countertops, sink), ambient (general), and accent (cabinets, art) lighting zones before placing any fixtures.
- Measure Ceiling Height: Your ceiling height dictates spacing; a general rule is to space lights 3-4 feet apart for an 8-9 foot ceiling, adjusting for higher or lower ceilings.
- Prioritize Task Lighting: Ensure primary work surfaces (all countertops, sink, cooktop) are shadow-free with focused light, often requiring lights placed 12-24 inches from cabinet fronts.
- Choose the Right Beam Angle & Trim: Narrow spotlights (15°-25°) highlight accents; wide floods (35°-50°) provide even general light; adjustable trims offer flexibility.
- Use a Mock Layout: Before cutting holes, use painter’s tape on the ceiling to visualize fixture placement and spacing based on your plan and furniture layout.
- Layer with Other Sources: Recessed lighting alone is rarely enough; combine with under-cabinet, pendant, and overhead fixtures for a balanced,functional design.
- Mind the Electrical: Plan fixture locations around joists, HVAC ducts, and existing wiring. Consult an electrician for code compliance and safe installation.
📑 Table of Contents
- Why Your Kitchen Lighting Layout Isn’t Just About Brightness
- Step 1: The Pre-Layout Blueprint – Assessment & Planning
- Step 2: The Mathematics of Spacing – Calculating Your Grid
- Step 3: Choosing Fixtures & Trims for the Job
- Step 4: The Physical Layout – Marking, Wiring, and Installation
- Step 5: Common Layout Mistakes & How to Avoid Them
- Conclusion: Your Kitchen, Perfectly Lit
Why Your Kitchen Lighting Layout Isn’t Just About Brightness
Before we dive into tape measures and spacings, we need to shift our mindset. Kitchen lighting is about layers. Imagine your kitchen as a stage. The recessed lights are your general wash, but you need spotlights on the actors (your countertops) and maybe a soft backlight for the set (your cabinetry). Relying solely on recessed cans for everything is a common mistake that leads to either overly bright, shadowy, or unbalanced rooms.
The Three Essential Layers of Kitchen Light
Every successful kitchen lighting plan incorporates these three layers:
- Ambient Lighting: This is the overall, general illumination that fills the room and provides safe navigation. Recessed lighting is a primary source here, creating a uniform “ceiling of light.”
- Task Lighting: This is focused, shadow-free light where you actually work. Countertops, the sink, and cooktop areas are critical task zones. Under-cabinet lighting is the star here, but strategically placed recessed lights can supplement.
- Accent Lighting: This adds drama and highlights architectural features, artwork, or beautiful cabinetry. Adjustable recessed trims are perfect for this, as are lights inside glass-front cabinets.
Your recessed lighting layout primarily addresses ambient light but must be planned to complement and not conflict with your task and accent sources.
Step 1: The Pre-Layout Blueprint – Assessment & Planning
You wouldn’t start building a house without a blueprint. Don’t start drilling holes without a plan. This preparatory phase is where 80% of your success is determined.
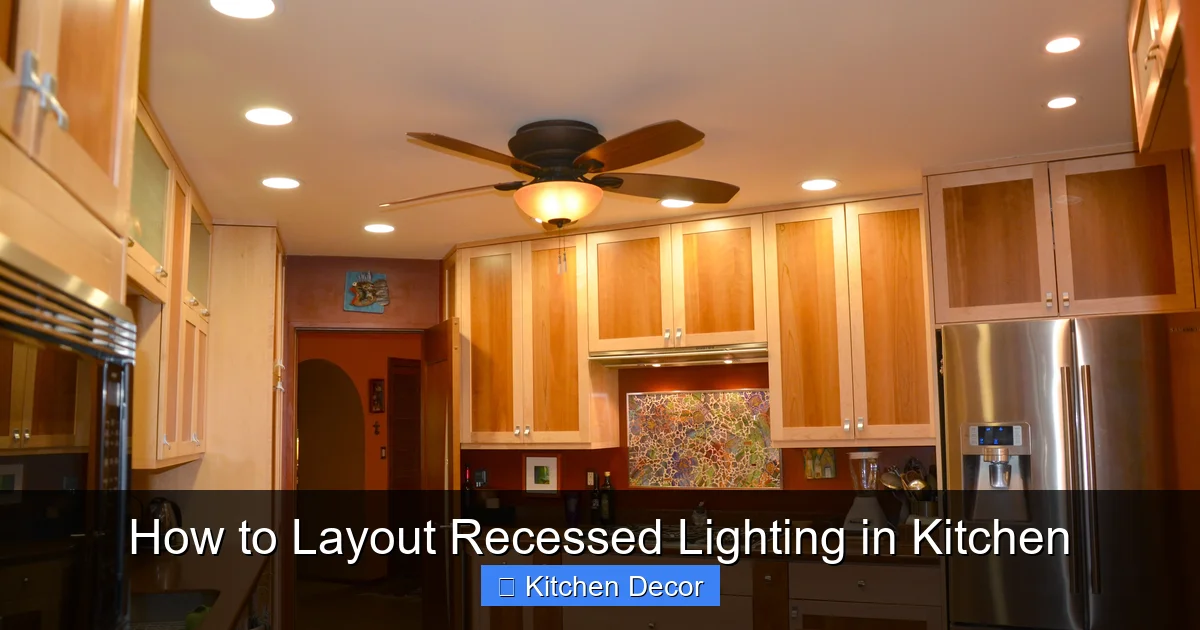
Visual guide about How to Layout Recessed Lighting in Kitchen
Image source: i.pinimg.com
Gather Your Tools & Documentation
You’ll need:
- A scaled floor plan of your kitchen (measure walls, note cabinets, island, appliances).
- A ceiling height measurement (from floor to finished ceiling surface).
- Graph paper or a digital design tool (like SketchUp Free or a simple spreadsheet).
- Painter’s tape.
- The specs (cut-in diameter, housing depth, trim style) for the recessed lights you intend to buy.
Identify Your Fixed Elements & Work Zones
On your floor plan, mark these immovable items in pencil:
- Cabinets & Countertops: Note the depth of upper cabinets (typically 12-15″). This is crucial because you want task light to hit the counter 12-24 inches from the cabinet front, not the wall behind it.
- Island/Peninsula: This is a major focal point and task area. Will you use pendants here? If yes, recessed lights may only need to provide ambient fill. If no, recessed lights must directly illuminate the island surface.
- Sink & Cooktop: These are non-negotiable task zones requiring excellent, shadow-free light.
- Appliances: Refrigerator, range, dishwasher. Light should fall on the floor in front of these for safety.
- Architectural Features: A beautiful coffered ceiling, a niche, or a piece of art. These are accent candidates.
Now, draw “zones” on your plan. Where is the primary prep area? The cleanup zone? The casual dining spot? This zoning will dictate where your light needs to be strongest.
Step 2: The Mathematics of Spacing – Calculating Your Grid
This is the core of the layout. The goal is an even, overlapping wash of light without dark spots or excessive brightness. The golden rule is based on your ceiling height and the beam angle of your fixture’s trim.
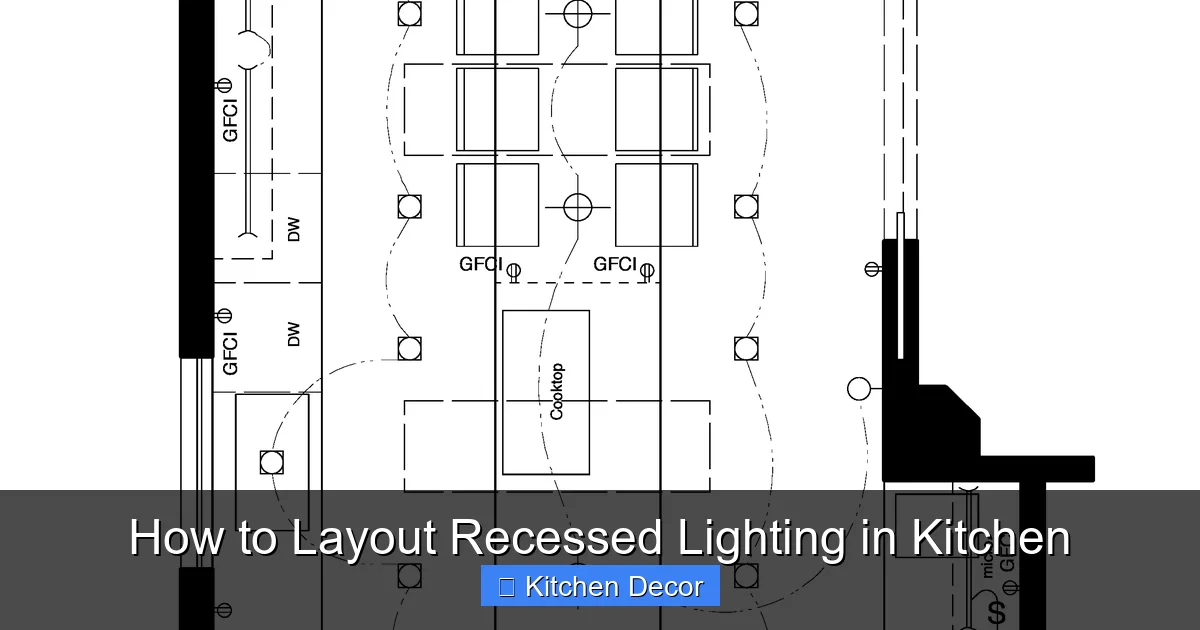
Visual guide about How to Layout Recessed Lighting in Kitchen
Image source: aldenmillerinteriors.com
Understanding Beam Spread & The “Spacing Formula”
Every recessed light trim has a specified beam angle (e.g., 25°, 35°, 50°). This angle determines how wide the light spreads on the floor. A common and effective formula for initial spacing is:
Spacing Distance = Ceiling Height x 0.5 to 0.75
For a standard 9-foot ceiling: 9 ft x 0.6 = 5.4 feet between fixtures. This is a starting point. You will adjust based on your specific trim’s beam spread and room needs. For a wide 50° flood trim, you might space them 5-6 feet apart on a 9-foot ceiling. For a narrower 30° spot, you might need them every 4 feet.
Creating the Grid: A Practical Walkthrough
Let’s layout a simple 12′ x 16′ kitchen with 9′ ceilings.
- Start at the Perimeter: Your first row of lights should typically be 2-3 feet from the wall. This prevents a “wall of light” effect and creates a softer transition to the walls. For a 12′ wide room, your first and last lights in a row would be at 2.5′ and 9.5′ (12′ – 2.5′).
- Determine Row Spacing: Using our formula (9 ft x 0.6 = 5.4 ft), we’d space rows about 5 to 5.5 feet apart. In a 16′ deep room, this gives you three rows: at ~2.5′, ~8′, and ~13.5′ from the back wall.
- Check for Countertop Coverage: This is the most critical check. From your row at 8′ from the back wall, is the light falling on the countertop edge? If your upper cabinets are 12″ deep, the counter edge is about 24-30″ from the wall. A light at 8′ from the back wall (so 4′ from the front of the counter if the room is 12′ deep) should perfectly illuminate the counter front. If not, you may need to shift the entire grid or add dedicated task lights.
- Adjust for the Island: If your island is 4′ wide and centered in a 12′ room, you have 4′ of aisle on each side. A light centered over the aisle (at the 4′ or 8′ mark in our room) will provide good ambient light over the island. For dedicated island task lighting, you might consider a separate pendant or a row of closer-spaced recessed lights directly over the island.
- Account for Obstacles: Now, overlay your ceiling joist locations (usually 16″ or 24″ on center). Can you run your wiring in the joist bays? If a planned hole location hits a joist, you must shift the entire row or use a remodel housing that can be fished between joists. Also, check for HVAC ducts, plumbing, or fire sprinklers.
Pro Tip: Use a simple spreadsheet. List your planned X,Y coordinates for each fixture. This becomes your installation checklist. For very large or complex kitchens, consider a professional lighting design software or consultant.
Step 3: Choosing Fixtures & Trims for the Job
Not all recessed lights are created equal. Your fixture and trim selection directly impacts the quality of light and the final look.
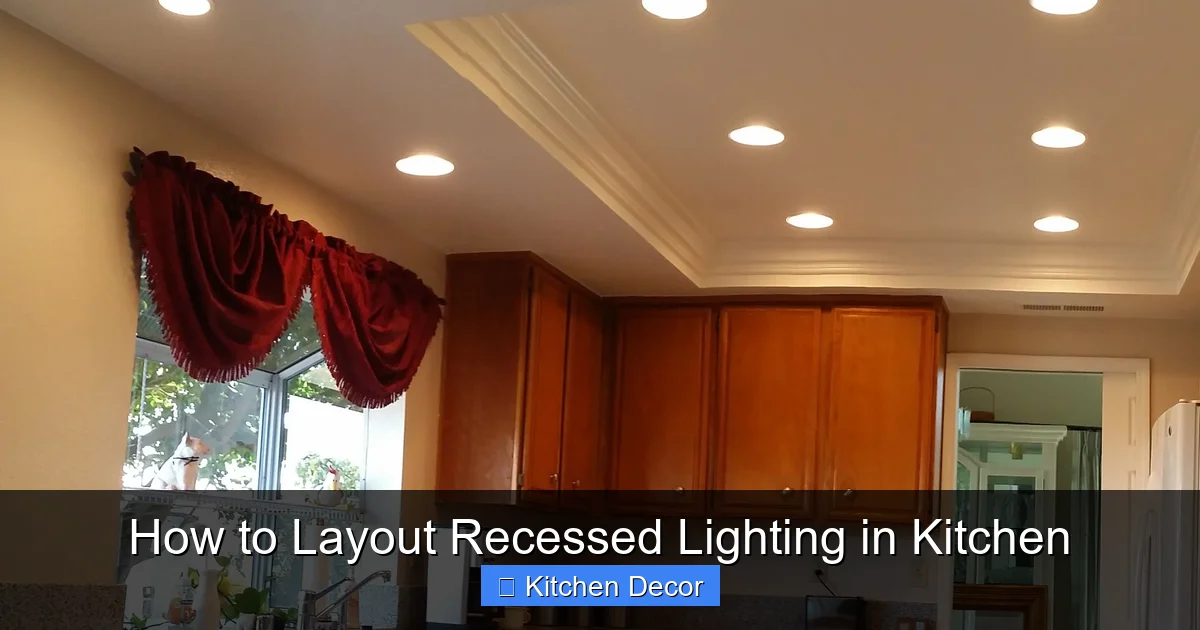
Visual guide about How to Layout Recessed Lighting in Kitchen
Image source: i.pinimg.com
Housing: New Construction vs. Remodel
- New Construction Housings: Used when you have full access to the ceiling joists (during a major renovation or new build). They have long “arms” that clamp to joists, offering superior stability and air sealing.
- Remodel Housings: Used when the ceiling is already finished. They have a smaller, tighter housing that is pushed up into the ceiling cavity and secured by tension clips or screws. Ensure your ceiling cavity depth (measure from drywall to joist) is greater than the housing depth specification.
Trim: The Face of Your Light – This is Where Function Meets Form
This is your most important aesthetic and functional choice.
- Baffle Trims: The most common. The ridged interior absorbs stray light, reducing glare and creating a crisp, clean beam. Excellent for general ambient and task lighting. Available in white, black, or metallic finishes.
- Reflector Trims: Have a highly polished interior (like a mirror) that maximizes light output and creates a brighter, more intense beam. Great for high ceilings or where you need maximum efficiency, but can cause more glare.
- Adjustable Trims: The gimbal or eyeball trim. The light source can be tilted (and sometimes rotated) after installation. Essential for accent lighting (highlighting art, cabinets) and for tweaking task light angles. Use these sparingly in general grids as they can look busy if overused.
- Square/Rectangular Trims: Offer a more modern, architectural look. Beam spread is often more defined. Ensure the housing is compatible.
Color Temperature & CRI: Setting the Mood
This is often overlooked but critical.
- Color Temperature (Kelvin): Measured in K. 2700K-3000K is warm white (cozy, traditional). 3500K-4000K is neutral/cool white (energetic, clean, great for task areas). 5000K+ is daylight (clinical, can be harsh in a home kitchen). Recommendation: Stick to 3000K-3500K for a warm, inviting, yet functional kitchen. You can use 4000K for dedicated task zones if desired.
- CRI (Color Rendering Index): Measures how accurately a light source shows color. Aim for 90+ CRI. This makes food look vibrant, wood grains rich, and fabrics true. Cheap LEDs may have a CRI of 80, which will make everything look dull.
Step 4: The Physical Layout – Marking, Wiring, and Installation
With your grid finalized and fixtures purchased, it’s time for the physical work.
The Tape Test: Never Skip This
Before you touch a drill, use painter’s tape to mark every single fixture location on the ceiling. Use your exact spacing from your plan. Then:
- Turn on all other lights in the house at night.
- Look at the tape marks from different angles in the room. Do they look balanced? Is the island adequately covered?
- Place your key pieces of furniture (if island seating) and stand at your main work areas. Does the light fall where you need it?
- This is your last, cheap chance to adjust.
Wiring Considerations & Best Practices
Unless you are a licensed electrician, this is the stage to hire a pro. However, you should understand the principles:
- Circuit Planning: Kitchen countertop receptacles require at least two 20-amp small appliance circuits by code (NEC). Your lighting can be on a separate 15-amp circuit, but often it’s grouped with other areas. Discuss with your electrician.
- Switching: This is your control layer. At minimum, have switches for:
- All Recessed Lights: A master switch.
- Under-Cabinet Lights: Independent control.
- Island/Pendant Lights: Independent control.
- Dimmed Circuits: Use dimmable LEDs and compatible dimmers (trailing edge for LEDs). Put all ambient and some task lighting on dimmers for ultimate flexibility.
- Junction Boxes: Every fixture and switch needs an accessible junction box. Plan wire runs (through joist bays) to minimize splices.
Installation Sequence
- Rough-in: Electrician installs housings, runs wires to junction boxes, and leaves wires protruding (pigtails). Housings must be level and securely attached.
- Insulation Contact (IC) Rating: If your ceiling has insulation (like in a cathedral ceiling), you must use IC-rated fixtures. They are designed to safely contact insulation without overheating.
- Air Sealing: Many modern housings have built-in gaskets or require additional caulking to prevent air leakage into the attic. This is crucial for energy efficiency.
- Trim Installation: This is the final, clean step. The trim or LED module snaps or screws into the housing. Ensure it’s seated properly and is clean of fingerprints.
Step 5: Common Layout Mistakes & How to Avoid Them
Even with a plan, pitfalls abound. Here are the most frequent errors and their fixes.
The “Grid That Ignores Cabinets” Mistake
Problem: Placing lights in a perfect, evenly-spaced grid without regard for cabinet locations. The result? Light hits the back wall of the upper cabinet, not the counter. You chop in shadow.
Solution: Your grid must be offset from the wall. The first row of lights should be 24-36 inches from the wall (depending on cabinet depth) to ensure light lands on the counterfront. Your grid lines should run parallel to the countertops, not necessarily the walls.
The “One-Size-Fits-All” Spacing Mistake
Problem: Using the same 4-foot spacing everywhere.
Solution: Density varies by zone. Over the main prep area, you might need lights every 3 feet. Over a walk-in pantry corner, every 6 feet may suffice. Let your task needs dictate local density.
The “Forget the Island” Mistake
Problem: Assuming ambient light from the perimeter will sufficiently light a large island.
Solution: For islands over 4 feet long, especially with seating, add dedicated lighting. This could be a row of recessed lights centered over the island (spaced 2-3 feet apart) or, more commonly and elegantly, pendants. If using recessed, use adjustable trims to aim light down onto the island surface.
The “Wrong Trim” Mistake
Problem: Using narrow spotlights everywhere, creating a spotted, uneven effect. Or using baffles in a high-ceilinged room where they don’t throw light far enough.
Solution: Match the trim to the job. Wide floods (50°) for high ceilings and general ambient. Narrower beams (25°-35°) for lower ceilings or to focus light on a specific counter run. Adjustables only where you need to aim.
The “No Dimming” Mistake
Problem: All lights on a simple on/off switch. The kitchen is either blindingly bright or pitch dark.
Solution: Install dimmers. A kitchen at 50% brightness is often perfect for mornings and evenings. It saves energy and extends bulb life. Use multi-location dimmers if switches are at both ends of a room.
Conclusion: Your Kitchen, Perfectly Lit
Laying out recessed lighting is a rewarding blend of art and arithmetic. It demands patience in the planning phase and precision in execution. Remember the core philosophy: light the task, fill the space, highlight the beauty. Start with a meticulous plan based on your kitchen’s unique dimensions and your personal workflow. Choose the right tools—the correct housings and, most importantly, the right trims for each purpose. Mock up the layout with tape, because a mistake on paper is free; a mistake in the ceiling is costly. Finally, embrace layering. Recessed lights are your foundation, but they shine brightest when supporting under-cabinet task lights and decorative pendants. By following this structured approach, you will transform your kitchen from a merely functional room into a brilliantly illuminated heart of the home, where every chop, stir, and sip happens under perfect light.
Frequently Asked Questions
How far apart should I space recessed lights in my kitchen?
A great starting point is to space them half to three-quarters of your ceiling height. For a standard 9-foot ceiling, aim for lights 4.5 to 6.5 feet apart. However, the final spacing depends heavily on your trim’s beam spread and your need for even countertop illumination. Always prioritize lighting the counterfront over a perfectly even grid.
Should I use LED or halogen bulbs for my kitchen recessed lights?
LED is the definitive modern choice. It uses a fraction of the energy, lasts 15-25 times longer, produces less heat (safer for cabinets), and is available in any color temperature and high CRI. Ensure you buy dimmable LEDs and a compatible LED dimmer switch for smooth, flicker-free dimming.
Can I install recessed lighting myself, or should I hire an electrician?
If you are only replacing existing fixtures with remodel housings in an accessible ceiling and are comfortable with basic electrical work, you may DIY. However, for any new wiring, running new circuits, cutting into ceilings with insulation, or if you are unsure about local electrical codes, hiring a licensed electrician is strongly recommended for safety, code compliance, and insurance purposes.
How do I prevent shadows on my countertops when using recessed lights?
Shadows are caused by lights being too far from the counter edge or by your body blocking the light. The solution is to place the first row of lights 24-36 inches from the wall (depending on upper cabinet depth) so the light lands on the counterfront, not the back wall. Supplement this with under-cabinet lighting, which eliminates body shadows entirely by placing the light source between you and your work surface.
How many recessed lights do I need for my kitchen?
There’s no single number. Calculate based on watts/lumens per square foot. A general guideline for kitchens is 30-40 lumens per square foot. For a 150 sq ft kitchen, you’d need 4,500-6,000 lumens total. If each LED can produces 800 lumens, you’d need roughly 6-8 fixtures. But this is just a starting point. Your layout, ceiling height, and fixture type will determine the final count. Always round up and consider having zones on separate switches.
What is the difference between a baffle and a reflector trim, and which should I use?
A baffle trim has a ridged, dark interior that absorbs stray light, reducing glare and creating a softer, more focused beam. It’s the most versatile and common choice for kitchens. A reflector trim has a shiny, polished interior that maximizes light output and creates a brighter, more intense beam, but with more potential for glare. Use baffles for most general and task lighting; use reflectors only for high ceilings where you need maximum throw, and be mindful of glare.