If your KitchenAid mixer isn’t spinning, the issue is often a simple attachment or bowl alignment problem, a worn planetary gear, or faulty motor brushes. Always start by unplugging the mixer and checking that the bowl and attachments are properly locked. If those are secure, the problem likely lies in the internal gear system or motor, which requires more advanced disassembly and part replacement. For complex issues or if your mixer is under warranty, contacting KitchenAid or a certified technician is the safest and most cost-effective route to get your beloved appliance back to whipping cream and kneading dough.
That familiar, satisfying hum that signals your KitchenAid mixer is ready to work has fallen silent. You’ve checked the outlet, you’ve wiggled the speed control, but the powerful motor just… won’t spin. Panic sets in as you imagine expensive repairs or the loss of your most trusted kitchen companion. Before you resign yourself to a costly service call or a sad trip to the store, take a deep breath. Many reasons a KitchenAid mixer isn’t spinning are diagnosable and fixable with a little patience, the right guidance, and a few common tools. This guide will walk you through a systematic, safe troubleshooting process, from the simplest user error to more complex internal gear and motor repairs. We’ll talk you through each step in plain language, so you can confidently determine if this is a DIY project or a job for the pros.
Key Takeaways
- Safety First: Always unplug your KitchenAid mixer before inspecting or attempting any repairs to prevent electric shock or accidental start-up.
- Check the Basics: Over 30% of “not spinning” issues are caused by a misaligned bowl or an attachment (like a paddle or whisk) not fully seated in the drive pin.
- Listen and Feel: A humming motor with no spin often points to a stripped gear (common plastic worm gear) or seized bearings, while no sound at all suggests an electrical fault.
- Know Your Limits: Replacing the planetary gear set or motor brushes is a moderate DIY task. Internal motor failure or control board issues are best left to professionals.
- Warranty Matters: Opening the mixer’s housing will void most manufacturer warranties. Check your warranty status before disassembling the unit.
- Maintenance is Key: Regularly cleaning the attachment hub, checking for wear on the drive pin, and avoiding overloading extends your mixer’s life and prevents many common problems.
📑 Table of Contents
- Section 1: The Essential First Steps – Safety & The Obvious Checks
- Section 2: Is It Humming or Silent? Diagnosing the Symptom
- Section 3: Accessing and Diagnosing the Planetary Gear System
- Section 4: Motor and Electrical System Repairs
- Section 5: When to Call a Professional and Warranty Considerations
- Section 6: Proactive Maintenance to Prevent Future Heartbreak
Section 1: The Essential First Steps – Safety & The Obvious Checks
Before you grab a screwdriver and dive into the mixer’s belly, you must rule out the simplest, safest possibilities. Jumping to complex repairs when the issue is a mislocked bowl is frustrating and risks damaging your mixer. This initial phase is critical.
Unplug and Stabilize
This is non-negotiable. Always unplug your KitchenAid mixer from the wall outlet before performing any inspection or repair. The mixer’s powerful motor can start unexpectedly if the speed control is bumped, leading to serious injury. Place the mixer on a stable, well-lit countertop. Clear the area so you have space to lay out parts if you disassemble anything.
The Bowl and Attachment Lock
The KitchenAid’s design includes a crucial safety interlock. The motor will not engage if the bowl is not properly secured or if the attachment is not fully seated. This is the #1 culprit for a mixer that appears dead.
- The Bowl: Raise the bowl handle and firmly push the bowl back until you hear and feel a distinct click. The bowl should not wiggle side-to-side. The locking mechanism on the rear of the mixer base must engage with the bowl’s stud.
- The Attachment: This is a frequent oversight. Whether you’re using a dough hook, paddle, or whisk, the attachment’s hub must slide completely onto the mixer’s drive pin (the small metal post in the center of the attachment opening). You should feel it drop into place and be flush with the bottom of the attachment. If it’s even slightly raised, the connection is incomplete.
- The Speed Control: Ensure the speed lever is firmly set to one of the numbered speeds (1-10) and not stuck in the “off” or “stir” position. Sometimes the lever can become slightly misaligned.
Practical Tip: With the mixer unplugged, manually try to turn the attachment by hand. If it spins freely within the bowl, the connection is likely okay. If it doesn’t turn or feels gritty, something is jammed or misaligned further down.
Power Source Verification
It sounds silly, but always confirm the power source. Plug another device, like a lamp or phone charger, into the same outlet. If it doesn’t work, check your home’s circuit breaker or fuse box. If the outlet is on a switched circuit, ensure the switch is on. For older homes, a tripped GFCI outlet (often in the kitchen or bathroom) can cut power without the breaker flipping. Press the “reset” button on any GFCI outlet.
Section 2: Is It Humming or Silent? Diagnosing the Symptom
Now, plug the mixer back in (briefly, for this test only) and set the speed lever to 1. Listen and feel closely. The sound (or lack thereof) is your biggest clue.

Visual guide about How to Fix a Kitchenaid Mixer That Isnt Spinning
Image source: trishdeseine.com
The Humming Motor with No Spin
If you hear a steady electrical hum but the attachments don’t turn, the motor is receiving power and trying to start, but something is mechanically blocking it or the motor itself has lost torque. This is the most common symptom for internal failures.
- Stripped Drive Gear: Inside your mixer, a vertical drive shaft from the motor turns a horizontal worm gear (usually made of plastic). This worm gear meshes with a larger nylon or metal planetary gear ring that drives the attachment shaft. Over time, especially with heavy doughs, the teeth on the plastic worm gear can strip or wear smooth. The motor spins its shaft, but the power isn’t transferred.
- Seized Bearings or Bushings: The drive shaft and planetary gear rotate on bearings or bushings. If these seize due to lack of grease, old age, or contamination, the entire system locks up.
- Obstruction in the Bowl: A utensil, a piece of dough wrapped around the dough hook, or even a large amount of very stiff dough can physically jam the rotation. Always stop the mixer immediately if you suspect this.
The Dead Silent Mixer
No sound, no hum, no movement. This points to an electrical failure before the motor.
- Faulty Speed Control Switch: The slide lever you move connects to an internal multi-position switch. This switch can wear out, get dirty, or have a loose connection, preventing power from reaching the motor.
- Failed Motor Brushes: Inside the motor, carbon brushes transfer electricity to the spinning armature. These brushes wear down over time (typically after 1,000+ hours of use). If they are too short or stuck, the motor won’t start. This is a common and relatively easy fix for many models.
- Blown Fuse or Thermal Overload: Some mixers have an internal thermal fuse that trips if the motor overheats. A power surge can also blow a small internal fuse. This requires a multimeter to diagnose.
- Broken Power Cord: Inspect the entire cord, especially where it enters the mixer base and the plug. Fraying, kinks, or a broken wire will stop all power.
Section 3: Accessing and Diagnosing the Planetary Gear System
If you’ve confirmed the bowl and attachments are perfectly locked and the symptom is a humming motor, your investigation moves to the gearbox. This is the heart of the spinning mechanism and the most common failure point. Accessing it requires removing the mixer’s end caps and housing.
Visual guide about How to Fix a Kitchenaid Mixer That Isnt Spinning
Image source: trishdeseine.com
Tools and Preparation
You’ll need a set of screwdrivers (flathead and Phillips), possibly a 1/4″ nut driver or socket, a putty knife or plastic pry tool, and a container for screws. Work on a soft towel to protect the mixer’s finish. Take photos as you disassemble to remember screw locations and wiring connections.
Step-by-Step Disassembly (General Guide)
Note: Model variations exist (Tilt-Head vs. Bowl-Lift). This covers a typical Tilt-Head model. For Bowl-Lift models, you must first remove the bowl support yoke.
- Remove the attachment hub cover (the silver ring around the drive pin) by prying it up with a flathead screwdriver or putty knife.
- Using a 1/4″ nut driver or socket, remove the large central nut that holds the attachment shaft in place. Hold the shaft with pliers to prevent it from turning.
- With the nut off, you can pull the attachment shaft straight up and out. Set it aside carefully.
- Now, tilt the head back. You’ll see the gear housing. Remove the screws holding the two plastic end caps (one on each side).
- Gently pry the main housing (the colored part) away from the metal gearbox. It is sealed with a rubber gasket. Work slowly around the perimeter.
You will now see the internal gears. The motor is on the right (from the back), with a small vertical shaft connected to the plastic worm gear. The worm gear meshes with the larger circular planetary gear ring (often white nylon).
Visual Inspection and the “Worm Gear” Test
Visually inspect the gears.
- Worm Gear: Look at the spiral threads. Are they worn smooth, chipped, or shredded? If the teeth are rounded off, it’s stripped and must be replaced. This is a classic failure.
- Planetary Gear Ring: Check the internal teeth. Are they worn or broken? Often, if the worm gear fails, it can damage the planetary gear ring, so both may need replacement.
- Grease: Is the grease old, dried out, or contaminated with black metal shavings? That indicates severe wear. You will need to clean everything thoroughly and repack with fresh food-safe grease during reassembly.
The Manual Spin Test: With the housing off, try to manually rotate the planetary gear ring (the large white ring) by hand. It should turn smoothly in both directions with slight resistance. If it’s locked, your bearings are seized. If it spins freely with no resistance, the worm gear is likely stripped and not engaging.
Section 4: Motor and Electrical System Repairs
If the gearbox looks pristine and spins freely, or if your symptom was a dead silent mixer, the fault lies in the motor or its control circuit. These repairs are slightly more technical but still manageable for a confident DIYer.
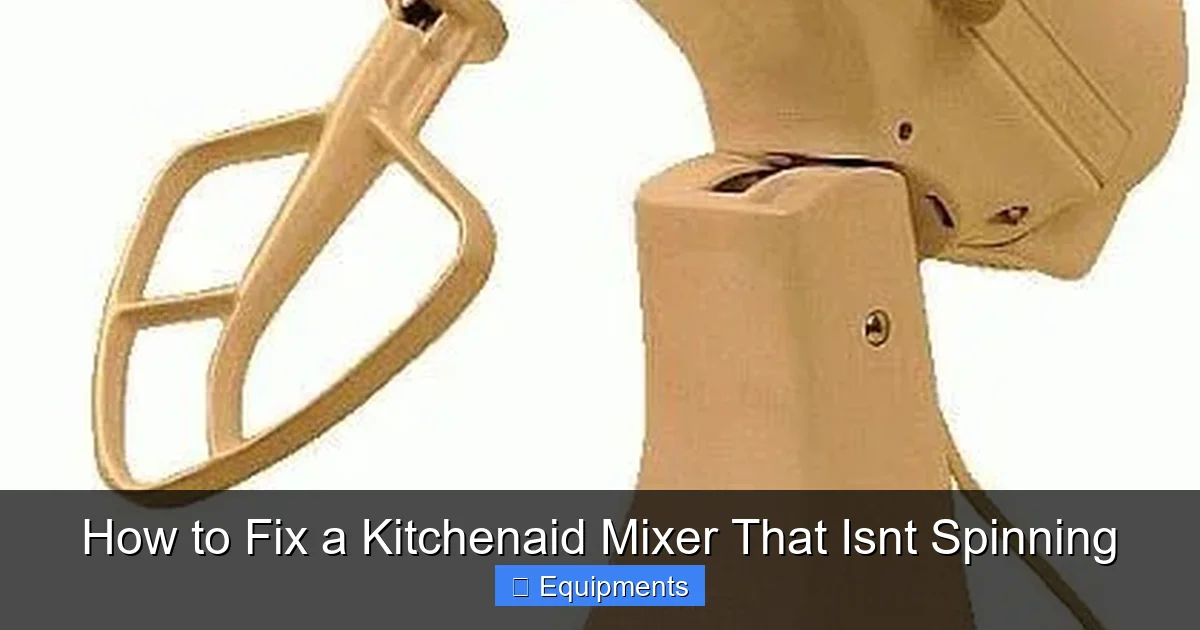
Visual guide about How to Fix a Kitchenaid Mixer That Isnt Spinning
Image source: i.pinimg.com
Replacing Motor Brushes
This is the most common electrical fix. Motor brushes are small carbon blocks, about the size of a fingernail, that press against the motor’s armature.
- Locate the brush caps. On most tilt-head models, they are on the back of the motor housing, near the bottom, under small plastic covers held by a screw or just a snap-fit.
- Remove the caps. You’ll see a spring and the carbon brush. Note the orientation. Pull the brush out (it’s connected by a short wire).
- Compare the old brush to a new one (purchase a KitchenAid-specific brush kit). A new brush is typically about 3/4″ long. If your old brush is worn down to less than 1/4″, it’s definitely time for replacement.
- Insert the new brush, ensuring the wire is connected and the spring is compressed against it. Replace the cap. Do this for both brushes.
Pro Tip: Even if one brush looks okay, replace both at the same time for even wear and performance.
Diagnosing the Speed Control Switch
If new brushes don’t solve a silent mixer, the speed control switch is the next suspect. You must access it by fully removing the mixer’s main housing.
- With the mixer unplugged and the head tilted back, remove all screws holding the colored plastic housing to the metal base. There are usually 4-6 screws, some on the sides and back.
- Carefully lift the housing off. The speed control lever will be connected to the switch mechanism. You may need to disconnect a wire harness or two. Take a photo first.
- The switch is a rectangular black component. Visually inspect for burn marks, melted plastic, or loose terminals. Use a multimeter set to continuity/ohms to test each speed setting. With the mixer unplugged, place one probe on the motor’s power input terminal and the other on the output terminal for each speed. You should get continuity (a beep or low resistance reading) on each speed setting. No continuity on any setting means the switch is dead.
Replacing the switch requires desoldering or unplugging the wires and installing the new unit, then reassembling. If you’re uncomfortable with this, it’s a professional job.
Section 5: When to Call a Professional and Warranty Considerations
Fixing your own mixer is empowering, but knowing your limits is crucial for safety and cost-effectiveness.
Signs It’s Time to Seek Expert Help
- Motor Failure: If you’ve replaced brushes and the gearbox is fine but the motor still only hums or is dead, the armature windings may be burnt out or the field magnets may have failed. Motor rewinding or replacement is complex.
- Severe Gear Damage: If both the worm gear and planetary gear are shredded, or if the gearbox casing is cracked, a professional rebuild or full gearbox replacement is recommended.
- Control Board Issues: Newer KitchenAid models (especially Pro Line) have electronic control boards. Diagnosing and replacing these requires specific knowledge and tools.
- Lack of Confidence or Tools: If at any point you feel unsure, stop. A botched repair can cause more damage. The cost of a professional repair on a high-end mixer is often justified by the expertise and warranty on the repair itself.
Warranty and Your Mixer’s Age
This is critical: The moment you remove the mixer’s main housing screws, you will void the manufacturer’s warranty. If your mixer is still under the standard 1-year warranty or an extended warranty you purchased, the only safe path is to contact KitchenAid Customer Care directly. They will authorize a warranty repair through their authorized service centers. Do not attempt internal repairs on a warrantied unit. For mixers outside the warranty, you are free to proceed, but consider the age and value. A 20-year-old mixer is often worth repairing, while a 5-year-old with a fried motor might not be, depending on part costs.
Section 6: Proactive Maintenance to Prevent Future Heartbreak
An ounce of prevention is worth a pound of cure. Simple habits will keep your KitchenAid spinning for decades.
Daily & Weekly Habits
- Always Lock the Bowl: Make it a ritual to push the bowl back firmly until it clicks.
- Fully Seat Attachments: Press down on attachments until they are flush. Give a slight twist—some attachments have a locking mechanism.
- Clean the Attachment Hub: Food debris and dried batter in the drive pin socket can prevent full seating. Unplug the mixer, remove the attachment, and use a damp cloth or a toothpick to clean around the pin. Never spray water directly into the socket.
- Don’t Overload: Respect your mixer’s capacity. Trying to knead a 5-pound batch of stiff dough in a 5-quart mixer is a direct path to gear failure. Split batches if necessary.
Annual Deep Care
- Grease Check (Advanced): Every few years, if you’re comfortable, open the gearbox. If the grease is dark, gritty, or dried, it’s time for a full repack with KitchenAid-approved food-grade grease (like their own or a high-quality synthetic). This is the best way to ensure bearing and gear longevity.
- Inspect the Drive Pin: The small metal post on which attachments rotate can bend or wear. Check it for straightness. A bent pin will cause wobble and premature wear.
- Tighten All Screws: Vibration can loosen screws on the housing and attachment hub. A periodic check with a screwdriver can prevent rattles and misalignments.
In the end, your KitchenAid mixer is a robust, mechanical marvel. Most “not spinning” problems are solvable. Start with the simple, safe checks. Move to the gear inspection if you hear a hum. Replace brushes for a silent unit. By understanding how your machine works, you become its best caretaker. Whether you successfully replace a $15 worm gear yourself or wisely decide to invest in a professional repair for a beloved, decades-old mixer, you’ve ensured that the heart of your kitchen can keep beating for many more years of baking and creating.
Frequently Asked Questions
Can I fix my KitchenAid mixer myself if it’s under warranty?
No. Opening the mixer’s housing by removing screws will immediately void the manufacturer’s warranty. If your mixer is still covered, you must contact KitchenAid Customer Care to file a warranty claim and have it repaired at an authorized service center.
My mixer hums loudly but doesn’t spin. What is the most likely part to replace?
A humming motor with no spin most commonly indicates a stripped plastic worm gear inside the gearbox. This gear wears out over time, especially with heavy doughs. Replacing the worm gear set (worm gear and often the planetary gear ring) is the typical fix for this symptom.
Is it worth repairing an old KitchenAid mixer?
Absolutely. KitchenAid mixers are built to last for decades. A gearbox rebuild (new gears, bearings, grease) or a motor brush replacement can cost $50-$150 in parts, far less than a new mixer. Their modular design means most parts are replaceable, making repair very cost-effective for a well-loved machine.
What does it mean if my mixer makes a grinding noise when it tries to spin?
A grinding noise usually means there is severe internal damage. It could be completely stripped gear teeth grinding against each other, or a seized bearing. You should unplug the mixer immediately to prevent further damage and inspect the gearbox. You will likely need to replace the affected gears and possibly bearings.
How much does it cost to have a professional fix a KitchenAid mixer that won’t spin?
Professional repair costs vary by location and issue. A simple motor brush replacement might be $50-$75 plus parts. A full gearbox rebuild (labor-intensive) can range from $150 to $300. Always get an estimate first, as the cost may approach the value of a newer used model, but for a high-end or sentimental mixer, it’s often worth it.
Can using the wrong attachment damage the gears?
Yes. Only use genuine KitchenAid attachments or certified compatible ones. Attachments with an incorrect hub size or a drive pin that is too long/short can improperly engage the drive system, putting unusual stress on the gears and potentially causing premature wear or breakage.