Drying mullein leaves in the oven is a fast, controlled method to preserve this versatile herb for year-round use in teas, tinctures, and natural remedies. By following precise temperature guidelines and proper preparation, you can achieve perfectly crisp, dried leaves that retain their beneficial compounds. This method is ideal for humid climates where air-drying is difficult and ensures a mold-free product when done correctly.
Key Takeaways
- Harvest at Peak Potency: Pick mullein leaves on a dry, sunny morning after the dew has evaporated but before the midday sun reduces their essential oil content.
- Low and Slow is Key: Always use the lowest possible oven temperature (140-170°F / 60-77°C) to dry mullein leaves; high heat destroys active compounds and risks burning.
- Prep is Non-Negotiable: Gently clean leaves of dirt and insects, pat them completely dry, and remove any damaged or diseased foliage before arranging them in a single layer.
- Monitor Constantly: Oven drying takes 1-4 hours depending on leaf thickness and humidity. Check frequently for crispness and rotate trays to ensure even drying.
- Cool Before Storing: Let dried leaves cool completely on a wire rack before transferring to an airtight container stored in a dark, cool place to prevent moisture reabsorption.
- Test for Readiness: Properly dried mullein leaves should be brittle and crumble easily between your fingers. If they are still pliable or have any softness, they need more drying time.
- Know Your Plant: Ensure absolute correct identification of common mullein (Verbascum thapsus). Only the leaves are typically used; the roots and seeds have different properties and preparation methods.
📑 Table of Contents
- Why Dry Mullein Leaves? The Power of the Velvet Plant
- Essential Preparation: Harvesting and Cleaning Your Mullein
- Step-by-Step: Drying Mullein Leaves in the Oven
- Storing Your Dried Mullein for Long-Term Potency
- From Dried Leaves to Useful Herbs: How to Use Your Oven-Dried Mullein
- Troubleshooting: Common Issues and How to Fix Them
- Safety First: Important Considerations When Using Mullein
Why Dry Mullein Leaves? The Power of the Velvet Plant
Before we dive into the how, let’s talk about the why. Mullein, often called the “velvet plant” due to its soft, hairy leaves, is a biennial herb with a storied history in traditional herbal medicine. Its large, fuzzy leaves are the star of the show, prized for their expectorant, demulcent, and anti-inflammatory properties. People have used mullein leaf tea for centuries to soothe irritated respiratory passages, ease coughs, and support lung health. But the fresh leaf is bulky, perishable, and can be irritating to the skin and mucous membranes due to those fine hairs. Drying transforms it into a stable, concentrated, and less irritating form that you can store in your pantry for months, ready to brew into a healing tea or tincture at a moment’s notice.
While traditional air-drying in a dark, well-ventilated space is the classic method, it has a major drawback: it’s completely at the mercy of your local humidity. In a damp climate or during a rainy spell, air-dried herbs are notorious for developing mold or mildew, ruining your entire harvest. This is where oven drying becomes a game-changer. It offers a controlled, enclosed environment that virtually eliminates the risk of mold, drastically reduces drying time from days to hours, and is entirely weather-independent. Learning how to dry mullein leaves in the oven is a valuable skill for any herbal enthusiast, ensuring a safe and potent supply of this remarkable herb.
Essential Preparation: Harvesting and Cleaning Your Mullein
The success of your dried mullein leaves begins long before you preheat the oven. Proper harvesting and cleaning are the foundational steps that determine the quality, potency, and safety of your final product. Rushing or skipping this phase can lead to contaminated, flavorless, or even unsafe dried herbs.
Visual guide about How to Dry Mullein Leaves in the Oven
Image source: thekitchenix.com
Timing Your Harvest for Maximum Potency
The best time to harvest mullein leaves is during its first year of growth (when it forms a low rosette) or early in the second year before it sends up its towering flower stalk. The ideal window is on a dry, sunny morning after the dew has fully evaporated but before the intense afternoon sun. Why this specific time? The plant’s essential oils and beneficial compounds are most concentrated during this period. The morning harvest ensures the leaves are dry on the surface, which is crucial for preventing mold during the drying process. Avoid harvesting after rain or when plants are wet.
Identifying and Selecting the Right Leaves
Not all leaves are created equal. You want to select healthy, vibrant green leaves that are free from holes, significant discoloration (yellowing or browning), spots, or any signs of disease or insect infestation. The large, lower leaves are the most common choice, but smaller, younger leaves can be more tender and potent. A quick rule of thumb: if a leaf looks damaged or sick, discard it. One bad leaf can introduce mold spores to your entire batch during the drying process. Use sharp, clean scissors or pruning shears to make a clean cut at the base of the leaf stem.
The Critical Cleaning Process: Removing Dirt and Pests
Mullein leaves grow close to the ground and are naturally hairy, which means they can trap a lot of dust, soil, and tiny insects. Cleaning them properly is essential.
- Initial Shake: Give each harvested branch a firm shake outdoors to dislodge any loose dirt and crawling insects.
- Gentle Rinsing: Fill a large bowl or clean sink with cool water. Submerge the leaves and swish them gently to remove remaining grit. Do not agitate them harshly, as the delicate leaves can tear.
- Inspect and Repeat: Lift the leaves out and inspect them. You may need to rinse a second time if the water was very dirty.
- Drying is Mandatory: This is the most important step after rinsing. You must remove all surface moisture. Lay the leaves out in a single layer on clean kitchen towels or a salad spinner. If using towels, gently pat them dry and replace the towels if they become damp. You can also use a fan to circulate air over them. The leaves must be completely dry to the touch before they go into the oven. Any residual water will turn to steam, causing the leaves to cook rather than dry, and will promote spoilage.
Step-by-Step: Drying Mullein Leaves in the Oven
Now for the main event. Oven drying is a straightforward process, but precision with temperature and attention to detail are what separate a successful batch from a burnt or moldy failure. Follow these steps exactly for perfect results every time.

Visual guide about How to Dry Mullein Leaves in the Oven
Image source: thekitchenix.com
Step 1: Preheat and Prepare Your Equipment
Gather your equipment: baking sheets (preferably rimmed to catch any loose hairs), parchment paper or silicone baking mats (to prevent sticking and make cleanup easier), an oven thermometer (highly recommended, as many ovens run hot or cool), and a wire cooling rack. Preheat your oven to the lowest possible temperature setting. For most ovens, this will be between 140°F and 170°F (60°C – 77°C). If your oven doesn’t go this low, set it to the “warm” setting or 200°F (93°C) and prop the door open slightly with a wooden spoon to allow moisture to escape and keep the internal temperature down. Never exceed 170°F (77°C). Higher temperatures will vaporize the precious volatile oils and can easily burn the delicate leaves.
Step 2: Arrange Leaves in a Single Layer
Take your completely dry leaves and arrange them in a single, non-overlapping layer on your prepared baking sheets. Do not pile them up. Overcrowding blocks airflow, leading to uneven drying and creating pockets of moisture where mold can thrive. The hairy leaves can also stick together, so give them plenty of personal space. If you have a lot of leaves, use multiple baking sheets and rotate them during the drying process.
Step 3: The Drying Process: Patience and Vigilance
Place the baking sheets in the preheated oven. The drying time can vary widely based on leaf thickness, size, and your oven’s true temperature. It can take anywhere from 1 to 4 hours. Set a timer to check the leaves every 30-45 minutes.
- Rotate Trays: Swap the positions of the baking sheets (top rack to bottom, front to back) each time you check to promote even drying.
- Check for Crispness: After the first hour, start testing. Remove a leaf from the center of a sheet, let it cool for a minute on your counter, and try to bend it. It should snap or crumble easily. If it’s still flexible and moist, it needs more time.
- Watch for Signs of Burning: The edges may begin to look slightly browned or feel crisp to the touch. If you see any signs of darkening or smell a toasty, almost burnt scent, immediately reduce the oven temperature or remove the leaves.
Step 4: The Cool-Down and Storage Protocol
Once the leaves are uniformly brittle and crumbly, turn off the oven. Carefully remove the baking sheets and immediately transfer the dried leaves to a wire cooling rack. Let them cool completely to room temperature. This is a critical, non-negotiable step. Placing warm leaves into a storage container will trap residual heat and moisture, creating a mini-greenhouse that leads to condensation and, ultimately, mold. Only when the leaves are completely cool to the touch should you proceed to storage.
Storing Your Dried Mullein for Long-Term Potency
Your beautifully dried mullein leaves are useless if not stored correctly. Proper storage protects your harvest from the three main enemies: light, air, and moisture. The goal is to create an airtight, dark, and cool environment.

Visual guide about How to Dry Mullein Leaves in the Oven
Image source: thekitchenix.com
Choosing the Right Container
Airtight glass jars with rubber seals (like Mason jars or Weck jars) are the gold standard. They provide an excellent barrier against oxygen and moisture. High-quality, food-grade plastic containers with tight-sealing lids are a second-best option. Avoid paper bags, cardboard boxes, or any container that is not truly airtight. For extra protection, you can place a small food-safe desiccant packet (like those found in supplement bottles) at the bottom of the jar to absorb any stray humidity.
Ideal Storage Conditions
Store your sealed containers in a cool, dark place. A pantry, cupboard, or basement that stays consistently cool and out of direct sunlight is perfect. Avoid storing herbs above the stove, next to the dishwasher, or in any area that experiences temperature fluctuations. Light and heat degrade the delicate herbal constituents over time, reducing potency and flavor.
Labeling and Shelf Life
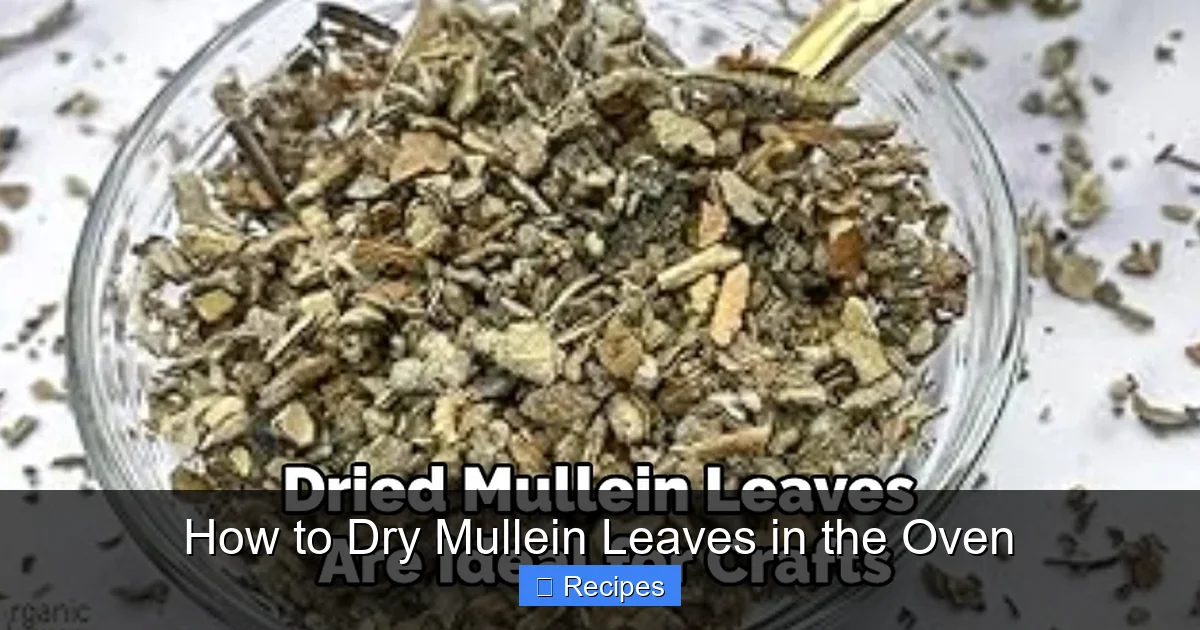
Always label your jars with the contents (“Dried Mullein Leaves”) and the date of drying. This simple habit prevents confusion and helps you use the oldest stock first (first-in, first-out). When stored perfectly, dried mullein leaves will retain their best quality for 12-18 months. Over time, they will slowly lose their vibrant color and aromatic potency, though they will remain safe to use as long as there is no sign of mold, off-smells, or insect infestation. A good rule of thumb: if it doesn’t smell like a pleasant, slightly sweet, earthy herb, don’t use it.
From Dried Leaves to Useful Herbs: How to Use Your Oven-Dried Mullein
Now that you have a jar of perfect, crisp mullein leaves, what do you do with them? The drying process makes them incredibly versatile.
For Respiratory Tea: The Classic Application
This is the most common use. To make a soothing mullein tea, steep 1-2 teaspoons of dried leaves in one cup of boiling water for 10-15 minutes. Strain carefully through a fine-mesh sieve or cheesecloth—the tiny leaf hairs can be irritating if consumed. The tea has a mild, slightly sweet, and earthy flavor. It is traditionally drunk 2-3 times a day to support respiratory comfort. You can blend it with other lung-supporting herbs like licorice root, marshmallow root, or thyme.
Creating Tinctures and Extracts
A tincture is a concentrated herbal extract made by soaking plant material in alcohol (usually vodka or grain alcohol). The dried mullein leaves are ideal for this. Pack a clean glass jar loosely with the dried leaves and cover with 80-proof (40%) alcohol. Seal tightly, shake daily, and store in a dark place for 4-6 weeks. Strain and bottle. Tinctures have a very long shelf life (several years) and allow for precise dosing with a dropper.
Culinary and Craft Uses
Don’t limit mullein to the medicine cabinet! The dried leaves have a subtle, spinach-like flavor when rehydrated. They can be crumbled into soups, stews, or sautéed with other greens. Historically, the dried leaves (and sometimes the flower stalks) were also used as a natural wick for oil lamps—simply soak a dried leaf stalk in oil and light it. Additionally, the large, dried leaves make beautiful, rustic additions to dried flower arrangements or potpourri mixes.
Troubleshooting: Common Issues and How to Fix Them
Even with the best instructions, things can go wrong. Here’s how to identify and solve the most common problems when you dry mullein leaves in the oven.
Problem: Leaves Are Burning or Browning Too Quickly
Cause: Oven temperature is too high. Many home ovens run hotter than their dial indicates.
Solution: Invest in an inexpensive oven thermometer to know your actual temperature. If your oven’s lowest setting is still too hot, prop the door open slightly with a wooden spoon or a heat-resistant utensil to allow hot air to escape and lower the internal temperature. You may also need to reduce the time the leaves are in the oven by checking them more frequently.
Problem: Leaves Are Not Drying / Feel Damp After Hours
Cause: Leaves were not completely dry before going into the oven, they were overcrowded on the tray, or the oven temperature is too low to effectively drive off moisture.
Solution: Ensure leaves are bone-dry to the touch before starting. Arrange them in a true single layer with space between each leaf. If after 3-4 hours they are still not crisp, your oven may not be reaching a high enough temperature. Increase it slightly (to 175°F / 80°C max) and continue monitoring. Ensure your oven’s ventilation (usually a vent at the back) is not blocked.
Problem: Mold or Mildew Spots Appear on Dried Leaves
Cause: Moisture was trapped during the drying process (from wet leaves or overcrowding) or the leaves were not cooled completely before storage.
Solution: This batch is compromised and should be discarded to avoid inhaling mold spores. For your next batch, be meticulous about pre-drying the washed leaves and arranging them in a single layer. Always, always cool the dried leaves on a wire rack for at least an hour before jarring.
Problem: Dried Leaves Are Extremely Brittle and Turn to Dust
Cause: Over-drying. The leaves were left in the oven too long after they had already reached the crisp stage.
Solution: Set a timer and start checking for doneness at the 60-minute mark. The moment they are crisp and crumble easily, remove them. It’s better to slightly under-dry and add 15 more minutes than to over-dry. If caught early, you can sometimes rehydrate overly dry leaves slightly by placing them in a sealed container with a slice of fresh apple or bread for a few hours, but prevention is best.
Safety First: Important Considerations When Using Mullein
While mullein is generally regarded as safe for most people when used appropriately, there are crucial safety points to understand. This is not a casual kitchen experiment; it’s herbal preparation.
First, positive plant identification is paramount. Common mullein (Verbascum thapsus) has distinctive large, woolly leaves that form a rosette and a tall, woody flower spike covered in small yellow flowers. Never harvest from an area that may have been sprayed with pesticides, herbicides, or near heavy traffic. Wash your hands after handling the fresh leaves, as the tiny hairs can cause skin irritation in sensitive individuals.
Second, understand that the seed and root of mullein have different properties and traditional uses than the leaf. This guide focuses solely on the leaves. The seeds contain a mild narcotic principle and are not used in the same way. The root is a stronger, more stimulating expectorant and is typically harvested from two-year-old plants in the fall. Do not substitute one part for another.
Third, as with any herbal medicine, consult with a healthcare professional before using mullein regularly, especially if you are pregnant, breastfeeding, have a known medical condition, or are taking prescription medications. While rare, some people may experience allergic reactions. Start with a small amount of tea to gauge your tolerance. The demulcent (soothing) action can sometimes interfere with the absorption of some oral medications, so take mullein tea at least 1-2 hours apart from prescription drugs.
Frequently Asked Questions
How long does it take to dry mullein leaves in the oven?
Typically, it takes between 1 to 4 hours at a low temperature (140-170°F / 60-77°C). The exact time depends on your oven’s accuracy, the thickness and size of the leaves, and ambient humidity. Always check for doneness by testing for brittleness rather than relying solely on time.
What is the safest oven temperature for drying mullein leaves?
The safest and most effective temperature range is between 140°F and 170°F (60°C – 77°C). Temperatures above 170°F risk destroying delicate volatile oils and can quickly burn the leaves. If your oven’s lowest setting is higher, prop the door open slightly to lower the internal temperature.
Can you dry mullein roots or flowers in the oven using the same method?
You can, but the process differs. Roots are much denser and require lower heat (around 120-140°F / 50-60°C) for a much longer period (6-12 hours), often sliced thinly. Flowers are more delicate and may only need 30-60 minutes at the lowest temperature. Always research the specific part you are drying, as optimal times and temps vary.
How can I tell if my oven-dried mullein leaves are completely dry?
They should be uniformly brittle and crumble easily between your fingers when cool. A properly dried leaf will snap or shatter, not bend. If they are still pliable, leathery, or have any softness or moisture in the center, they need more drying time. When in doubt, dry them a bit longer.
Is oven-dried mullein as potent as air-dried mullein?
When done correctly at low temperatures, oven-dried mullein can retain comparable potency to air-dried. The controlled, low-heat environment of the oven actually helps preserve volatile oils better than a slow air-dry in less-than-ideal (humid) conditions. The key is avoiding high heat, which is the true enemy of herbal potency.
Can I store my dried mullein leaves in the refrigerator or freezer?
While you can, it’s generally not recommended unless you live in an extremely humid environment. Refrigerators and freezers can introduce moisture when containers are opened and closed (condensation). A consistently cool, dark, and dry pantry in an airtight glass jar is the superior storage method. If you must use the freezer, ensure the container is 100% airtight and let it come to room temperature before opening to prevent condensation.