Drying eggshells in the oven is a simple, effective way to prepare them for gardening, crafts, or as a calcium supplement for chickens. The process removes all moisture, preventing mold and making the shells easy to crush into a fine powder. Just bake cleaned shells at a low temperature until crisp. This eco-friendly hack turns kitchen scraps into a valuable resource.
Key Takeaways
- Always Clean First: Remove the inner membrane and wash shells thoroughly to prevent odors and bacteria before drying.
- Low and Slow is Key: Bake at a low temperature (200-250°F / 95-120°C) for 30-45 minutes to dry without discoloring or smoking.
- Cool Completely: Let the shells cool in the oven or on a rack; any residual heat = moisture, which causes clumping.
- Grind for Best Results: Use a coffee grinder, food processor, or mortar and pestle to turn dried shells into a fine, versatile powder.
- Store Airtight: Keep the crushed shells in a sealed glass jar in a dry, dark place to maintain freshness and prevent moisture absorption.
- Safety First: Handle hot baking sheets with mitts; avoid high heat to prevent shells from smoking or burning.
- Versatile Applications: Dried, crushed shells are excellent for garden soil amendment, pest deterrent, chicken feed supplement, and natural abrasive cleaners.
[FEATURED_IMAGE_PLACEHOLDER]
📑 Table of Contents
- Why You Should Dry Eggshells: Beyond Just Compost
- Gathering and Preparing Your Eggshells: The Critical First Steps
- The Oven Drying Method: A Step-by-Step Guide
- From Crisp to Powder: Grinding and Storing Your Dried Shells
- Creative and Practical Uses for Your Homemade Eggshell Powder
- Troubleshooting: What to Do When Things Go Wrong
- Conclusion: A Simple Habit with Lasting Impact
Why You Should Dry Eggshells: Beyond Just Compost
You crack an egg for breakfast, and there it is—the fragile, chalky shell. For many, it goes straight into the trash or, for the more eco-conscious, into the compost bin. But what if that seemingly worthless shell could be transformed into a powerful, natural resource for your garden, your crafts, or even your backyard chickens? Drying eggshells in the oven is the crucial first step in unlocking their full potential. It’s a simple, almost effortless process that changes the shell’s physical structure from brittle and moist to crisp, dry, and easily crushable. This isn’t just about preservation; it’s about activation. A fully dried shell can be pulverized into a fine, bioavailable calcium powder that plants adore, a gritty cleaner that scours pots without scratching, or a dietary supplement that strengthens egg-laying hens’ shells. By learning how to properly dry eggshells in the oven, you embrace a zero-waste lifestyle, save money on commercial products, and connect with a time-honored practice of using every part of a resource.
The journey from egg to useful ingredient starts with understanding why drying is non-negotiable. A fresh, wet eggshell is a breeding ground for bacteria and mold. If you simply toss wet shells into a jar, they’ll clump, rot, and smell terrible. The moisture locked inside the porous calcium carbonate structure is the enemy of long-term storage and usability. Oven-drying evaporates every last drop of that water, sterilizing the shell in the process. The result is a lightweight, odorless, crisp fragment that can be stored indefinitely without spoilage. It’s a small act with a massive impact on utility. Whether you’re a devoted organic gardener seeking to amend soil pH and add calcium, a crafter looking for a natural texture in Papier-mâché or mosaic tiles, or a chicken keeper wanting to boost your flock’s health, the oven is your most reliable tool for perfect preparation.
Gathering and Preparing Your Eggshells: The Critical First Steps
Before your eggshells ever touch the oven’s heat, proper preparation is everything. Rushing this stage is the number one reason for failed drying attempts—resulting in smoky ovens, unpleasant odors, or shells that still trap moisture. Think of this as prepping your raw material. You wouldn’t bake a cake with flour that has lumps and debris, right? The same principle applies here. Clean, membrane-free shells dry faster, more evenly, and without any lingering egg smell.
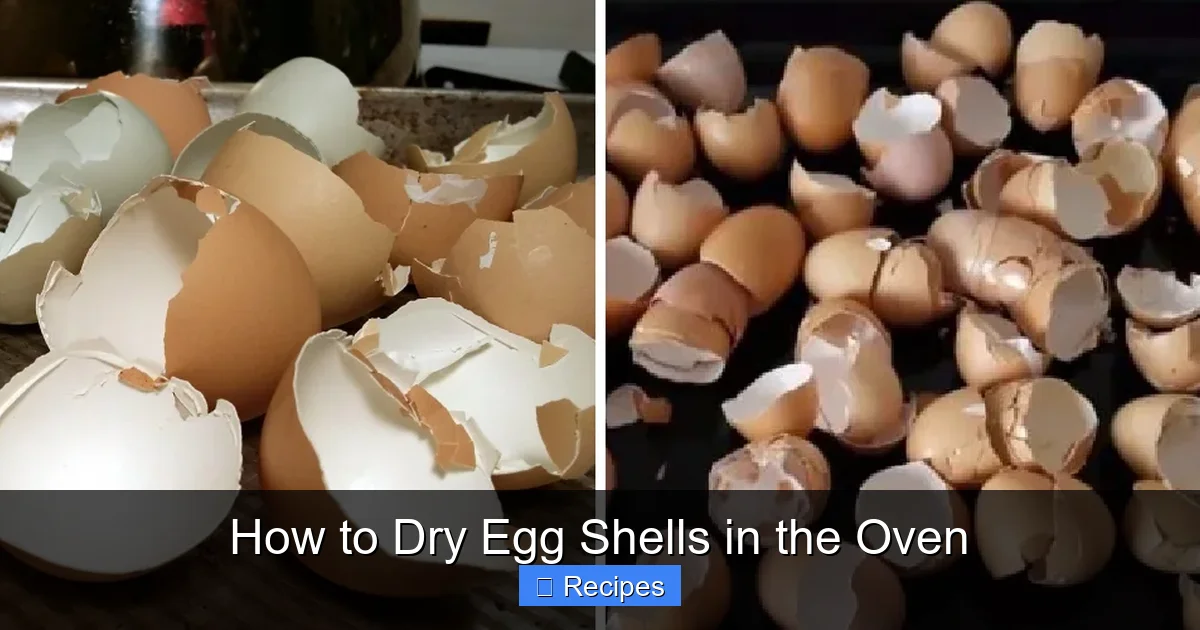
Visual guide about How to Dry Egg Shells in the Oven
Image source: thekitchenix.com
Cleaning: Removing the Membrane is Mandatory
The thin, translucent film lining the inside of the shell is organic matter. If left on, it will cook, shrink, and can potentially burn or smoke in the oven. It also retains moisture, preventing the shell itself from drying thoroughly. To remove it, after cracking your eggs, peel away as much of the membrane as possible with your fingers. For stubborn bits, place the shell piece in a small bowl of warm water and let it soak for 5-10 minutes. The membrane will loosen, making it easy to peel off. This step might feel tedious at first, but it becomes a quick, almost meditative habit with practice.
Washing and Sanitizing
Once de-membrane-d, give the shells a good rinse under cold running water. Use your fingers to dislodge any tiny bits of egg white or yolk. For an extra sanitizing boost, especially if you’re concerned about Salmonella (a good practice if shells will be used for chicken feed or in a garden where you eat root vegetables), soak the clean shells for a few minutes in a solution of 1 tablespoon of white vinegar per cup of water. Vinegar is a natural disinfectant and helps remove any residual grease. After soaking, rinse them thoroughly one final time.
Drying Before the Oven
This is a step many skip, but it saves energy and time. Shake off excess water and lay your clean shells on a clean kitchen towel or paper towels. Pat them gently to remove surface moisture. Let them air-dry on the counter for 15-30 minutes. You don’t need them bone-dry, but starting with a shell that isn’t dripping water means your oven’s heat is focused on evaporating the shell’s internal moisture, not surface water. It also prevents steam from building up in the oven, which can be a problem.
The Oven Drying Method: A Step-by-Step Guide
Now for the main event. Drying eggshells in the oven is remarkably straightforward, but precision in temperature and timing is what separates crispy, perfect shells from burnt, smoky disappointments. The goal is gentle, consistent heat that pulls out moisture without cooking the shell into a brittle, brown mess.
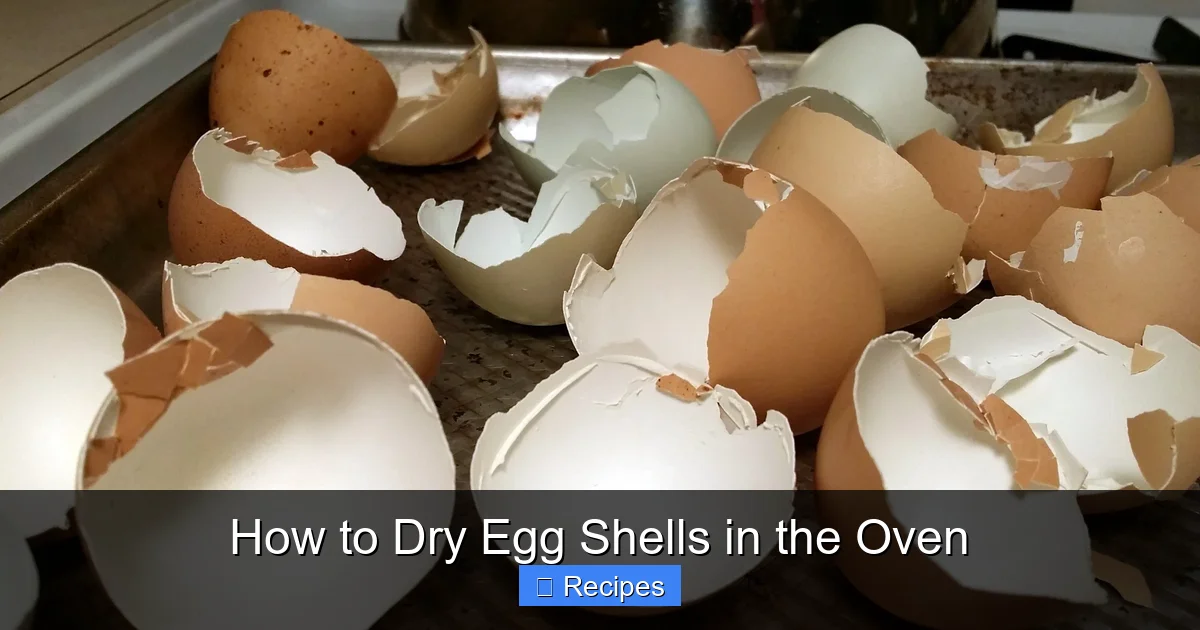
Visual guide about How to Dry Egg Shells in the Oven
Image source: zerowastechef.com
Step 1: Preheat and Prepare Your Baking Equipment
Preheat your oven to a low temperature: between 200°F and 250°F (95°C to 120°C). This is not a high-heat operation. The low setting ensures a slow, even dehydration. Higher temperatures can cause the organic remnants (even tiny bits of membrane you missed) to smoke or burn, and can slightly discolor the shells, turning them a yellowish-brown. While not harmful, it’s less aesthetically pleasing for crafts. Line a baking sheet with parchment paper. This isn’t strictly necessary for the shells, but it creates an easy, non-stick surface for cleanup and prevents any tiny shell fragments from slipping through the rack if you use one. Arrange your pre-dried eggshells in a single layer on the baking sheet. Don’t overcrowd them; they need space for air to circulate around each piece. If you have a huge batch, use multiple sheets and rotate them halfway through.
Step 2: Baking Time and Monitoring
Place the baking sheet(s) in the preheated oven. Set a timer for 30 minutes. After 30 minutes, check the shells. They should look dry and slightly more opaque. Carefully flip over any larger pieces to ensure even drying. The total baking time will typically range from 30 to 45 minutes, depending on the size and thickness of your shells and your oven’s accuracy. The shells are done when they are completely crisp and brittle. You should be able to easily crush a piece between your fingers—it should snap, not bend. If they still feel slightly pliable or damp, return them to the oven in 5-minute increments, checking frequently. Never walk away for the full duration on the first try; oven temperatures vary, and it’s easy to overshoot.
Step 3: The Crucial Cooling Phase
Once your shells are perfectly crisp, turn the oven off. Do not remove the shells immediately. This is a critical pro tip. Let the baking sheet sit inside the turned-off oven until it has cooled completely to room temperature. Why? Because hot shells are like a sponge for ambient humidity. If you take them out while warm and place them on a counter, they will immediately start to absorb moisture from the air, negating all your hard work. The oven’s residual heat will continue to drive off any last traces of moisture as it cools, and the cooling shells will be in a controlled, dry environment. This step guarantees a truly dry product ready for storage. After the oven is cool, you can remove the sheet.
From Crisp to Powder: Grinding and Storing Your Dried Shells
You’ve got a tray of perfectly dried, cool, crisp eggshells. Fantastic! But a large, sharp shell fragment is only marginally useful. The real magic happens when you transform it into a fine, consistent powder or small, manageable crumbles. This increases the surface area dramatically, making the calcium and other minerals more accessible for soil absorption, chicken digestion, or cleaning action.

Visual guide about How to Dry Egg Shells in the Oven
Image source: janeovenrecipes.com
Choosing Your Grinding Tool
The tool you use depends on the quantity you have and the fineness you desire. For small batches (a dozen eggs’ worth), a sturdy mortar and pestle works wonderfully. It gives you great control over texture and is easy to clean. For medium to large batches, a coffee grinder (dedicated solely to this purpose, as shells will dull blades) is the champion. It produces a very fine, flour-like powder in seconds. A food processor or blender can also be used, but you may need to pulse and scrape down the sides multiple times, and the result might be a slightly coarser, more varied texture. For a rustic, coarse crush (good for sharp-edged garden mulch), you can simply place the shells in a sealed plastic bag and crush them with a rolling pin or the bottom of a heavy pan.
Grinding Technique for Fine Powder
If using a grinder or processor, work in batches. Don’t overfill the bowl. Pulse in short bursts, then shake or stir the contents to redistribute the shells, and pulse again. Sift the ground material through a fine-mesh sieve. The super-fine powder will fall through, and any larger, unground chunks can be returned to the grinder for another round. This sifting step ensures a uniform product, which is especially important if you’re mixing it into chicken feed or potting soil where consistency matters.
Storage: Keeping Moisture Out Forever
Your dried, crushed eggshells are now ready for their new life. Store them in an airtight container. Glass jars with rubber seals (like old jam jars) are ideal. Plastic containers can work, but ensure they are truly airtight and not permeable to humidity over long periods. Store the container in a cool, dark, and dry place—a pantry shelf, a cupboard, or a basement shelf. Avoid storing them above the stove or near the dishwasher, where steam and temperature fluctuations occur. When stored correctly, your eggshell powder will last indefinitely, retaining all its beneficial properties. Label the jar with the date, just for your own peace of mind.
Creative and Practical Uses for Your Homemade Eggshell Powder
Now that you have this valuable, free resource, what do you do with it? The applications span gardening, animal care, and household tasks. This is where your effort pays off in tangible benefits.
Gardening Gold: Soil Amendment and Pest Deterrent
Eggshells are over 90% calcium carbonate, making them a superb, slow-release source of calcium for your soil. Calcium is vital for preventing blossom end rot in tomatoes, peppers, and squash. It also helps balance soil pH in acidic gardens. To use, work 1-2 tablespoons of crushed shells per planting hole into the soil before setting out seedlings. For established plants, gently scratch 1/4 to 1/2 cup of coarse or fine powder into the top inch of soil around the drip line. The sharp, jagged edges of coarsely crushed shells also make a fantastic slug and snail deterrent. Create a protective barrier around susceptible plants like lettuce or hostas. The shells are uncomfortable for these soft-bodied pests to cross. For a finer application, mix the powder with water to create a “eggshell tea” (steep 1/4 cup in a gallon of water for a few days, strain), and use it to water plants.
Chicken Feed Supplement: Stronger Shells, Happier Hens
If you keep chickens, dried eggshell powder is a legendary supplement. Laying hens have an enormous demand for calcium to produce strong eggshells. A deficiency leads to thin, soft shells or shell-less eggs, which is stressful for the hen. Offer your crushed shells in a separate, small dish alongside their regular feed. Hens will self-regulate their intake. Start with a tablespoon of fine powder per 4-5 hens daily. You can also mix it into their layer feed at a rate of about 1% of the total feed volume. The grit-like texture also aids in their digestion. Always ensure shells are completely clean and dry to avoid introducing bacteria to your coop.
Natural Cleaning and Crafting Power
The mild abrasive quality of eggshells makes them a fantastic gentle scrubber. Mix a spoonful of powder with a little water or liquid castile soap to create a paste. Use it with a sponge to scrub baked-on grime from pots and pans (especially enamel or glass), clean glass baking dishes, or even polish stainless steel sinks. It’s non-toxic and leaves no chemical residue. For crafts, the uses are endless. Add the powder to homemade paper for texture. Mix with glue for a stone-like finish on boxes or figurines. Use whole or crushed dried shells in mosaic projects. They also add a wonderful, tactile element to sensory bins for children.
Troubleshooting: What to Do When Things Go Wrong
Even a simple process like oven-drying can have hiccups. Here’s how to diagnose and fix common issues.
Problem: The shells smoked or smelled bad during baking.
Solution: This almost always means some membrane was left on the shell. It has cooked and burned. In the future, be more meticulous about membrane removal. For this batch, if the shells are still crisp and don’t smell rancid (just smoky), you can still use them as a coarse garden mulch where smell isn’t an issue, but not for feed or indoor crafts. If they are blackened, discard them.
Problem: The shells are still slightly flexible or damp after baking.
Solution: They simply need more time. Return them to the (still warm) oven for 5-10 minute intervals, checking each time. Ensure they are in a single layer and your oven temperature is accurate with an oven thermometer. Low humidity days aid drying; on very humid days, the cooling step (leaving in the oven) is even more critical.
Problem: The crushed shells clump together in storage.
Solution: Moisture got in. Ensure your storage container is truly airtight. Store it in the driest part of your home. If clumping occurs, you can often salvage the batch by spreading the clumps on a baking sheet and re-drying them in a 200°F oven for 15-20 minutes, then letting them cool completely again in the oven before re-storing.
Conclusion: A Simple Habit with Lasting Impact
Drying eggshells in the oven is more than a kitchen hack; it’s a fundamental practice in sustainable living. It transforms a daily waste product into a stable, versatile, and incredibly useful material. The process requires minimal active time—just a few minutes of cleaning, a short bake, and a patient cool-down—yet the payoff is immense. You gain a free, organic calcium source for your garden that can save you from plant diseases, a nutritional boost for your chickens, and a non-toxic cleaning aid for your home. By following the clear steps of thorough cleaning, low-temperature baking, complete cooling, and airtight storage, you ensure success every time. Start saving your eggshells today. In less than an hour of passive oven time, you can stockpile a resource that will nourish your plants, support your animals, and clean your home for months to come. It’s a small, powerful step toward a more self-sufficient and waste-conscious household.
Frequently Asked Questions
Can I dry eggshells without an oven?
Yes, you can air-dry them on a counter or rack for several days, or use a food dehydrator on a low setting. However, oven-drying is faster, more reliable for complete moisture removal, and also sanitizes the shells, which is important for feed or garden use near edible plants.
What happens if I bake the shells at too high a temperature?
High heat (above 300°F/150°C) can cause any remaining organic membrane to smoke or burn, creating odors and potentially blackening the shells. While not harmful to plants, burnt shells can be unpleasant for crafts or chicken feed. Stick to the recommended low range of 200-250°F for best results.
Do I need to remove every single bit of the inner membrane?
It’s highly recommended. Even small remnants can shrink, cook, and potentially smoke in the oven. They also trap moisture, preventing the shell from drying completely. Taking the extra minute to peel off the membrane ensures a cleaner, drier, and odor-free final product.
How long do dried eggshells last?
When stored in a truly airtight container in a cool, dark, and dry place, dried and crushed eggshells can last indefinitely. Their mineral content doesn’t degrade. The only risk is moisture absorption, which proper storage prevents.
What is the best way to grind dried eggshells for chicken feed?
A dedicated coffee grinder produces the finest, most consistent powder, which is easiest for chickens to digest and mix into feed. A mortar and pestle works well for smaller batches. Aim for a powder similar to coarse sand or flour; very large pieces are harder for chickens to consume effectively.
Can I use eggshells from store-bought eggs?
Absolutely. However, if you are using them for gardening (especially edible plants) or chicken feed, consider rinsing them with a vinegar-water solution to remove any potential residues from commercial washing or processing. Organic or locally sourced eggs are a great choice if you’re concerned about this.