Disconnecting a gas stove isn’t rocket science—but it does require caution, the right tools, and a systematic approach. This guide walks you through every step, from shutting off the supply to testing for leaks, so you can remove or replace your stove with confidence and safety.
Key Takeaways
- Turn off the gas at the main valve: This is the first and most important safety step.
- Gather the right tools: Adjustable wrench, pipe thread sealant, leak‑detect solution, and a bucket are essential.
- Check for leaks after disconnection: Use soapy water or a commercial detector before completing the job.
- Label connections: Marking hoses and fittings saves time and avoids mistakes when reinstalling.
- Know local codes: Some regions require a licensed plumber for gas work; verify before you start.
- Store the stove safely: Keep it upright on a padded surface to prevent damage.
- Plan for disposal or resale: Follow local regulations for proper disposal or donation.
📑 Table of Contents
- Introduction: Why Knowing How to Disconnect a Gas Stove Matters
- 1. Safety First: Preparing Your Workspace
- 2. Identifying the Connection Types
- 3. Step‑by‑Step Disconnection Process
- 4. What to Do With the Disconnected Stove
- 5. Common Mistakes and How to Avoid Them
- 6. When to Call a Professional
- Conclusion: Confidence Meets Safety
Introduction: Why Knowing How to Disconnect a Gas Stove Matters
If you’ve ever wanted to replace an old stove, move into a new kitchen, or simply perform a deep clean, you’ll need to know how to disconnect a gas stove. Unlike electric appliances, a gas stove is hooked up to a pressurized fuel line. A careless mistake can cause a leak, a fire, or even an explosion. That’s why many homeowners hesitate, thinking they need a professional for every tiny job.
Good news: with the right preparation, basic tools, and a safety‑first mindset, you can safely disconnect a gas stove yourself. This guide breaks the process into bite‑size steps, explains the why behind each action, and offers practical tips you can apply right away. By the end, you’ll feel empowered to tackle the task without fear.
1. Safety First: Preparing Your Workspace
1.1. Gather Essential Tools and Materials
Before you even touch the stove, collect the following items:
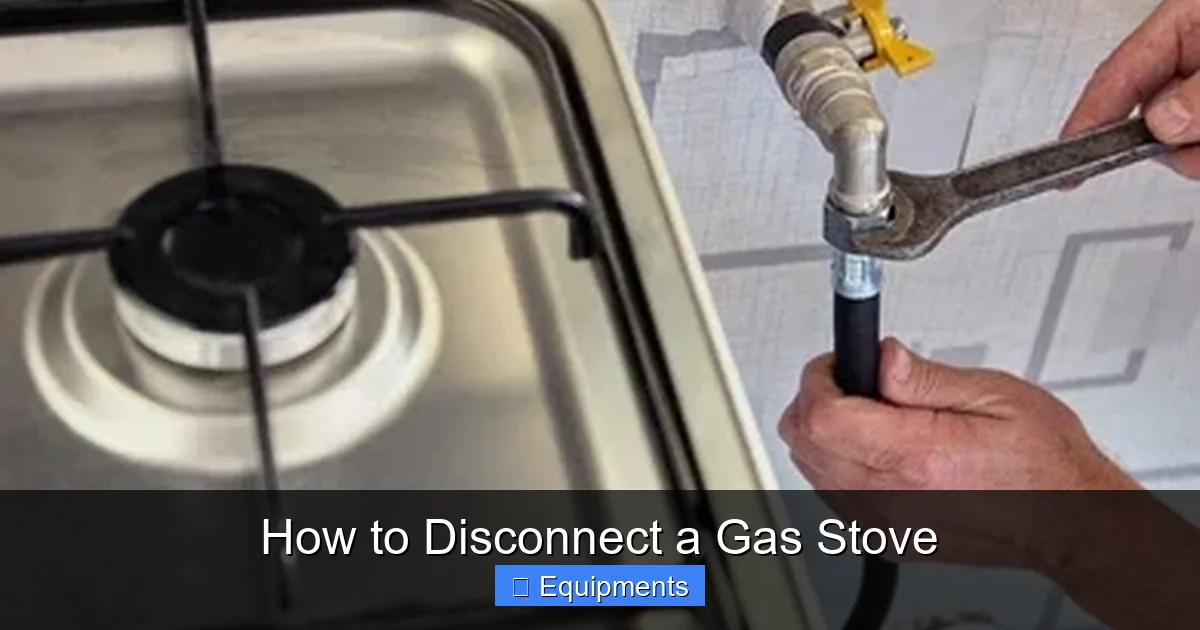
Visual guide about How to Disconnect a Gas Stove
Image source: shutterstock.com
- Adjustable wrench or pipe wrench
- Pipe thread sealant (often called Teflon tape)
- Leak‑detect solution – either a commercial spray or a simple mix of dish soap and water
- Bucket or shallow pan
- Flashlight
- Protective gloves and safety glasses
- Gas shut‑off key (if your home uses a key‑type valve)
Having everything within arm’s reach prevents you from scrambling mid‑job and reduces the chance of errors.
1.2. Shut Off the Gas Supply
The most critical step is to stop the flow of gas. Locate the main gas shut‑off valve for your home – usually a lever or knob near the gas meter. Turn it clockwise until it stops. If your kitchen has a dedicated shut‑off valve for the stove, turn that off instead. Verify that the valve is fully closed by attempting to light a burner; it should not ignite.
1.3. Ventilate the Area
Even after the gas supply is off, a small amount of residual gas may linger. Open windows and doors, and if you have an exhaust fan, run it for several minutes. Good airflow clears any stray fumes and makes leak testing easier.
2. Identifying the Connection Types
2.1. Standard Threaded Pipe (NPT)
Most older homes use a threaded metal pipe with National Pipe Thread (NPT) fittings. These have a tapered thread that tightens as you turn the wrench clockwise. You’ll see a metal nut and a short length of pipe leading to the stove.
Visual guide about How to Disconnect a Gas Stove
Image source: shutterstock.com
2.2. Flexible Gas Hose
Modern installations often use a flexible stainless‑steel or corrugated hose. It snaps onto a quick‑connect fitting on the stove and a threaded nut on the wall. The hose is easier to remove but still requires careful unscrewing.
2.3. Quick‑Connect (Push‑In) Fittings
Some appliances use a push‑in connector that clicks into place. These are common in rental units because they simplify installation. To disconnect, you usually press a release clip or pull a tab while turning the connector.
3. Step‑by‑Step Disconnection Process
3.1. Remove the Stove from the Counter
Slide the stove forward gently, using a helper if it’s heavy. Place a sturdy, flat board underneath to support the weight while you work on the back. This prevents the stove from tipping and protects the floor.
Visual guide about How to Disconnect a Gas Stove
Image source: shutterstock.com
3.2. Detach the Gas Line
Depending on your connection type, follow the appropriate sub‑steps:
- Threaded pipe: Place a bucket under the joint to catch any residual gas. Use the adjustable wrench to loosen the nut counter‑clockwise. Turn slowly; you may hear a soft hissing sound as the remaining gas escapes.
- Flexible hose: Loosen the nut on the wall side first, then the nut on the stove side. Hold the hose steady to avoid pulling it out of the fitting.
- Quick‑connect: Press the release clip while turning the connector counter‑clockwise. Pull the hose gently away from the stove.
Once the connection is free, set the hose or pipe aside in the bucket to catch any drips.
3.3. Seal the Open Pipe Ends
After removal, immediately seal the exposed pipe threads with a piece of rag or a pipe cap. This prevents dust, insects, or accidental gas flow if the main valve is turned back on before you finish the job.
3.4. Test for Leaks
Even though the gas is off, it’s good practice to check for leaks before you finish:
- Mix a few drops of dish soap with water in a spray bottle.
- Apply the solution to the now‑disconnected fittings.
- If bubbles form, there is still gas escaping – tighten the connection or reseal the pipe.
When you’re certain there are no leaks, you can proceed to the next step.
4. What to Do With the Disconnected Stove
4.1. Storing Safely
If you plan to reuse the stove later, store it upright on a padded surface. Use moving blankets or a thick rug to cushion the burners and glass top. Avoid stacking heavy items on top.
4.2. Disposal or Donation
Many municipalities treat gas appliances as bulky waste. Call your local waste management service for pickup instructions. Alternatively, charities often accept working stoves; just make sure you provide the original gas line kit.
4.3. Preparing for a New Installation
When installing a replacement stove, keep the old connections as a reference. Label the pipe ends with masking tape and a marker (“supply” vs. “return”) to speed up the new hookup.
5. Common Mistakes and How to Avoid Them
5.1. Forgetting to Turn Off the Main Valve
This is the biggest safety hazard. Always double‑check that the lever is fully closed before you start unscrewing anything.
5.2. Using the Wrong Wrench Size
A wrench that’s too small can strip the nut, making it impossible to remove. Measure the nut’s width and use a wrench that fits snugly.
5.3. Ignoring Leak Tests
Even a tiny leak can cause a fire hazard. Always run the soap‑water test, even if you think everything is tight.
5.4. Not Wearing Protective Gear
Gloves protect your hands from sharp pipe ends, and safety glasses shield your eyes from any sudden spray of gas or debris.
6. When to Call a Professional
While many homeowners can safely disconnect a gas stove, there are situations where a licensed plumber or gas technician is required:
- Your home uses a concealed gas line behind walls or ceilings.
- The gas valve is corroded, rusted, or difficult to turn.
- You smell gas after the job, despite leak testing.
If any of these apply, stop work immediately and contact a qualified professional. It’s better to spend a little extra than to risk safety.
Conclusion: Confidence Meets Safety
Knowing how to disconnect a gas stove empowers you to maintain your kitchen, replace outdated equipment, and avoid costly service calls. By following the steps outlined—shutting off the gas, identifying your connection type, unscrewing carefully, sealing pipe ends, and testing for leaks—you can complete the job safely and efficiently. Remember, safety always comes first; when in doubt, call a licensed technician. With the right tools and a calm, methodical approach, you’ll have your stove disconnected and your kitchen ready for the next project.
Frequently Asked Questions
Can I disconnect a gas stove without turning off the main gas valve?
No. The main gas valve must be closed to prevent gas flow. Working on a live line is extremely dangerous and violates most building codes.
What type of wrench is best for gas stove connections?
An adjustable wrench or a pipe wrench with a smooth jaw works best. Make sure it fits the nut snugly to avoid stripping the threads.
How do I know if my stove uses a flexible hose or a rigid pipe?
Look at the back of the stove. A flexible hose is usually a corrugated metal tube with a quick‑connect fitting; a rigid pipe is a solid metal pipe with threaded nuts.
Is it necessary to use pipe thread sealant when reconnecting the stove?
Yes, applying Teflon tape (or a suitable sealant) to the threads helps create a gas‑tight seal and reduces the chance of leaks.
What should I do if I detect a gas leak after reconnecting?
Turn off the gas supply immediately, open windows, and do not operate any electrical switches. Contact a licensed plumber or gas utility to repair the leak.
Are there any legal restrictions on DIY gas stove disconnection?
Many jurisdictions require a licensed professional for any gas work. Check local building codes or contact your gas provider to confirm the regulations in your area.