Dehydrating mango in your oven is a simple, rewarding way to create a healthy, preservative-free snack. By slicing ripe mangoes thinly and baking them at a low temperature for several hours, you can achieve that perfect chewy texture. Proper storage in an airtight container ensures your homemade dried mango stays fresh for months. It’s an easy, cost-effective method to enjoy tropical flavor year-round.
Key Takeaways
- Choose Ripe, Firm Mangoes: Perfect for dehydrating are mangoes that are ripe and fragrant but still firm, like Ataulfo or Kent varieties, to ensure sweetness and sliceability.
- Slice Thinly & Uniformly: Aim for ¼-inch slices for even drying. Use a sharp knife or mandoline for consistency, which prevents some pieces from burning while others remain moist.
- Low & Slow is Key: Set your oven to its lowest temperature, ideally between 130°F (55°C) and 170°F (77°C). This gently removes moisture without cooking the mango.
- Patience During Drying: Drying takes 6-12 hours. Check periodically by feeling for a dry, leathery texture with no sticky spots. Oven door can be propped open to release moisture.
- Condition Before Storing: After drying, let pieces “condition” in a jar for a week, shaking daily. This redistributes any residual moisture and prevents mold.
- Store in a Cool, Dark Place: Use airtight containers or vacuum seal. Store in a pantry for 2-3 months or freeze for up to a year to maintain peak flavor and texture.
- Get Creative with Uses: Beyond snacking, use your dried mango in oatmeal, salads, baked goods, smoothies, or as a sweet addition to grain bowls and trail mix.
📑 Table of Contents
- Why Dehydrate Mango? The Sweet Benefits of Homemade Dried Mango
- Selecting & Prepping Your Mangoes: The Foundation of Success
- The Oven Dehydration Process: Step-by-Step
- How to Tell When Your Dried Mango is Done
- Conditioning and Storing for Long-Term Freshness
- Creative Ways to Use Your Homemade Dried Mango
- Troubleshooting Common Dehydrating Problems
- Conclusion: Your Journey to Perfect Oven-Dried Mango
Why Dehydrate Mango? The Sweet Benefits of Homemade Dried Mango
There’s something truly magical about the intense, sun-kissed sweetness of a piece of dried mango. It’s like capturing a tropical vacation in a chewy, convenient bite. While you can easily buy bags of dried mango at the store, making your own using just your oven offers unparalleled benefits. You control the sugar (none added!), avoid preservatives like sulfur dioxide, and can select the exact variety and ripeness you love. It’s also incredibly cost-effective, especially when mangoes are in season. The process is surprisingly simple, requiring minimal equipment beyond a baking sheet and your oven. This guide will walk you through every single step, from selecting the perfect mango at the market to storing your final batch so it stays perfect for months. Get ready to transform fresh, fragrant mangoes into a shelf-stable, delicious treat that’s perfect for lunchboxes, hiking trips, or a quick sweet tooth fix.
The Superior Taste and Health of Homemade
Store-bought dried mango often has a noticeably different texture and flavor. Commercial versions are frequently processed with added sugars or sweeteners and treated with preservatives to enhance color and shelf life. When you dehydrate mango in oven at home, you experience the pure, unadulterated taste of the fruit. The natural sugars caramelize slightly during the drying process, creating a deep, complex sweetness that’s far more interesting than the often one-dimensional sweetness of commercial products. From a health perspective, you’re getting pure fruit fiber and vitamins (like A and C) without any unknowns. It’s a whole-food snack you can feel good about serving to your family.
Selecting & Prepping Your Mangoes: The Foundation of Success
The journey to perfect dried mango begins long before you turn on the oven. The quality of your starting fruit is the single most important factor. A poorly chosen mango will yield a tough, flavorless, or overly sticky final product. Your goal is to find mangoes that are ripe enough to be deeply sweet and aromatic but still firm enough to slice cleanly without turning to mush.

Visual guide about How to Dehydrate Mango in Oven
Image source: foodstoragemoms.com
Best Mango Varieties for Dehydrating
Not all mangoes are created equal when it comes to drying. Some varieties are simply better suited due to their flesh texture and sugar content.
- Ataulfo (Champagne) Mangoes: These are arguably the gold standard. They have a buttery, non-fibrous texture, a small flat seed, and an intensely sweet, honey-like flavor with minimal tartness. Their creamy flesh dries into a wonderfully tender, chewy piece.
- Kent Mangoes: Another excellent choice. Kents are juicy, sweet, and have relatively little fiber. They are larger than Ataulfos, offering more yield per fruit.
- Honey (Ataulfo’s cousin): Similar to Ataulfo in sweetness and texture, often a bit more affordable.
- Tommy Atkins: This is the common, widely available red mango. It has more fibrous flesh and a pronounced tartness. It *can* be used, but the result will be chewier and less sweet than the premium varieties. It’s a good option if that’s all you can find.
Pro Tip: Shop at Latin or Asian markets, where you’ll often find a wider variety of mangoes at better prices, especially during their peak season.
How to Tell if a Mango is Ripe for Dehydrating
You need a mango that’s ripe but not overripe. An overripe mango will be too soft to slice and may ferment slightly, leading to off-flavors. Here’s your checklist:
- Scent: A ripe mango will have a sweet, fragrant aroma at the stem end. If it has no smell, it’s not ripe. If it smells fermented or sour, it’s too ripe.
- Feel: Gently squeeze the mango. It should yield slightly to pressure, like a ripe avocado, but not be mushy. It should feel firm with a little give.
- Color: This varies by variety. Ataulfos turn a deep golden yellow with a slight blush. Kents develop a greenish-yellow to red blush. Don’t rely on color alone; use scent and feel as your primary guides.
If your mangoes are still firm, you can ripen them at room temperature for a day or two. Once ripe, use them immediately or dehydrate them right away for best results.
Essential Prep Work: Washing, Peeling, and Slicing
Proper preparation ensures even drying and a better final texture. Here’s the step-by-step process:
- Wash Thoroughly: Even if you plan to peel, wash the mango under cool running water, scrubbing the skin gently with a vegetable brush to remove any wax, dirt, or pesticide residues.
- Peel the Mango: You can use a vegetable peeler, a paring knife, or the famous “hedgehog” method (slice off cheeks, score flesh in a crisscross pattern, and turn the skin inside out). Peeling is recommended for a cleaner final product, as the tough skin doesn’t dehydrate well and can be chewy.
- Remove the Seed: The flat, oval seed runs through the center. After removing the cheeks, you’ll have two large halves with flesh attached to the seed. Carefully slice the flesh off the seed. You can often get a few usable slices from around the seed.
- Slice Uniformly: This is the most critical step. Aim for slices that are about ¼-inch (6 mm) thick. Consistency is key—if slices are uneven, thinner ones will burn while thicker ones remain moist. Use a sharp chef’s knife or a mandoline slicer for perfect uniformity. If using a mandoline, be extremely careful and use the hand guard.
Preventing Browning: To Soak or Not to Soak?
Mango flesh, like many fruits, will oxidize and turn brown once cut. While this doesn’t affect taste, it can lead to a less appealing dark color in your dried mango. You have a few options:
- Lemon Juice Bath: Mix 1 tablespoon of fresh lemon juice or lime juice with 1 cup of cold water. Briefly dip the mango slices in this solution for 30-60 seconds. This acidity helps inhibit oxidation. Pat dry lightly with a clean towel before arranging on trays.
- Ascorbic Acid (Vitamin C): For a more neutral flavor, use a commercial ascorbic acid powder (often sold for canning/fruit prep). Mix 1 teaspoon with 1 cup of water and dip slices.
- Skip It: Many home dehydrators skip this step. The browning is mostly cosmetic and the mango will still taste delicious. If you’re using very ripe, golden mangoes, the visual difference may be minimal.
Note: Avoid using sulfur dioxide (the preservative used in many commercial products) for a natural approach.
The Oven Dehydration Process: Step-by-Step
Now for the main event. Dehydrating in a conventional oven requires understanding your appliance’s quirks and maintaining a low, consistent temperature. The goal is to remove moisture slowly, allowing the sugars to concentrate and the fruit to become pliable, not brittle like a cracker.
Visual guide about How to Dehydrate Mango in Oven
Image source: thekitchenix.com
Preparing Your Oven and Trays
First, ensure your oven is clean. Any burnt-on food debris can smoke or impart off-flavors. You’ll need:
- Baking sheets (rimmed sheets work best to catch any drips)
- Parchment paper or silicone baking mats (highly recommended for easy cleanup and to prevent sticking)
- Wire cooling racks (optional but helpful for promoting air circulation underneath slices)
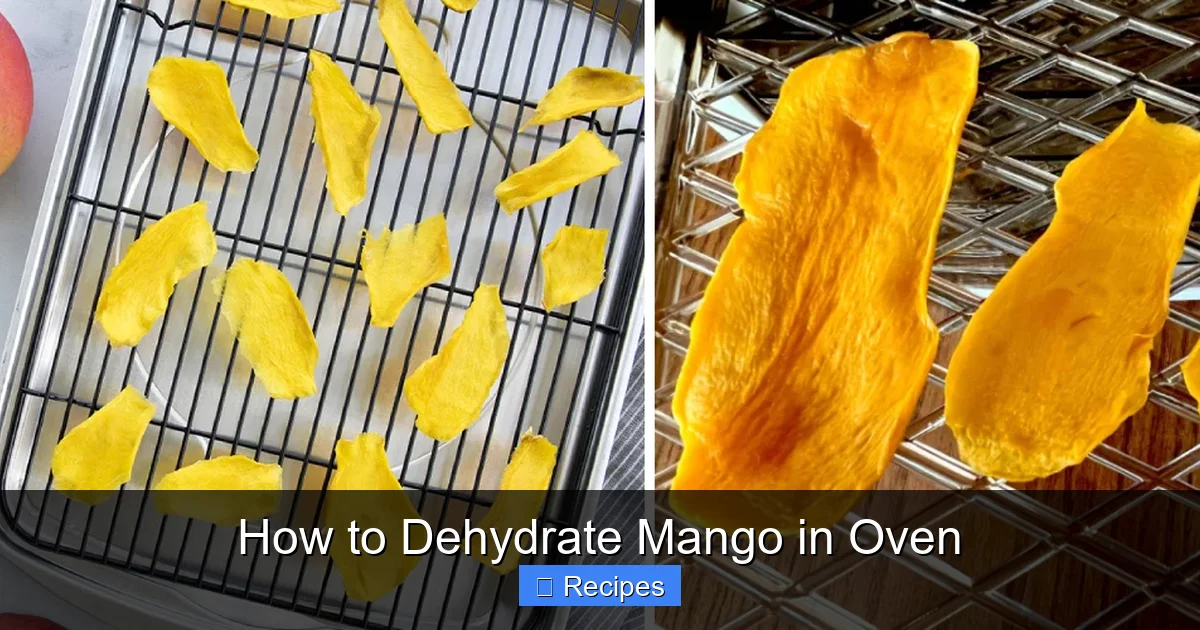
Line your baking sheets with parchment paper or a silicone mat. If you have wire racks, you can place them on top of the lined sheets and arrange the mango slices directly on the racks. This allows hot air to circulate above and below each piece, promoting more even drying.
Setting the Perfect Temperature and Time
The cardinal rule of oven dehydrating is LOW and SLOW. Most standard ovens have a minimum temperature of 170°F (77°C) or 200°F (93°C). This is often too hot and risks cooking or burning the delicate mango slices. Here’s how to navigate it:
- Ideal Temperature Range: Aim for 130°F (55°C) to 150°F (65°C). This mimics a dedicated dehydrator’s setting.
- If Your Oven Goes Lower: Perfect! Set it to 130°F or 140°F.
- If Your Oven’s Lowest is 170°F: This is a common challenge. You can still succeed by:
- Setting the oven to its lowest setting (170°F).
- Prop the oven door open slightly with a wooden spoon or oven-safe silicone pad. This releases heat and moisture, bringing the internal temperature closer to the desired range. Use an oven thermometer to monitor the actual temperature inside!
- Be prepared for a longer drying time and watch closely for signs of cooking.
Estimated Drying Time: This varies wildly based on slice thickness, oven accuracy, humidity, and mango variety. Expect anywhere from 6 to 12 hours. thinner slices (1/8-inch) may take 6-8 hours; thicker slices (up to 1/3-inch) may take 10-14 hours. Do not rush it.
Arranging the Slices for Optimal Airflow
Place the mango slices on the prepared trays in a single layer with a small gap between each piece. They should not touch or overlap. This is non-negotiable for even dehydration. If pieces touch, they will steam each other and develop moist, sticky spots that can spoil. If you’re using a wire rack, place slices carefully so they don’t fall through.
Monitoring and Rotating for Even Drying
Ovens often have hot spots. To ensure all your mango dries evenly:
- After 3-4 hours, check the trays. If your oven has multiple racks, rotate the trays—move the top rack to the bottom and vice versa. Also, rotate each tray 180 degrees.
- Gently flip slices halfway through the drying time if they seem to be sticking or if your oven’s heat is very uneven.
- Start checking for doneness around the 6-hour mark (see next section for how to test).
How to Tell When Your Dried Mango is Done
This is the moment of truth. Under-dried mango will develop mold in storage. Over-dried mango will be unpleasantly tough and brittle. You want that perfect leathery, pliable texture.
Visual guide about How to Dehydrate Mango in Oven
Image source: mlumhgko02cf.i.optimole.com
The Feel Test: Your Primary Tool
Remove a few slices from different parts of the tray and let them cool for a minute (they firm up as they cool). Then:
- Fold a piece gently. It should bend easily without cracking.
- Press your fingernail into the thickest part. It should feel dry to the touch, with no soft, moist spots.
- Tear a piece. You should see no beads of moisture or sticky threads. The tear should be clean.
- The surface should feel dry and perhaps slightly tacky, but not wet or sticky.
If it feels even slightly cool or damp in the center, it needs more time. Remember, it’s better to slightly over-dry than under-dry for safe storage.
Visual and Temperature Cues
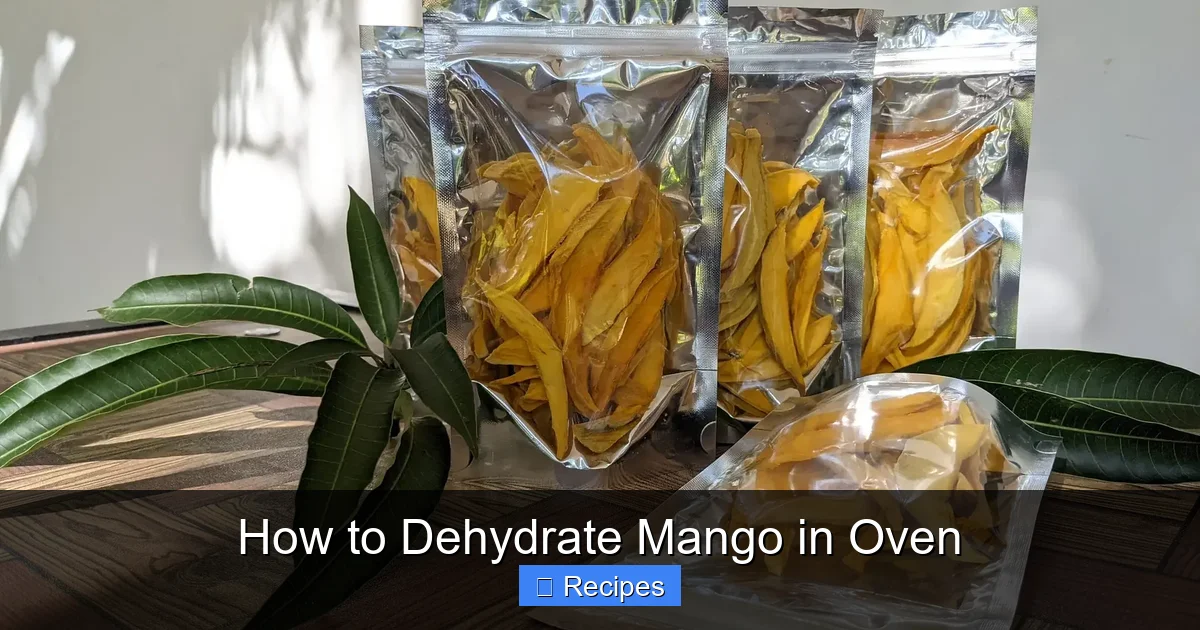
Properly dried mango will have darkened in color to a deep golden-orange or amber. It will look translucent when held up to light, not opaque and wet. If you have a food thermometer, the internal temperature of a thick piece should reach at least 130°F (55°C) and hold there for a while, which helps ensure pathogen reduction.
Conditioning and Storing for Long-Term Freshness
You’ve survived the long wait, and your mango is perfectly dried. But the job isn’t done yet. Proper conditioning and storage are the final, crucial steps to ensure your hard work pays off with months of perfect snacking.
The Critical Conditioning Step
Even after your oven cycle, some moisture may be trapped inside thicker pieces or hidden in the batch. Conditioning is a simple process that equalizes moisture throughout the batch and reveals any under-dried pieces before you seal them away.
- Once completely cool, place all your dried mango pieces into a clean, dry glass jar. Fill it about 2/3 full.
- Screw the lid on tightly.
- Leave the jar at room temperature, out of direct sunlight, for 7 to 10 days.
- Once a day, open the jar and shake it vigorously. This redistributes any moisture pockets.
- After the conditioning period, inspect the mango. If you see any condensation on the jar walls or if pieces feel softer/stick together, the batch was not dry enough. You must re-dehydrate those pieces immediately.
- If the jar is dry and the pieces remain separate and leathery, you’re ready for long-term storage.
Best Storage Methods and Containers
Moisture and oxygen are the enemies of dried fruit. Your storage must be airtight.
- Short-Term (2-3 months): Use high-quality glass jars with clamping lids (like Weck or Kilner), sturdy plastic containers with locking seals, or heavy-duty resealable bags (squeeze out all air). Store in a cool, dark pantry or cupboard.
- Long-Term (6-12 months): For the absolute best shelf life, vacuum sealing is king. Portion your dried mango into vacuum-seal bags and seal. Store the sealed bags in the freezer. This can preserve flavor and texture for up to a year.
- Refrigeration: You can also store conditioned dried mango in the fridge in an airtight container for 6 months. This is a good middle-ground if you don’t have a vacuum sealer.
Always label your containers with the date you made them. Even perfectly stored dried fruit slowly degrades over time.
Creative Ways to Use Your Homemade Dried Mango
Don’t just eat them by the handful (though that’s perfectly valid!). Your DIY dried mango is a versatile ingredient that can elevate all kinds of dishes.
Beyond the Snack Bag
- Trail Mix & Granola: Chop into chunks and mix with nuts, seeds, coconut flakes, and other dried fruits for a custom energizing mix.
- Breakfast Boost: Stir chopped pieces into oatmeal, yogurt parfaits, or cold cereal for a burst of tropical sweetness.
- Smoothie & Bowl Star: Add a few pieces to your morning smoothie for natural sweetness and fiber, or use as a vibrant topping for acai or smoothie bowls.
- Baking Ingredient: Chop and fold into muffins, banana bread, or scones. They add moistness and a fruity punch. Try them in a mango bread or coconut mango bars.
- Salad & Grain Bowl Topper: Slice into thin strips to add a chewy, sweet contrast to savory salads, quinoa bowls, or grain-based side dishes with goat cheese and jalapeño.
- Charcuterie Boards: They look beautiful and pair wonderfully with sharp cheeses like aged cheddar or manchego, as well as cured meats.
- Infusions: Add a few pieces to a jar of simple syrup for a mango syrup for cocktails or desserts. Or steep in hot water for a fruity tea.
Troubleshooting Common Dehydrating Problems
Even with the best instructions, things can go awry. Here’s how to fix the most common issues.
“My mango is sticky/chewy and won’t dry!”
Cause: Oven temperature is too high (cooking the outside while trapping moisture inside), slices are too thick, or humidity in your kitchen is very high. Pieces may also be touching.
Solution: Ensure slices are uniformly thin (¼-inch). Lower your oven temperature (use an oven thermometer!). If your oven’s lowest is 170°F, prop the door open. Ensure pieces are not touching on the tray. Be patient—it may need 12+ hours. If pieces are already dry on the outside but sticky inside, you can try re-drying them at a low temp.
“My mango is too hard/brittle and tough to chew.”
Cause: Over-drying. This is less common than under-drying but happens if you forget about it or your oven runs hot.
Solution: Unfortunately, over-dried fruit cannot be rehydrated to its original texture. You can still use it! Grind it into a powder for smoothies or flavoring, or chop finely and use as a sweet, crunchy topping for yogurt or ice cream where a bit of toughness is acceptable.
“My dried mango has white crystals on it.”
Cause: Sugar bloom. This is natural! As moisture evaporates, some of the fruit’s natural sugars migrate to the surface and crystallize. It’s completely harmless and doesn’t affect taste.
Solution: None needed. It’s a sign of a pure, unsweetened product. Just brush it off or eat as is.
“Will it mold? How can I prevent it?”
Cause: The #1 reason for mold is insufficient drying or improper storage with residual moisture.
Prevention is Key: 1) Ensure slices are truly dry (leathery, no soft spots). 2) Always condition your batch for a week. 3) Store only in completely airtight containers. 4) Use a desiccant packet (food-safe) in your storage jar for extra insurance in humid climates. If you ever see fuzzy mold (white, green, black), discard the entire batch immediately.
Conclusion: Your Journey to Perfect Oven-Dried Mango
Learning how to dehydrate mango in oven connects you with the simple, rewarding process of food preservation. It transforms a seasonal, fresh fruit into a portable, nutrient-dense treasure that captures summer’s sweetness all year long. The magic lies in respecting the process: choosing the right fruit, slicing with care, embracing the low-and-slow oven method, and never skipping the conditioning step. Your first batch might not be perfect, but with these detailed guidelines, you are equipped to troubleshoot and achieve that ideal chewy, sweet, and pliable texture. The result is a snack that’s far superior to anything you can buy, made with your own hands and full of natural goodness. So next time you see a beautiful display of mangoes at the market, buy a few extra. Turn on your oven, fill your kitchen with a heavenly tropical aroma, and enjoy the unparalleled satisfaction of biting into your very own homemade dried mango. It’s a skill that pays delicious dividends for months to come.
Frequently Asked Questions
Can I dehydrate mango in any oven, including a toaster oven?
Yes, you can use a standard full-size oven, a convection oven (which may reduce drying time slightly), or even a toaster oven. The key is using the lowest possible temperature and ensuring good air circulation. For toaster ovens, use the “bake” setting, not “toast,” and monitor closely as they can run hot. Always use an oven thermometer to verify the internal temperature.
How long does dehydrated mango last and what’s the best way to store it?
Properly dried and conditioned mango stored in an airtight container in a cool, dark pantry will last 2-3 months. For maximum longevity (6-12 months), vacuum-seal portions and store them in the freezer. Refrigeration in airtight jars is also effective for about 6 months. Always check for signs of moisture or mold before consuming.
Can I rehydrate dried mango? How do I do it?
Yes, you can rehydrate it for use in recipes like chutneys, oatmeal, or baked goods. Place the dried mango pieces in a bowl and cover with warm water, fruit juice, or even rum. Let it soak for 30 minutes to 2 hours, until it reaches your desired softness. Drain and pat dry before using.
Why is my dried mango turning dark brown or almost black?
This is usually due to a combination of high oven temperature and the natural caramelization of the mango’s sugars. Using a lower temperature (130°F-150°F) and propping the oven door open can help. Some browning is natural and doesn’t indicate spoilage, but a very dark, almost burnt color suggests the temperature was too high.
What is the best stage of ripeness for mango to be dehydrated?
The ideal mango is ripe and fragrant but still firm to the touch. It should yield slightly to gentle pressure like a ripe avocado. Avoid mangoes that are rock-hard (unripe) or mushy, bruised, or leaking juice (overripe). A ripe, firm mango will slice cleanly and yield the sweetest, best-textured dried product.
My oven doesn’t go below 200°F. Can I still dehydrate mango successfully?
Yes, but it’s more challenging. You must prop the oven door open with a wooden spoon to release heat and moisture, which will lower the internal temperature. Use an oven thermometer to monitor the actual temp inside; you’re aiming for 130°F-150°F. Be prepared for a longer drying time (potentially 12+ hours) and watch the mangoes very closely to prevent cooking or burning. Rotating trays frequently is essential.
Pingback: Mango Chutney - kitchenandhouseware.com