Decorating kitchen shelves is the perfect blend of art and utility. It’s about creating displays that are both beautiful and functional, reflecting your personal style while keeping essentials within reach. By mastering a few core principles—like the rule of three, mixing textures, and balancing color—you can turn any open shelf into a stunning focal point. This guide provides a step-by-step framework to help you confidently style your shelves, avoid common mistakes, and keep them looking fresh and organized year-round.
Kitchen shelves. They’re the unsung heroes of our cooking spaces, aren’t they? One minute they’re a practical storage solution for plates and pantry staples, and the next, they can feel like a chaotic jumble of mismatched items. But what if I told you that learning how to decorate a shelf in the kitchen is one of the simplest, most impactful ways to inject your personality into the heart of your home? It’s true. These open surfaces are a blank canvas, a stage waiting for you to curate a display that’s equal parts functional and fabulous. Forget the pressure of perfection; this is about creating a space that tells your story, makes you smile, and actually helps you in your daily kitchen routines. So, grab a step stool and your favorite cup of coffee—it’s time to transform those shelves from afterthought to asset.
We’re not talking about a museum-grade installation here. The beauty of kitchen shelf decor is its flexibility and its inherent connection to daily life. It should feel approachable, useful, and authentically you. Whether you have a single floating shelf above your sink or a grand, floor-to-ceiling unit, the same core principles apply. In this complete guide, we’ll walk through every step, from the initial purge to the final flourish. We’ll talk about styling tricks that designers use, how to blend your prettiest pieces with your most-used pots, and how to adapt your shelves for every season. Get ready to see your kitchen in a whole new light.
Key Takeaways
- Start with a Clean Canvas: Always empty, clean, and declutter shelves before styling. This creates a blank slate and ensures your decor is the star.
- Embrace the “Rule of Three”: Group items in odd numbers (3, 5, 7) for visual harmony and a more dynamic, natural look.
- Create Visual Triangles & Vary Heights: Arrange objects to form invisible triangles and use risers or stacks to create varying heights, adding depth and interest.
- Mix Function with Form: Combine decorative pieces (vases, art) with everyday kitchen items (beautiful bowls, canisters, cookbooks) for a lived-in, practical feel.
- Incorporate Texture and Color Strategically: Balance hard surfaces (wood, metal) with soft ones (linen, pottery) and use a cohesive color palette to avoid chaos.
- Leave Breathing Room: Avoid overcrowding. Negative space is crucial for a clean, sophisticated look and makes dusting easier.
- Edit and Rotate Regularly: Treat your shelves as living displays. Edit out items that don’t fit and rotate seasonal pieces to keep the look fresh and intentional.
📑 Table of Contents
- 1. The Foundation: Assess, Purge, and Plan
- 2. The Stylist’s Toolkit: Core Principles for Beautiful Displays
- 3. Blending Beauty with Utility: What to Actually Put on Your Shelves
- 4. Shelf Styling by Kitchen Zone: Practical Applications
- 5. Seasonal Refreshes and Common Mistakes to Avoid
- 6. Your Final Touch: The Art of the Edit and Keeping It Fresh
- Conclusion: Your Kitchen, Your Canvas
1. The Foundation: Assess, Purge, and Plan
Before you buy a single new vase or rearrange a single mug, you need to do the dirty work. Trust me, skipping this step is the reason most shelf projects end in frustration. A successful kitchen shelf starts long before you place anything on it.
The Great Emptying and Deep Clean
Begin by taking everything off your shelves. Yes, everything. This is your chance to wipe down the wood, tile, or metal with a damp cloth. Notice any sticky spots or dust bunnies? Now you can get them. As you empty, sort items into four piles: Keep, Relocate, Donate/Recycle, and Toss. Be brutally honest. That chipped mug from a decade-old company picnic? Probably belongs in the toss pile. The fancy serving platter you only use twice a year? Might be better stored elsewhere, freeing up prime shelf real estate for things you use weekly. The goal is to end up with a curated collection of items you genuinely love and/or use.
Understanding Your Shelf’s “Job”
Not all shelves are created equal. A shelf above your stove has a different primary function than one beside your coffee nook. Ask yourself: What is this shelf’s main purpose?
- Primary Storage: Holds everyday dishes, glasses, or baking ingredients.
- Display & Style: A decorative ledge above a sink or window, holding plants and art.
- Work Zone: Holds cooking oils, spices, and utensils needed while prepping.
- Hybrid: A mix of pretty and practical (the most common type).
Defining this purpose will guide your decisions. A storage-heavy shelf needs sturdy, useful items first. A display shelf can lean more into art and decor.
Finding Your Theme (It’s Easier Than You Think)
You don’t need a strict theme like “coastal” or “farmhouse.” But having a loose directional idea—a mood board in your mind—creates cohesion. Look around your kitchen. What’s the dominant style? Modern with clean lines? Warm and rustic with lots of wood? Cozy cottage with open shelving? Your shelf decor should feel like a natural extension. Pull inspiration from your countertops, cabinet hardware, and even your backsplash. Maybe your theme is simply “earthy neutrals” or “a pop of blue.” It could be “all my travel souvenirs” or “cookbook covers as art.” This isn’t about buying all new things; it’s about grouping what you already own in a way that tells a visual story.
2. The Stylist’s Toolkit: Core Principles for Beautiful Displays
Now for the fun part: the actual arranging. Think of these principles as your styling superpowers. They’re simple rules that create instant polish and balance.
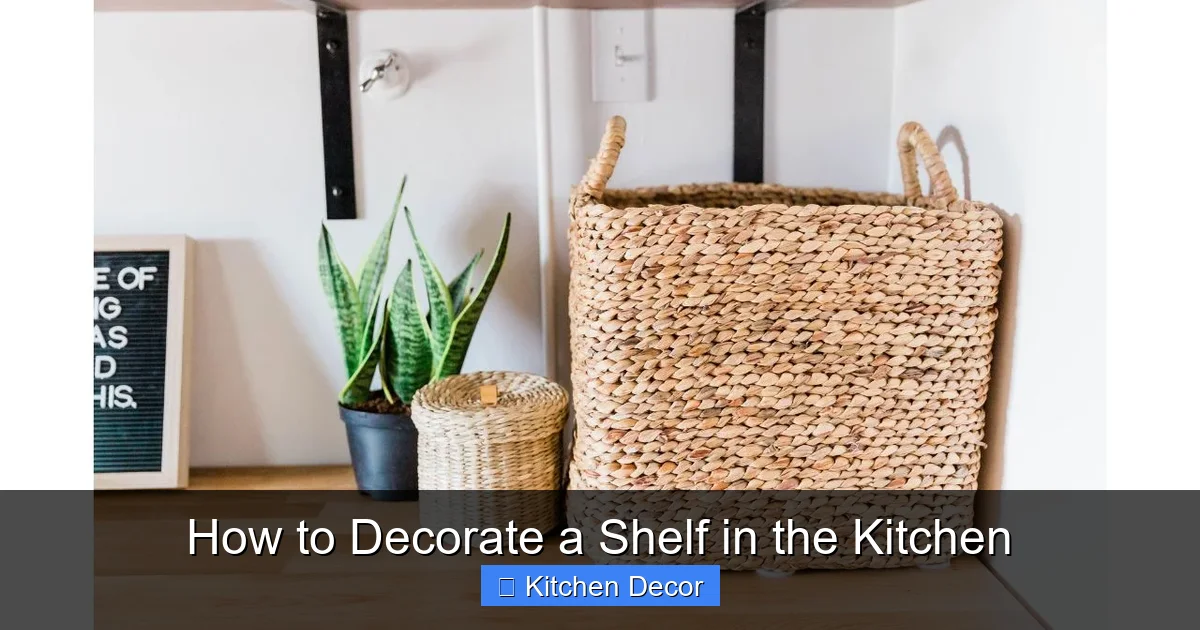
Visual guide about How to Decorate a Shelf in the Kitchen
Image source: florencerevival.com
The Magic of the “Rule of Three” (and Five, and Seven)
This is the golden rule of styling. Our eyes are naturally drawn to odd numbers. Grouping items in threes, fives, or sevens feels more dynamic and less rigid than even-numbered groupings. So, instead of two candles on a shelf, try three of varying heights. Instead of four cookbooks, stack five. This principle applies to the number of main “collections” on a shelf too. You might have three distinct vignettes on a long shelf: one with plants, one with ceramics, and one with books. Odd numbers create a sense of abundance and organic flow.
Height and Depth: The Secret Dimension
A flat shelf is a boring shelf. You need to create a landscape, not a lineup. This is where varying heights is non-negotiable.
- Use Risers: Wooden blocks, vintage books, or small boxes can elevate shorter items, creating a layered platform.
- Stack and Layer: Stack plates or bowls. Lean a frame or cutting board against the wall behind other objects.
- Incorporate Tall, Thin Objects: A slender vase, a tall bottle of olive oil, or a candlestick add verticality.
- Think Forward and Back: Place some items slightly forward and others set back to create depth. A small plant in a pot can sit in front of a stack of books.
The Invisible Triangle Technique
This is a pro trick for arranging a group of 3-5 items on a small section of shelf. Imagine an invisible triangle connecting the tops of your three main objects. The triangle should feel balanced, not lopsided. For example, if you have a tall vase on the left, a medium stack of books in the middle, and a small bowl on the right, the triangle formed should look stable and pleasing. It’s a guide for spacing and scale.
Color, Texture, and Material Balance
This is where cohesion happens. You don’t need a monochromatic scheme, but you should have a unifying thread.
- Color: Pull 2-3 colors from your kitchen’s existing palette (e.g., the blue in your tiles, the brass of your faucet, the green of your plants) and repeat them in your shelf decor. Use neutrals (wood, white, black, beige) as your base to let the colors pop without clashing.
- Texture: A shelf of all smooth ceramics and glass feels cold. Mix it up! Combine rough wood, smooth stone, nubby linen, shiny metal, and soft pottery. This tactile variety makes the eye (and the hand) want to explore.
- Material: Balance hard materials (metal, glass, ceramic) with organic ones (wood, woven baskets, dried grasses). This softens the hard edges of a kitchen and adds warmth.
3. Blending Beauty with Utility: What to Actually Put on Your Shelves
Okay, theory is great, but what things do we use? Here’s your practical shopping (and repurposing) list, broken into categories.
Functional Heroes: The Everyday Essentials
These are the workhorses that earn their place. Style them intentionally.
- Cookbooks: Don’t just line them up. Stack them horizontally. Use a few as risers. Stand a couple up and tuck a small object (a wooden spoon, a lemon) in front. Consider displaying them by color spine-out for a rainbow effect, or by size for a clean look.
- Beautiful Dishware: That special set of cereal bowls you never use? Now’s their time to shine. Mix patterns or keep them solid. Use a plate as a base for a small plant or fruit bowl.
- Canisters & Jars: Fill uniform glass or ceramic canisters with pasta, coffee beans, or tea. The uniform shapes create instant rhythm. Use apothecary jars for smaller items like spices or sugar.
- Vases & Pitchers: Even if you rarely buy flowers, a collection of interesting vases in different shapes is pure shelf candy. A vintage cream pitcher can hold utensils.
- Baskets & Bins: Woven seagrass or rattan baskets are perfect for corralling onions, potatoes, or linens. They add incredible texture and hide clutter.
Decorative Accents: The Soul of Your Shelf
These are the pieces that add personality and spark joy.
- Plants & Florals: The #1 shelf enhancer. A trailing pothos, a sturdy snake plant, a pot of herbs (yes, they’re useful and pretty!), or a simple bunch of eucalyptus in a vase. Use a mix of potted plants and cut stems.
- Art & Objects: A small framed print, a vintage sign, a sculptural object, a family photo in a simple frame, a souvenir from a trip. These tell your story. Lean art against the wall instead of hanging it for a casual look.
- Candles & Lighting: Taper candles in holders, a small lantern, or a string of fairy lights draped along a shelf add warmth and ambiance.
- Antiques & Collections: A line of salt and pepper shakers, a collection of vintage measuring cups, old keys in a bowl. Group your collections together for impact.
The “Tray” Trick: Your Instant Styling Secret
This is the easiest way to create a curated vignette in seconds. Place a tray (wooden, marble, metal) on your shelf and style a grouping of 3-5 items on top of it. The tray contains the collection, making it look intentional and not like random clutter. It also makes dusting a breeze—just lift the tray! Style your tray using the rule of three and vary heights within it.
4. Shelf Styling by Kitchen Zone: Practical Applications
Let’s get specific. How you decorate depends entirely on where the shelf is located.
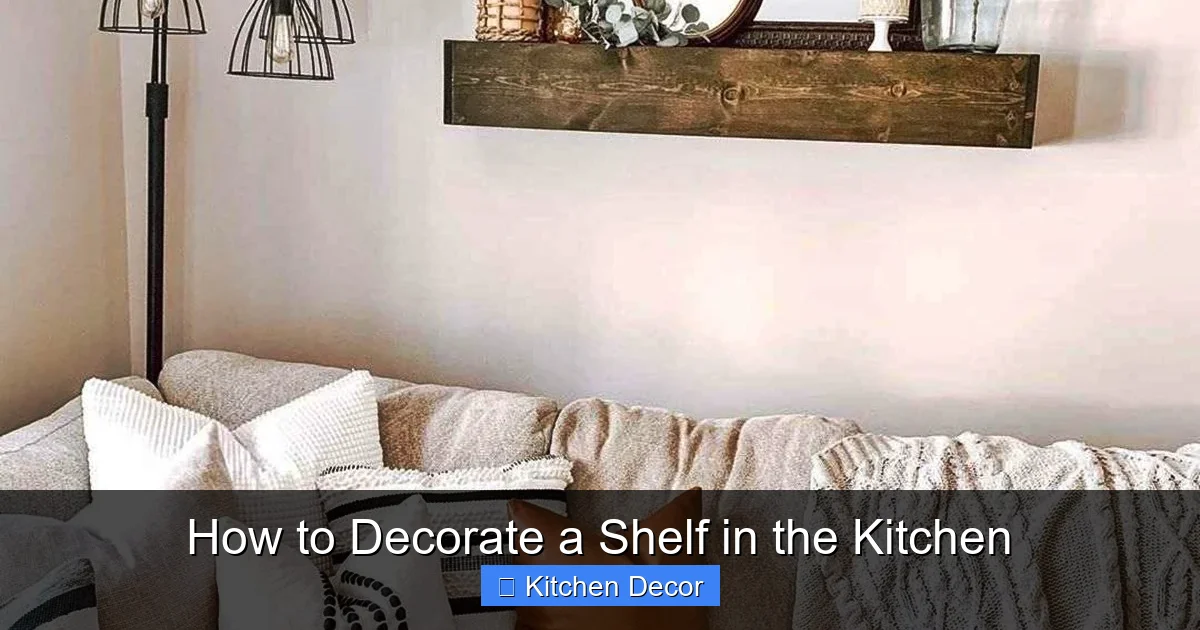
Visual guide about How to Decorate a Shelf in the Kitchen
Image source: citizenside.com
Above the Sink or Window: The Display Stage
This is your kitchen’s most prominent display area. It’s seen by everyone and is rarely used for heavy storage. Go for beauty and light.
- Prioritize: Plants (especially ones that love light), art, pretty glassware, a small vase for fresh flowers, a decorative bowl for spare keys or soap.
- Avoid: Heavy pots, bulky appliances, or anything that will obstruct the view or get splashed constantly.
- Pro Tip: Use a narrow, long shelf here. A single, continuous line of matching vases with a single stem in each is stunningly simple.
Next to the Stove or Range: The Cooking Zone
This shelf is all about accessibility and heat resistance.
- Prioritize: Cooking oils in pretty decanters, everyday spices in uniform jars, a utensil holder with wooden spoons and whisks, a pot of your most-used herbs (thyme, rosemary).
- Avoid: Paper products, anything plastic that could melt, delicate glassware, or fabrics.
- Pro Tip: Use a magnetic spice rack on the side of your fridge or a rail with S-hooks for hanging utensils if shelf space is tight. Keep this zone lean and mean for efficiency.
Pantry or Appliance Garage Shelves: The Storage Solution
Here, function leads, but style can follow.
- Prioritize: Uniform canisters for dry goods, labeled bins for snacks, a basket for onions/potatoes, stacks of plates or bowls.
- Style Trick: Use the front rows for your most attractive items (beautiful cans of olive oil, colorful pasta in jars). Store less-pretty backups behind them. A small plant or a framed photo on an empty corner of a deep shelf adds a personal touch.
- Avoid: Overcrowding. Leave space between items for easy grabbing. Clutter is the enemy of a functional storage shelf.
5. Seasonal Refreshes and Common Mistakes to Avoid
Your kitchen shelves shouldn’t be static. A few small changes with the seasons keep them feeling current and alive.
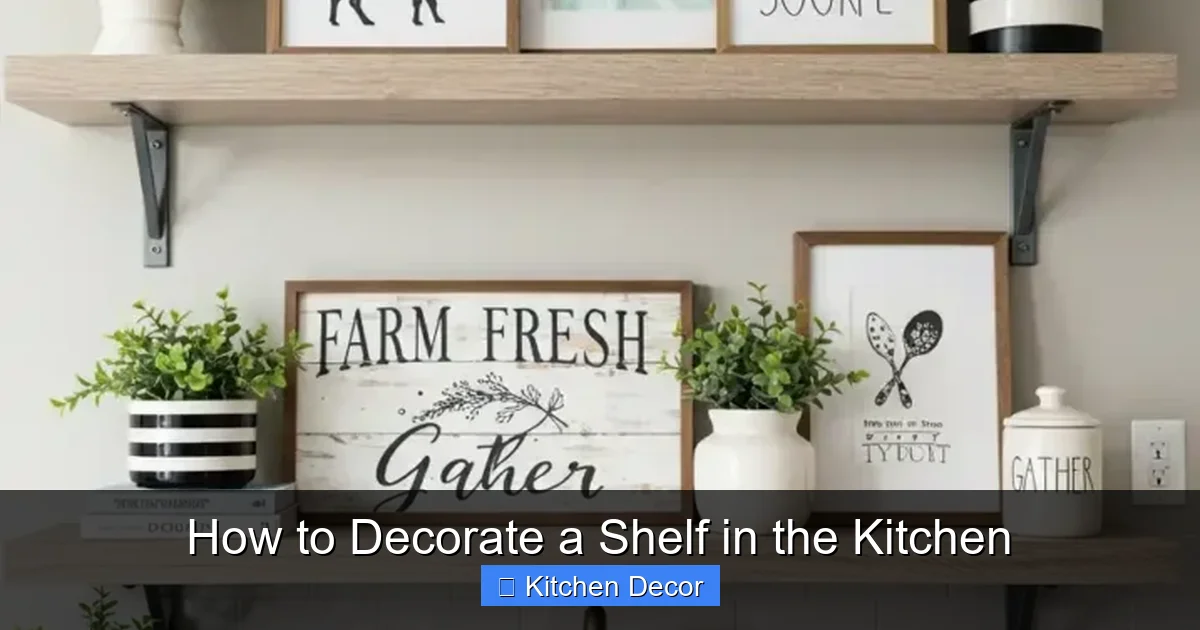
Visual guide about How to Decorate a Shelf in the Kitchen
Image source: decorateva.com
Easy Seasonal Updates
- Spring: Bring in fresh pastels, budding branches, lightweight ceramics, and lemons or limes in a bowl.
- Summer: Use bright, sunny colors, woven textures, seashells, and herb bundles. Swap heavy blankets for linen towels.
- Fall: Incorporate deep oranges, rusts, and browns. Add mini pumpkins, dried wheat, pinecones, and cozy textiles like a small plaid throw.
- Winter/Holidays: Bring in metallics (gold, silver), evergreen sprigs, candles, and festive ornaments. A simple string of battery-powered fairy lights adds magic year-round.
The 5 Most Common Kitchen Shelf Mistakes (And How to Fix Them)
- Overcrowding: This is the #1 sin. If you can’t easily pick up an item without moving three others, it’s too full. Fix: Edit ruthlessly. Remove 20% of your items. You’ll instantly feel calmer.
- Ignoring Scale: A tiny trinket lost on a huge shelf or a massive bowl crowding out everything else. Fix: Group small items together on a tray. Use risers to give smaller items more presence. Ensure large items have enough personal space.
- Forgetting the “Breathing Room”: Negative space (empty shelf) is a design tool. It gives the eye a place to rest. Fix: Don’t feel compelled to fill every inch. Space out your groupings.
- No Rhythm or Repetition: Everything is a unique snowflake, which creates visual chaos. Fix: Repeat a color (e.g., two blue vases), a shape (round bowls), or a material (wooden spoons) throughout your shelves to create rhythm.
- All Decor, No Function: A shelf that’s purely decorative can feel cold and impractical in a kitchen. Fix: Ensure at least 50-60% of what’s on your frequently used shelves has a purpose—holding dishes, storing food, housing utensils. Blend the beautiful with the useful.
6. Your Final Touch: The Art of the Edit and Keeping It Fresh
You’ve styled a gorgeous shelf. You step back and admire your work. Now, what? The work isn’t over. The magic of a well-decorated kitchen shelf is that it’s a living, breathing part of your home. It can—and should—evolve.
The “One In, One Out” Rule
To prevent your shelves from becoming a dumping ground again, adopt a simple rule: if you bring a new decorative item onto the shelf, another one must leave. This forces you to be intentional and keeps clutter at bay. It also means your shelves will always feel curated, not accumulated.
Seasonal & Occasional Rotation
Don’t just change things for the seasons. Rotate items based on your life. Have a beautiful set of cake stands you only use for birthdays? Bring them out for a week after a celebration. Got a souvenir mug from a great vacation? Feature it for a month to bring back the memories. This keeps your kitchen feeling dynamic and connected to your current life and interests.
The Monthly 5-Minute Tidy
Once a month, do a quick shelf check. Wipe down surfaces. Straighten books. Remove anything that doesn’t belong (a stray receipt, a random tool). Toss any dead plants. This tiny maintenance habit prevents the slow creep of mess and ensures your beautiful shelves stay that way.
Conclusion: Your Kitchen, Your Canvas
Learning how to decorate a shelf in the kitchen is ultimately an exercise in making a space that serves you, delights you, and feels unmistakably like yours. It’s not about following a rigid set of rules from a magazine, but about understanding the principles of balance, rhythm, and purpose—and then confidently breaking the rules to suit your own taste. Start with a clean slate, think in layers and triangles, mix the useful with the beautiful, and never be afraid to edit.
Your kitchen is the heartbeat of your home. The items you choose to display on its shelves are the stories you tell about who you are, what you love, and what you value. Maybe it’s a collection of thrifted pottery that speaks to your love of history. Maybe it’s a single, stunning piece of art that makes you pause. Maybe it’s just a perfectly organized row of your favorite teas. Whatever it is, own it. Style it with intention. And then, most importantly, use it. Let your kitchen shelves be both a beautiful backdrop and a functional partner in your daily life. Because the best decor is the kind that’s lived in, loved, and always ready for the next cup of coffee.
Frequently Asked Questions
How many items should I put on a kitchen shelf?
There’s no magic number, but a good rule of thumb is to style in vignettes or groups of 3, 5, or 7 items. For a long shelf, create 2-3 distinct groupings, leaving generous negative space between them. The goal is curated, not crowded. Always step back and ask if you could easily remove one item without the display falling apart—if yes, you might have too many.
How do I decorate around my kitchen appliances on open shelves?
Treat the appliance as part of the decor. First, ensure it’s clean and visually appealing (e.g., wipe down your toaster). Then, style around it using the rule of three: place a small plant or a stack of books to one side, and a vase or utensil holder to the other, creating a balanced triangle. Use a tray to group related items like coffee mugs and a canister next to your coffee maker.
What are the best things to put on a shelf above my kitchen sink?
This is a prime display spot. Use it for items that enjoy humidity and light: potted herbs like mint or basil, trailing plants like ivy, a beautiful soap dispenser and towel, a small vase for fresh flowers, or lightweight art/photos. Avoid heavy, breakable, or paper items that will get wet or damaged by steam.
How can I make my kitchen shelves look more expensive?
It’s all about editing and cohesion. First, remove 30% of your items—simplicity reads as expensive. Second, use a limited color palette (neutrals + 1-2 accent colors). Third, invest in a few high-quality, simple pieces like a beautiful wooden cutting board, a ceramic vase, or linen towels. Fourth, ensure every item is clean and dust-free. Finally, use the “tray trick” to create neat, intentional groupings.
How do I prevent dust on my kitchen shelves?
First, don’t overcrowd—it makes dusting impossible. Second, embrace the “tray.” Style vignettes on trays; you can lift the entire tray to dust underneath. Third, choose smooth, easy-to-wipe materials like sealed wood, metal, or glass for your shelves and decor items. Finally, incorporate a quick 2-minute dusting into your weekly kitchen cleaning routine using a microfiber duster.
Can I mix different wood tones on my kitchen shelves?
Absolutely, and it can look very warm and collected. The key is to have a dominant wood tone (e.g., your shelf itself or a large cutting board) and then introduce 1-2 other tones as accents. For example, a dark walnut shelf with a light oak bowl and a medium-toned wooden spoon. Avoid having more than three distinct wood tones in one small area to prevent a disjointed look.