Cutting cheese correctly is the secret to a beautiful, functional charcuterie board. It’s not just about slices; it’s about respecting each cheese’s texture to enhance flavor and make it easy for guests to enjoy. Using the right knife for the cheese type—from a sturdy cleaver for hard aged cheeses to a pronged knife for creamy brie—prevents sticking and crumbling. This guide breaks down simple, foolproof techniques for every cheese style, ensuring your board looks professional and tastes perfect.
So, you’veassembled a stunning array of cured meats, sweet and savory accompaniments, and a gorgeous selection of cheeses for your charcuterie board. You’ve got the colors, the textures, the whole beautiful spread mapped out in your head. But then you stare at that wheel of brie or block of aged cheddar and a critical question hits: how do I actually cut this cheese? It’s the moment that can make or break the entire experience. A poorly cut cheese can crumble into a mess, stick stubbornly to a knife, or look unappetizing, while a perfectly cut wedge or slice invites guests in and makes every bite effortless and elegant. Cutting cheese for a charcuterie board is a simple skill that transforms your spread from good to unforgettable. This isn’t about fancy culinary school techniques; it’s about understanding a few basic principles and respecting the unique personality of each cheese on your board. Let’s dive in and turn you into a confident, board-building cheese ninja.
Key Takeaways
- Cutting affects both presentation and taste: Proper cuts showcase the cheese’s interior, make it easy to pick up, and can even influence how its flavors are perceived.
- Match the knife to the cheese: Use a hard cheese knife/cleaver for firm blocks, a soft cheese knife (often with holes) for creamy wheels, and a fork or your hands for crumbly varieties.
- Temperature is non-negotiable: Always let cheese come to room temperature (at least 30-45 minutes) before cutting. Cold cheese is brittle, sticks to knives, and won’t release its full aroma.
- Cut with the grain for hard cheeses: Slice perpendicular to the natural lines or crystals in cheeses like aged cheddar or parmesan for cleaner cuts and a better mouthfeel.
- Portion control is key: Plan for 1-1.5 oz of each cheese per person. Cut a variety of shapes—wedges, slices, cubes—to add visual interest and cater to different preferences.
- Presentation follows function: Arrange cut pieces so the rind is on the outside (where possible), and provide a separate knife for each cheese to avoid flavor cross-contamination.
- Practice makes perfect: Don’t stress. The goal is deliciousness and enjoyment. Even imperfectly cut cheese that’s at the right temperature will taste better than perfectly cut, cold cheese.
📑 Table of Contents
- Why Cutting Cheese Properly Matters: It’s More Than Just Slicing
- Essential Tools: What You Actually Need (And What You Don’t)
- Mastering the Cut: Techniques for Different Cheese Types
- Portioning and Presentation: From Board to Plate
- Pro Tips and Common Mistakes to Avoid
- Conclusion: Serving with Confidence and Joy
Why Cutting Cheese Properly Matters: It’s More Than Just Slicing
Before we talk about the how, we need to solidify the why. Why does the cut matter so much when you’re just going to eat it anyway? Two fundamental reasons: visual appeal and functional deliciousness.
The Visual Impact: Your Board’s First Impression
A charcuterie board is a feast for the eyes before it’s a feast for the mouth. The arrangement tells a story of abundance and care. Neat, intentional cuts create a sense of order and professionalism. A wedge of manchego with a clean diagonal slice, a pyramid of cubed gouda, a soft-ripened cheese with a elegant slice removed to reveal the creamy interior—these are visual cues that say, “This was made with thought.” Conversely, a cheese that’s been hacked at with random, crumbling chunks looks messy and suggests a lack of effort. The cut exposes the cheese’s true color and texture, whether it’s the ivory paste of a triple-cream, the crystalline specks in an aged gouda, or the fluffy white interior of a fresh chèvre. This visual cue sets expectations for the flavor and texture to come.
Flavor and Texture Preservation: The Science of the Bite
How you cut a cheese directly impacts how it tastes and feels in your mouth. For hard, aged cheeses like Parmigiano-Reggiano or aged cheddar, cutting with the grain (perpendicular to any natural lines or protein crystals) is crucial. Slicing against the grain can make the cheese taste overly crumbly and can cause those delicious tyrosine crystals to shatter unevenly, diminishing that delightful crunch. For soft-ripened cheeses like brie or camembert, a clean slice through the rind and into the paste ensures you get a perfect ratio of the earthy, mushroomy rind to the rich, buttery interior in every bite. A jagged tear might give you all rind or all paste, throwing off the balance. Furthermore, proper cutting prevents excessive handling. The less you touch and manipulate the cheese with your hands (beyond the initial placement), the less it warms up unevenly and the longer it stays at its ideal serving temperature on the board.
Essential Tools: What You Actually Need (And What You Don’t)
You don’t need a drawer full of specialized cheese tools. In fact, a minimalist approach often works best. The golden rule: use a knife dedicated to each cheese type to avoid flavor transfer. A knife that has sliced a pungent blue cheese should never touch a delicate, fresh goat cheese. Here’s your essential toolkit.
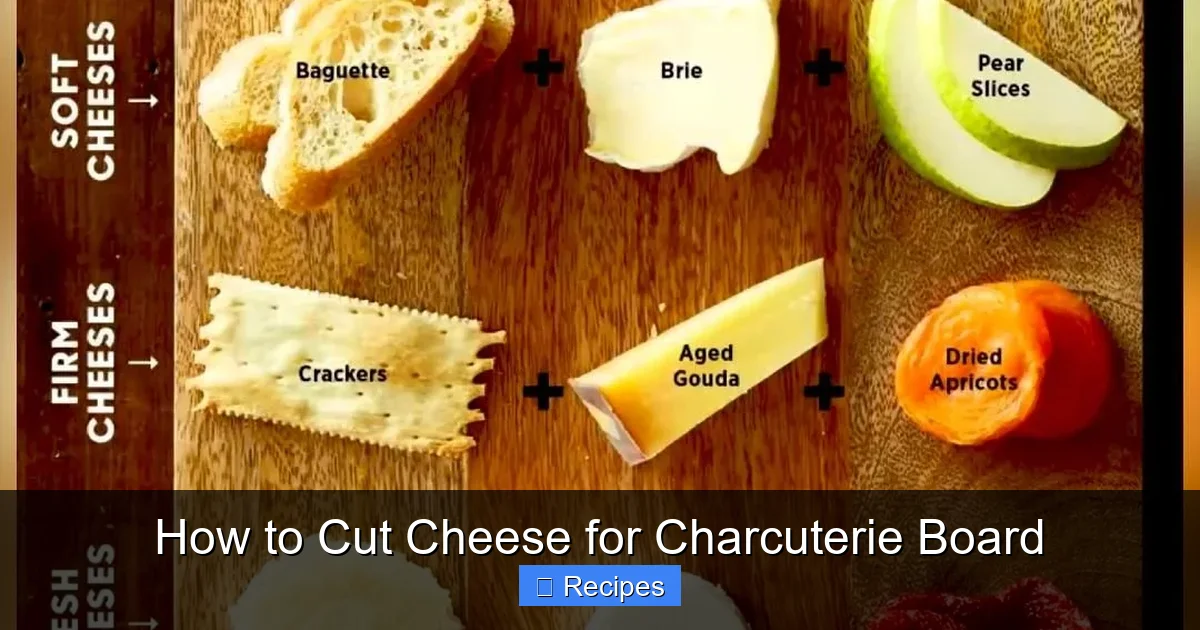
Visual guide about How to Cut Cheese for Charcuterie Board
Image source: i.pinimg.com
Cheese Knives vs. Regular Knives: Understanding the Difference
You might wonder if a regular chef’s knife will do. Sometimes, yes, but cheese-specific knives are designed for a reason.
- Hard Cheese Knife/Cleaver: These have a short, heavy, often rectangular blade with a slightly sharp edge. The weight and heft allow you to press down and break through dense, crystalline textures (like a 24-month aged gouda or parmesan) rather than just slicing. The blunt edge is perfect for prying off chunks. A sturdy cleaver can work in a pinch.
- Soft Cheese Knife: Look for a knife with a wide, thin, often slightly curved blade and, most importantly, holes in the blade. These holes are not decorative; they prevent the creamy, sticky paste from adhering to the metal, ensuring a clean slice every time. The wide blade helps support the soft cheese as you cut.
- Universal/Plate Knife: A simple, medium-sized knife with a sharp edge and a rounded tip can handle a surprising number of semi-soft and semi-hard cheeses (like havarti, monterey jack, or younger cheddars). It’s your workhorse.
- Cheese Fork/Prongs: Essential for crumbly cheeses like feta or aged blue cheese. The prongs allow you to spear and lift pieces without them falling apart. You can also use a small fork.
Other Helpful Tools (The Nice-to-Haves)
A cheese plane or cheese slicer is fantastic for creating thin, elegant slices from semi-soft to firm wheels (like emmental or young provolone). A small offset spatula or cheese knife with a forked tip helps transfer delicate slices to the board without breaking them. But remember, your fingers are also a tool! For some cheeses, like a fresh goat cheese log, the best presentation is simply breaking it into rustic chunks by hand—it looks artisanal and is perfectly acceptable.
Mastering the Cut: Techniques for Different Cheese Types
This is the core of our guide. Cheeses are broadly categorized by texture, and each category demands a slightly different approach. We’ll cover the main families you’ll find on a typical board.

Visual guide about How to Cut Cheese for Charcuterie Board
Image source: cdn.momsdish.com
Hard and Semi-Hard Cheeses: The Firm Foundation
Think aged cheddar, gouda, manchego, parmesan, pecorino romano. These are dense, often crystalline, and can be brittle if cold.
The Goal: Clean slices or manageable chunks that are easy to pick up.
The Technique:
- Temperature First: This is 80% of the battle. Take these cheeses out of the fridge at least 45 minutes before serving. They should feel pliable at the edges, not rock-hard.
- Identify the Grain: Look closely at the cut face of the cheese. You’ll often see fine lines or tiny white crystals (tyrosine) running in one direction. This is the “grain.” You want to cut perpendicular (at a 90-degree angle) to these lines.
- For Wedges/Wheels (like Manchego): Place the wheel on its flat side. Using your hard cheese knife or a sturdy chef’s knife, make a downward, firm stroke from the top of the wheel towards the base, cutting a triangular wedge. Start at the center and work your way out. For a wheel with a rind, you can cut a wedge that includes a bit of rind, or slice the wheel into parallel planks from the side, creating rectangles with a rind edge.
- For Blocks (like Cheddar): Stand the block on its narrow end. Slice downward, again cutting against the grain. For a more board-friendly shape, you can then cut those slices in half crosswise to create shorter rectangles, or turn the block and cut it into cubes from the side.
- For Very Hard Cheeses (Parmesan/Pecorino): Use a dedicated cheese knife or a sharp paring knife. You’re not slicing thin pieces; you’re breaking off fragments. Use the tip of the knife to score a line on the surface, then insert the blade and use a twisting/prying motion to break off a chunk. These shards are perfect for nibbling.
Pro Tip: If your hard cheese is still a bit too firm and crumbles, don’t fight it. Embrace it and break it into rustic chunks with your hands or the knife. It will still taste fantastic.
Soft and Creamy Cheeses: The Delicate Divas
Think brie, camembert, triple-cream (like Brillat-Savarin), and fresh mozzarella. These are high-moisture, oozy, and can be tricky.
The Goal: Clean slices that hold their shape, or a neat removal of a “cap” to expose the interior.
The Technique:
- Temperature is CRITICAL: These must be supremely room temperature. If they are cold, the interior will be firm and the rind will tear instead of slice. Give them a full hour out of the fridge.
- For Wheels (Brie/Camembert): The classic presentation is a whole wheel with a slice removed. Use your soft cheese knife (the one with holes). Place the wheel on the board. Starting at the edge of the wheel, insert the knife blade horizontally into the side, and make a smooth, confident cut straight across the diameter, removing a wedge or a single slice. Wipe the blade clean between cuts. Alternatively, you can cut the entire wheel into 6 or 8 equal wedges like a pie, but be sure to cut from the center outward.
- For Logs (Fresh Goat Cheese): You can slice the log into rounds with a clean, wet knife (dip it in hot water, dry it). For a more rustic look, break the log into 2-3 inch chunks by hand. The crumbly texture is part of its charm.
- For Fresh Mozzarella (Balls): Drain well and pat dry with a paper towel. You can leave them whole, tear them by hand into rustic pieces, or slice them with a sharp knife. For a beautiful presentation, try the “floret” method: place the ball on a board, cup your hand over it, and use a sharp knife to make several downward, rocking cuts while rotating the ball, creating a flower-like bundle of strands.
Pro Tip: If a soft cheese is sticking to the knife, the knife isn’t hot or sharp enough, or the cheese is still too cold. Dip the blade in hot water, dry it thoroughly, and try again. A dedicated soft cheese knife with holes will be your best friend here.
Fresh and Crumbly Cheeses: The Tumbleweeds
Think feta, queso fresco, ricotta salata, and some aged blue cheeses. These are salty, moist, and have a tendency to fall apart.
The Goal: Attractive, bite-sized pieces that don’t turn to dust.
The Technique:
- Accept the Crumb: You will not get a perfect cube. Your goal is controlled crumbling.
- Use a Fork or Your Hands: This is the primary tool. For a block of feta, use the tines of a fork to spear a corner and gently lift/pull off a chunk. For a larger wheel of blue cheese, use a knife to score a grid on the surface, then use a fork or spoon to lift out the resulting cubes.
- The “Dollop” Method for Ricotta: If using fresh ricotta (the wet kind), it’s often best to spoon small dollops onto the board directly from the container. For drier ricotta salata, you can crumble it with your fingers over a designated spot on the board.
- For Blue Cheese: If it’s a creamy, spreadable blue (like gorgonzola dolce), you can use a knife to spread a portion onto a cracker right on the board, or place a whole wedge. For a firm, crumbly blue (like roquefort), use a knife to cut small wedges from the wheel, or crumble it with a fork.
Pro Tip: Keep these cheeses in their brine or oil until the last minute, then drain on a paper towel for a few minutes to remove excess liquid. This prevents them from making other board elements soggy.
Portioning and Presentation: From Board to Plate
You’ve got your perfect cuts. Now, how much do you make, and where do you put it?
Visual guide about How to Cut Cheese for Charcuterie Board
Image source: wilingga.com
How Much Cheese Per Person? The Math of Indulgence
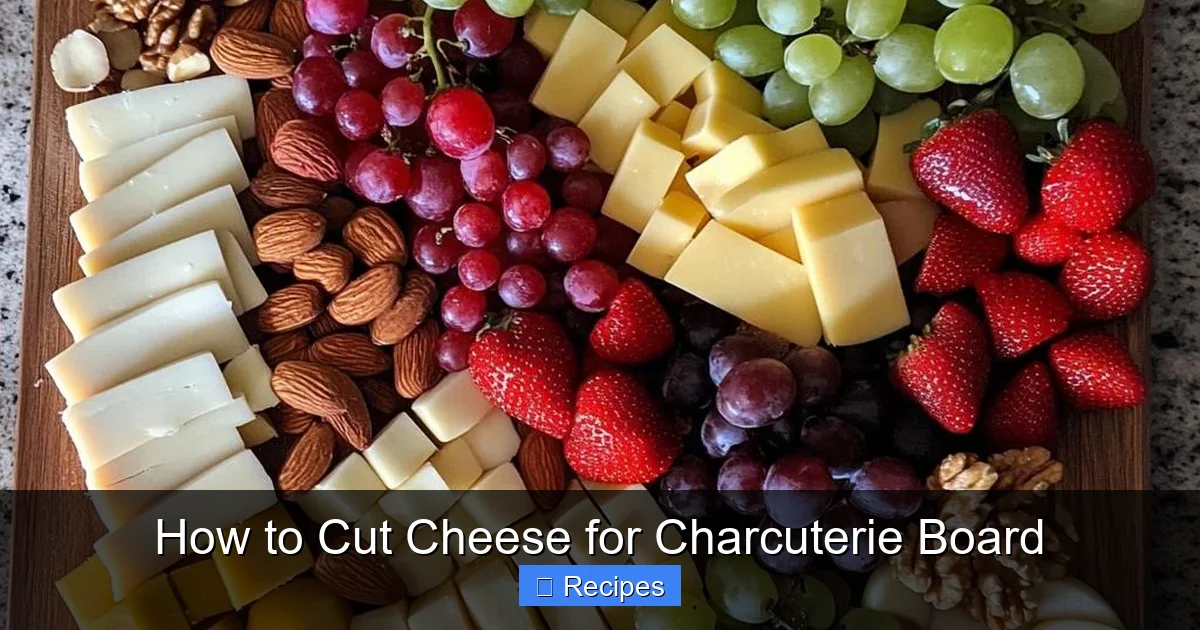
A common rule of thumb for a charcuterie board that is the main appetizer or light meal is 1 to 1.5 ounces of each cheese per guest. So, if you’re serving 8 people and offering 4 different cheeses, you’d need about 32-48 ounces (2-3 pounds) total. It’s better to have a little extra than to run short. For a larger gathering, scale up. Remember, people will also be eating meat, fruit, nuts, and bread. A good range is to offer 3 to 5 distinct cheeses for a group of 6-12. This provides variety without overwhelming the board or the palate. Aim for a progression: a fresh/soft cheese, a semi-soft, a hard/aged, and perhaps a blue or a funky washed-rind.
Arranging Your Cut Cheese for Maximum Appeal
Think of your board as a canvas. Use the cheese as focal points.
- Place Whole Wheels/Logs Strategically: A whole small wheel of brie or a log of goat cheese can be an anchor piece. Place it first, then build around it. If you’ve cut a slice from a wheel, leave the wheel intact and place the slice next to it.
- Group by Type, Separate by Flavor: Keep milder cheeses together and stronger ones (like blues or stinky washed-rinds) in their own corner, preferably downwind from the delicate cheeses. This prevents strong aromas from overpowering subtle ones.
- Show the Rind: For washed-rind and soft-ripened cheeses (like epoisses or brie), the rind is part of the experience. Arrange pieces so the rind is visible. You can place a whole wheel with the rind facing outward, or arrange slices with the rind edge on the outside of the pile.
- Vary the Shapes: Mix triangles (from wedges), rectangles (from sliced blocks), cubes, and rustic crumbles. This creates visual texture.
- Leave Space!: This is the biggest mistake. Don’t crowd the board. You need room for meats to be fanned out, space for bowls of olives or nuts, and gaps for guests to pick up items without disturbing everything else. Aim for 30-40% negative space.
- Use Small Bowls and Spreaders: Place crumbly cheeses (feta, blue) in small ceramic bowls or on a spoon to contain them. Include a small knife or spoon for each cheese bowl. For soft cheeses, a butter knife or dedicated soft-cheese knife should be placed on the board next to it.
Pro Tips and Common Mistakes to Avoid
Let’s consolidate the wisdom and steer you clear of the pitfalls.
Temperature is Everything (Yes, We’ll Say It Again)
This cannot be overstated. Cold cheese is flavorless cheese. The fats and aromatic compounds are locked up. Take cheeses out of the refrigerator at least 1 hour, preferably 1.5 hours, before assembling the board. For very hard cheeses, 45 minutes may suffice. For soft, creamy cheeses, give them the full 90 minutes. A good test: press your finger gently into the side of a soft cheese; it should leave a slight indent. For hard cheese, it should feel pliant, not rock-solid.
Don’t Overcomplicate: The “Good Enough” Rule
Your guests are there to enjoy themselves, not critique your knife skills. If a piece of cheddar breaks when you try to slice it, perfect—now you have a crumbly piece. If the brie wedge isn’t a perfect triangle, who cares? The flavor is what matters. Focus on getting the cheese to the right temperature and using a reasonably sharp, appropriate knife. The rest is secondary. Rustic, hand-torn pieces often look more inviting and artisanal than perfectly uniform factory cuts.
The One-Knife-Per-Cheese Rule (And Why It’s a Game-Changer)
Using the same knife for a mild mozzarella and then a pungent blue cheese is a cardinal sin. The residual blue flavor will contaminate the mild cheese. It takes two seconds to swap knives or wipe one thoroughly with a clean cloth (though wiping isn’t as foolproof as using separate tools). If you’re short on knives, designate a “mild” and a “strong” knife and be religious about wiping between uses, starting with the mildest cheese and working your way to the strongest.
Cutting Against the Grain: A Hidden Sin
For aged, hard cheeses, slicing parallel to those visible lines/crystals will result in a grainy, unpleasant texture and muted flavor. Always look for the direction of the protein structure and cut across it. It’s a small detail that makes a big difference in the eating experience.
Neglecting the Board’s Practicality
Think about how people will eat. Don’t place a large, heavy wheel of cheese in the center where it’s hard to reach. Put it near an edge. Ensure there’s a clear path for a knife to access each cheese. Place softer, more delicate cheeses (like fresh goat cheese) in spots where they won’t get jostled by elbows reaching for something else.
Conclusion: Serving with Confidence and Joy
Building a charcuterie board is an act of hospitality and creativity. The way you cut the cheese is the foundational step that supports everything else—the beautiful arrangement, the effortless serving, the delighted tasting. Remember the core pillars: temperature, the right tool, and respecting the cheese’s nature. Let your aged cheddar be sliced against its grain into sturdy rectangles. Let your brie be presented as a whole wheel with a slice cleanly removed. Let your feta be crumbled into a bowl with a fork. These simple, intentional actions communicate care and knowledge. They elevate your board from a random assortment of snacks to a curated experience. So next time you’re faced with a cheese block, take a breath, find the right knife, let it warm up, and make your cut. Your guests—and your taste buds—will thank you for it. Now go forth and build your beautiful board.
Frequently Asked Questions
Can I cut the cheese ahead of time?
It’s best to cut cheeses just before serving, especially soft and semi-soft varieties, as they can dry out, sweat, or lose their ideal texture. Hard cheeses can be cut 1-2 hours ahead if kept covered at room temperature. If you must prep earlier, store cut pieces in airtight containers in the fridge and bring them to room temperature for 30 minutes before arranging on the board.
What’s the best all-around knife for cutting cheese if I only want to buy one?
A good quality medium-sized universal cheese knife or a small chef’s knife is the most versatile single tool. It can handle semi-soft and semi-hard cheeses like cheddar, gouda, and havarti. For a truly dedicated all-rounder, look for a knife with a slightly curved tip and a forked end, which can also help with lifting and serving.
How do I know how much cheese to buy for my board?
Plan for 1 to 1.5 ounces of each cheese per person. If you’re offering 4 cheeses to 8 people, aim for 3-4.5 pounds total. It’s better to have a little extra. Also, consider your board’s other elements: if meats and accompaniments are abundant, you can lean toward the lower end of the cheese estimate.
What’s the biggest mistake people make when cutting cheese for a board?
The most common error is cutting cheese while it’s still cold from the fridge. Cold cheese is hard, sticks to knives, doesn’t release its aroma, and can crumble or shatter. Always allow at least 30-45 minutes (up to 90 for soft cheeses) for it to come to room temperature before you even think about cutting it.
How should I cut a very crumbly cheese like feta without it turning into a mess?
Don’t use a knife. Use a fork to spear and lift chunks directly from the block, or simply crumble it by hand over a small bowl or a designated spot on the board. You can also buy feta in pre-crumbled form, but crumbling it yourself often yields a nicer texture.
After cutting, how do I store the leftover cheese on the board?
If the board will be out for more than 2 hours, it’s safest to discard any leftover cheese that was sitting at room temperature for food safety. For a shorter gathering, you can cover the board loosely with plastic wrap and refrigerate the whole thing, but expect the textures to change. It’s better to store different cheese types separately in airtight containers with their original wrapping or parchment paper, then bring them out again for a second (shorter) serving session after re-warming.