Cutting a hole in a stainless steel sink requires careful preparation, the right tools, and strict safety measures. You must secure the sink, mark the cut precisely, and use a slow, steady technique with lubricant to avoid damaging the sink or causing injury. Properly deburring and sealing the cut edge is crucial for a professional, rust-free finish. Never rush the process; patience and the correct approach yield perfect results.
So, you need to cut a hole in your stainless steel sink. Maybe you’re installing a new faucet with a different spout reach, adding a built-in soap dispenser, or fitting a water filtration system. Whatever the reason, the thought of cutting into that tough, gleaming metal can be intimidating. You might be picturing sparks, ruined sinks, or worse. But here’s the secret: with the right preparation, tools, and a calm, steady hand, you can do this yourself like a pro. It’s not about brute force; it’s about smart technique. This guide will walk you through every single step, from gathering your gear to applying the final sealant, ensuring a clean, safe, and professional result. We’ll turn that daunting task into a manageable, successful DIY project.
Stainless steel is a fantastic material for sinks—durable, hygienic, and corrosion-resistant. However, its hardness is what makes cutting it a specialized job. Using the wrong tool or method will lead to a ragged hole, a ruined drill bit, potential damage to the sink’s finish, and a serious risk of injury. The process essentially involves melting and grinding away the metal, which generates intense heat. That’s why controlling speed and using ample lubrication are the two unbreakable rules of this job. Follow this guide closely, respect the material, and you’ll have that new hole perfectly sized and ready for your fixture in no time.
Key Takeaways
- Safety First: Always wear heavy gloves, safety glasses, and hearing protection. Secure the sink firmly to prevent dangerous movement.
- Tool Choice is Critical: Use a bi-metal hole saw or a carbide-tipped hole saw for thicker steel. A standard twist drill bit will dull instantly and is unsafe.
- Lubrication is Non-Negotiable: Cutting oil or WD-40 must be applied constantly to reduce heat, prevent tool damage, and ensure a clean cut.
- Speed & Pressure: Use the lowest drill speed possible (under 500 RPM for large holes) and let the tool do the work—apply minimal, steady pressure.
- Deburring is Essential: Immediately after cutting, use a deburring tool or metal file to remove all sharp, ragged edges to prevent injury and ensure proper seal.
- Test Before Final Cut: Always practice on a scrap piece of similar stainless steel to calibrate your speed and technique.
- Seal the Cut: Apply a high-quality silicone sealant around the underside of the new hole to create a waterproof barrier and prevent leaks.
📑 Table of Contents
Essential Preparation: Your Workspace and Safety Gear
Before you even touch a tool, your preparation phase is 50% of the battle. A cluttered, unsafe workspace leads to mistakes and accidents. This isn’t a job for a cramped apartment bathroom; you need space, light, and stability.
Setting Up a Safe, Stable Workspace
The absolute first rule is to remove the sink from the countertop if at all possible. Working on a sink that’s still installed is a nightmare. You risk damaging the countertop, have no access to the underside for support or cleanup, and work in an awkward, unstable position. If removal isn’t an option (like with an undermount sink already sealed), you must create an incredibly sturdy support system from below using 2x4s and clamps to prevent any flexing. But removal is always preferable.
Once the sink is out, place it on a solid, flat work surface—a heavy workbench or a pair of sawhorses with a sheet of rigid foam or plywood on top. The sink must not rock or move an inch. Use C-clamps or heavy-duty strap clamps to secure it firmly at multiple points around the perimeter, not near your cut line. The vibration from cutting will cause an unsecured sink to “walk” and potentially crack or cause your drill to bind, which is a major cause of kickback and injury.
Non-Negotiable Personal Protective Equipment (PPE)
Do not skip this. Cutting stainless steel produces sharp metal shavings (swarf), tiny hot particles, and can cause tools to snag. Your eyes, hands, and ears are at risk.
- Safety Glasses/Goggles: A must. Metal shards can fly at high speed. Wrap-around goggles are best.
- Heavy-Duty Gloves: Leather work gloves or cut-resistant gloves. They protect from sharp edges on the sink and from the hole saw if it binds. Do not wear loose gloves that could get caught.
- Hearing Protection: The sound of a hole saw cutting metal is piercing and can cause immediate hearing damage. Use earplugs or earmuffs.
- Long Sleeves & Closed-Toe Shoes: Protect your skin from hot metal shavings and debris.
- Respirator/Dust Mask (Optional but Recommended): While not as dusty as wood, fine metal particles are generated. A basic N95 mask is wise, especially if cutting in an enclosed space.
Gathering the Right Tools and Materials
Using the wrong drill bit is the #1 reason for project failure. Here’s your checklist:
- Drill: A powerful corded drill is ideal. It provides constant torque and doesn’t slow down under load like many cordless models. If using cordless, ensure it’s a high-torque model with a fresh, high-capacity battery.
- The Correct Hole Saw: This is your star tool. You need a bi-metal hole saw or a carbide-tipped hole saw specifically rated for metal cutting. Do not use a wood-cutting hole saw. Bi-metal (HSS teeth welded to a flexible steel body) is excellent for most sink thicknesses (16-20 gauge). For very thick commercial sinks, carbide-tipped is more durable. Size it exactly to your faucet/escutcheon template.
- Drill Bit for Pilot Hole: A 1/8″ or 3/16″ high-speed steel (HSS) twist drill bit. This starts the hole saw straight.
- Cutting Lubricant: Cutting oil (like 3-in-One) or a penetrating oil like WD-40. This is absolutely critical.
- Deburring Tool or Round Metal File: To clean the sharp, burr-filled edge after cutting.
- Center Punch and Hammer: To make a definitive starting point for your pilot hole.
- Straight Edge and Marker: For precise layout.
- Clamps: Multiple C-clamps or bar clamps to secure the sink.
- Template: The paper or plastic template that came with your faucet or accessory.
- High-Quality Silicone Sealant: 100% silicone, mold-resistant, for the final waterproof seal.
- Rags: For cleaning and applying lubricant.
Marking and Layout: Precision is Everything
Measure twice, cut once. This old adage is gospel here. A misplaced hole on a stainless sink is often impossible to fix. The polished surface also makes marking tricky.
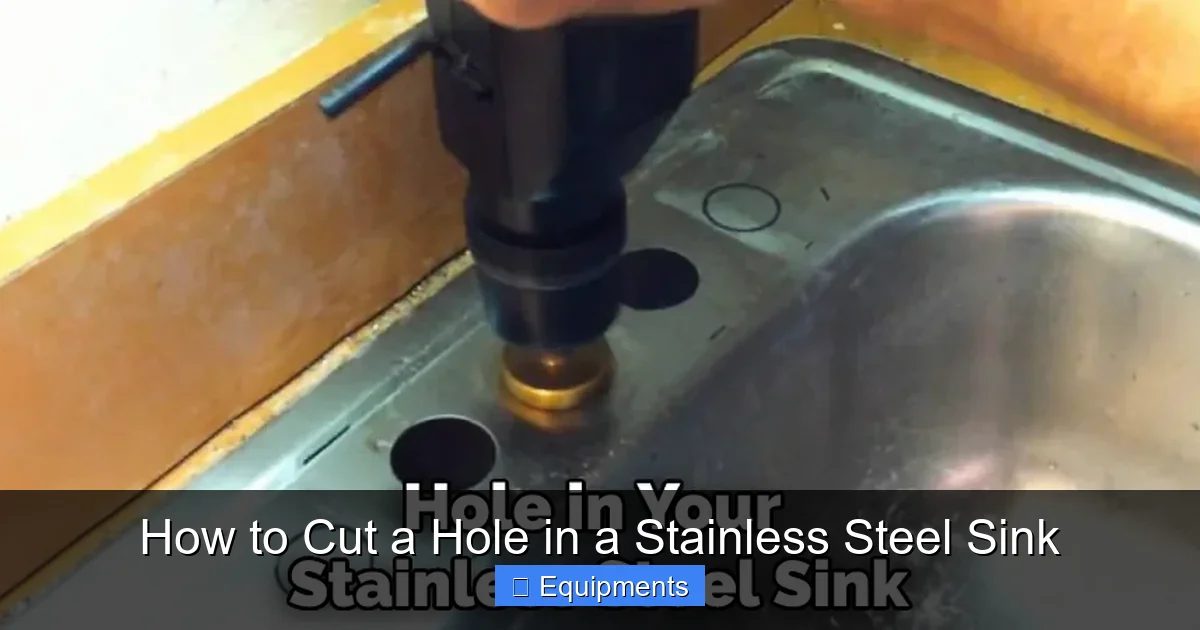
Visual guide about How to Cut a Hole in a Stainless Steel Sink
Image source: theplumbero.com
Cleaning and Preparing the Sink Surface
Thoroughly clean the area where you’ll be working with a degreaser and a lint-free cloth. Any residue will cause your marker to smudge or your template to slip. The surface must be perfectly clean and dry.
Using the Template Correctly
Most faucet manufacturers provide a paper or plastic template. If it’s paper, reinforce it with a piece of cardboard or thin plastic to prevent tearing. If it’s a flimsy plastic template, trace it onto a rigid piece of plywood or plastic for better stability. Center the template exactly where the fixture needs to mount. For centerset faucets, this is usually the existing holes. For a single-hole faucet, it’s the center of the sink bowl. For a soap dispenser, it’s typically near the faucet base or on the countertop edge. Use the template’s mounting holes to align perfectly if replacing an old fixture.
Marking the Cut Line
Use a fine-tip permanent marker (like a Sharpie) or a center punch for the ultimate in precision. A marker line can be hard to see on brushed stainless. A center punch mark at the exact center is invaluable. If your hole saw has a pilot bit, you only need to mark the center point. If it’s a template with a full ring, trace the inner circumference clearly. Double-check all measurements from the sink’s edges and drain before you commit to a mark.
The Cutting Process: Technique and Control
This is the main event. Your patience and adherence to the following steps will determine your success. Rushing here is the biggest mistake.
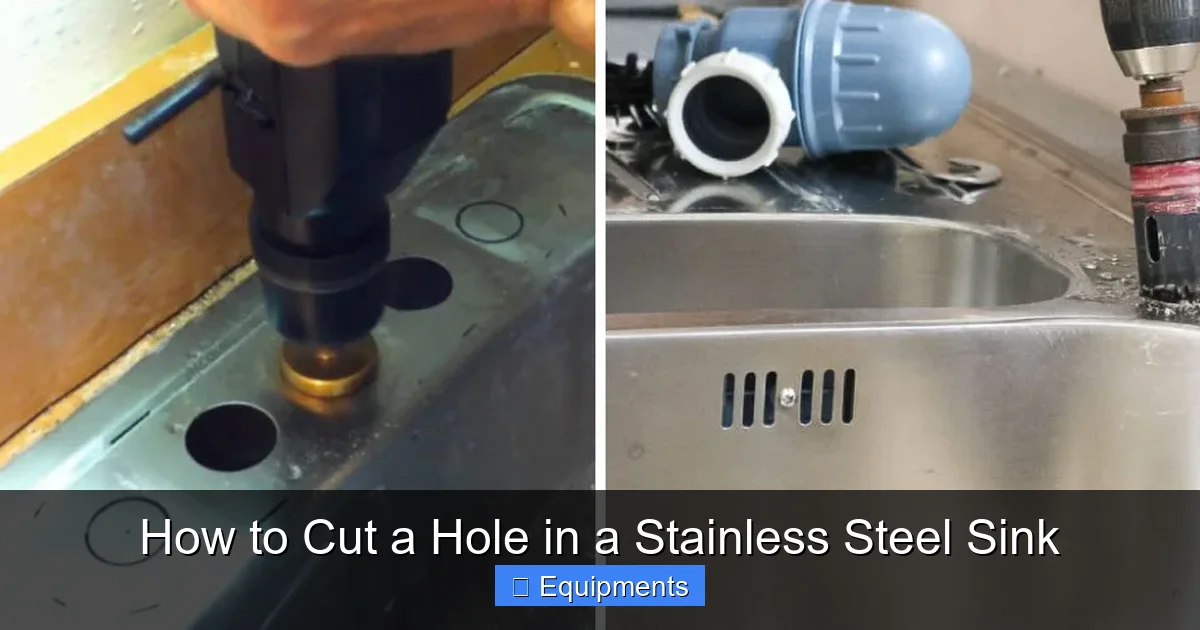
Visual guide about How to Cut a Hole in a Stainless Steel Sink
Image source: thekitchenix.com
Creating the Pilot Hole
Place your 1/8″ HSS drill bit into the center punch mark. Set your drill to its lowest speed setting. High speed creates heat and dulls bits instantly. Apply a drop of cutting oil directly on the mark. Hold the drill perfectly perpendicular to the sink surface. Start the drill and apply firm, steady pressure. Let the bit do the work—don’t force it. Once the pilot hole is through, remove the bit. This hole guides the hole saw’s pilot bit and prevents it from wandering.
Attaching and Positioning the Hole Saw
Slide the hole saw onto the drill’s arbor, ensuring it’s tightened according to the manufacturer’s instructions. Place the saw’s pilot bit into the pilot hole you just drilled. The pilot bit is crucial for keeping the large saw straight and centered. Before you start the saw, liberally apply cutting oil around the entire circumference of the cut line on both sides of the sink if possible.
Cutting: Slow, Steady, and Lubricated
This is the most critical phase. Set your drill to the absolute lowest torque/speed setting. For a 1.5″ to 2″ hole saw in 18-gauge steel, this is typically between 200-500 RPM. Higher speeds generate catastrophic heat. Position yourself so you can apply steady, straight-in pressure without straining. Align the hole saw vertically. Turn the drill on.
- Start the Cut: Gently press the saw into the metal. You’ll feel resistance. Maintain firm, consistent pressure straight down. Do not tilt the drill.
- Constant Lubrication: Every 5-10 seconds, pause and squirt more cutting oil directly into the cut gap around the saw. You should see metal shavings, not sparks. If you see smoke or the drill motor strains, STOP. Let it cool, add more lubricant.
- Feel for the Break-Through: As the saw nears completion, the resistance will decrease slightly. This is when you must be extra steady to avoid the saw grabbing and snapping or marring the underside. Continue until the saw breaks through completely.
- Release Pressure: Once through, turn off the drill and do not lift the saw while it’s still spinning. Wait for it to stop completely before lifting it away. A spinning saw with sharp teeth can catch on the fresh edge and pull the drill from your hands.
Finishing Touches: Deburring and Sealing
The hole is cut, but it’s not finished. The inside edge will be razor-sharp, jagged, and full of burrs. Leaving it like this is dangerous and will prevent a proper seal for your fixture.
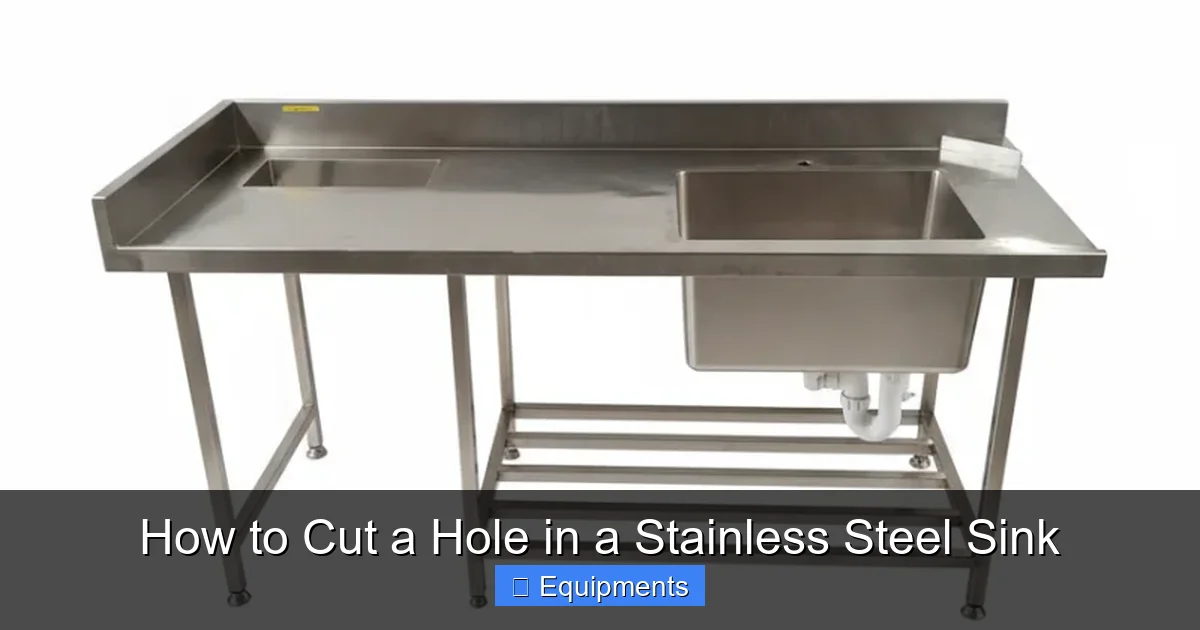
Visual guide about How to Cut a Hole in a Stainless Steel Sink
Image source: shop.kitchenequipmentaustralia.com.au
Deburring and Cleaning the Edge
Use a dedicated deburring tool (a handheld tool with a rotating blade) or a round metal file (not a flat file). Run it gently around the entire circumference of the hole on both the top and bottom sides. Your goal is to remove all the sharp, ragged metal. The edge should be smooth to the touch. Wipe away all metal shavings with a rag. Inspect the hole under a light—you should see a clean, uniform edge with no hanging bits of metal.
Applying the Waterproof Seal
Before installing your faucet or accessory, apply a continuous bead of 100% silicone sealant to the underside of the sink, around the entire hole. This does two things: it creates a watertight barrier between the metal and the fixture’s mounting hardware, and it helps cushion and seal the installation. Use a finger or a sealant tool to smooth the bead. Let it cure for the time specified on the tube (usually 24 hours) before fully tightening the fixture and exposing it to water pressure.
Troubleshooting and Common Mistakes
Even with careful planning, you might encounter issues. Here’s how to handle them.
The Hole Saw is Binding or Stuck
This is usually due to heat and lack of lubrication, or too much pressure. Immediately stop the drill. Let everything cool completely. Pry the saw out gently with a screwdriver if it’s stuck in the hole. Add more lubricant, reduce your pressure, and ensure your drill speed is at its lowest. A binding saw can twist violently and cause injury.
The Hole is Not Round or is Wobbly
This indicates the pilot bit slipped or the saw wasn’t held perfectly straight. Prevention is key: a good pilot hole and a steady hand. If the hole is only slightly out of round, you might be able to use a round metal file to carefully enlarge and true it to the correct size. If it’s severely misshapen, you may need to use a slightly larger escutcheon (decorative plate) or, in the worst case, patch and start over in a new location.
Excessive Burrs or a Jagged Edge
This points to a dull hole saw or insufficient lubrication. A sharp saw with plenty of oil will produce a relatively clean cut. Deburring is still required, but excessive burrs mean your cutting process was too aggressive. Replace the hole saw if it’s dull. A dull saw works by grinding and smearing metal, creating more heat and burrs.
You Accidentally Cut Through the Sink’s Finish on the Top Side
This can happen if the hole saw’s teeth catch on the exit side. To prevent this, place a scrap piece of wood or hardboard behind the sink (on the side you’re cutting from) as a backup. The saw will cut into the wood first on break-through, protecting the sink’s underside finish. If you’ve already marred the top surface, you can sometimes polish it out with fine steel wool and stainless polish, but deep scratches are permanent.
Conclusion: Confidence Through Careful Execution
Cutting a hole in your stainless steel sink is a rewarding DIY project that saves you the cost and wait time of a professional plumber. It boils down to three pillars: immaculate preparation, the correct specialized tools, and unwavering patience during the cut. Remember, you are not drilling through wood or plastic. You are grinding through hardened metal, and that demands respect for the process. By securing your sink, wearing your safety gear, using a bi-metal hole saw with constant lubrication at low speed, and taking the time to deburr and seal properly, you will achieve a clean, safe, and factory-like result. The first hole might feel nerve-wracking, but the technique is the same every time. Now, armed with this knowledge, you can approach the task with confidence. Take a deep breath, set up your space, and make that precise cut. Your new faucet or accessory is waiting.
Frequently Asked Questions
Can I use a regular drill bit for wood to cut a hole in a stainless steel sink?
No. Standard high-speed steel (HSS) twist drill bits for wood or metal will dull almost instantly when cutting stainless steel and can overheat and break. You must use a hole saw designed specifically for metal cutting, either bi-metal or carbide-tipped.
How do I prevent the stainless steel from rusting at the cut edge?
Stainless steel resists rust due to its chromium oxide layer. Cutting damages this layer. Immediately after deburring, clean the area with a solvent like acetone to remove any metal fines. Applying a passivation solution (available at welding supply stores) can help reform the protective layer. Finally, the silicone sealant you apply around the fixture will shield the raw edge from constant water exposure.
Is a jigsaw with a metal-cutting blade a good alternative to a hole saw?
For small, straight cuts or notches, a jigsaw with a fine-toothed bi-metal blade can work. However, for a round hole, a hole saw is vastly superior. A jigsaw is hard to control in a circle, especially in thin metal, and will likely produce a wobbly, rough-edged hole. The hole saw provides a perfect circle with minimal effort when used correctly.
What size hole saw do I need for a standard faucet?
>It depends entirely on your faucet model. Standard widespread faucets typically need 1.25″ to 1.5″ holes for the spout and handles. A single-hole (mini-widespread) faucet usually requires a 1.5″ hole. Always consult your faucet’s installation instructions and use the provided template. Measure the mounting nut or escutcheon underneath the sink for the most accurate size.
What should I do if I mess up and the hole is too big or in the wrong place?
For a hole that’s slightly too large, you can sometimes use a larger decorative escutcheon or flange to cover it. For a hole in the wrong location, your options are limited. You can sometimes patch the hole with a stainless steel plate screwed and sealed from underneath, but it’s a noticeable repair. In many cases, especially on a visible part of the sink, the only permanent fix is to replace the sink.
Should I cut the hole from the top or bottom of the sink?
Always cut from the finished, visible side (the top). Cutting from the underside risks the hole saw catching on the thin metal and tearing the finish on the top side as it breaks through. The top side is also easier to mark accurately. Place a piece of scrap wood under the sink on the underside to protect the finish during the final break-through.
