Cleaning the top of your oven above the grill element is a crucial but often neglected task. This area accumulates baked-on grease and food debris that can smoke, smell, and even damage your oven’s heating element. The process requires caution to avoid harming electrical components and the oven’s interior coating. By using the right tools, safe cleaning solutions, and a methodical approach, you can effectively restore this hard-to-reach area and maintain your oven’s performance and longevity.
Key Takeaways
- Safety is Paramount: Always disconnect power and ensure the oven is completely cool before starting to clean above the grill element to prevent electrical shock or damage.
- Avoid Abrasives: Never use steel wool, metal scrapers, or harsh abrasive pads, as they will scratch and permanently damage the oven’s enamel coating.
- Protect the Heating Element: Take deliberate steps to shield the exposed grill element from cleaning solutions and physical contact to prevent corrosion or malfunction.
- Choose the Right Cleaner: Opt for commercial oven cleaners labeled safe for the interior or a homemade paste of baking soda and water for a less toxic approach.
- Patience is Key: Allow cleaning pastes or sprays to dwell for the recommended time (often 15-30 minutes) to soften hardened grime before gentle scrubbing.
- Regular Maintenance Prevents Buildup: Wipe the oven ceiling with a damp cloth after each use while the oven is still warm (not hot) to stop grease from baking on permanently.
- Know When to Call a Pro: If you notice visible damage to the heating element, persistent smoke during cleaning, or are uncomfortable, seek professional appliance repair assistance.
📑 Table of Contents
- Why Cleaning Above the Grill Element is a Challenge You Can’t Ignore
- Essential Safety First: Preparing Yourself and Your Oven
- Gathering Your Arsenal: Tools and Cleaning Solutions
- The Step-by-Step Deep Cleaning Process
- Maintaining a Clean Oven Ceiling: Prevention is Easier
- Troubleshooting: Common Mistakes and How to Fix Them
- Conclusion: A Clean Oven is a Happy (and Safe) Oven
Why Cleaning Above the Grill Element is a Challenge You Can’t Ignore
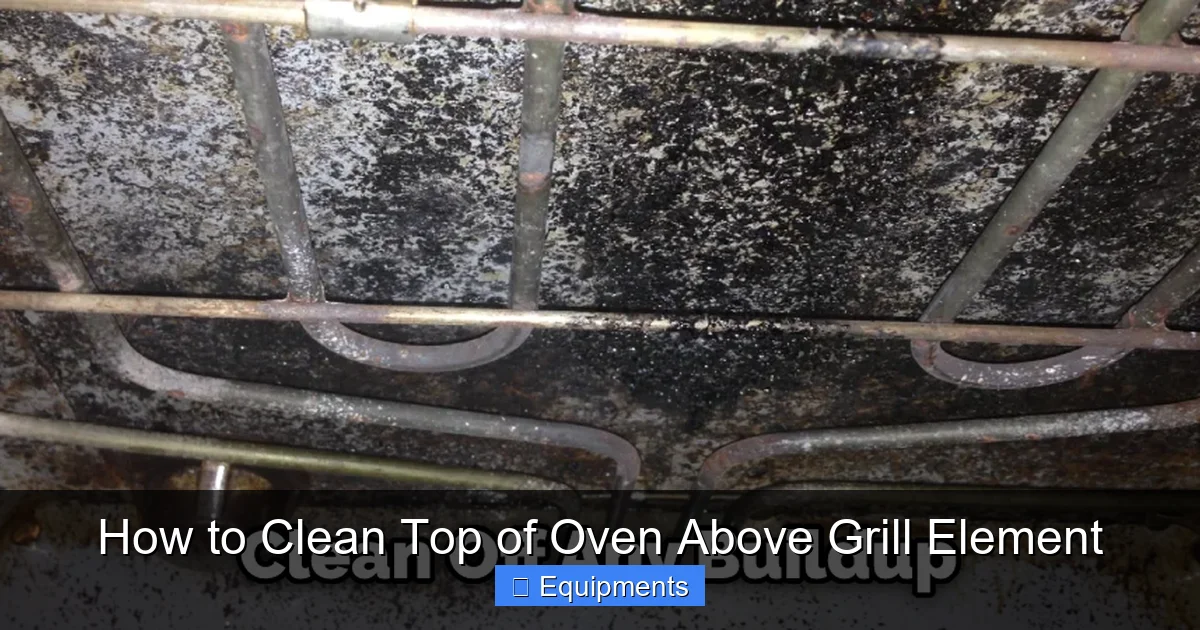
Let’s face it: cleaning your oven is a chore most of us put off. We scrub the racks, wipe up spills on the floor, and maybe even attack the door glass. But there’s one notorious spot that often gets overlooked, hidden in plain sight—the flat ceiling of the oven, especially the area directly above the grill or broiler element. This is the final frontier of oven grime. Here, airborne grease vapors from everything you roast and bake rise and settle, baking onto the surface under intense heat. Over time, they form a stubborn, carbonized layer that’s tough as nails. It’s not just an eyesore; this buildup can smoke violently when you use the grill, create unpleasant odors that transfer to your food, and in severe cases, can even damage the sensitive heating element itself by trapping heat or causing corrosive reactions. Understanding why this spot is so problematic is the first step toward conquering it safely and effectively.
The Science of the Stubborn Stain
That black, flaky crust isn’t just dirt; it’s a chemical process called pyrolysis. When fatty or oily food splatters hit the scorching-hot oven walls (often over 500°F/260°C during grilling), they don’t just dry out—they polymerize. The fats break down and re-bond into a hard, plastic-like residue. This is the same principle that makes self-cleaning ovens work, but it happens in a localized, uncontrolled way on your oven’s ceiling. Because heat rises, this area is consistently the hottest part of the oven cavity during grilling, accelerating this process. The result is a layer that standard soap and water simply cannot penetrate.
Essential Safety First: Preparing Yourself and Your Oven
Before you even think about a cleaning cloth, you must prioritize safety. The area above the grill element houses the oven’s main electrical heating component. Any moisture or cleaning chemical contacting the element’s terminals or the wiring behind it can cause a short circuit, corrosion, or even a fire. Furthermore, the oven’s interior is coated with enamel, which can be etched by strong acids or scratched by abrasives. Rushing in without a plan is the fastest way to cause expensive damage. This section is non-negotiable—follow these precautions to the letter.

Visual guide about How to Clean Top of Oven Above Grill Element
Image source: fairmoore.co.uk
1. The Power Must Be Off: Truly Off
This is the golden rule. Don’t just turn the oven knob to “off.” You must disconnect the appliance from its power source. For a freestanding oven, unplug it from the wall outlet. For a built-in model, locate the dedicated circuit breaker in your home’s electrical panel and switch it off. Verify it’s off by trying to turn the oven on—it should do nothing. This eliminates any risk of the element accidentally energizing while your hands are near it with a wet cloth or cleaning solution.
2. Cool Down Period: Wait It Out
Never attempt to clean a hot oven. The metal surfaces can cause severe burns, and cleaning chemicals applied to hot surfaces can vaporize dangerously, creating toxic fumes or even igniting if using a flammable product. Allow the oven to cool completely for at least 4-6 hours after its last use. The entire cavity, including the ceiling and element, should be at room temperature. Touch-test carefully with the back of your hand before starting.
3. Ventilation and Protection
Even with the power off, fumes from commercial oven cleaners can be potent. Open windows wide and run your kitchen exhaust fan on high. Wear rubber gloves to protect your skin from chemical burns and a pair of safety goggles to shield your eyes from any splashes. Wear old clothes you don’t mind ruining. Have plenty of clean, dry rags and paper towels on hand for wiping and drying.
Gathering Your Arsenal: Tools and Cleaning Solutions
Armed with safety knowledge, you now need the right tools for the job. Using improper equipment is a primary cause of oven damage. The goal is to soften and lift the grime without scratching the porcelain enamel or poking the heating element. Your toolkit should be a mix of gentle applicators, effective (but safe) cleaners, and protective barriers.
Visual guide about How to Clean Top of Oven Above Grill Element
Image source: thekitchenix.com
Gentle Scraping and Scrubbing Tools
Your best friends here are plastic and wood. A plastic scraper or spatula is ideal for gently lifting softened, flaky residue. A wooden spoon or a paint scraper with a plastic edge works too. For scrubbing, use non-abrasive scrub pads like those made for non-stick pans (e.g., the blue “non-scratch” Scotch-Brite pads) or a soft-bristled nylon brush (like a vegetable brush). Avoid anything metal—steel wool, wire brushes, or the green abrasive side of a sponge will leave permanent scratches that become rust magnets.
Choosing Your Cleaning Agent
You have two main paths: commercial or homemade. Commercial oven cleaners (like Easy-Off or Zep) are powerful, aerosolized formulas designed to dissolve carbonized grease. They contain strong chemicals (often sodium hydroxide or lye) and require extreme caution—read the label, wear gloves and goggles, and ensure perfect ventilation. Homemade baking soda paste is a popular, less-toxic alternative. Mix baking soda with a small amount of water to form a thick, spreadable paste. It’s alkaline, mildly abrasive, and effective on moderate buildup, though it requires more elbow grease and a longer dwell time (several hours or overnight). For extremely tough, carbonized spots, a pumice stone (wet) used *very gently* on the enamel surface can work, but it’s risky and should be a last resort on a small, inconspicuous test area first.
Protective Barriers for the Element
This is the most critical piece of kit. You must shield the grill element from any liquid. The best tool is heavy-duty aluminum foil. Tear off a large sheet and carefully mold it over the entire element, creating a tight, sloped tent that channels any drips away from the element’s connections and toward the oven walls. You can secure it with a small piece of masking tape on the far wall, but avoid taping near the element itself. An alternative is a silicone baking mat cut to size, but foil is cheap, disposable, and conforms perfectly.
The Step-by-Step Deep Cleaning Process
Now, let’s get to work. This methodical process is designed for maximum effectiveness with minimum risk. It assumes you have a moderate to heavy layer of baked-on grease. For light, recent spills, you can skip straight to the gentle scrubbing with a damp, soapy cloth after the foil protection is in place.
Visual guide about How to Clean Top of Oven Above Grill Element
Image source: thekitchenix.com
Step 1: Access and Protection
With the oven cool and power off, remove the oven racks. This gives you full visibility and working space. Now, focus on the element. Gently shape your sheet of aluminum foil into a protective cover. Start at the back, draping it over the element’s tubular coils and extending it forward and down the oven walls a few inches. The goal is to create a continuous slope so any liquid cleaner you apply runs down the wall, not into the element’s mounting holes. Be meticulous here—a single drip can cause big problems.
Step 2: Apply the Cleaner
If using a commercial spray: Shake the can well. Holding it 6-8 inches from the ceiling, spray a light, even coat over the soiled area. You don’t need to soak it; a misty coating is sufficient. Avoid spraying directly into the foil tent or onto the element’s mounting points. Let the chemical work for the time specified on the can, usually 15-30 minutes. It will turn brown as it dissolves the grease.
If using a baking soda paste: Spread a generous layer (about 1/4 inch thick) over the affected area using a spatula or your gloved fingers. The paste needs direct contact with the grime. For very thick buildup, you can first use your plastic scraper to chip away the very top, flakiest layer before applying paste. The paste will dry and darken as it pulls out the grease. For best results with baking soda, let it sit for several hours, or ideally, overnight.
Step 3: Gentle Agitation and Wiping
After the dwell time, take your non-abrasive scrub pad or nylon brush. Dampen it slightly with warm water. Using light, circular motions, agitate the surface. The grime should now be soft and paste-like. For commercial cleaner, you’ll see the brown residue wipe away. For baking soda, the dark paste will turn gray as it collects the grease. Work in small sections. Use your plastic scraper to gently lift any remaining thick patches. Do not scrub hard. Let the chemical action do the work; your job is to wipe and lift.
Step 4: The Crucial Rinse
This step is vital. Any cleaner residue left on the enamel can continue to etch it or smoke during the next use. Take a clean cloth or a few paper towels, dampen them thoroughly with clean, warm water, and wring them out well. Wipe the entire cleaned area repeatedly, rinsing your cloth frequently. You may need to do this 5-10 times to ensure all traces of baking soda or chemical are gone. Follow up with a final wipe-down using a cloth dampened only with water. The surface should feel smooth and slightly slick, not gritty or soapy.
Step 5: Final Dry and Inspection
Use a dry microfiber cloth to buff the oven ceiling completely dry. Any remaining moisture can cause spotting or, if it seeps to the element, potential issues. Now, carefully remove the aluminum foil tent from the element. Inspect the element itself. If it has any white, crusty residue (from baking soda) or chemical film, wipe it gently with a dry cloth. Do not get it wet. Finally, leave the oven door open for 15-20 minutes to ensure any lingering humidity evaporates before you replace the racks and restore power.
Maintaining a Clean Oven Ceiling: Prevention is Easier
That deep clean was a marathon. The good news is, you can avoid ever needing such an intense session again with simple, consistent habits. Maintenance takes just seconds and makes cleaning a breeze. The key is to stop grease before it bakes on.
The Post-Cooking Wipe-Down Ritual
This is the single most effective habit. Right after you turn off the oven—while it is still warm but not hot (around 150-200°F/65-93°C)—grab a damp microfiber cloth or a non-abrasive scrub pad. Give the oven walls, floor, and especially the ceiling a quick wipe. The residual heat softens any fresh splatters, and the moisture lifts them before they can dry and harden. Do this every time you use the oven for roasting or grilling. It becomes a 30-second habit that saves hours of labor later.
Strategic Cooking Practices
You can reduce the amount of airborne grease that ends up on the ceiling. When roasting meats or vegetables, use a roasting pan with a rack. This elevates the food, allowing drips to collect in the pan below rather than splattering against the oven walls. For items that might spatter (like pizzas with lots of oil, or juicy meats), consider using a splash guard—a large, flat baking sheet placed on a lower rack to catch upward-spraying grease. Also, avoid overfilling pans with oil, as excess oil vaporizes and coats the oven interior.
Using Oven Liners (With Caution)
A heavy-duty, non-stick oven liner placed on the oven floor can catch drips and spills, making bottom cleanup trivial. However, never place a liner on the oven floor of a gas oven or directly on the heating element of any oven, as it can melt, smoke, or catch fire. Its use is strictly for the floor, not the ceiling. For ceiling protection, there is no safe liner product—the foil tent method during deep cleans is your only viable option.
Troubleshooting: Common Mistakes and How to Fix Them
Even with the best intentions, things can go wrong. Here’s how to identify and recover from common cleaning mishaps.
Problem: The Cleaner Left a White, Chalky Residue
Cause: This is almost always baking soda paste that wasn’t rinsed thoroughly enough. Baking soda is alkaline and will leave a film if not completely washed off.
Solution: Dampen a cloth with a weak white vinegar solution (1 part vinegar to 3 parts water). Vinegar is acidic and will neutralize the alkaline baking soda, dissolving the residue. Wipe the affected area, then immediately rinse with a clean, water-dampened cloth. Dry thoroughly.
Problem: I Accidentally Got Cleaner on the Heating Element
Cause: Your foil tent failed or you sprayed too directly.
Solution: If it’s a commercial cleaner, act fast. Wipe the element immediately with a dry cloth to absorb as much as possible. Then, use a cloth dampened with clean water to gently wipe it again. Finally, dry it completely. Turn the oven on to a low temperature (around 300°F/150°C) for 15-20 minutes with the door closed. This will help evaporate any remaining moisture. Monitor it closely for any smoking or strange smells the first few times you use it.
Problem: The Enamel Coating is Now Scratched and Dull
Cause: You used a metal scraper or abrasive pad.
Solution: Unfortunately, this damage is permanent. Scratches in the enamel coating are prone to rusting. To slow rust, keep the area as clean and dry as possible. You can apply a very thin layer of high-temperature oven paint (available in aerosol cans at appliance parts stores) to the scratched area after it’s perfectly clean and dry. This is a cosmetic fix. To prevent this, always use plastic tools and soft pads.
Problem: The Grime is So Thick It Won’t Budge
Cause: Years of neglect have created a true carbonized layer.
Solution: You may need to resort to a pumice stone. Soak the stone in water for 10 minutes. Then, with very light pressure, rub the damp stone in a circular motion on the soiled enamel. The stone will wear down as it gently abrades the grime. Stop immediately if you feel any resistance or see enamel coming off. This is a high-risk technique best saved for the final, most stubborn spots after paste/cleaner has done most of the work. If you’re not confident, it’s time to call a professional for a thermal cleaning or consider oven replacement.
Conclusion: A Clean Oven is a Happy (and Safe) Oven
Cleaning the top of your oven above the grill element doesn’t have to be a daunting, destructive ordeal. It’s a task that rewards patience, preparation, and the right technique. By respecting the danger of the electrical element, shielding it properly, and using gentle yet effective cleaning methods, you can restore that forgotten ceiling to a clean, smoke-free state. Remember, the real secret isn’t in the strength of your cleaner, but in the consistency of your maintenance. A quick wipe-down after each use is the ultimate time-saver. You’ve now equipped yourself with the knowledge to tackle this specific cleaning challenge head-on. Your oven—and your future roasts—will thank you for it. Put on some gloves, gather your foil and baking soda, and reclaim your oven’s ceiling. You’ve got this!
Frequently Asked Questions
Can I use regular all-purpose cleaner on the oven ceiling above the element?
No. All-purpose cleaners are not designed for high-heat, baked-on grease and are often too mild to be effective. More importantly, many contain ingredients that can become corrosive when heated. Always use a cleaner specifically labeled for oven interiors or a baking soda paste.
How often should I deep clean this part of my oven?
With consistent post-use wipe-downs, a deep clean using paste or commercial cleaner should only be needed once or twice a year. If you grill or roast frequently and notice smoking or odors during use, it’s a sign it’s time for a deeper cleaning.
What if my grill element is already damaged or corroded?
If you see visible damage like blisters, cracks, or heavy white/green corrosion on the element, do not attempt to clean around it. The element itself needs to be replaced by a qualified appliance repair technician. Cleaning near a failing element is a fire risk.
Is it safe to use a steam cleaner on the oven ceiling?
Use extreme caution. Steam cleaners introduce moisture directly into the oven cavity. While steam can help loosen grime, any water that drips or runs down onto the heating element terminals can cause damage. It’s generally safer to use the damp cloth method after applying a cleaning agent, as you have more control over moisture.
Can I prevent all grease from reaching the oven ceiling?
You can’t prevent it entirely, but you can drastically reduce it. Always use a lidded roasting pan or a pan with a rack to contain splatters. Avoid excessive oil on food before roasting. Using a lower rack with a baking sheet as a splash guard is also highly effective.
My oven has a self-cleaning cycle. Can I use that instead?
Yes, the self-clean (pyrolytic) function is designed to incinerate all residues, including on the ceiling and around the element, to ash. However, you must still remove the oven racks (which can’t withstand the extreme heat) and ensure the foil tent is removed. The cycle locks the door and heats to ~900°F (480°C) for 2-4 hours. It’s the easiest method but uses significant energy and creates a lot of ash to wipe out afterward.