Raspberries are incredibly delicate and spoil quickly if not handled correctly. The key to longevity is a gentle vinegar wash to kill mold spores, followed by thorough air-drying on a paper towel. Store them in a single layer in a breathable container in the fridge, never washed until ready to eat. For long-term storage, freezing on a tray before bagging preserves individual berries perfectly.
There is something almost magical about a perfectly ripe raspberry. That burst of sweet-tart flavor, the delicate aroma, the jewel-like appearance—it’s a true summer treasure. But that magic comes with a curse: raspberries are perhaps the most finicky and fleeting of all fresh berries. One moment they’re plump and perfect, the next they’re a sad, moldy mess in the back of your fridge. Learning how to properly clean and store raspberries isn’t just a kitchen tip; it’s an essential skill for anyone who wants to enjoy these fragile fruits at their peak. The frustration of throwing away a whole container of expensive berries after just a day or two is all too common. This guide will demystify the process, giving you simple, science-backed techniques to dramatically extend the life and freshness of your raspberries, ensuring more of them make it from the container to your bowl (or your famous raspberry pie).
The core problem with raspberries is their structure. Unlike sturdy blueberries or strawberries, raspberries are an aggregate fruit made up of dozens of tiny drupelets, each holding a tiny droplet of juice, held together by a central core. This creates hundreds of microscopic nooks and crannies—perfect hiding spots for moisture, mold spores, and physical damage. They have no protective outer skin, making them supremely vulnerable. Therefore, the principles of how to clean and store raspberries are centered on one goal: minimizing moisture and physical trauma from the moment you bring them home. It’s a delicate dance of sanitation, dryness, and gentle storage. Let’s break down every step, from initial inspection to long-term freezing, so you can become a master of raspberry preservation.
Key Takeaways
- Never wash raspberries before storing: Moisture is the primary cause of mold and rapid spoilage in these fragile berries.
- Use a diluted vinegar solution for cleaning: A 3:1 water-to-vinegar mix effectively kills mold spores without leaving a taste if rinsed well.
- Dry completely and gently: Using a salad spinner on low or patting with paper towels removes all surface moisture critical for storage.
- Store in a single layer in a breathable container: Use a shallow container lined with paper towels and covered loosely to prevent crushing and moisture buildup.
- The refrigerator is essential: Keep raspberries in the crisper drawer, the coldest part of your fridge, ideally at 32-36°F (0-2°C).
- Freeze for long-term storage: Freeze berries in a single layer on a baking sheet first to prevent clumping, then transfer to a freezer bag.
- Consume quickly: Even with perfect storage, fresh raspberries last only 3-5 days; plan to use them soon after purchase or picking.
📑 Table of Contents
- Why Raspberries Spoil So Quickly: Understanding the Enemy
- Step 1: The Initial Inspection and Sorting (Do This First!)
- Step 2: The Cleaning Method – A Vinegar Wash for Maximum Safety
- Step 3: Drying – The Most Critical and Often Overlooked Step
- Step 4: The Perfect Storage Container and Location
- Step 5: Long-Term Storage – Freezing Raspberries Perfectly
- Common Mistakes That Ruin Raspberries (And How to Avoid Them)
- Conclusion: Freshness is a Process, Not an Accident
Why Raspberries Spoil So Quickly: Understanding the Enemy
Before we dive into solutions, understanding *why* raspberries are so perishable helps you appreciate why each step matters. Their spoilage is a perfect storm of biological and physical factors.
The Mold Spore Problem
Mold is public enemy number one. Raspberries are often harvested and packed in environments where airborne mold spores (like Botrytis cinerea, or gray mold) are prevalent. These spores are microscopic and already present on the fruit when you buy it. They lie dormant until they find the perfect conditions: moisture, warmth, and a food source. Your raspberry container is a microenvironment that can quickly become a mold incubator if not managed correctly.
The Moisture Trap
Raspberries are like little water balloons. Their structure holds onto water from rain, washing, or even ambient humidity. Any free water on the surface or trapped between berries creates a direct highway for mold spores to germinate and spread from berry to berry. A single wet berry in a container can spoil its neighbors in a matter of hours.
Physical Fragility
The tiny drupelet structure is not built for impact. Rough handling during transport, washing, or even just moving the container can crush berries, leaking juice that further accelerates spoilage and creates a sticky, messy environment. Bruised or damaged spots are also entry points for mold and bacteria.
So, our strategy is a defensive one: eliminate existing spores, remove all moisture, prevent physical damage, and keep them cold. Every step of the proper cleaning and storing process is designed to counter one of these three threats.
Step 1: The Initial Inspection and Sorting (Do This First!)
The moment you bring your raspberries home, your preservation clock starts ticking. The very first step, before any washing or storing, is a critical inspection. This is your chance to remove any “bad apples” (or bad berries) that could compromise the whole batch.

Visual guide about How to Clean and Store Raspberries
Image source: thekitchenix.com
How to Sort Properly
Dump the raspberries onto a clean kitchen towel, baking sheet, or large bowl. Handle them with extreme care—think of them as fragile eggs. Your goal is to identify and remove any berries that are:
- Moldy: Look for any visible white, green, or gray fuzzy spots. Even a tiny spot means the entire berry is compromised, as mold threads have likely penetrated it.
- Leaking or extremely soft: Berries that are oozing juice or feel like a water balloon are already on the brink. They will spoil their neighbors quickly.
- Severely bruised or crushed: These are also high-risk for spreading decay.
Be ruthless. It can be painful to discard even one berry, but saving the rest is worth it. A single moldy berry can trigger a chain reaction. For a pint of berries, you might lose 2-3; that’s a small price to pay for keeping the other 20+ fresh for days longer.
Don’t Wash Yet!
This is the most important rule of how to store raspberries: Do not wash them until you are ready to eat or use them. This cannot be stressed enough. Washing introduces moisture directly into the fruit’s structure and onto its surface. If you wash a batch and then store them, you are essentially guaranteeing they will mold within 24-48 hours. The only exception is if you are planning to freeze them immediately after washing (more on that later). For fresh storage, keep them bone-dry.
Step 2: The Cleaning Method – A Vinegar Wash for Maximum Safety
Now that you’ve removed the obvious offenders, it’s time to address the invisible ones: the mold spores and any surface bacteria or pesticide residue. While a simple water rinse might seem sufficient, a brief soak in a diluted vinegar solution is the gold standard for berry sanitation. It’s a natural, food-safe disinfectant that dramatically reduces the microbial load without affecting flavor when done correctly.
Visual guide about How to Clean and Store Raspberries
Image source: chowhound.com
Why Vinegar Works
White distilled vinegar is acidic (typically 5% acetic acid). This acidic environment is hostile to many types of mold and bacteria. A short soak kills a significant percentage of spores on the surface. Studies on berry preservation have shown that a vinegar wash can extend shelf life by several days compared to water alone. The key is the dilution and the rinse.
Making the Perfect Vinegar Solution
You want a solution strong enough to kill spores but mild enough not to impart a vinegary taste. The standard, effective ratio is:
- 3 parts cold water
- 1 part white distilled vinegar
For a small batch, mix 3 cups of water with 1 cup of vinegar in a large bowl. You only need enough liquid to fully submerge the berries. For a larger container of raspberries, scale up accordingly. Do not use red wine vinegar or apple cider vinegar, as their colors and flavors can transfer to the delicate berries. Plain white distilled vinegar is neutral and clear.
The Washing Technique: Gentle is the Name of the Game
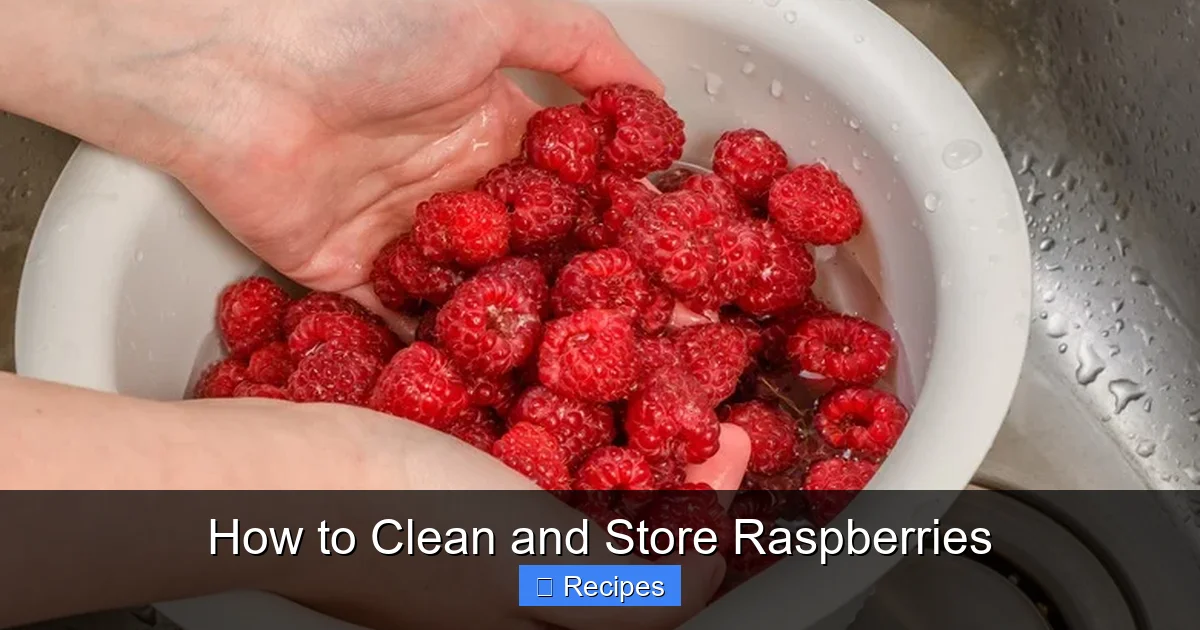
Place your sorted, dry raspberries into the bowl of vinegar solution. Gently agitate them with your hand or a large spoon for about 30 seconds to 1 minute. Do not rub or scrub. You are simply allowing the solution to contact all surfaces. Let them soak for no more than 1-2 minutes. Any longer and you risk the berries absorbing a slight vinegar flavor or becoming waterlogged.
The Crucial Rinse
Drain the vinegar solution. You now have a bowl of raspberries that are clean but still coated in a thin layer of acidic water. This must be completely removed. Fill a separate large bowl with fresh, cold water. Gently transfer the raspberries to the clean water bowl and swish them around briefly to rinse away any residual vinegar. This second rinse is non-negotiable for flavor purity.
Alternative: The Colander Rinse Method
If you’re concerned about handling the fragile berries too much, you can do the entire process in a colander. Place the sorted berries in a colander set over a bowl. Slowly pour the vinegar solution over them, letting it drain through. Then, slowly pour the clean rinse water over them. However, this method may not submerge the berries as thoroughly, so the bowl soak is generally more effective for full coverage.
Step 3: Drying – The Most Critical and Often Overlooked Step
If the vinegar wash is the sanitation step, drying is the preservation step. No moisture can remain on the berries or between them for successful storage. This is where many people fail. Simply shaking off the water or letting them sit on a counter is not enough. You must actively and thoroughly remove every trace of surface water.
Visual guide about How to Clean and Store Raspberries
Image source: chopnotch.com
Why a Salad Spinner is Your Best Friend
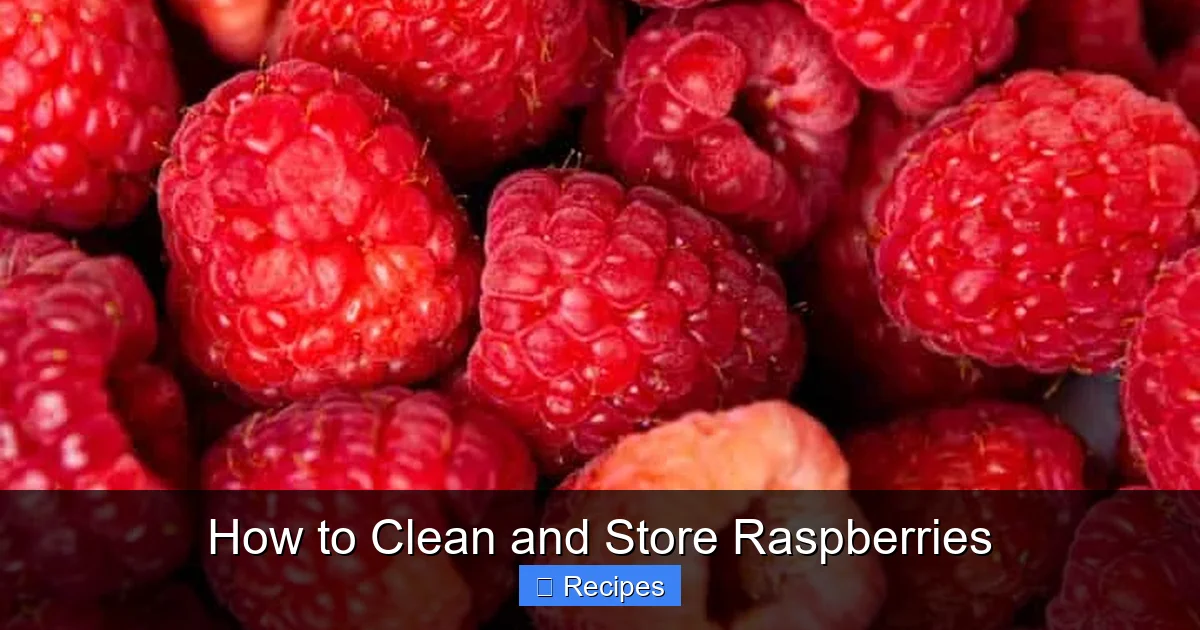
The absolute best tool for drying raspberries is a clean salad spinner. It uses centrifugal force to fling water away without any physical contact that could crush the fruit.
- Place the washed and rinsed raspberries in the inner basket of the spinner.
- Do not overfill; work in batches if necessary.
- Spin on the lowest setting for 30-45 seconds. The low speed is crucial—high speeds will pulverize your berries into a purée.
- Stop, check for excess water in the outer bowl, empty it, and spin again for another 20-30 seconds if needed.
- You should see a significant amount of water collected in the outer bowl.
The result is a basket of beautifully dry, intact raspberries. This method is efficient and highly effective.
The Paper Towel Method (No Spinner? No Problem)
If you don’t have a salad spinner, you must be even more meticulous with the paper towel method.
- Lay out several layers of clean, lint-free paper towels (or a clean, lint-free kitchen towel) on a baking sheet or large plate.
- Gently transfer the rinsed raspberries in a single layer onto the towels.
- Pat them *very* gently with more paper towels on top. Do not rub or press down. You are blotting, not squeezing.
- Let them sit for 15-20 minutes. The towels will absorb residual moisture.
- Flip the berries over onto fresh paper towels and pat the other side gently.
- Replace the towels if they become saturated. The goal is for the berries to feel completely dry to the touch and for no wet spots to remain on the paper.
This method requires patience but yields excellent results. You can also use a clean, lint-free cloth like a flour sack towel.
Step 4: The Perfect Storage Container and Location
Now you have clean, dry, sorted raspberries. The battle is half won. The next phase is providing them with the ideal home in your refrigerator. The container you choose and how you arrange the berries are just as important as the cleaning.
Container Rules: Breathable, Shallow, and Single-Layer
The ideal container for raspberries has three key characteristics:
- Breathable: It should allow for some air circulation to prevent moisture buildup from the berries’ slight respiration. A plastic clamshell container with ventilation holes (the one they often come in) is actually perfect if you’ve cleaned and dried the berries first. Alternatively, a shallow glass or ceramic baking dish covered loosely with plastic wrap or a damp (not wet) kitchen towel works well. Avoid airtight, sealed plastic containers—they trap humidity.
- Shallow: You want the berries to form as close to a single layer as possible. If you pile them 3 or 4 deep, the berries on the bottom will be crushed by the weight of the ones on top. Their juices will leak, creating a soggy, mold-prone layer. Use a wide, shallow dish rather than a deep bowl.
- Lined: Always line the container with a dry paper towel. This will absorb any minute moisture that might still be present or that develops from normal berry respiration. Change this liner every day or two if it becomes damp.
The Refrigerator’s Crisper Drawer: The Coldest Spot
Where you put the container in your fridge matters. The crisper drawer is designed for produce and is typically the coldest, most humid-controlled part of the refrigerator. Store your raspberries there. Ensure your fridge is set to the proper temperature: 32-36°F (0-2°C). Any warmer and mold spores will thrive. If your fridge doesn’t have a dedicated crisper, place the container on the lowest shelf, as cold air sinks.
The “Don’t” List for Fresh Storage
- Don’t store them in the original plastic clamshell if it’s sealed shut. Transfer them to your breathable, shallow container.
- Don’t cover them tightly with plastic wrap directly on the berries. If you must cover, do it loosely or use a dome lid that doesn’t touch the fruit.
- Don’t store them near ethylene-producing fruits like apples, bananas, or avocados. Ethylene gas accelerates ripening and decay in berries.
- Don’t expect them to last more than 3-5 days, even with perfect care. Plan your meals accordingly.
Step 5: Long-Term Storage – Freezing Raspberries Perfectly
When you have a surplus of raspberries—from a u-pick farm or a great farmer’s market sale—freezing is the ultimate solution. But simply dumping them into a freezer bag results in a solid block of berry mush. The key to freezing raspberries successfully is to freeze them individually first, a process called “tray freezing” or “flash freezing.”
Preparation for Freezing: Clean, Dry, Dry Again
For freezing, you must wash the berries first to remove field dirt and potential pests. Follow the same vinegar wash and drying procedure as for fresh storage, but be even more meticulous with the drying. Any surface ice crystals will cause the berries to stick together. They need to be completely dry to the touch.
The Tray Freezing Method (The Only Right Way)
- Line a large baking sheet (or several smaller ones) with parchment paper. Do not use wax paper, as berries can stick.
- Spread the completely dry raspberries in a single layer on the parchment paper. They should not be touching. This is crucial to prevent clumping.
- Place the baking sheet in the freezer. Ensure it’s on a flat surface where it won’t be disturbed.
- Freeze for 3-4 hours, or until the berries are rock solid.
- Once frozen, quickly transfer the individual berries to a heavy-duty freezer bag or airtight freezer container. Squeeze out as much air as possible before sealing.
- Label the bag with the date. Properly frozen raspberries will maintain good quality for 10-12 months.
Using Frozen Raspberries
Frozen raspberries are fantastic for smoothies, sauces, baked goods (muffins, pies, crisps), and compotes. Do not thaw them before using in these applications; add them directly from the freezer. They will release more liquid than fresh berries, so you may need to adjust thickeners (like cornstarch) in recipes. They are not ideal for applications where a firm, whole berry is required, like a fresh fruit salad or as a garnish, as they will be soft once thawed.
Common Mistakes That Ruin Raspberries (And How to Avoid Them)
Even with the best intentions, a few common errors can sabotage your efforts. Here’s a checklist of pitfalls to avoid.
Mistake 1: Washing Before Storing (The #1 Sin)
We’ve said it before, but it bears repeating. Washing introduces the moisture that guarantees spoilage. Wash only what you will consume within the next day or two. For the rest, keep them dry.
Mistake 2: Inadequate Drying
A berry that feels “mostly dry” is still too wet. You must achieve true dryness. If you skip the spinner and just shake them, you’re leaving 80% of the surface moisture. Be patient with the paper towel method or invest in a $20 salad spinner—it will pay for itself in saved berries.
Mistake 3: Storing in a Deep, Piled Container
Crushing is silent spoilage. The weight of the top berries smashes the ones below, creating a juicy, mold-friendly soup at the bottom of your container. Always, always use a shallow vessel and arrange berries in a single layer.
Mistake 4: Ignoring the “One Bad Berry” Rule
It’s easy to think, “I’ll just pick out the moldy one and eat the rest.” This is a gamble you will almost always lose. Mold spreads through microscopic filaments you cannot see. By the time you see a spot, the whole berry is infested, and spores have likely traveled to its neighbors. Toss the entire affected berry immediately.
Mistake 5: Keeping Them Too Warm
Leaving raspberries on the counter overnight or in a warm kitchen is a death sentence. They must be refrigerated immediately after cleaning/drying. If you buy them from a farm stand on a hot day, put them in a cooler with ice packs for the ride home.
Conclusion: Freshness is a Process, Not an Accident
Mastering how to clean and store raspberries transforms your relationship with this magnificent fruit. It shifts you from a frustrated consumer, constantly battling waste, to a confident caretaker, maximizing every precious berry. The process is simple in theory: inspect and sort, sanitize with a quick vinegar wash, dry with obsessive thoroughness, and store cold, dry, and in a single layer. It takes just 5-10 minutes of active time but saves you money, reduces food waste, and ensures you have perfect, fresh raspberries ready for your morning yogurt, your afternoon salad, or your evening dessert.
Remember, raspberries are a seasonal, delicate gift. They are not meant to last for weeks. The goal is not to make them immortal, but to honor their short lifespan by giving them the conditions they need to stay at their best for as long as nature allows. By following these steps—especially the non-negotiable rules of never washing before storage and drying completely—you will consistently enjoy raspberries that are plump, sweet, and utterly free of that dreaded fuzz. Now, go forth and enjoy those berries! They’ve earned it, and so have you.
Frequently Asked Questions
Can I wash raspberries with just water?
You can, but a diluted vinegar wash (3 parts water, 1 part white vinegar) is significantly more effective at killing mold spores and bacteria that cause rapid spoilage. If using only water, be extra vigilant about thorough drying.
How long do cleaned and dried raspberries last in the fridge?
Even with perfect cleaning, drying, and storage in a single layer in the fridge’s crisper drawer, expect fresh raspberries to last 3-5 days. Always inspect them daily and remove any berries that show signs of softening or mold immediately.
What is the best container for storing raspberries in the refrigerator?
The best container is shallow, breathable, and lined with a dry paper towel. The original plastic clamshell with ventilation holes works if you’ve transferred cleaned, dry berries into it. Alternatively, a wide glass baking dish covered loosely with plastic wrap or a lid that doesn’t touch the berries is ideal.
Can I freeze raspberries without them turning into a solid block?
Yes, but you must use the tray freezing method. After washing and thoroughly drying, spread the berries in a single layer on a parchment-lined baking sheet and freeze until solid (3-4 hours). Only then transfer them to a freezer bag. This prevents them from sticking together.
My raspberries are starting to get a little soft. Can I revive them?
You can often revive slightly soft but not moldy raspberries by soaking them in a bowl of ice water for 5-10 minutes. This can help them crisp up by allowing them to reabsorb some water. Remove, dry thoroughly on paper towels, and use them immediately.
Is it safe to store raspberries with other fruits in the fridge?
It’s best to store raspberries separately from other fruits, especially those that produce ethylene gas like apples, bananas, avocados, and tomatoes. Ethylene accelerates the ripening and decay process in raspberries, causing them to spoil much faster.