Cleaning your Shark steam mop with vinegar is a simple, cost-effective way to remove mineral buildup and restore its steaming power. White vinegar’s acetic acid safely dissolves limescale from the tank, heating element, and nozzles without harsh chemicals. The process involves unplugging the mop, creating a vinegar-water solution, running a cleaning cycle, and thoroughly rinsing all parts. Regular maintenance with this method prevents clogs, extends your mop’s life, and ensures hygienic, efficient cleaning on your floors. Always consult your specific model’s manual first and ensure everything is completely dry before reassembly.
Key Takeaways
- Vinegar is a powerful natural descaler: The acetic acid in white vinegar effectively dissolves mineral deposits (limescale) from hard water that clog Shark steam mop systems, restoring optimal steam output and pressure.
- Safety is the first step: Always unplug the mop and let it cool completely before beginning any cleaning. Never attempt to clean a hot or powered steam mop to avoid burns or damage.
- The process is a cycle of clean and rinse: A vinegar-water solution must be run through the system, followed by multiple thorough rinsing cycles with clean water to remove all acidic residue, preventing damage to internal components.
- Manual disassembly is crucial for a complete clean: Removing and soaking the mop head/cleaning pad, water tank cap, and nozzle(s) in vinegar ensures all contact points are free of debris and scale, not just the internal plumbing.
- Prevention is key to reducing cleaning frequency: Using distilled or demineralized water in your Shark steam mop dramatically reduces limescale buildup, meaning you’ll need to perform this deep cleaning less often.
- Dry storage prevents mold and mildew: After cleaning and rinsing, allow every component—especially the mop pad and water tank—to air-dry completely before reassembly and storage to avoid unpleasant odors and bacterial growth.
- Know when vinegar is appropriate: This method is for routine limescale removal. For mold, mildew, or significant grime on external plastic parts, a mild soap solution is better. Always avoid abrasive cleaners or bleach inside the tank.
[FEATURED_IMAGE_PLACEHOLDER]
📑 Table of Contents
- Why Your Shark Steam Mop Needs Regular Cleaning
- Understanding Why Vinegar Works (And What You Need)
- Step-by-Step Guide: The Deep Clean Process
- Maintenance Tips to Reduce Cleaning Frequency
- Troubleshooting: What If It’s Still Clogged?
- When NOT to Use Vinegar and Final Thoughts
- Conclusion: A Simple Habit for a Powerful Clean
Why Your Shark Steam Mop Needs Regular Cleaning
You love your Shark steam mop. It makes quick work of sticky spills, sanitizes surfaces without chemicals, and leaves your hard floors gleaming. But over time, you might notice it’s not producing as much steam as it used to. The steam might sputter, feel weaker, or take longer to heat up. The culprit is almost always the same thing: invisible mineral buildup, also known as limescale, from your tap water.
Every time you fill your Shark mop’s tank, tiny amounts of calcium and magnesium in the water travel through the system. When the water heats to produce steam, these minerals are left behind, gradually coating the inside of the water tank, the heating element, the small internal tubes, and the steam nozzles. Think of it like plaque in arteries—it restricts flow and forces your mop to work harder. This not only reduces cleaning performance but can eventually lead to clogs, sputtering, and even permanent damage if left unchecked.
This is where a simple, natural cleaning agent comes in: white distilled vinegar. Its mild acetic acid is perfectly suited to dissolve these mineral deposits without harming the plastic and metal components of your Shark mop. Learning how to clean a Shark steam mop with vinegar is an essential skill for any owner. It’s an inexpensive, non-toxic, and highly effective maintenance ritual that will bring your mop back to life and extend its service for years. Let’s walk through the entire process, step by step.
Understanding Why Vinegar Works (And What You Need)
The Science of the Solution
Vinegar is a weak acid, typically containing about 5% acetic acid. When this solution comes into contact with calcium carbonate (the primary component of limescale), a gentle chemical reaction occurs. The acid reacts with the mineral deposits, dissolving them into water-soluble compounds that can be easily flushed out of the system. It’s a safe, natural alternative to commercial descalers, which can be more expensive and sometimes harsher on plastic seals.
Visual guide about How to Clean a Shark Steam Mop with Vinegar
Image source: mopreviewer.com
Gathering Your Supplies
Before you start, gather these items. Having everything at hand makes the process smooth.
- White Distilled Vinegar: The star of the show. Avoid apple cider vinegar or flavored varieties, as they can leave residues. A standard 1-liter bottle is more than enough.
- Clean Water: Preferably distilled or filtered. For the rinsing cycles, you must use clean, mineral-free water to avoid reintroducing scale.
- Soft-bristled brush: An old toothbrush or a small bottle brush is ideal for scrubbing the tank, nozzle, and cap without scratching surfaces.
- Soft, lint-free cloths or microfiber towels: For wiping down all parts.
- A container or bowl: For soaking smaller parts like the mop pad and nozzle.
- Optional: A small amount of mild dish soap. For cleaning the exterior or the mop pad if it’s greasy, but never mix soap with vinegar inside the tank.
Step-by-Step Guide: The Deep Clean Process
Now, let’s get into the nitty-gritty. This process is broken into clear phases: preparation, the vinegar cleaning cycle, thorough rinsing, and final assembly. Always refer to your specific Shark model’s user manual first, as designs can vary slightly (e.g., some have removable nozzles, others don’t).
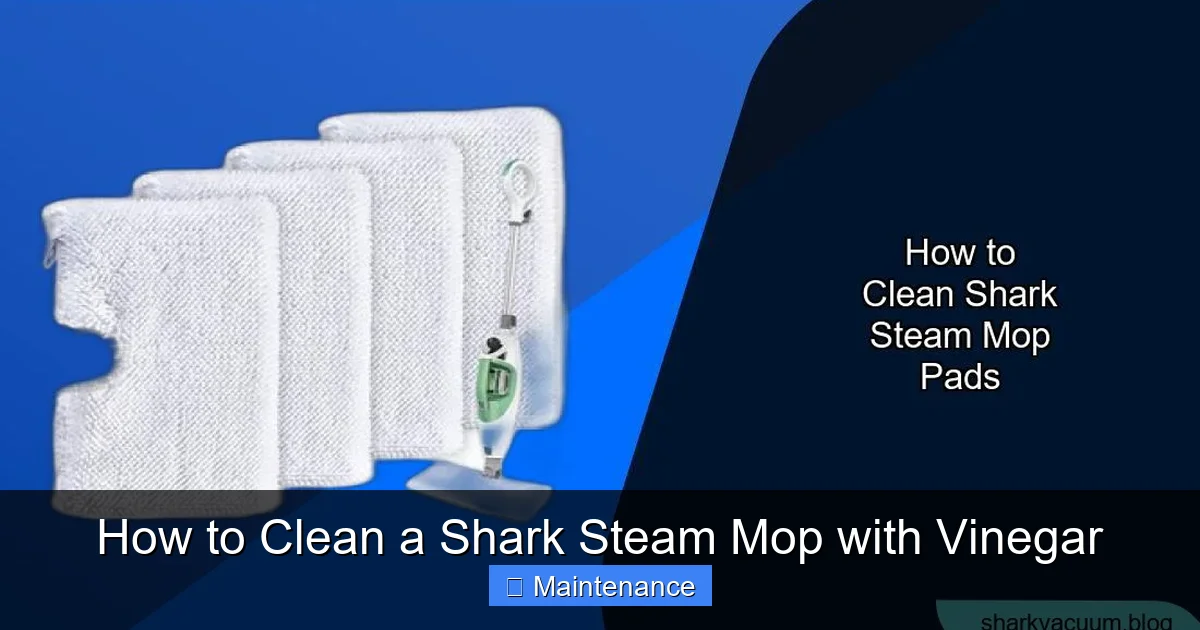
Visual guide about How to Clean a Shark Steam Mop with Vinegar
Image source: sharkvacuum.blog
Phase 1: Preparation and Safety
1. Unplug and Cool Down: This is non-negotiable. Ensure your steam mop is completely disconnected from the power outlet and has had at least 30 minutes to cool down after its last use. The water inside the tank and heating element can be scalding hot.
2. Disassemble What You Can: Remove the cleaning pad/microfiber head from the mop base. If your model has a separate water tank lid or cap, take it off. Locate the steam nozzle(s)—usually a small rubber or plastic piece on the underside of the mop head where steam exits. Check your manual to see if it’s removable. Gently detach it if possible.
3. Empty Residual Water: Tilt the mop and pour out any remaining water from the tank. Let it drain completely.
Phase 2: The Vinegar Cleaning Cycle
1. Prepare the Vinegar Solution: For a standard Shark steam mop tank (usually 300-500ml capacity), a 1:1 ratio of white vinegar to water is a great starting point. For heavier buildup, you can use a more potent solution, like 2/3 vinegar to 1/3 water. Do not use undiluted vinegar, as its strength can be unnecessarily harsh on seals over time. Mix your solution in a separate cup or bowl.
2. Fill the Tank: Carefully pour the vinegar-water mixture into the clean, empty water tank. Avoid spilling. Secure the tank lid tightly.
3. Run the Cleaning Cycle:
- Reattach the water tank to the mop body if you removed it.
- Plug the mop back into the wall outlet.
- Place the mop head on a towel or old cloth in a well-ventilated area (like a bathroom or garage). The vinegar smell will be strong during this process.
- Turn the mop on and allow it to heat up and emit steam. You will likely see cloudy, discolored steam at first—this is the vinegar reacting with and lifting the mineral deposits.
- Let the mop run and steam continuously for about 3-5 minutes. You should hear a difference in the sound of the steam; it may become steadier and stronger as the blockage clears.
- After 3-5 minutes, turn the mop off and unplug it. Let it sit for 10-15 minutes with the vinegar solution still in the tank. This “soak” time allows the acid to work on any stubborn deposits in the heating chamber and tubes.
4. Empty the Tank: After the soak, carefully tilt the mop and pour the now-dirty, cloudy vinegar solution down the drain. Rinse the tank with clean water and pour that out as well.
Phase 3: The Critical Rinsing Cycles
This is the most important phase to ensure no vinegar residue remains, which could corrode internal parts. You must perform this multiple times.
1. First Rinse Cycle: Fill the tank with clean, fresh water (distilled is best). Reattach the tank, plug in the mop, and run it on a hard floor surface (or over towels) until the tank is nearly empty. You should see clear, odorless steam. Empty any remaining water.
2. Repeat: Perform this rinse cycle 2-3 more times with fresh water each time. By the final cycle, the steam should be completely clear, and there should be no vinegar smell. If a faint smell persists, do another rinse cycle. This step cannot be skipped or rushed.
Phase 4: Cleaning External Parts and the Mop Head
While the rinsing cycles are running, clean the other components.
- The Water Tank and Cap: Wash the inside and outside of the water tank and its cap with warm, soapy water (a drop of mild dish soap). Use your soft brush to scrub the opening and any crevices. Rinse thoroughly with clean water to remove all soap. Dry completely with a cloth or let air-dry.
- The Steam Nozzle(s): If removable, soak the nozzle in a bowl of undiluted white vinegar for 15-20 minutes. Use the soft brush to gently scrub any visible scale or debris from the tiny steam holes. Rinse extremely well under running water, ensuring no vinegar remains trapped inside. If not removable, carefully clean the exterior hole with a vinegar-dampened cotton swab, then wipe with a water-dampened swab, and finally a dry one.
- The Mop Base/Plate: Wipe the underside of the mop head (the metal or plastic plate that contacts the floor) with a cloth dampened with your vinegar solution to remove any stuck-on mineral film. Follow with a cloth dampened with clean water, then dry.
- The Microfiber Pad: Machine wash the cleaning pad according to its care label. If it’s heavily soiled with mineral film, add ½ cup of vinegar to the wash cycle. Ensure it is 100% dry before reattaching it to the mop.
Phase 5: Reassembly and Final Check
1. Ensure Everything is Bone Dry: This is vital. Use your microfiber cloth to dry every nook and cranny of the tank, cap, base, and nozzle. Any trapped moisture can lead to mold or mildew growth. Let parts air-dry for an extra 20 minutes if you’re unsure.
2. Reassemble: Attach the clean, dry nozzle to the mop base. Secure the clean, dry microfiber pad. Reattach the full water tank to the body.
3. Final Test: Fill the tank with fresh, distilled water. Plug in the mop and let it heat up. Without placing it on the floor, trigger the steam (if your model has a trigger) or let it emit steam to check the flow. You should see a strong, steady burst of steam with no sputtering. Your Shark steam mop is now clean and ready for action!
Maintenance Tips to Reduce Cleaning Frequency
Cleaning with vinegar every 1-2 months will keep your Shark mop in top shape. But you can stretch the time between deep cleans by adopting these simple habits.

Visual guide about How to Clean a Shark Steam Mop with Vinegar
Image source: howtofinders.com
Use Only Distilled or Demineralized Water
This is the single most effective tip. Tap water is the source of limescale. By switching to bottled distilled water (available at most grocery stores), you eliminate minerals from entering the system entirely. It’s a small extra cost per fill that saves you hours of cleaning and prolongs the life of your appliance.
Empty and Dry After Every Use
Never leave water sitting in the tank. After each mopping session, unplug the mop, let it cool, then empty any remaining water from the tank. Wipe the tank opening with a dry cloth. Leave the tank lid off and the mop standing upright in a well-ventilated area to air-dry completely for at least an hour before storing.
Regular Quick Flush
Once a week, if you use your mop frequently, do a quick rinse cycle with just clean water. Fill the tank, run the mop until half the water is steamed, then empty and dry. This helps flush out any loose particles before they cake on.
Care for the Pad
A clogged, dirty pad reduces cleaning efficiency and can push debris back into the steam path. Wash the pad after every 2-3 uses. Replace it according to the manufacturer’s guidelines or when it becomes thin, stiff, or permanently stained.
Troubleshooting: What If It’s Still Clogged?
Sometimes, even a vinegar clean doesn’t fully restore power. Here’s what to do.
Persistent Weak Steam or No Steam
If the steam is still weak after a thorough vinegar and rinse cycle, the nozzle may be severely clogged.
- For removable nozzles: Soak it in vinegar for several hours or even overnight. Use a thin, flexible wire (like a pipe cleaner or a bent paperclip used very gently) to carefully poke through the steam holes. Be extremely gentle to avoid damaging the nozzle.
- For fixed nozzles: With the mop unplugged and cool, use a vinegar-dampened cotton swab to probe the steam hole as deeply as possible. Follow with a water-dampened swab, then a dry one. You can also try using a syringe to flush the nozzle hole with vinegar, then water.
Strange Noises (Gurgling or Clicking)
These sounds can indicate the heating element is coated with scale and overheating, or there’s an airlock in the line. Repeat the full vinegar cleaning process, ensuring the 15-minute soak time. If the noise persists, the heating element may be severely damaged and require professional assessment or replacement.
Water Leaking from the Base
This is often due to a worn seal or gasket around the water tank connection or the nozzle. After cleaning, carefully inspect all rubber seals for cracks, tears, or mineral deposits. Clean them gently with a vinegar solution. If they are damaged, you may need to order replacement parts from Shark.
When NOT to Use Vinegar and Final Thoughts
Limitations of the Vinegar Method
While fantastic for limescale, vinegar is not a universal cleaner for your Shark mop.
- Avoid for Mold/Mildew: If you smell a musty odor or see black spots, you have a biological growth problem. Vinegar can kill some mold, but for a thorough sanitization, you may need a diluted hydrogen peroxide solution (3%) or a dedicated appliance cleaner designed for this. Ensure the area is well-ventilated and wear gloves.
- Don’t Use on Heavily Greased Parts: The mop pad can get greasy from kitchen floors. For this, a soak in warm, soapy water is more effective than vinegar. Rinse well.
- Never Mix Cleaners: Never mix vinegar with bleach, ammonia, or commercial drain cleaners. This creates toxic fumes.
Always consult your Shark user manual. Some manufacturers may have specific warnings against using any descaling agents other than their own brand. Using vinegar generally voids the warranty if it causes damage, but when done correctly as described, it is a low-risk, high-reward practice.
Conclusion: A Simple Habit for a Powerful Clean
Your Shark steam mop is a workhorse. It deserves a little TLC to keep performing at its peak. Cleaning it with white vinegar is a straightforward, affordable, and eco-friendly ritual that directly combats the #1 enemy of steam appliances: hard water scale. By following this comprehensive guide—from the careful preparation and potent vinegar cycle to the indispensable multiple rinses and meticulous drying—you are investing in the longevity and efficiency of your cleaning tool.
Incorporate the prevention tips, especially the switch to distilled water, and you’ll find you only need to perform this deep clean every few months instead of every month. A clean steam system means hotter, drier steam, faster heating times, and floors that truly sparkle. It transforms your Shark mop from a occasionally struggling tool back into the powerful, chemical-free cleaning powerhouse you bought it to be. So gather your vinegar, set aside 30 minutes, and give your mop the deep clean it’s earned. Your floors—and your mop—will thank you.
Frequently Asked Questions
Can I use lemon juice instead of white vinegar to clean my Shark steam mop?
Yes, lemon juice contains citric acid and can work as a descaler. However, it’s less potent than white vinegar and can leave a sticky residue or a stronger, longer-lasting citrus smell. White vinegar is generally more effective and efficient for this specific task.
My steam mop still doesn’t produce strong steam after a vinegar clean. What should I do?
First, ensure you performed all rinsing cycles thoroughly. Residual vinegar can interfere with steam production. Next, focus on the nozzle: soak a removable one in vinegar for several hours and gently clean the holes. For fixed nozzles, use vinegar-dampened cotton swabs. If the problem persists, the heating element may be severely scaled, or there could be an internal fault requiring professional repair.
Will the vinegar smell go away completely after rinsing?
If you perform 3-4 thorough rinsing cycles with clean, fresh water, the vinegar smell should be completely gone. Any lingering odor indicates you need to rinse more. The smell during the vinegar cycle will be strong, so ensure good ventilation by opening a window or running a fan.
Is it okay to use tap water if I clean with vinegar regularly?
You can, but you’ll need to clean with vinegar much more frequently (potentially monthly). Using distilled or demineralized water is the best long-term strategy to prevent scale buildup in the first place, protecting your investment and saving you time and effort on maintenance.
How often should I perform this deep vinegar cleaning?
This depends on your water hardness and usage. As a general rule, perform a full vinegar clean every 1-2 months if you use the mop weekly and have hard water. If you use distilled water, you may only need to do it once or twice a year for maintenance. Watch for signs like reduced steam output or longer heat-up times.
Will using vinegar void my Shark mop’s warranty?
Shark’s official guidelines typically recommend using only clean water and may state that using descalers or vinegar can void the warranty if it causes damage. However, many users perform this maintenance without issue. To be safe, check your specific model’s warranty terms. When done correctly with proper rinsing, the risk of damage from a diluted vinegar solution is very low.