Choosing the right pendant lights for your kitchen island is crucial for both task lighting and style. Key factors include matching the pendant size to your island’s dimensions, selecting an appropriate number of fixtures, and ensuring the style complements your kitchen’s decor. Proper hang height and bulb brightness are non-negotiable for safety and ambiance. This guide breaks down every consideration, from finish and material to installation tips, so you can make a confident, beautiful choice.
Let’s be honest: the kitchen island is the heart of the home. It’s where we chop vegetables for date night dinner, where kids do homework while snacks are prepared, and where friends gather with drinks as the evening unfolds. It’s a multitasking marvel. And what crowns this hardworking surface? The lighting. Specifically, the pendant lights hanging above it. Choosing the wrong ones can leave you squinting in shadows or, worse, create a visual clash that undermines your entire kitchen’s carefully curated style. But choosing the right ones? That’s where the magic happens. The perfect kitchen island pendant lights provide essential task lighting, define the space, and inject your personality into the room. They turn a functional zone into a stunning focal point. This guide will walk you through every single step, measurement, and consideration, so you can select pendant lights that are not just beautiful, but perfectly suited to your island and your life. We’ll talk size, style, number, height, and even the kind of light bulb that will make your marble countertop gleam just right. By the end, you’ll approach the lighting aisle (or your online cart) with the confidence of a design pro.
Key Takeaways
- Size & Scale Are Paramount: The width of your pendant(s) should be in proportion to your island’s length. A common rule is that a single pendant’s diameter should be about 1/4 to 1/3 the island’s width, or the combined width of multiple pendants should follow this ratio.
- Quantity & Spacing Matter: For islands over 6 feet, two or three pendants are standard. Space them evenly, leaving at least 24-30 inches between each fixture and from the island ends to avoid a cluttered look.
- Hang Height Has a Sweet Spot: The bottom of the pendant should typically be 28-36 inches above the countertop. This provides adequate task light without obstructing views or causing glare.
- Style Should Complement, Not Compete: Choose finishes (brass, nickel, black) and materials (glass, metal, fabric) that echo other hardware and lighting in your kitchen for a cohesive design.
- Light Output & Color Temperature Are Functional: For task lighting, aim for 300-500 lumens per pendant and a color temperature of 2700K-3000K (warm white) to 3500K (neutral white) for clarity without harshness.
- Dimmability is a Game-Changer: Install your pendants on a dimmer switch. This allows you to switch from bright task lighting for meal prep to a softer, ambient glow for dining and entertaining.
- Consider the Bulb Type & Shade: LED bulbs are efficient and long-lasting. The shade style (open, enclosed, linear) affects both the light distribution pattern and the fixture’s visual weight.
📑 Table of Contents
- Why Your Kitchen Island Deserves Special Lighting Attention
- Step 1: Getting the Size and Scale Just Right
- Step 2: Deciding on the Number of Pendants
- Step 3: Finding Your Style—Finishes, Materials, and Shapes
- Step 4: Nailing the Installation Height and Spacing
- Step 5: The Technical Bits—Bulb Type, Dimmability, and Light Direction
- Step 6: Budget, Quality, and Long-Term Considerations
- Putting It All Together: A Final Checklist Before You Buy
Why Your Kitchen Island Deserves Special Lighting Attention
Before we dive into the “how,” let’s establish the “why.” The kitchen island is a unique zone. It’s not a perimeter countertop tucked against a wall; it’s a free-standing, often central, workspace. It needs light from above that is both functional and atmospheric. Recessed ceiling lights alone often cast shadows on the island surface because you’re standing *between* the light source and the work area. Pendants, hanging directly over the island, eliminate those shadows by bringing the light source down and closer to the task.
Think of pendants as the spotlight on your kitchen’s main stage. They draw the eye, anchor the island, and can tie together your upper cabinets, countertop material, and even your bar stools. A poorly chosen pendant—too small, too large, wrong style—can make the island feel lost or overwhelmed. The right pendant, however, creates harmony. It says, “This is where the action is, and it looks intentional and fabulous.” This section sets the stage for understanding that choosing pendant lights isn’t just an accessory decision; it’s a foundational element of your kitchen’s design and functionality.
The Dual Role: Task Lighting and Decorative Statement
Your island pendants must walk a fine line between two jobs. First, they are workhorses. You need clear, shadow-free light for slicing, dicing, reading recipes, and spotting spills. Second, they are jewelry. When the meal is done and the island becomes a casual dining spot or a place for a morning coffee, the lighting should create a warm, inviting ambiance. This duality means you can’t just pick a pretty shade; you must consider the light’s quality (brightness and color) as much as its form. A dark, opaque shade might look dramatic but could cast a gloomy pool of light. A clear glass shade might be beautiful but could create glare if the bulb is too exposed. The best choices often balance these needs—like a linen shade that diffuses light softly or a metal shade with an open bottom that directs light downward efficiently.
Understanding Light Quality: Lumens, Kelvins, and CRI
To master the functional side, you need a quick primer on light bulb specs. Don’t worry, it’s simpler than it sounds. Lumens measure brightness. For a kitchen island, you’ll want a combined total of roughly 1,000-1,500 lumens for a standard 4-6 foot island. A single standard 60-watt equivalent LED bulb puts out about 800 lumens, so two or three bulbs are usually sufficient. Kelvins (K) measure color temperature. Lower numbers (2700K-3000K) are warm and yellowish, cozy like candlelight. Higher numbers (3500K-4100K) are cooler and whiter, like daylight, which is great for precision tasks but can feel clinical if too high. For a kitchen, 2700K-3000K is a safe, flattering bet, while 3000K-3500K offers a nice balance of warmth and clarity. Finally, CRI (Color Rendering Index) tells you how accurately a light source shows colors. Aim for a CRI of 90 or above. This is crucial! A low-CRI bulb will make your ripe tomatoes look dull and your fresh herbs lackluster. You want your food and finishes to pop with true color.
Step 1: Getting the Size and Scale Just Right
This is the first, most critical step. The wrong size pendant is the fastest way to a disproportional look. The scale of your pendant(s) must be in direct conversation with the size of your island. A tiny pendant over a massive 8-foot island will look like a lost postage stamp. A giant, oversized pendant over a petite breakfast nook island will feel oppressive and clumsy. So, how do you get it right?
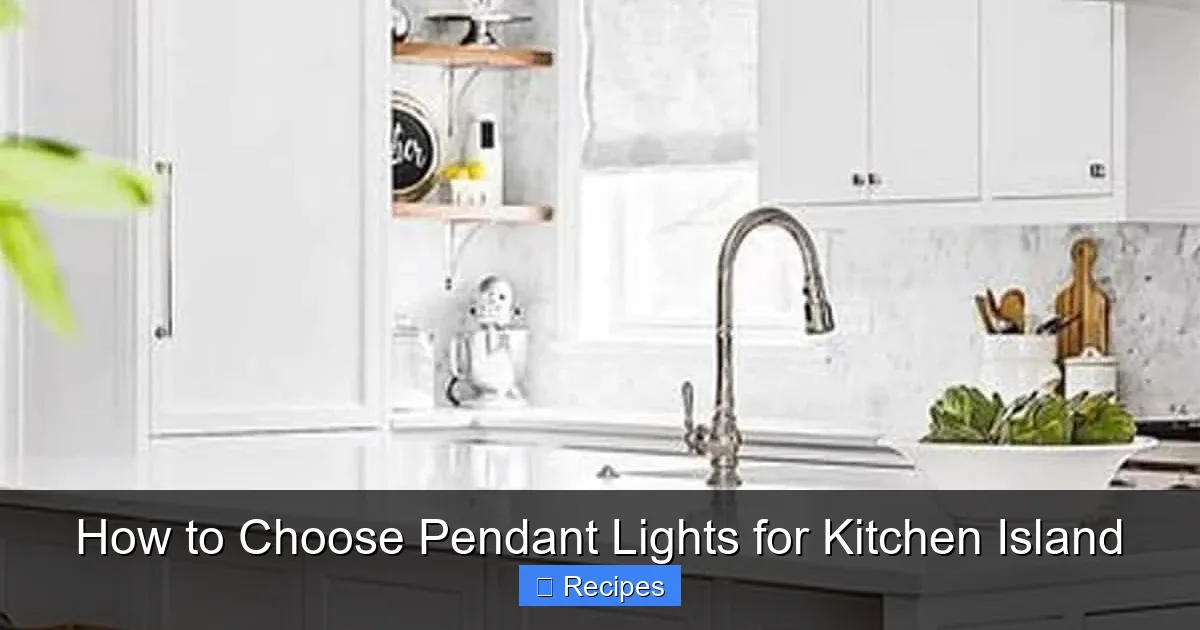
Visual guide about How to Choose Pendant Lights for Kitchen Island
Image source: cravingsomecreativity.com
The Golden Ratio for Single vs. Multiple Pendants
First, measure your island. You need the length (longest side) and width (shorter side). The width is most relevant for pendant sizing. Here’s the rule of thumb: The diameter (or width, for non-round shades) of your pendant fixture should be approximately 1/4 to 1/3 the width of your island. For example, if your island is 48 inches (4 feet) wide, look for a single pendant with a diameter between 12 and 16 inches. If your island is a substantial 60 inches wide, a single pendant would need to be 15-20 inches, which might be too large and heavy. This is where multiple pendants come in.
For islands longer than about 6 feet, two or three pendants are almost always the better choice. The combined width of all pendants (measured side-by-side) should still be about 1/4 to 1/3 the island’s width. If you’re going with three pendants over a 72-inch island, each pendant might be in the 10-14 inch range. The key is that the “cluster” of pendants as a whole unit feels proportional to the surface below. Always visualize this. Use painter’s tape on the floor to mark the footprint of your chosen pendant(s) to see if it feels balanced before you buy.
Visual Weight and Shape: Round, Rectangular, and Linear
Don’t just look at the raw measurement; consider the fixture’s visual weight and shape. A large, open, airy cage pendant might *read* as lighter than a solid, dense glass orb of the same diameter. A rectangular or linear pendant (like a long bar or a series of small globes on a track) is excellent for long islands, as it mirrors the island’s shape and provides even light distribution. A round pendant is classic and versatile. For a very long island (8+ feet), consider three pendants or a single, substantial linear pendant that spans a good portion of the island’s length. The goal is that the lighting arrangement feels like a cohesive unit, not an afterthought.
Step 2: Deciding on the Number of Pendants
Once you have a sense of size, the next question is: one, two, three, or more? The answer depends almost entirely on your island’s length, but also on your style preference and the pendant design itself.

Visual guide about How to Choose Pendant Lights for Kitchen Island
Image source: images.1stoplighting.com
Island Length: The Primary Deciding Factor
Here’s a practical breakdown:
- Under 48 inches (4 ft): A single, well-sized pendant is usually perfect. It becomes a central, decorative focal point without overwhelming the space.
- 48 inches to 72 inches (4-6 ft): This is the most common range. Two pendants are the standard here. They provide excellent, even coverage and a balanced, symmetrical look that is pleasing to the eye.
- Over 72 inches (6 ft): Two pendants can still work if they are large enough, but three pendants often provide superior, more even task lighting and look more intentional on a long expanse. For islands over 9 feet, three pendants are strongly recommended.
- Extra-Long Islands (10+ ft): You might even consider four small pendants or two long linear pendants, spaced appropriately.
The Symmetry vs. Asymmetry Debate
Symmetry (evenly spaced pendants) is the safe, classic, and most common choice. It feels orderly and calm. However, don’t be afraid of asymmetry for a more modern, eclectic feel. For example, with a 6-foot island, you could place one larger pendant off-center and a smaller accent light on the other side. This works best with a strong, intentional design theme. The rule for asymmetry is that it must look deliberately *unbalanced*, not accidentally lopsided. The pendants should be different in a way that feels curated—perhaps one large woven shade and one small metallic globe. If you’re unsure, stick with symmetry. It’s hard to go wrong.
Step 3: Finding Your Style—Finishes, Materials, and Shapes
Now for the fun part: making it look like *your* kitchen. The pendant’s aesthetic is where your personality shines. But to make it cohesive, you need to be a design detective in your own home.
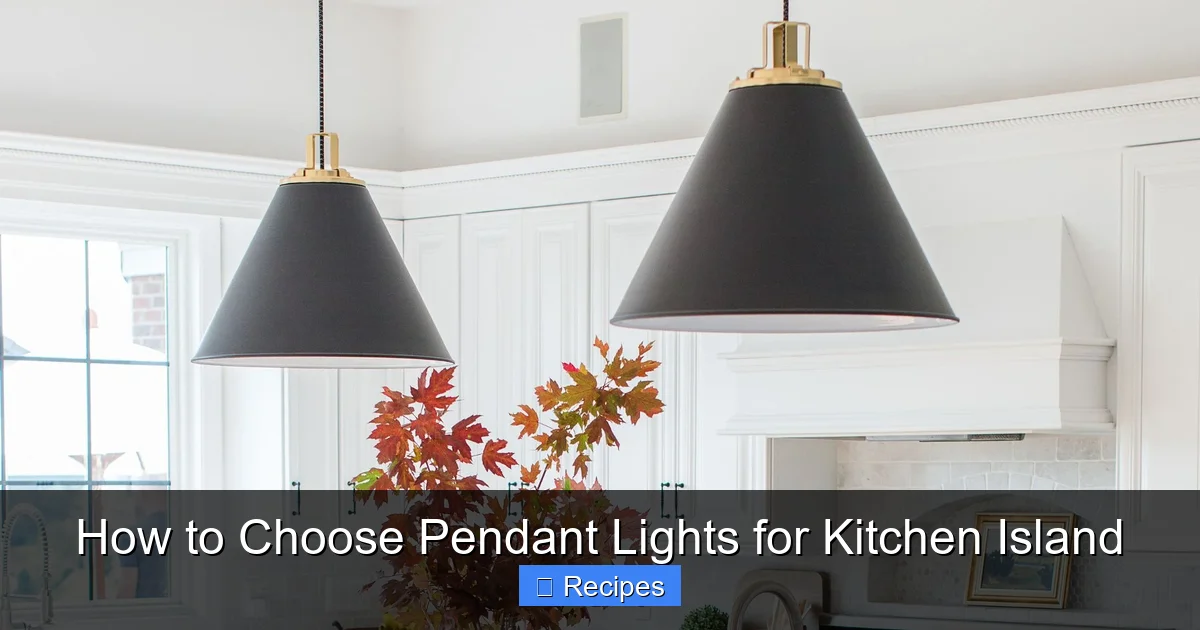
Visual guide about How to Choose Pendant Lights for Kitchen Island
Image source: archedmanor.com
Matching and Mixing Finishes
Look around your kitchen. What are your cabinet hardware (knobs, pulls) made of? What about your faucet, sink, and other light fixtures (like under-cabinet lights or the range hood)? The easiest path to a pulled-together look is to match your pendant finish to one of these existing elements. If you have brushed nickel pulls and a chrome faucet, a brushed nickel pendant is a no-brainer. This creates a visual thread that ties the room together. But mixing finishes is also an advanced, stylish move. The rule for mixing is to choose two finishes that have enough contrast (like matte black and brass) and to repeat each finish at least twice in the space for balance. So, if you have brass hardware on your island cabinets, a black pendant could work beautifully if you have another black element elsewhere (like a black stove or black bar stools). Avoid creating a “one-off” that feels orphaned.
Material Palette: Glass, Metal, Fabric, Natural
The shade material dictates the light’s character.
- Glass (Clear, Frosted, Seeded): Feels light, airy, and modern. Clear glass shows the bulb, so choose a stylish bulb. Frosted or seeded glass diffuses light nicely, reducing glare.
- Metal (Brass, Bronze, Nickel, Iron): Can be a shade itself (like a bowl or cone) or a cage/frame. Metal is durable and comes in every finish. Open metal cages are great for directing light down.
- Fabric/Linen: Provides the softest, most diffused, and warm light. It feels traditional, cozy, and elegant. Perfect for creating ambiance.
- Natural Materials (Wicker, Rattan, Wood, Stone): Adds warmth, texture, and an organic, rustic or coastal vibe. These are statement pieces that bring a handcrafted feel.
- Mixed Materials: A glass shade with a brass top, or a fabric shade with a metal canopy. These are excellent for adding visual interest and layering textures.
Step 4: Nailing the Installation Height and Spacing
You’ve bought the perfect pendants. Now, where on earth do you hang them? This is not a “measure once, hang forever” situation. Getting the height and spacing wrong can ruin even the most beautiful fixture.
The 28-36 Inch Rule (And When to Break It)
The standard guideline is to hang the bottom of the pendant 28 to 36 inches above your countertop surface. This range is the sweet spot. Why? It puts the light source at the perfect height to illuminate the workspace without your head (or the head of someone sitting at the island) blocking the light. It also keeps the pendant out of the way of normal movement and prevents accidental bumps. But rules are made to be adapted. If your ceilings are very high (over 9 feet), you might lean toward the 36-inch measurement or even slightly higher to avoid the pendants looking like they’re dangling from the sky. If your ceilings are lower (8 feet or less), you may need to go closer to 28 inches, but be cautious—you don’t want to compromise headroom. Always consider the people using the space. A quick test: have someone stand at the island as if preparing food; the pendant should be at or just above their line of sight when looking down at the counter.
Spacing for Multiple Pendants: The 24-30 Inch Guideline
When hanging two or three pendants, spacing is key. You want even light distribution and a balanced look. The general rule is to leave 24 to 30 inches between each pendant, measured from the center of one fixture to the center of the next. Additionally, the outermost pendants should be positioned 12-18 inches in from the ends of the island. This creates a pleasing margin and prevents the lights from feeling crammed against the edges. For a 72-inch island with three pendants: space them 24 inches apart, center-to-center. That means the first pendant’s center is 18 inches from one end, the second is centered, and the third is 18 inches from the other end. Use a tape measure and a pencil to mark the canopy’s center point on the ceiling before you cut any holes!
Step 5: The Technical Bits—Bulb Type, Dimmability, and Light Direction
This is where functionality is locked in. You can have the most gorgeous pendant in the world, but if it uses a bulb that casts a sickly green tinge or can’t be dimmed, you’ll be frustrated daily.
LED is the Undisputed Champion
Forget about incandescent and even CFLs. LED bulbs are the only sensible choice for modern kitchen pendants. They use a fraction of the energy, last for 15-25 years (seriously, you might never change them), and produce very little heat—important if your shade is fabric or close to combustible materials. When shopping for LED bulbs, pay attention to the same specs we discussed: lumens for brightness and Kelvin for color temperature. Buy a few different bulbs (e.g., 2700K vs. 3000K) and test them in your fixture at home before committing to a whole set. The quality of LED light varies wildly, and a cheap bulb can have a terrible CRI, making your food look unappetizing.
Dimmability is Non-Negotiable for Most
Seriously, consider this a requirement. A dimmer switch transforms your kitchen. Full brightness for chopping onions. Half brightness for a romantic dinner on the island. A soft glow for late-night cleanup. It’s the single biggest upgrade you can make to your kitchen lighting. But you must ensure both your bulbs AND your switch are rated as dimmable. Not all LEDs dim well, and some require specific “trailing edge” dimmers. When in doubt, buy bulbs and a dimmer from the same reputable brand. Have an electrician install a proper dimmer switch—those old-fashioned slide dimmers for incandescents often buzz and flicker with LEDs.
Shade Style: Open Bottom, Enclosed, or Linear?
The shade design controls where the light goes.
- Open Bottom (Cage, Bell, Hemisphere): Directs 100% of the light downward. This is ideal for pure task lighting on the island. It’s efficient and minimizes glare in your eyes if you’re standing at the counter.
- Enclosed (Fabric, Drum, Closed Glass): Diffuses light in all directions. This creates a softer, more ambient glow that also lights the surrounding area. It’s less efficient for direct task lighting but more flattering and atmospheric.
- Linear/Rectangular: Often has an open bottom along its long axis, providing a fantastic, even “wash” of light down the entire length of a long island. Perfect for eliminating shadows across a wide workspace.
Step 6: Budget, Quality, and Long-Term Considerations
Pendant lights range from $30 big-box specials to $1,000+ designer pieces. Where you land depends on your budget and how you view the investment.
Where to Splurge and Where to Save
You can find great style in many price ranges, but some aspects are worth investing in. Consider splurging on the fixture itself if it’s a major design statement you’ll live with for years. High-quality metals (solid brass, not plated), thick glass, and robust construction feel substantial and will last. You can save on the bulbs. Good LED bulbs are affordable and you can upgrade them later if technology improves. Also, if you find a pendant style you love in a less expensive material (like a well-designed resin or composite), it can be a smart buy. The most important thing is that the fixture is UL-listed for safety and comes from a reputable manufacturer with a decent warranty. Read reviews—cheap fixtures often have安装 headaches or finish that chips easily.
Maintenance and Cleaning: A Practical Reality
Think about your lifestyle. If you have a busy family with sticky fingers and a penchant for spraying cooking oil, a complex, multi-faceted glass cage with lots of nooks and crannies will be a nightmare to clean. A simple, smooth metal or glass shade can be wiped down in seconds. Fabric shades can be dust magnets and may be harder to clean if something spills on them. Be honest with yourself about the maintenance you’re willing to do. A beautiful fixture that becomes a grimy eyesore in six months is a failed investment. Choose a material and design that fits your cleaning tolerance.
Putting It All Together: A Final Checklist Before You Buy
Before you click “add to cart” or hand over your credit card, run through this final mental checklist. Does your chosen pendant(s):
- Fit the Scale: Is the size (single or combined) 1/4 to 1/3 the island width?
- Fit the Number: Does the quantity match the island length (1 for <4ft, 2 for 4-6ft, 3 for >6ft)?
- Hang at the Right Height: Will the bottom be 28-36″ above the counter? (Mark it with tape!).
- Have Proper Spacing: Is there 24-30″ between centers, and 12-18″ from island ends?
- Match or Complement Finishes: Does the metal finish echo another element in the kitchen?
- Provide the Right Light: Are you using 2700K-3500K, high-CRI LED bulbs? Is the fixture dimmable?
- Fit the Style & Maintenance: Does the material and shape suit your kitchen’s decor and your cleaning habits?
If you can answer “yes” to all of these, you have found your pendant lights. Congratulations! You are about to light up your kitchen island in the best way possible.
Frequently Asked Questions
How high should pendant lights hang above a kitchen island?
The standard height is 28 to 36 inches from the bottom of the pendant to the countertop surface. This provides optimal task lighting without obstructing views or causing head bumps. For very high ceilings (over 9 feet), you can lean toward the higher end of this range or add a few extra inches.
How many pendant lights do I need for a 6-foot island?
For a standard 6-foot (72-inch) island, two pendants are the most common and classic choice. They should be spaced evenly, with the center of each pendant about 24-30 inches apart and positioned 12-18 inches in from each end of the island. Three pendants can also work beautifully if you prefer a more lavish look or need brighter, more even light.
What type of light bulb is best for kitchen island pendants?
A high-quality, dimmable LED bulb is the best choice. Look for a color temperature between 2700K (warm white) and 3500K (neutral white) for a flattering, functional light. Ensure the bulb has a high CRI (Color Rendering Index) of 90+ so your food and finishes look their true, vibrant colors.
Should I use a dimmer switch with my island pendants?
Absolutely. A dimmer switch is highly recommended. It allows you to adjust the light from bright for food preparation to a soft, ambient level for dining and entertaining. This single upgrade dramatically increases the versatility and atmosphere of your kitchen. Just ensure your LED bulbs are specifically labeled as “dimmable.”
How do I clean fabric or enclosed pendant shades?
For fabric shades, regular dusting with a soft brush attachment on your vacuum or a microfiber cloth is key. For deeper cleaning, check the manufacturer’s instructions; some may be hand-washable. For enclosed glass or metal shades, simply remove them (if possible) and wipe with a damp microfiber cloth and mild soap, then dry thoroughly. Avoid harsh chemicals that could damage finishes.
Can I mix and match pendant styles over my island?
Yes, you can mix styles for an eclectic, curated look, but it requires a deliberate approach. The most successful mixes share a common element, such as the same color finish, material (all glass, all metal), or overall shape (all round). Asymmetrical mixing (e.g., one large and one small) works best when the pendants are clearly different in a way that feels intentional, not accidental. When in doubt, using identical pendants is always a safe and elegant choice.