Changing your kitchen cabinet color is one of the most cost-effective ways to transform the entire look and feel of your kitchen. Whether you choose to paint, reface, or use a glaze, proper preparation is the non-negotiable first step for a durable, professional finish. This guide walks you through every method, from assessing your cabinet material to the final hardware swap, ensuring you achieve a beautiful result that lasts for years. With the right tools, techniques, and a little patience, you can completely change the kitchen cabinet color and create your dream space without a full renovation.
Key Takeaways
- Proper assessment is crucial: Identify your cabinet material (solid wood, MDF, laminate, thermofoil) as it dictates the entire prep and painting process. Painting over laminate requires specific bonding primers and paints.
- Prep work makes or breaks the project: Over 70% of a successful cabinet paint job is in the preparation. This includes thorough cleaning, deglossing, sanding, and priming, especially on glossy or laminate surfaces.
- Paint choice matters: Use a high-quality, durable paint specifically formulated for cabinets and trim, like an acrylic enamel or water-based polyurethane. These offer a hard, smooth, washable finish.
- Method matters: Painting is the most common DIY option, but refacing (applying new veneer) or using a chalk paint/glaze system are excellent alternatives depending on your budget, timeline, and cabinet condition.
- Don’t forget the details: Updating hardware (knobs, pulls) and potentially the cabinet interiors creates a cohesive, high-end look. Removing doors/drawers for painting and labeling them is essential for a perfect reinstall.
- Patience with drying/curing is key: Allow adequate drying time between coats and a full cure time (often 7-14 days) before heavy use to prevent chips, scratches, and stickiness.
📑 Table of Contents
- Your Kitchen’s Secret Weapon: A Cabinet Color Change
- Step 1: The Critical Assessment – What Are Your Cabinets Made Of?
- Step 2: The Unsexy (But Essential) Prep Work
- Step 3: The Painting Process – Achieving a Flawless Finish
- Step 4: Beyond Paint – Alternative Methods to Change Kitchen Cabinet Color
- Step 5: The Finishing Touches – Hardware and Reassembly
- Step 6: Pitfalls to Avoid – Common Mistakes That Ruin a Paint Job
- Conclusion: Your New Kitchen Awaits
Your Kitchen’s Secret Weapon: A Cabinet Color Change
Ever walk into your kitchen and feel that it’s just… fine? The layout works, the appliances are functional, but the overall vibe feels dated, dark, or simply not you. Before you consider a massive, budget-busting remodel, there’s one powerful design secret that designers and savvy homeowners have used for decades: changing the kitchen cabinet color. It’s the single most impactful update you can make to this central room. A new cabinet color can make a small kitchen feel larger, a dark kitchen feel brighter, and an outdated kitchen feel modern and fresh. It’s a high-impact, relatively low-cost project that you can often tackle yourself over a weekend or two. This isn’t just about slapping on a coat of paint; it’s about understanding your surfaces, choosing the right products, and executing the steps with care. Whether you dream of crisp white shaker-style cabinets, a moody navy blue, a warm greige, or even a bold black, this guide will equip you with everything you need to confidently change kitchen cabinet color and love the result.
Step 1: The Critical Assessment – What Are Your Cabinets Made Of?
Before you buy a single can of paint, you must become a cabinet detective. The material your cabinets are made from is the single most important factor in determining your entire approach. Using the wrong method on the wrong surface is a one-way ticket to peeling paint and heartbreak. Here’s how to identify what you’re working with.
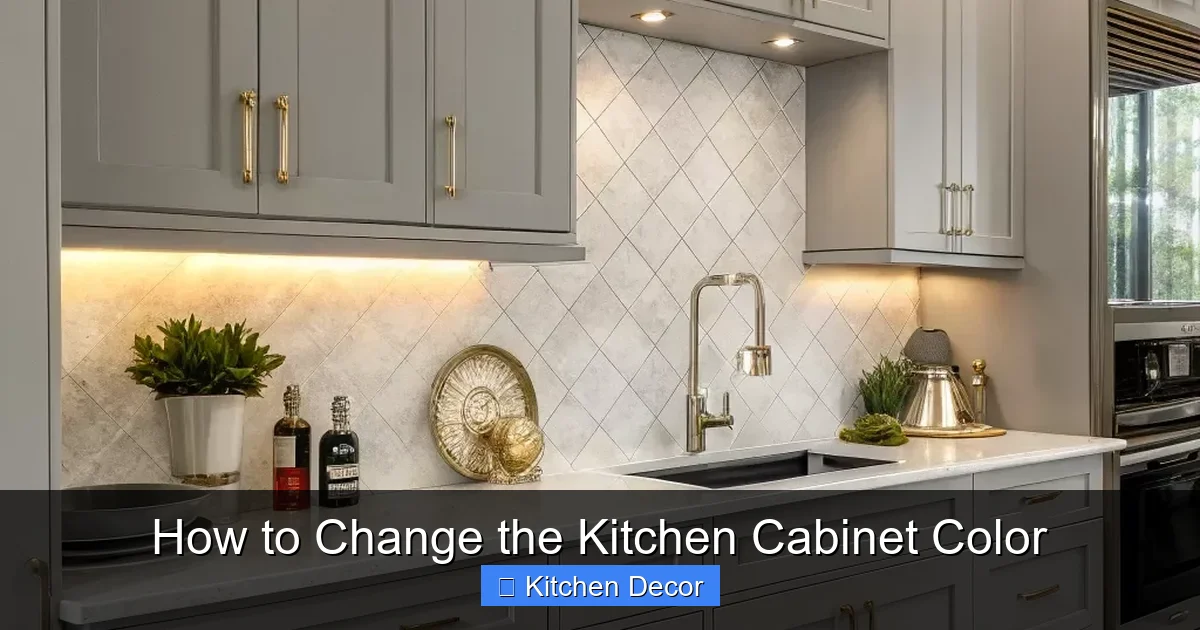
Visual guide about How to Change the Kitchen Cabinet Color
Image source: i.pinimg.com
Solid Wood Cabinets
These are the gold standard and the easiest to paint. You can often tell by the grain pattern on the end grains (the edges of cabinet doors and drawer fronts). Solid wood cabinets, like oak, maple, cherry, or pine, accept paint beautifully after proper sanding and priming. The main consideration is the wood grain itself; open-grained woods like oak may require a wood filler or a sanding sealer to achieve a perfectly smooth finish if that’s your goal.
Engineered Wood (MDF, Particleboard with Veneer)
Most modern cabinets are made from Medium-Density Fibreboard (MDF) or particleboard with a thin wood veneer or melamine surface. The surface is usually very smooth and non-porous. Painting over laminate or thermofoil surfaces is the trickiest scenario. You cannot just paint directly onto these slick surfaces. They require an aggressive deglossing, a specific high-adhesion bonding primer (often shellac-based or a dedicated laminate primer), and then a top-quality paint. Skipping the bonding primer is the most common reason for paint failure on these surfaces.
Thermofoil Cabinets
These have a vinyl-like, heat-fused plastic coating over an MDF core. They are extremely glossy and smooth. Changing the color on thermofoil is challenging. The plastic coating must be thoroughly scuffed and cleaned, and a special primer is mandatory. In many cases, professionals recommend refacing (replacing the doors and drawer fronts with new, paint-ready ones) as a more reliable long-term solution if the thermofoil is in poor condition or heavily textured.
Pro Tip: Perform the “scratch test” in an inconspicuous area (like the inside of a cabinet door). Use your fingernail or a coin to scratch the surface. If it scratches easily and reveals a brown or tan core, it’s likely MDF/particleboard with a veneer. If it’s very hard to scratch and feels plastic-y, it’s probably laminate or thermofoil.
Step 2: The Unsexy (But Essential) Prep Work
Let’s be clear: you will spend 80% of your total project time on preparation. Rushing or skipping this step guarantees a disappointing finish. This is where you build the foundation for a professional-looking result. To change kitchen cabinet color successfully, your surfaces must be impeccably clean, dull, and dry.
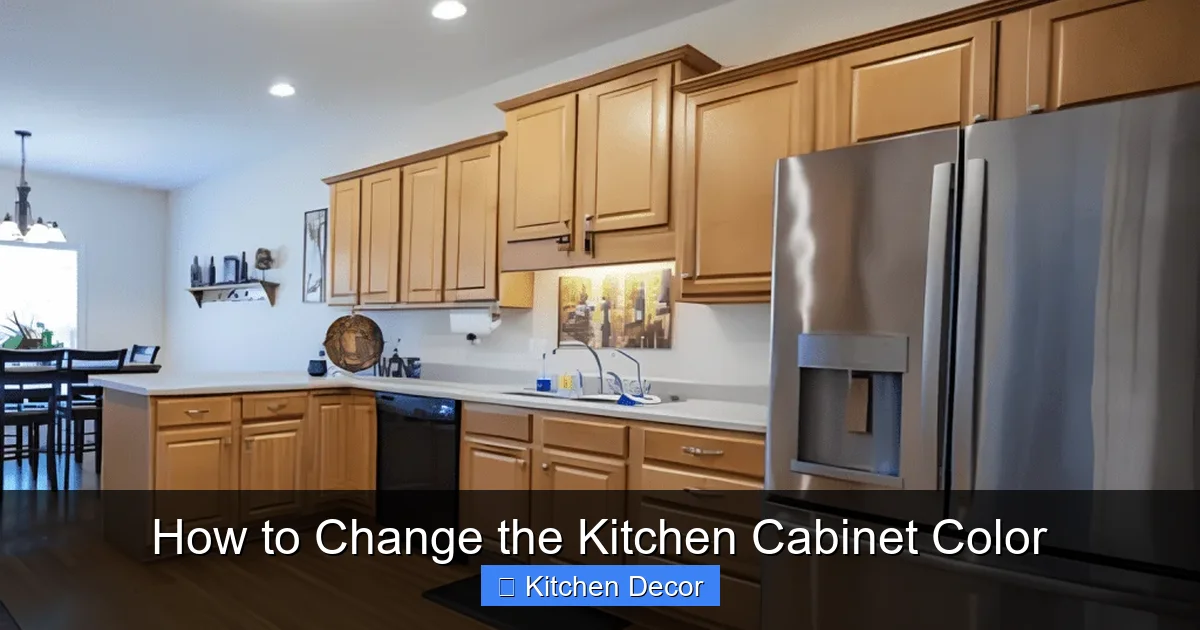
Visual guide about How to Change the Kitchen Cabinet Color
Image source: certapro.com
Cleaning and Deglossing
Kitchen cabinets are coated in years of grease, food splatter, and fingerprints. This oily film is a paint’s worst enemy. Use a strong degreaser like TSP substitute, Krud Kutter, or a simple solution of trisodium phosphate (follow safety instructions). Scrub every surface, rinse thoroughly with clean water, and let dry completely. For glossy surfaces (laminate, some factory finishes), you must sand or chemically etch the surface to create “tooth” for the primer to grip. Use 120-150 grit sandpaper and sand evenly until the shine is gone. Wipe away all dust with a tack cloth or a damp rag. For stubborn gloss, a liquid deglosser/chemical etcher can be used, but sanding is more reliable.
Repair and Sand
Inspect every door, drawer front, and cabinet box. Fill any dents, scratches, or holes with a high-quality wood filler. For oak grain, apply a grain filler if you desire a super smooth surface. Once repairs are dry, sand the entire surface with 150-grit sandpaper to smooth out the filler and create a uniform, slightly rough surface. The goal is not to remove the finish, but to dull it. After final sanding, wipe everything down again with a damp cloth and let dry.
Priming: The Non-Negotiable Step
Primer is not optional. It seals the surface, blocks stains, and provides the best adhesion for your paint. The type of primer is dictated by your cabinet material.
- For solid wood & MDF: A high-quality oil-based or water-based stain-blocking primer works well.
- For laminate/thermofoil: You MUST use a bonding primer. Products like Zinsser B-I (oil-based) or Zinsser Bulls Eye 1-2-3 (water-based, but check label for laminate) are industry standards. For the toughest adhesion, a shellac-based primer like Zinsser BIN is the champion, but it has a strong odor and requires mineral spirits for cleanup.
Apply a thin, even coat with a brush (for edges) and a high-density foam roller or a spray gun (for flat panels) for the smoothest result. Let the primer dry completely according to manufacturer instructions and sand lightly with 220-grit sandpaper to remove any brush marks or dust nibs. Wipe clean.
Step 3: The Painting Process – Achieving a Flawless Finish
Now for the fun part! Applying the color. The goal here is a smooth, drip-free, hard surface that can withstand daily use. Your tool choice significantly impacts the final look.
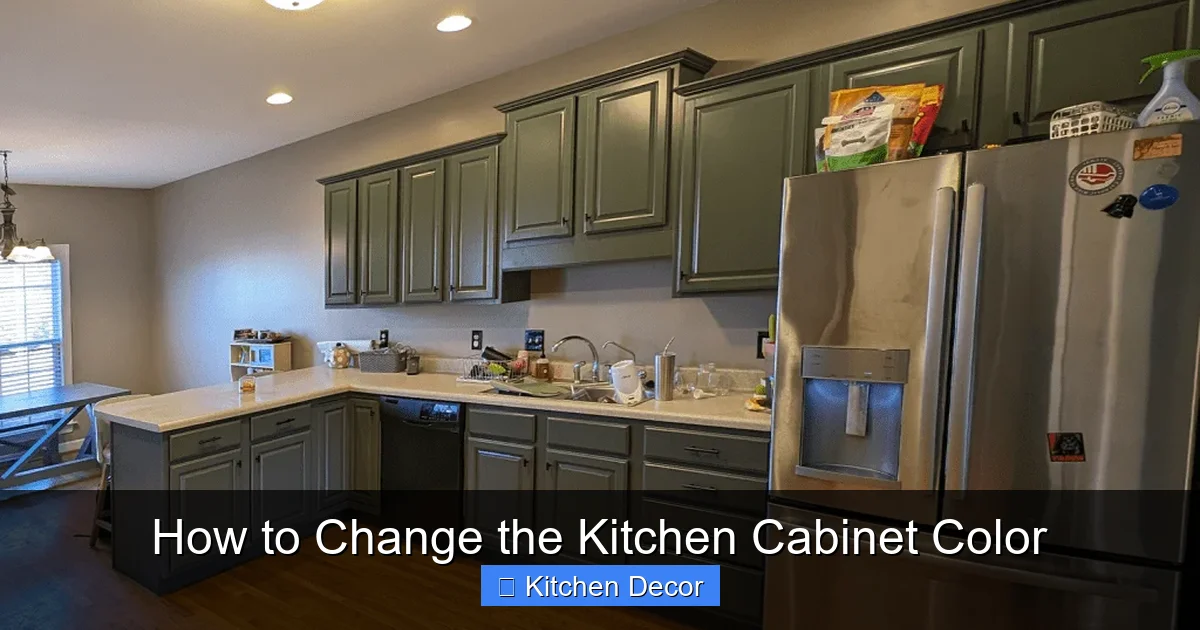
Visual guide about How to Change the Kitchen Cabinet Color
Image source: certapro.com
Choosing Your Paint and Tools
Paint: Do not use interior wall paint. Invest in a paint specifically designed for cabinets, trim, and doors. Look for labels like “acrylic enamel,” “water-based polyurethane,” or “cabinet paint.” Brands like Benjamin Moore Advance, Sherwin-Williams ProClassic, and Behr Premium Plus Ultra Cabinet & Trim are excellent. These paints level out (flow into a smooth film) and cure to a very hard, durable surface. They are typically water-based for easier cleanup and lower odor, but take longer to fully cure.
Tools:
- Brushes: Use a high-quality synthetic bristle brush (2-2.5 inches) for edges and details. A angled sash brush is perfect for getting into corners.
- Rollers: A high-density foam roller cover (¼” or ⅜” nap) is ideal for flat panels. It minimizes texture and gives a finish close to a spray gun. Avoid standard fabric rollers, which leave a pronounced texture.
- Sprayer (Optional but Game-Changing): If you have access to an HVLP (high-volume low-pressure) sprayer, it will give you the most professional, factory-like finish with no brush or roller marks. It requires more setup, masking, and cleanup but is worth it for a flawless result on raised panel doors.
Application Technique
Always work in a dust-free, well-ventilated area (garage, workshop, or a very well-covered kitchen). If painting in place, remove all hardware and thoroughly tape off countertops, walls, and appliances with painter’s tape and plastic sheeting. For best results, remove all cabinet doors and drawer fronts and paint them separately on a flat, horizontal surface. Label the back of each door with a piece of tape noting its location (e.g., “BD-1” for base door 1) to avoid confusion later.
- First Coat (The “ tack coat”): Apply a thin, even coat of paint. Don’t try to achieve full coverage in one go. Thin coats are key to avoiding drips and sags. Paint in the direction of the wood grain. For panels, paint the recessed details first with a brush, then the flat surfaces with the foam roller. For the cabinet boxes, use a brush for edges and a roller for flat surfaces.
- Light Sanding: After the first coat is dry to the touch (check can for dry time, usually 2-4 hours), sand lightly with 320-grit sandpaper or a fine sanding sponge. This removes any dust nibs or brush strokes and provides a “tooth” for the next coat. Wipe clean with a damp cloth.
- Second Coat: Apply a second thin, even coat using the same technique. This should get you to full, even coverage. For some colors or over dark stains, a third coat may be necessary. Repeat the light sanding between coats if needed.
Critical: Maintain a “wet edge” by painting into the previous stroke before it dries to avoid hard lines. Work systematically, top to bottom, inside to out.
Step 4: Beyond Paint – Alternative Methods to Change Kitchen Cabinet Color
Painting isn’t the only path. Depending on your budget, skill level, and the condition of your cabinets, these alternatives might be a better fit to change kitchen cabinet color.
Cabinet Refacing or Replacing Doors
This is the most thorough and often longest-lasting solution. Refacing means keeping the existing cabinet boxes but installing new cabinet door and drawer front faces, typically made of solid wood, plywood, or MDF with a veneer. You can also purchase ready-to-paint (RTP) doors online in various styles. This allows you to completely change the style (e.g., from raised panel to shaker) and color with a perfect, new surface. It’s more expensive than DIY painting but less than a full cabinet replacement. It’s ideal if your cabinet boxes are in great shape but the doors are damaged, warped, or you want a major style change.
Chalk Paint & Milk Paint
These are popular for their matte, rustic finishes and minimal prep claims. While they can adhere well to many surfaces with less sanding, they are not as durable or moisture-resistant as traditional enamel paints for a high-use area like a kitchen. They are best suited for a decorative, low-traffic kitchen or for furniture. If you go this route, you must seal the final finish with a high-quality, water-based polyurethane for any hope of durability against spills and splatters.
Glazing and Antiquing
This isn’t about changing the base color entirely but adding depth and character. You apply a glaze (a translucent tinted medium) over a dried base coat of paint or stain and then wipe it off, leaving it in the recesses of moldings and profiles. It creates a beautiful, layered, aged effect. It’s a fantastic way to update cabinets without committing to a solid, bold color change from the start.
Step 5: The Finishing Touches – Hardware and Reassembly
Your cabinets are painted and cured. Now it’s time for the details that elevate the whole look.
Updating Hardware
New cabinet pulls and knobs are like jewelry for your cabinets. This is the easiest, cheapest way to make your newly painted cabinets look custom and high-end. Consider the style: sleek, modern pulls for a contemporary look; round knobs or bin pulls for a traditional or farmhouse feel. Ensure the new hardware fits the existing hole spacing (most common is 3” or 96mm on center). If not, you’ll need to fill the old holes with wood filler, sand smooth, prime, and paint the area before drilling new holes.
Reassembly with Care
Before rehanging doors, ensure the paint is fully cured (this can take 7-14 days for full hardness, even if dry to the touch). Reattach hinges carefully. If you have adjustable hinges, now is the time to ensure all doors are aligned perfectly. Install drawer fronts, making sure they are straight and aligned with adjacent doors. Finally, install all new hardware. Take your time here; a misaligned pull can throw off the entire look.
Painting the Interior?
For a truly cohesive look, consider painting the inside of your cabinet boxes and the backs of cabinet doors. This is especially impactful with glass-front cabinets or if you use light inside. Use the same meticulous prep and painting process. It’s extra work but creates a stunning, custom-built appearance every time you open a cabinet.
Step 6: Pitfalls to Avoid – Common Mistakes That Ruin a Paint Job
Even with the best intentions, a few missteps can derail your project. Here are the most common mistakes when you change kitchen cabinet color.
- Rushing the prep: Skipping the deglosser on laminate, not sanding enough, or leaving grease behind. Prep is 80% of the battle.
- Using the wrong primer/paint: Using wall paint or skipping the bonding primer on non-wood surfaces is the #1 cause of peeling.
- Applying thick coats: “One coat coverage” is a myth for cabinets. Thick coats lead to drips, sags, and a gummy finish that never fully cures hard. Thin, multiple coats are essential.
- Not sanding between coats: This step smooths the finish and provides adhesion for the next layer. Don’t skip it.
- Reinstalling too soon: The paint may be dry to the touch, but it is not cured. Handling doors too early can leave fingerprints and cause chips. Wait at least 48-72 hours before reinstalling, and a full week before subjecting to normal use.
- Painting in dusty conditions: Painting in a garage with the door open on a windy day or in a kitchen full of sawdust from other projects will leave a gritty, bumpy finish. Ensure your painting environment is as clean as possible.
- Neglecting the “invisible” areas: Paint the edges of doors, the interior of cabinet boxes, and the underside of shelves. These areas are visible when doors are open and will look unfinished if left bare.
Conclusion: Your New Kitchen Awaits
Learning how to change kitchen cabinet color is a journey of patience and precision, but the destination is incredibly rewarding. You have the power to completely redefine your kitchen’s personality—from a dark, traditional space to a bright, airy modern haven—with a relatively small investment of time and money. Remember, the secret sauce is always in the preparation. Respect the process: identify your cabinet material, clean and sand meticulously, use the correct primer, apply thin coats of quality paint, and allow for proper curing. Whether you choose a classic white, a dramatic navy, a soft sage green, or you opt for a full refacing project, the transformation will be profound. You’re not just painting cabinets; you’re investing in the heart of your home. So roll up your sleeves, take your time, and get ready to fall in love with your kitchen all over again.
Frequently Asked Questions
What is the best type of paint for kitchen cabinets?
For a durable, washable finish, use a high-quality acrylic enamel or water-based polyurethane paint specifically labeled for cabinets, trim, and doors. Brands like Benjamin Moore Advance and Sherwin-Williams ProClassic are top choices as they level smoothly and cure to a hard surface that resists chips and stains.
Do I need to sand my cabinets before painting?
Yes, absolutely. Sanding is non-negotiable for a lasting finish. You must sand to remove the glossy finish and create a rough surface (“tooth”) for the primer and paint to mechanically bond to. Use 120-150 grit for initial scuff sanding, and 220 grit for smoothing between coats.
How long does it take for painted cabinets to fully cure?
While paint may be dry to the touch in 2-4 hours, the curing process (where the paint reaches its maximum hardness and durability) takes much longer. For most water-based cabinet paints, full cure is 7-14 days. Avoid heavy use, cleaning, or slamming doors during this period to prevent damage.
Can I paint my cabinets without removing the doors?
You can, but it’s not recommended for a professional result. Painting in place makes it difficult to get smooth finishes on edges and the backs of doors, and you risk getting paint on countertops and walls. Removing doors and drawers allows you to paint them flat on a sawhorse, which is far easier and yields a much better finish.
Is it cheaper to paint cabinets or buy new ones?
Painting your existing cabinets is significantly cheaper than buying and installing all-new cabinets. DIY painting costs primarily in paint, primer, and supplies ($200-$500 for a full kitchen). New cabinet installation can cost thousands. Refacing (buying new doors) sits in between cost-wise.
Can I paint over laminate cabinets?
Yes, but with a critical caveat: you must use a high-adhesion bonding primer (like Zinsser B-I or BIN) specifically designed for slick surfaces like laminate. Clean and sand the laminate thoroughly first. Without this specialized primer, the paint will almost certainly peel and fail.