Building a chimney for a wood stove is a critical project that demands meticulous planning, strict adherence to building codes, and a focus on safety. This guide walks you through every phase, from understanding clearance requirements and selecting the right components to the step-by-step installation process and essential maintenance. While some preparatory work can be DIY, the actual roof penetration and final connections are high-risk tasks best left to certified professionals. Prioritize safety and legal compliance to enjoy efficient, worry-free warmth from your wood stove for years to come.
Key Takeaways
- Codes & Permits are Non-Negotiable: Always consult your local building and fire codes before starting. Obtain necessary permits; this is often legally required and ensures your installation meets safety standards.
- Clearance is Everything: The single most important rule is maintaining the manufacturer’s specified clearance between the chimney pipe and any combustible materials (walls, ceilings, roofs). Use listed thermal shields or increase spacing if needed.
- Material Choice Matters: Use only UL-listed, high-temperature chimney components (Class A or Type HT pipe) designed for wood stoves. Never use single-wall pipe for through-the-roof or exterior runs beyond the stove’s connector.
- The Taller, The Better (Usually): Chimney height is crucial for proper draft. It must extend at least 3 feet above the roof penetration and be 2 feet higher than any part of the building within 10 feet. This prevents downdraft and smoke spillage.
- Professional Help for Roof Work: The roof jack installation and flashing are complex, high-risk tasks. Improper installation leads to leaks and fire hazards. Hiring a certified chimney professional for this phase is strongly advised.
- Test Before You Trust: After installation, perform a thorough smoke test to check for leaks and ensure strong, consistent draft before using the stove regularly.
- Maintenance is Part of Ownership: An annual professional inspection and cleaning by a certified chimney sweep is essential to remove creosote, check for damage, and ensure safe operation.
📑 Table of Contents
- Introduction: The Heart of the Hearth
- Phase 1: The Planning & Preparation Stage (Where 80% of Success Lies)
- Phase 2: Selecting the Right Equipment & Materials
- Phase 3: The Installation Process – Step-by-Step
- Phase 4: Testing, Inspection, and Final Touches
- Phase 5: Operation, Maintenance, and Troubleshooting
- Conclusion: Safety is the Ultimate Goal
Introduction: The Heart of the Hearth
There’s nothing quite like the radiant heat and cozy ambiance of a wood stove. It transforms a room into a sanctuary of warmth. But that comforting fire depends entirely on one critical, often overlooked, component: the chimney system. A properly built chimney for a wood stove is not just a pipe to the sky; it’s a sophisticated, engineered exhaust system that safely removes deadly gases, creates the draft that feeds your fire, and protects your home from fire. Doing it wrong isn’t just inefficient—it’s a direct threat to your family’s safety and your property.
This guide is designed to demystify the entire process of how to build a chimney for a wood stove. We’ll move from the drafting table to the rooftop, covering planning, material selection, the step-by-step installation sequence, and the non-negotiable maintenance that follows. Our goal is to equip you with the knowledge to either manage the project with a clear understanding of its complexities or to communicate effectively with professionals you hire. Remember, when it comes to venting combustion appliances, cutting corners is never an option.
Phase 1: The Planning & Preparation Stage (Where 80% of Success Lies)
Rushing to buy pipe and start drilling is the fastest route to a failed, dangerous installation. This phase is all about information gathering, measurement, and compliance. Skipping it guarantees problems down the line.
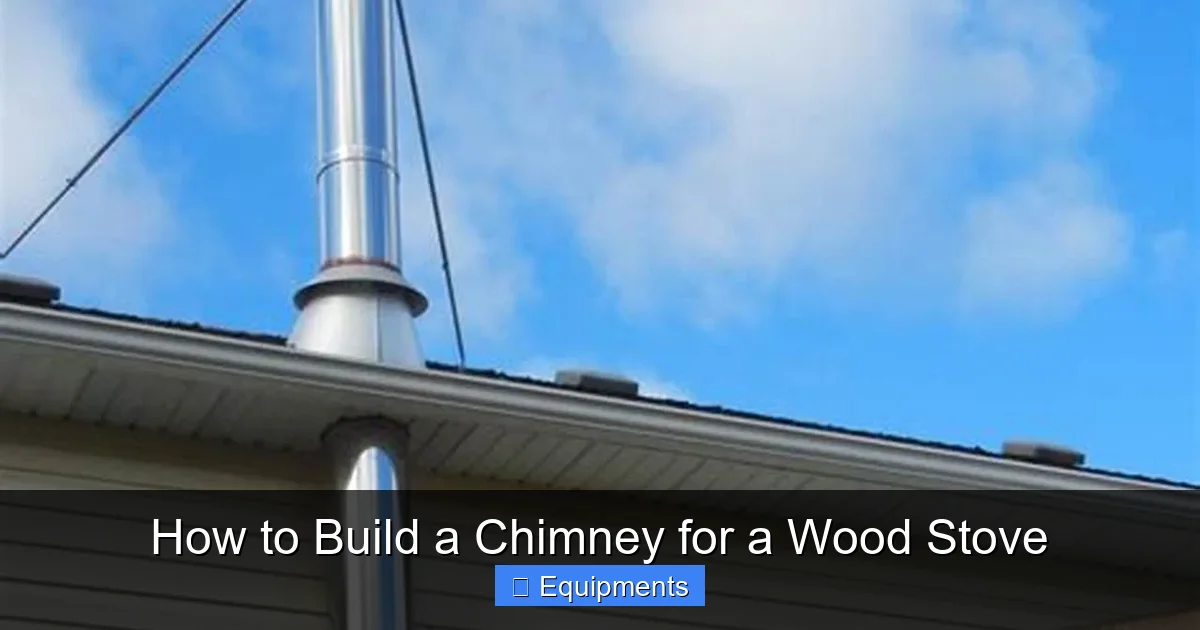
Visual guide about How to Build a Chimney for a Wood Stove
Image source: thechimneyworks.com
Understanding the “Why”: Draft and Clearance
Your wood stove chimney has two primary jobs. First, it must create draft—a steady flow of air up the flue that pulls smoke and combustion gases (like carbon monoxide) out of your home and pulls fresh air into the firebox to sustain combustion. Second, it must isolate extreme heat from the structure of your house. Draft is largely a function of chimney height and temperature. Clearance is about physics and safety—hot pipes can ignite nearby wood framing, insulation, or drywall if placed too close.
Step 1: Decode Your Wood Stove Manual
Your journey starts here. Locate the installation manual for your specific wood stove model. This document is your bible. It will dictate:
- Minimum Clearances: The exact distance the stove and its connector pipe must maintain from walls, floors, and ceilings. This is often measured from the stove’s outer surface. It will also specify clearances for the chimney pipe itself once it leaves the stove.
- Approved Venting Systems: The manufacturer will list specific brands and types of chimney pipe (e.g., “Class A” or “Type HT”) that are certified for use with your stove. Using anything else voids the warranty and is illegal in most jurisdictions.
- Maximum Horizontal Run: Most codes and manufacturers severely limit or forbid horizontal runs of chimney pipe. The stove should vent vertically as quickly as possible. If a horizontal section is absolutely necessary, it will have a strict maximum length (often 5-10 feet) and must be sloped upward at a minimum angle (usually 1/4 inch per foot).
- Connector Pipe Requirements: The short section of pipe connecting the stove to the first fixed support or wall thimble is often called the “connector.” It may have different clearance rules than the main chimney system.
Practical Tip: Take a photo of these pages from your manual. You’ll refer to them constantly during planning and installation.
Step 2: Survey the Path & Take Precise Measurements
You need to map the exact route from your stove’s flue outlet to the roof. This is a 3D puzzle.
- Interior Route: Will the pipe go straight up through a closet, a corner of a room, or an interior wall chase? Sketch it out. Measure every vertical and horizontal dimension.
- Exterior Route: If the pipe must exit the house and run along an exterior wall before going up, this is the riskiest configuration for downdraft and requires very careful planning. Interior runs are always preferred.
- Roof Penetration Point: Identify the exact spot on the roof where the pipe will exit. This must be as high and as central as possible relative to the roof peak to meet height requirements and avoid turbulent air from the ridge. Avoid low-slope roofs if possible.
- Total Height Calculation: You need to calculate the total chimney height from the stove flue collar to the final tip. This includes all pipe sections, elbows, and the vertical rise above the roof. Use the stove manual’s formula, which typically requires a minimum total height (e.g., 15 feet) to establish proper draft, plus the mandatory roof clearance (3 feet above the roof, 2 feet above anything within 10 feet).
Step 3: Research & Obtain Permits
This is not a step to skip. Call your local building department. Explain you are installing a wood stove and need to know:
- What permits are required?
- Which building and fire codes apply (often the International Residential Code -IRC- and local amendments)?
- Do they require an inspection? If so, when (typically after rough-in and after final)?
- Are there any specific local restrictions (e.g., historic districts, HOA rules)?
Paying for a permit and scheduling an inspection is a small price for a legal, insured, and safe installation. It also protects you if you ever sell your home. The inspector will verify clearances, support spacing, roof flashing, and final height.
Phase 2: Selecting the Right Equipment & Materials
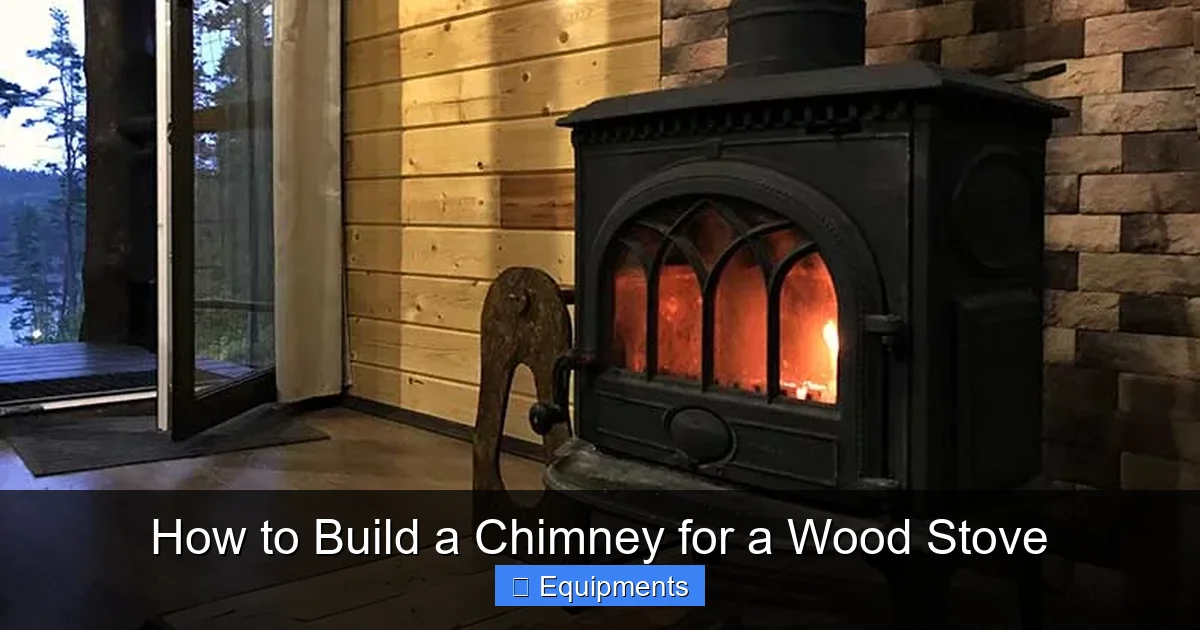
You cannot use standard HVAC duct, stovepipe from a hardware store, or any improvised materials. You must use a listed factory-built chimney system designed for solid fuel appliances. These are typically categorized as Class A or Type HT (High Temperature) chimneys. They are double-walled or triple-walled systems with an inner stainless steel or ceramic liner, insulating material (like vermiculite or dense ceramic), and an outer stainless steel or painted galvanized casing.
Visual guide about How to Build a Chimney for a Wood Stove
Image source: fullservicechimney.com
Component Breakdown: What You’ll Actually Buy
A complete chimney system is modular. You purchase the pieces that fit your planned route.
- Starter Section (or Pipe Length): The first section that attaches directly to the stove’s flue collar. It may be a special “shiplap” or “snap-lock” section that telescopes into the next piece.
- Straight Pipe Sections: Available in 2-foot and 3-foot lengths. They have male/female ends that lock together. The inner liner must face inward.
- Elbows (45° and 90°): Used for changing direction. Critical: Each 90° elbow dramatically reduces draft (equivalent to adding 5-10 feet of vertical pipe). Use 45° elbows where possible. Never use more than two 90° elbows in a system.
- Wall Support / Thimble: A fire-resistant collar that passes through a combustible wall. It provides a secure, code-compliant penetration point with proper clearance. The chimney pipe must be supported at this point and at regular intervals.
- Roof Support / Flashing: The crucial component that seals the pipe penetration through the roof. It must be sized for your specific pipe diameter and roof pitch (e.g., “6/12 pitch”). It is not a DIY fabrication; it is a manufactured, listed product.
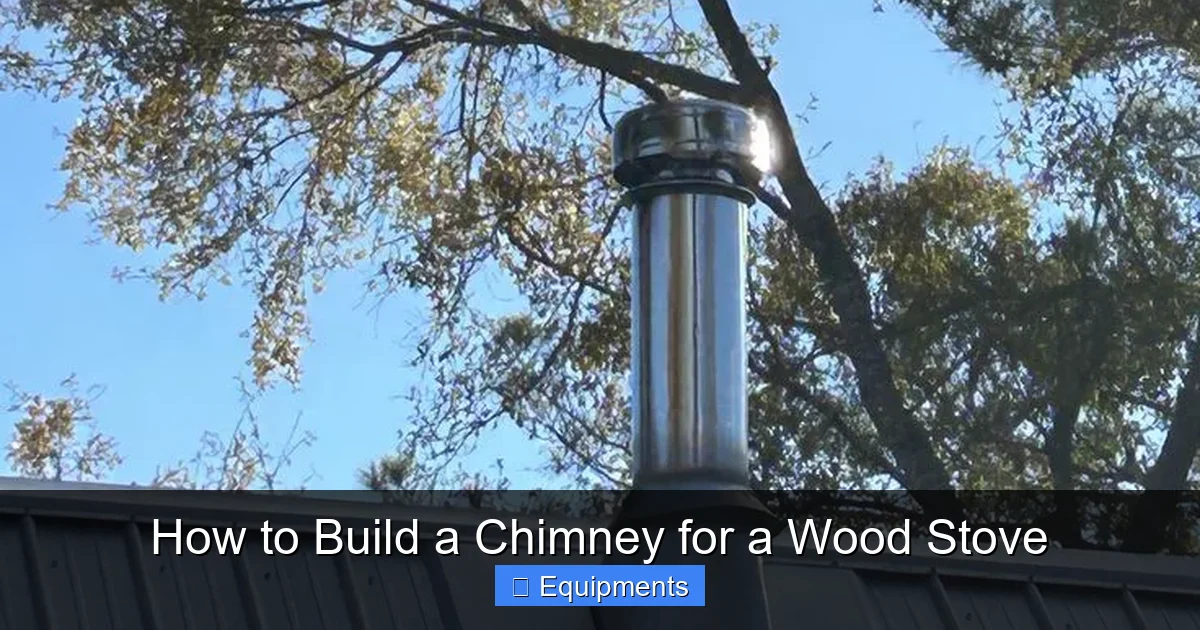
- Storm Collar & Rain Cap: The storm collar fits over the pipe where it exits the flashing, sealing the top of the flashing from weather. The rain cap (or spark arrestor) sits on top of the chimney to prevent rain, snow, debris, and sparks from entering or exiting.
- Support straps / Wall Brackets: Every 8-10 feet of vertical run (check manufacturer specs), the chimney must be secured to the wall or structure with listed support straps to prevent tipping.
- Insulation (if needed): For runs through unconditioned spaces (like an attic or garage), you may need to add insulating chimney wrap to maintain high flue gas temperature and prevent excessive condensation and creosote formation.
Tool Checklist
You’ll need:
- Pipe wrench or channel-lock pliers
- Tape measure & level
- Marker
- Drill with metal-cutting bits (for support strapping)
- Screwdriver / impact driver
- Reciprocating saw or angle grinder (for cutting through wall/roof materials)
- Safety gear: gloves, safety glasses, dust mask
- Specialty: A chimney brush of the correct diameter for your pipe. Buy this now; you’ll need it for cleaning later.
Phase 3: The Installation Process – Step-by-Step
With plans approved, materials staged, and the area protected (drop cloths, etc.), we begin. Important: The stove itself should NOT be connected until the entire chimney system is complete, tested, and approved.
Visual guide about How to Build a Chimney for a Wood Stove
Image source: i.pinimg.com
Step 1: Install the Stove (or at least position it)
Place the wood stove in its final location, respecting the clearances noted in your manual. Use a non-combustible floor pad (listed hearth extension) if required. Do not connect it to power or gas (if it has a gas starter). Just get it positioned. Mark the center point on the ceiling or wall above where the flue outlet aligns.
Step 2: Cut the Penetration(s)
This is the first major destructive step.
- For an Interior Chase: If the pipe runs inside a closet or enclosed wall, you will frame a “chase” (a box) around the planned pipe route using metal studs or wood, maintaining the required clearance to combustibles. You then cut holes in the top plate of the chase and the floor/ceiling above for the pipe to pass through.
- For a Through-Wall Installation: If the pipe must exit through an exterior wall, you will cut a large, precisely sized hole for the wall thimble. The thimble’s outer dimensions will determine your cut size. This hole must maintain clearance from any framing members. Use a reciprocating saw carefully.
- For the Roof: THIS IS THE MOST DANGEROUS PART. STRONGLY CONSIDER HIRING A PROFESSIONAL. If you proceed, use extreme caution. From the attic, mark the exact center point on the roof sheathing. Cut a hole slightly larger than the outer diameter of your flashing. The flashing will sit on the roof surface and its flange will be sealed under the roofing shingles.
Step 3: Assemble the Pipe System from the Top Down (or Bottom Up)
The standard method is to start from the roof and work downward, assembling sections and lowering them through the penetration. This is easier than trying to push pipe upward from the stove.
- From the attic/roof, lower the first section of pipe through the roof hole. It will eventually rest on the roof support or flashing.
- Install the roof flashing. This is a precision fit. The pipe’s outer casing must pass through the flashing’s pipe opening. The flashing’s base flange will be installed *under* the existing shingles (you’ll need to carefully lift adjacent shingles). Seal the flange to the roof with high-temperature roofing cement and secure with roofing nails. Re-seal the lifted shingles. This is where 90% of roof leaks originate if done poorly.
- Install the storm collar over the pipe and flashing, sealing it to the pipe with high-temp silicone.
- Lower pipe sections down through the flashing, adding straight sections and any necessary 45° elbows as you go. Ensure each lock is fully engaged. The inner liner must be clean and unobstructed.
- As the pipe descends, install wall support straps at the intervals specified by the manufacturer (usually every 8-10 feet). These must be secured to solid framing (studs, joists) with long, corrosion-resistant screws.
- If passing through a wall thimble, the pipe should be centered within the thimble with the required clearance. The thimble itself is secured to the wall framing.
- Continue until the lower end of the pipe is at the height where it will connect to the stove’s connector.
Pro Tip: Have a helper on the roof to manage the pipe as you lower it. Use a rope to control the descent if needed.
Step 4: The Final Connection & Support
The last section of chimney pipe, now protruding from the wall or ceiling, is connected to the stove’s connector pipe (often a short piece of single-wall, black stovepipe). This connector must be as short and straight as possible. The connection point (the first fixed support) must be within 18 inches of the stove outlet per most codes.
- Secure the final section of Class A pipe to a wall support or ceiling support very close to where it meets the stove connector.
- Install the connector pipe from the chimney pipe down to the stove flue collar. Use a stovepipe wrench to tighten the bands. Do not over-tighten and deform the pipe.
- Ensure the entire assembly is plumb and level as required. The final chimney height above the roof must meet the 3-2-10 rule (3 feet above the roof, 2 feet above anything within 10 feet). Use a roof cap to achieve exact height.
Phase 4: Testing, Inspection, and Final Touches
The pipe is up. The connections are tight. Now you prove it works safely.
The Essential Smoke Test (A Cold Test)
Before lighting your first fire, you must perform a smoke test to check for leaks and draft.
- Seal the System: Close the stove damper (if it has one). From the stove side, completely seal the flue collar opening. You can use a wad of aluminum foil or a purpose-made flue plug. You are trying to create a slight vacuum inside the cold chimney.
- Create Smoke: Light a small, smoky fire (like a few pieces of newspaper twisted into a tight roll) or use a smoke pencil inside the stove. Let it generate smoke, then let it die down so you have a room full of light smoke.
- Observe: Go to every joint, seam, thimble, and penetration point in the chimney system. You should see no smoke escaping. Even a tiny wisp indicates a leak or poor connection. Any leak must be disassembled, the sealing gasket (if applicable) replaced or the connection re-tightened, and retested.
- Check Draft (Optional but Recommended): With the stove cold and unsealed, light a match and hold it near the open flue collar. The flame should be pulled steadily into the flue, not blown out or sucked in erratically. This indicates baseline draft.
Scheduling the Official Inspection
Contact your building inspector for a final inspection. They will:
- Verify all clearances are met (often using a “clearance gauge”).
- Check that all supports are properly installed.
- Inspect the roof flashing and storm collar for proper installation.
- Confirm the chimney meets the required height above the roof.
- Ensure you are using the correct, listed components.
- Review your permit paperwork.
Do not operate the stove until you have passed this inspection and received final approval. It is a legal requirement in most areas.
Phase 5: Operation, Maintenance, and Troubleshooting
Your chimney is built and approved. Now begins its life of service.
The Golden Rule: Annual Professional Cleaning & Inspection
This is the single most important maintenance task. Hire a CSIA (Chimney Safety Institute of America) certified chimney sweep annually, preferably before the burning season. They will:
- Remove all creosote deposits (a flammable byproduct of wood burning that can cause chimney fires).
- Inspect the entire system for cracks, corrosion, blockages (nests, debris), and deterioration of the liner and supports.
- Check the firebox and stove for cracks.
- Ensure the damper operates (if present).
Keep a copy of their inspection report. It is valuable for your records and future home sales.
DIY Cleaning: The How-To (For Between Professional Sweeps)
You can perform light cleaning yourself with the proper brush and rods, but understand the risks (soot, creosote dust, roof work). Always wear a respirator, goggles, and coveralls.
- Ensure the stove is completely cold.
- Remove the stovepipe connector from the chimney pipe.
- From the bottom (stove side), insert the brush head attached to flexible rods. Work it up and down the length of the accessible pipe, agitating to dislodge creosote.
- Use a vacuum with a HEPA filter to clean the stove and firebox of all debris. Never use a household shop vac for creosote ash.
- For the upper portion of the chimney, you may need to access it from the roof (extremely dangerous). This is why professional service is highly recommended.
Common Problems & Quick Fixes
- Smoke Spilling into the Room: This is a draft problem. Check for: a cold chimney (pre-warm with a hair dryer or newspaper), an obstruction (bird nest), negative pressure from other exhaust fans (kitchen, bathroom), or insufficient chimney height. The solution is often increasing the chimney height.
- Excessive Creosote Buildup: Caused by burning wet, unseasoned wood or operating the stove at low, smoldering temperatures. Solution: Only burn dry, seasoned wood (moisture content below 20%). Build hot, fast fires initially to heat the flue, then reduce air for sustained burn.
- Condensation / Leaks in the Pipe: New pipes can sweat condensation. This usually stops once the pipe is “cured” by several hot fires. Persistent leaks at joints mean a poor connection or a damaged gasket.
Conclusion: Safety is the Ultimate Goal
Learning how to build a chimney for a wood stove is a deep dive into the intersection of physics, building science, and strict safety protocols. The process outlined here—from the meticulous planning and code research to the careful selection of UL-listed components and the precision of the installation—is designed to result in a system that is not only functional and efficient but, above all, safe. The warmth from your wood stove is a simple pleasure, but the complex chimney that makes it possible demands respect. There is no shame in hiring a certified professional for the entire job or for the critical roof penetration phase. The investment protects your home, your family, and your peace of mind. Treat your chimney system with the seriousness it deserves, commit to a lifetime of annual inspections and cleanings, and you will enjoy the timeless comfort of a wood fire for decades to come, with confidence and security.
Frequently Asked Questions
Do I really need a permit to install a wood stove chimney?
Yes, in virtually all jurisdictions. A permit ensures your installation meets current safety codes and is inspected for compliance. Installing without a permit is illegal, voids insurance, and creates a major liability if a fire occurs. It also protects future home buyers.
Can I build the entire chimney myself, or should I hire a pro?
This depends on your skill level. If you are a competent DIYer with experience in roofing, framing, and reading technical instructions, you can handle the interior planning, pipe assembly, and support installation. However, the roof penetration and flashing installation are high-risk, high-skill tasks where mistakes lead to leaks and fires. Most experts recommend hiring a certified chimney professional for all work above the roofline and for the final connection and testing.
How much does it typically cost to have a chimney professionally installed for a wood stove?
Costs vary widely based on location, roof complexity, height, and materials. A complete professional installation, including the chimney system, roof flashing, labor, and permits, typically ranges from $2,000 to $5,000 or more. Get multiple detailed quotes from CSIA-certified companies.
What’s the difference between single-wall stovepipe and Class A chimney pipe?
Single-wall black stovepipe is for short, interior horizontal or vertical runs inside the room connecting the stove to a wall or ceiling thimble. It has very low clearance to combustibles (often 18 inches) and cannot be used for through-the-roof or exterior runs. Class A (Type HT) chimney pipe is a factory-built, double-walled, insulated system. It is designed for all vertical runs, through-the-roof applications, and exterior installations, with much smaller clearance requirements (often 2 inches). You must use Class A pipe from the first fixed support or wall thimble all the way to the roof cap.
How often does a wood stove chimney really need to be cleaned?
At a minimum, once per year by a certified professional, before the heating season begins. If you burn your stove regularly as a primary heat source, you may need cleanings 2-3 times per season. The rate of creosote formation depends entirely on wood species, moisture content, and burning practices. Never guess; have a pro inspect it annually.
My chimney is smoking into the house. What could be wrong?
Smoke spillage is a draft issue. Common causes include: a cold flue (pre-warm it), an obstructed flue (nest, debris), insufficient chimney height (it may need to be taller), a closed or partially closed damper, negative air pressure from other exhaust fans (run a kitchen fan, etc.), or a leaky chimney connection allowing smoke to escape inside the house. Start by checking for obvious obstructions and ensuring the flue is fully open. If the problem persists, call a professional for a draft diagnosis.