Braising ribs in the oven is the secret to achieving unmatched tenderness and deep, complex flavor with minimal effort. This low-and-slow cooking method transforms tough cuts into succulent meat that literally falls off the bone. By searing first and then simmering in a flavorful liquid covered for hours, you create a self-basting environment that breaks down collagen perfectly. Follow this comprehensive guide for foolproof, restaurant-quality ribs straight from your kitchen.
Key Takeaways
- Low and slow is non-negotiable: Braising requires consistent, low oven heat (typically 275°F – 300°F / 135°C – 150°C) for 2.5 to 4 hours to properly melt connective tissue into gelatin.
- The sear is crucial for flavor: Never skip the initial stovetop sear. It creates the Maillard reaction, yielding a rich, browned crust that adds profound depth to the final dish.
- Liquid choice defines the profile: Your braising liquid (broth, beer, wine, cider) and aromatics (onion, garlic, herbs) infuse the meat from the inside out. It’s the flavor foundation.
- Create a perfect seal: A tight-fitting Dutch oven lid or foil wrap traps steam, ensuring the ribs cook in their own vapor and braising liquid, preventing drying.
- Resting is part of cooking: Let the ribs rest, covered, for 20-30 minutes after braising. This allows juices to redistribute, making them even more tender and easier to handle.
- Finish with texture contrast: For a caramelized crust, finish the ribs under a broiler or on a grill for 2-5 minutes after braising, glazing with sauce if desired.
- Don’t discard the braising liquid: The liquid becomes an incredible, rich sauce. Strain it, skim excess fat, and reduce it on the stove for a luxurious finishing glaze.
📑 Table of Contents
- Why Braising is the Ultimate Technique for Tender Ribs
- Choosing Your Ribs: Pork vs. Beef and Cuts Explained
- The Essential Equipment: Your Dutch Oven is Key
- Step-by-Step: The Braising Process from Sear to Sauce
- Flavor Variations: Customize Your Braising Liquid
- Troubleshooting & Pro Tips for Perfection
- The Grand Finale: Serving Your Braised Ribs
Why Braising is the Ultimate Technique for Tender Ribs
Let’s be honest. Perfect ribs are the holy grail of home cooking. We’ve all experienced the disappointment of chewing endlessly on a tough, dry rack. The magic of braising bypasses this problem entirely. It’s a two-part, moist-heat cooking method designed specifically for tough, muscular cuts of meat—like pork spareribs or beef short ribs—that are packed with connective tissue and collagen.
The first step, searing, is all about building flavor. When you get a good brown crust on the meat, you’re triggering the Maillard reaction, a chemical process that creates hundreds of new flavor compounds. It’s the difference between a boiled, bland piece of meat and something that tastes deeply savory and complex. The second step, the slow simmer in a covered pot with liquid, is about transformation. That tough collagen doesn’t just soften; it dissolves into the cooking liquid and turns into unctuous, mouth-coating gelatin. This is what gives braised ribs their legendary, fall-off-the-bone texture and luxurious mouthfeel. The oven provides the most even, hands-off heat source for this hours-long process, making it the ideal method for achieving perfection without constant monitoring.
Choosing Your Ribs: Pork vs. Beef and Cuts Explained
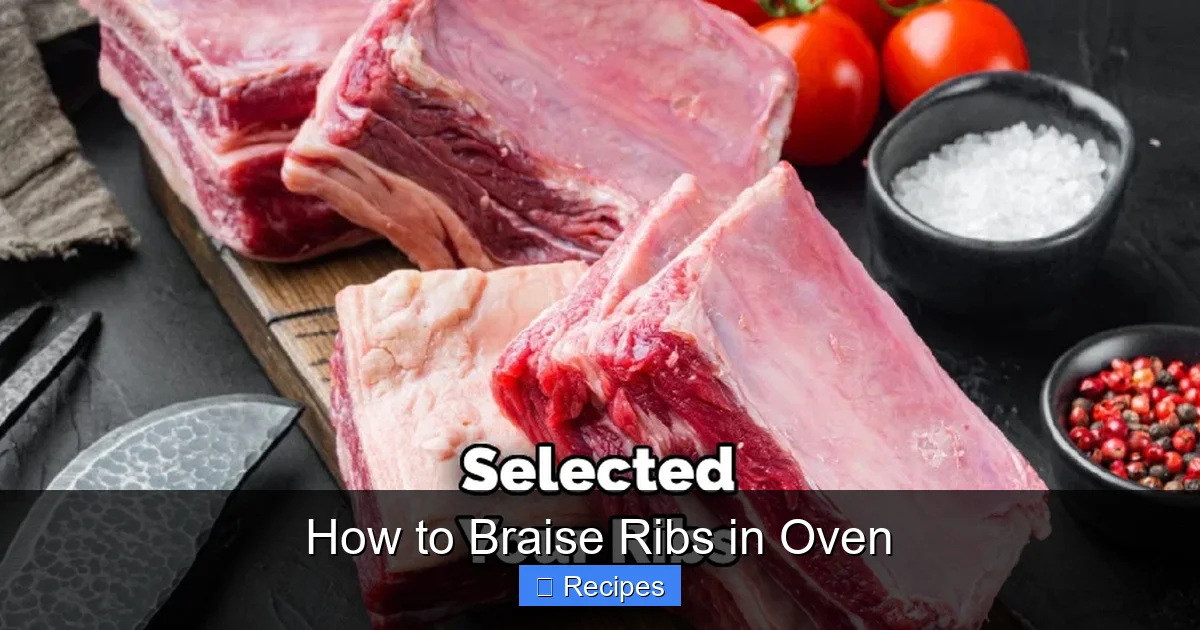
Before you even heat a pan, choosing the right ribs is your first critical decision. The two main contenders braise beautifully but have distinct characteristics.
Visual guide about How to Braise Ribs in Oven
Image source: thekitchenix.com
Pork Spareribs
These are the classic BBQ rib, coming from the belly side of the pig. They have a good meat-to-bone ratio, are relatively fatty, and have a milder, sweeter flavor. For braising, you’ll typically find them in two main styles:
- St. Louis Style: The rectangular, trimmed rack with the sternum bone, cartilage, and rib tips removed. They cook more evenly and are easier to portion.
- Baby Back Ribs: Looser, curvier ribs from the top of the ribcage near the spine. They are more tender (and expensive) to begin with, so they require slightly less braising time—often about 1.5 to 2.5 hours. They can dry out more easily if over-cooked.
Pro Tip: Look for ribs with a good, even pink color and marbling. Avoid any with dried-out edges or a strong, unpleasant smell.
Beef Short Ribs
These are the heavyweight champions of braising. English-cut short ribs are a single, thick, bone-in piece of meat (about 2-3 inches thick) with a generous layer of fat and dense connective tissue. They are incredibly rich, beefy, and unctuous when braised correctly. They require a longer cook time—often 3 to 4 hours—to fully break down their substantial structure. The result is less about “falling off the bone” and more about a sliceable, fork-tender piece of meat with a sublime texture.
Pro Tip: If you see “flanken-style” beef short ribs, these are cut across the bone into thin strips (often used in Korean galbi). These are fantastic but cook much faster, in about 1.5 to 2 hours.
The Essential Equipment: Your Dutch Oven is Key
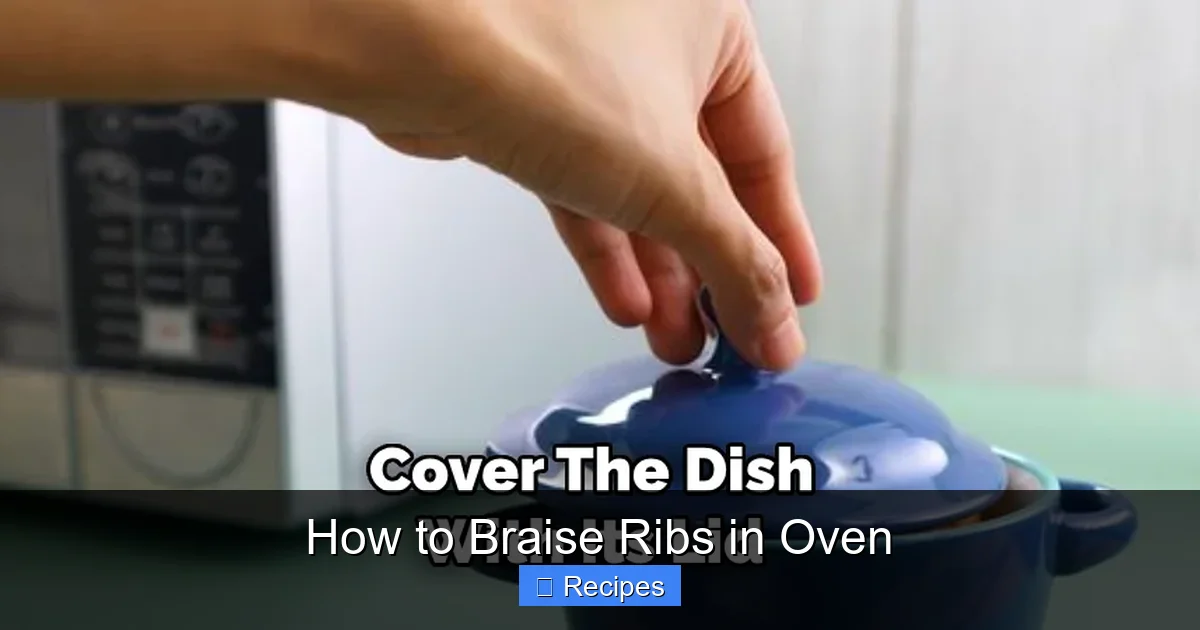
You truly only need one specialized piece of equipment for perfect oven-braised ribs: a heavy, oven-safe pot with a tight-fitting lid. The undisputed champion is a Dutch oven, typically made of enameled cast iron or bare cast iron.
Visual guide about How to Braise Ribs in Oven
Image source: thekitchenix.com
- Why a Dutch Oven? Its thick walls provide superb, even heat retention and distribution, eliminating hot spots. It goes from stovetop to oven seamlessly. The heavy lid creates a perfect seal, trapping in steam and vapor. Enameled versions are easier to clean and don’t react with acidic ingredients like tomatoes or wine.
- Size Matters: For a full rack of pork ribs (about 2-3 lbs), a 5-6 quart Dutch oven is ideal. For larger beef short ribs or multiple racks, step up to a 7-8 quart. The ribs should fit snugly in a single layer without being crammed. They need space for the braising liquid to circulate.
- Alternatives: A heavy, oven-safe saucepan with a tight lid can work for smaller batches. You can also use a sturdy roasting pan covered tightly with aluminum foil, but it won’t retain heat as evenly as a Dutch oven.
Step-by-Step: The Braising Process from Sear to Sauce
Now, let’s walk through the process. This method works for both pork and beef ribs, with adjustments for time.
Visual guide about How to Braise Ribs in Oven
Image source: i.pinimg.com
Step 1: Prep and Dry the Ribs
Remove your ribs from the refrigerator 30 minutes before cooking. Pat them extremely dry with paper towels. This is the #1 secret to a good sear. Any surface moisture will steam the meat instead of browning it. If the rack is very long, you can have the butcher or use a heavy knife to cut it into 2-3 rib sections for easier handling and more even cooking.
Step 2: The Mandatory Sear
Preheat your Dutch oven over medium-high heat. Add 1-2 tablespoons of a high-smoke-point oil (like avocado, canola, or vegetable oil). Once shimmering, working in batches if necessary to avoid crowding, place the ribs meat-side down. Do not move them. Let them sear for 3-5 minutes until a deep, dark brown crust forms. Flip and sear the other side for 2-3 minutes. Remove the ribs and set them on a plate. Don’t worry about cooking them through; this is purely for color and flavor.
Step 3: Build the Braising Liquid Base
With the pot still hot, reduce heat to medium. Add a diced onion, a couple of chopped carrots, and a stalk of celery (the classic mirepoix). Cook, stirring, for 5-7 minutes until softened. This builds a sweet, aromatic base. Add 3-4 minced garlic cloves and cook for 1 minute more until fragrant—don’t let it burn.
Now, deglaze! Pour in 1 cup of your chosen liquid (beer, red wine, apple cider, or broth) and use a wooden spoon to scrape up all the delicious browned bits stuck to the bottom (the fond). This is pure flavor. Let it simmer for 2 minutes to burn off the raw alcohol if using wine or beer.
Step 4: Add Aromatics and Liquid
Stir in your herbs and spices. A classic combination is 2 bay leaves, 1 teaspoon whole black peppercorns, and a sprig of fresh thyme or rosemary. Then, pour in enough of your main braising liquid to come about halfway up the sides of the ribs. For pork, a mix of equal parts apple juice/cider and chicken broth is fantastic. For beef, use a robust beef broth, perhaps with a splash of red wine. The liquid should not cover the ribs completely; the top half will steam and brown from the trapped vapor.
Step 5: The Oven Braise
Bring the liquid to a gentle simmer on the stovetop. Return the ribs to the pot, nestling them into the liquid and vegetables, meat-side up if possible. Cover the pot tightly with its lid. Transfer it to a preheated oven.
- Temperature: Set your oven to 300°F (150°C). This is the sweet spot for gentle, steady cooking without toughening the meat.
- Time: Braise for 2.5 to 3 hours for pork ribs and 3 to 4 hours for beef short ribs. The ribs are done when a fork or knife slides into the thickest part of the meat with zero resistance and meets the bone with a gentle twist.
Important: Check the pot after the first hour. If the liquid is boiling aggressively, reduce the oven temperature to 275°F. You want a steady, gentle simmer, not a rolling boil.
Step 6: Rest and Reduce the Sauce
Once tender, carefully remove the pot from the oven. Use tongs to transfer the ribs to a clean baking sheet or platter. Cover loosely with foil and let them rest for at least 20 minutes. This is crucial for juicy results.
While the ribs rest, strain the braising liquid through a fine-mesh sieve into a saucepan, discarding the solids. Skim off as much excess fat from the surface as you can. Bring the liquid to a boil and reduce it by half or until it coats the back of a spoon. This concentrated sauce is your reward. Season it with salt and pepper to taste. You can also whisk in a tablespoon of cold butter at the end for a glossy finish.
Flavor Variations: Customize Your Braising Liquid
The beauty of braising is how the liquid becomes the soul of the dish. Here are three master formulas to inspire you.
The Classic Beer & Mustard Braise (Pork)
Use 1.5 cups of a malty, non-hoppy beer (like a brown ale or lager) and 0.5 cups chicken broth. Add 2 tablespoons of whole-grain mustard and a tablespoon of brown sugar to the deglazing step. This creates a tangy, sweet, and savory sauce perfect for pork.
Red Wine & Tomato Braise (Beef)
Use 2 cups of a dry, drinkable red wine (like Cabernet Sauvignon or Merlot) and 1 cup beef broth. Add a 14-ounce can of crushed tomatoes and a tablespoon of tomato paste when you add the aromatics. This yields a rich, Italian-inspired osso buco-style sauce.
Asian-Inspired Ginger-Soy Braise (Either)
Use 1.5 cups of low-sodium chicken or beef broth and 0.5 cups of coconut water or pineapple juice. Add 1/4 cup soy sauce, 2 tablespoons grated ginger, 3 minced garlic cloves, and 1 teaspoon of five-spice powder to the deglazing step. Garnish with sliced scallions and toasted sesame seeds.
Troubleshooting & Pro Tips for Perfection
Even with a simple method, small issues can arise. Here’s how to solve them.
- Problem: My ribs are still tough after the recommended time.
Solution: They simply need more time. The collagen breakdown happens at its own pace. Put the lid back on and braise for another 30-45 minutes. True doneness is determined by a fork test, not the clock. - Problem: My sauce is too thin or watery.
Solution: You must reduce it. After straining, simmer the liquid uncovered until it reaches your desired consistency. You can also mix 1 tablespoon of cornstarch with 2 tablespoons of cold water and whisk it in, simmering for 2 minutes to thicken. - Problem: I don’t have a Dutch oven.
Solution: Use a heavy, oven-safe saucepan or a deep roasting pan. If using a roasting pan, create a tight seal by covering it with a double layer of heavy-duty aluminum foil, crimped tightly around the edges. - Problem: Can I braise ribs ahead of time?
Solution: Absolutely! Braised ribs taste even better the next day. Complete the entire process, let them cool in the braising liquid in the pot, then refrigerate. To serve, reheat gently on the stovetop or in a 300°F oven, then finish under the broiler if desired.
The Grand Finale: Serving Your Braised Ribs
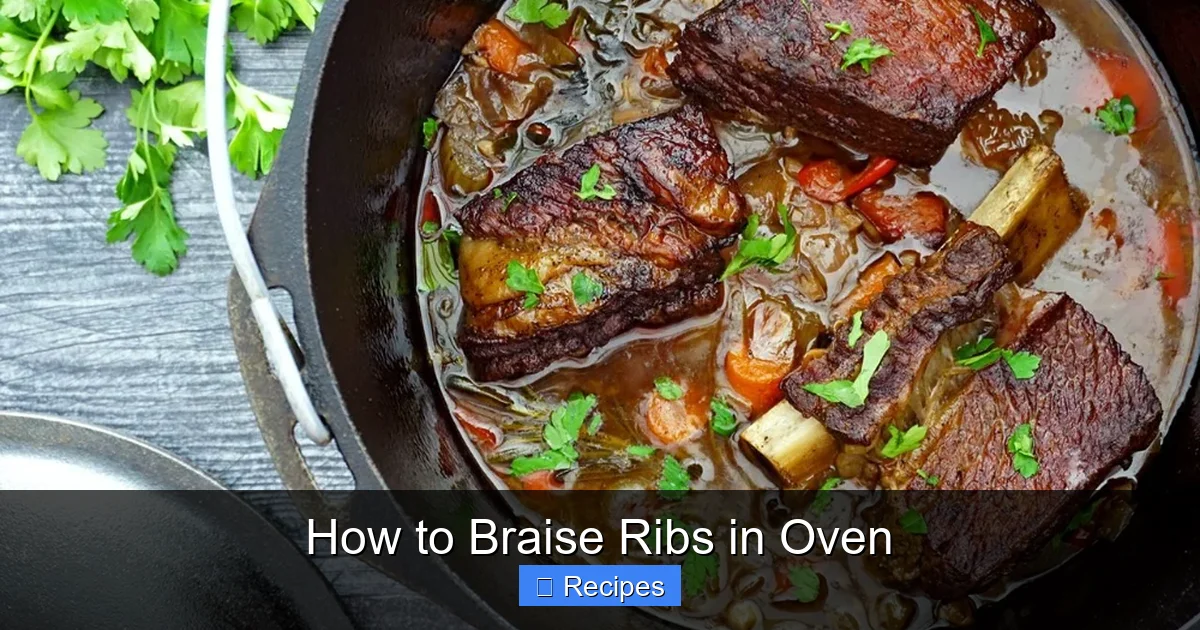
Now for the best part. The final texture after a proper braise and rest should be incredibly tender, with the meat pulling away from the bone with the slightest touch. For pork ribs, you can often separate them into individual ribs by gently twisting the bone. For beef short ribs, they will slice cleanly across the grain.
For the ultimate textural contrast, finish them under a broiler. Place the rested ribs on a baking sheet, meat-side up. Brush them generously with your reduced sauce. Broil on high for 2-4 minutes, watching closely, until the surface is caramelized and sticky. This step adds a beautiful, slightly crisp exterior that contrasts wonderfully with the melt-in-your-mouth interior.
Serve the ribs with the remaining warm sauce on the side or drizzled over the top. Classic accompaniments include creamy mashed potatoes, buttered egg noodles, or crusty bread to soak up every last drop of that incredible sauce. A simple, bright green salad or pickled vegetables provide a refreshing counterpoint to the rich meat.
Frequently Asked Questions
Can I braise ribs without searing them first?
While searing is highly recommended for maximum flavor development, you can technically skip it in a pinch. However, your final dish will lack the deep, savory, browned crust and complex flavor that the Maillard reaction provides. The ribs will still become tender but will taste flatter and more one-dimensional.
What’s the best braising liquid for pork ribs?
There is no single “best” liquid, as it depends on your desired flavor profile. A combination of apple juice or cider and chicken broth is a classic, foolproof choice that complements pork beautifully. For a richer, darker sauce, use beer (like a brown ale) or a mix of beer and broth. For a sweeter note, use cola or root beer. Always include aromatics like onion and garlic.
How do I know when the ribs are done braising?
Time is a guide, but texture is the truth. The ribs are done when a fork or the tip of a sharp knife can be inserted into the thickest part of the meat with no resistance at all. You should be able to gently twist a pork rib bone and have the meat pull away cleanly. For beef short ribs, a knife should slide through the meat as if it were soft butter. If there’s any chewiness, they need more time.
Can I use a slow cooker instead of the oven?
Yes, you can adapt this method for a slow cooker. After searing the ribs and sautéing the vegetables on the stovetop, transfer everything to a 6-quart or larger slow cooker. Add the braising liquid. Cook on LOW for 6-8 hours for pork ribs or 8-10 hours for beef short ribs. The results will be similarly tender, though you miss out on the potential for a final broiler finish unless you transfer the ribs to a baking sheet.
My braising sauce is too salty. How can I fix it?
If you’ve oversalted, the best fix is to dilute. Add a splash of unsalted broth or water to the reduced sauce, then taste and adjust. You can also add a small amount of sweetness (a teaspoon of honey or a pinch of brown sugar) to balance the saltiness. The most important prevention is to use low-sodium broth and season the final reduced sauce carefully, as the liquid concentrates as it reduces.
Are spare ribs or baby back ribs better for braising?
Both are excellent, but they behave differently. Spareribs (including St. Louis style) have more fat and connective tissue, making them ideal for the long, slow braise. They become incredibly juicy and tender. Baby back ribs are more tender and leaner to start with, so they require less cooking time (often 1.5-2.5 hours) and can become dry if over-braised. For a foolproof, ultra-tender result, many prefer the forgiving nature of spareribs for braising.
Pingback: Oven Baked Ribs in Aluminum Foil - kitchenandhouseware.com