Converting a natural gas stove to propane requires swapping out specific internal components, primarily the burner orifices and adjusting the regulator pressure. This is not a simple plug-and-play task and carries serious risks if done incorrectly, including gas leaks, fires, or carbon monoxide poisoning. Always start by checking your stove’s manufacturer for an approved conversion kit and instructions. If you are not 100% confident in your mechanical skills and understanding of gas systems, hiring a qualified appliance technician is the only safe recommendation.
Key Takeaways
- Safety is Paramount: Improper conversion can lead to explosive gas leaks, fires, or deadly carbon monoxide poisoning. If unsure, hire a professional.
- Manufacturer Approval is Essential: Your stove’s brand and model must have a specific, approved propane conversion kit available. Using generic or incorrect parts is extremely dangerous.
- Propane Has Higher Pressure: Propane operates at about 10-11 inches of water column pressure, while natural gas is around 7. The regulator must be adjusted or swapped.
- Orifice Size is Critical: Propane requires smaller burner orifices (holes) because it’s denser and has more BTUs per cubic foot than natural gas. Using the wrong size causes improper combustion.
- It’s More Than Just Orifices: A full conversion may also require a new regulator, a different pilot assembly (for older stoves), and sometimes new stove knobs or valve adjustments.
- Leak Testing is Non-Negotiable: After any work, a thorough, methodical leak test with soapy water (or a leak detector solution) on every gas connection is mandatory before lighting the stove.
- Check Local Codes & Warranty: Some areas require a licensed technician to perform gas appliance work. An improper DIY conversion will almost certainly void your manufacturer’s warranty.
📑 Table of Contents
- Introduction: Why Would You Convert a Gas Stove?
- Understanding the Core Differences: Natural Gas vs. Propane
- Safety First: The Non-Negotiable Prerequisites
- The Step-by-Step Conversion Process
- Post-Conversion: The Mandatory Leak Test and Ignition
- Troubleshooting Common Post-Conversion Issues
- Professional Conversion vs. DIY: Making the Right Choice
- Conclusion: Safety Over Savings
Introduction: Why Would You Convert a Gas Stove?
So, you’ve moved into a new home, or maybe you’re setting up a vacation cabin, and you’ve discovered a fantastic natural gas stove sitting in the kitchen. The only problem? The property is serviced by propane, not natural gas. Or perhaps you’ve found an incredible deal on a used natural gas range, but your home runs on propane. This is a very common situation, and the question inevitably arises: can you convert it, and more importantly, how do you convert a natural gas stove to propane?
The short answer is: yes, it is often possible, but it is absolutely not a simple switch. It is a precise mechanical adjustment that changes how the stove’s fuel system operates. Natural gas and propane are both hydrocarbons, but they have different chemical compositions, densities, and pressure requirements. Think of it like using the wrong grade of fuel in a high-performance engine—it might run, but it will perform poorly and could cause catastrophic damage. The same principle applies here. This guide will walk you through the entire process, from understanding the differences to the final safety check, with a constant, unwavering emphasis on safety and manufacturer specifications.
Understanding the Core Differences: Natural Gas vs. Propane
Before you even touch a tool, you must understand why the conversion is necessary. The two fuels behave differently, and your stove is engineered for one specific fuel from the factory.
Visual guide about How Do You Convert a Natural Gas Stove to Propane
Image source: stovewise.com
Pressure and Energy Density
This is the most critical difference. Propane is a liquid under pressure in your tank and becomes a gas when released. It is much denser and contains more energy (BTUs) per cubic foot than natural gas. A natural gas stove’s internal gas valves and orifices are designed for a lower-pressure, lower-BTU fuel. If you feed propane into an unmodified natural gas stove, the flames will be huge, yellow, sooty, and incredibly hot—a major fire and burn hazard. Conversely, feeding natural gas into a propane-converted stove will result in weak, sputtering, mostly blue flames that won’t cook effectively.
The Role of the Orifice
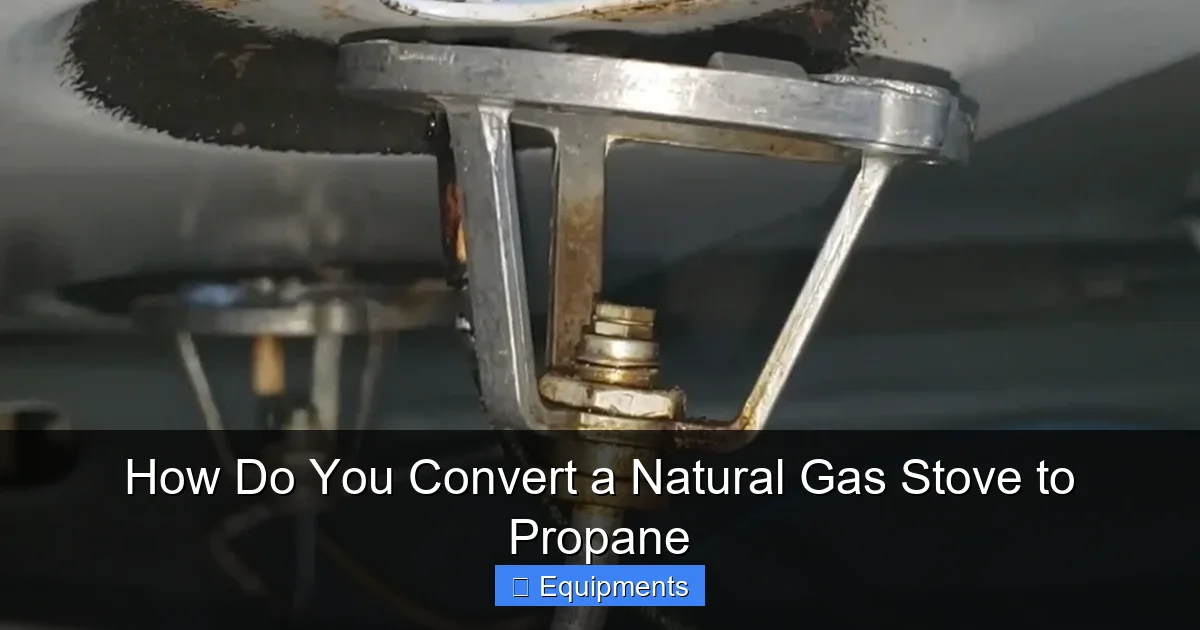
The orifice is a tiny, precisely drilled brass fitting at the end of each burner’s gas tube. It’s the final restriction that meters the exact amount of gas to the burner. Because propane has more energy, it needs a smaller orifice hole to deliver the same heating power (BTU output) as a larger hole for natural gas. A natural gas orifice will simply let too much propane through, leading to the dangerous, oversized flame mentioned above.
Regulator Pressure
The regulator is the device that reduces the high pressure from your home’s gas line to the low, safe pressure the stove’s internal valves can handle. Standard natural gas line pressure is typically around 7 inches of water column (WC). Propane tank pressure, after the regulator, is set higher, usually around 10-11 inches WC. The stove’s internal regulator (or sometimes an external one) must be adjusted or replaced to match this incoming pressure. An incorrect pressure setting will cause poor combustion regardless of the orifice size.
Safety First: The Non-Negotiable Prerequisites
We cannot stress this enough: working with gas is inherently dangerous. Before you even consider the how do you convert a natural gas stove to propane question, you must pass these safety checkpoints.
Visual guide about How Do You Convert a Natural Gas Stove to Propane
Image source: propaneva.com
1. Find the Manufacturer’s Conversion Kit
This is the golden rule. A proper conversion is not about finding “any” small orifice. You need the specific, engineered kit for your exact stove model number. This kit will include the correct orifices (often color-coded), a new regulator spring or entire regulator, and sometimes new pilot burners or knobs. The kit’s instructions are part of the stove’s certified safety design.
- How to find your model number: It’s on a sticker usually on the back panel, inside the oven door frame, or under a cooktop griddle.
- Where to get the kit: Contact the manufacturer’s customer service (e.g., GE, Whirlpool, Samsung, LG, Viking) or an authorized parts distributor. Have your model number ready. Do not use “universal” orifices from a hardware store unless they are explicitly listed for your model.
2. Check Your Warranty and Local Codes
Performing an unauthorized conversion will void your stove’s warranty. More importantly, many municipalities and insurance policies require that any gas appliance work be performed by a licensed professional. A quick call to your local building department or a review of your homeowner’s insurance policy can save you from major liability and financial loss later.
3. Gather the Right Tools and Supplies
You’ll need more than just a wrench. A proper conversion kit is part one. You’ll also need:
- Adjustable wrenches (including small ones for orifice nuts)
- Socket set
- Screwdrivers (various types)
- Gas leak detection solution (or a homemade mixture of dish soap and water in a spray bottle)
- Flashlight
- Gloves
- Manufacturer’s service manual (often available online)
4. Know When to Stop and Call a Pro
If at any point you encounter a situation not covered in your specific model’s manual, if you smell a strong gas odor after disassembly, if you are uncomfortable with any step, or if your stove is an older model with unknown history—stop immediately and call a certified appliance technician. The cost of a service call is trivial compared to the risk of an explosion or carbon monoxide poisoning.
The Step-by-Step Conversion Process
Assuming you have your manufacturer-approved propane conversion kit and have decided to proceed with extreme caution, here is the generalized process. Your stove’s specific manual is the ultimate authority and must be followed.
Visual guide about How Do You Convert a Natural Gas Stove to Propane
Image source: propaneva.com
Step 1: Shut Off the Gas and Disconnect Power
Locate the gas shut-off valve for the stove. It’s usually behind the stove or in the basement. Turn it to the “off” position. If your stove is electric-start, unplug it from the wall. For safety, also turn off the circuit breaker that powers any electronic ignition or clock.
Step 2: Access the Burner Orifices
This varies by model. For most standard ranges:
- Lift or remove the cooktop. This often involves removing screws or grates and carefully prying up the top. Consult your manual.
- Once the cooktop is up, you’ll see the burner caps and the burner tubes. At the end of each tube, where the gas enters, is the orifice. It’s a small brass nut with a tiny hole in the center.
- Some stoves have orifices accessible from underneath the cooktop or behind an access panel. Oven burners will have orifices accessible inside the oven after removing the oven floor panel.
Step 3: Remove and Replace All Burner Orifices
Using the correct size wrench (often 1/2” or 9/16”), carefully unscrew each natural gas orifice. They may be tight. Keep them organized so you know which came from which burner (though in a kit, they are often identical).
- Critical: Do not enlarge or modify the hole in any orifice. Propane orifices are factory-drilled to exact specifications.
- Install the new propane orifices from your kit. Hand-tighten first, then give a firm, final quarter-turn with the wrench. Do not overtighten and strip the threads.
Step 4: Adjust or Replace the Regulator
This is the second most critical step. The regulator is usually located behind the stove, attached to the gas line.
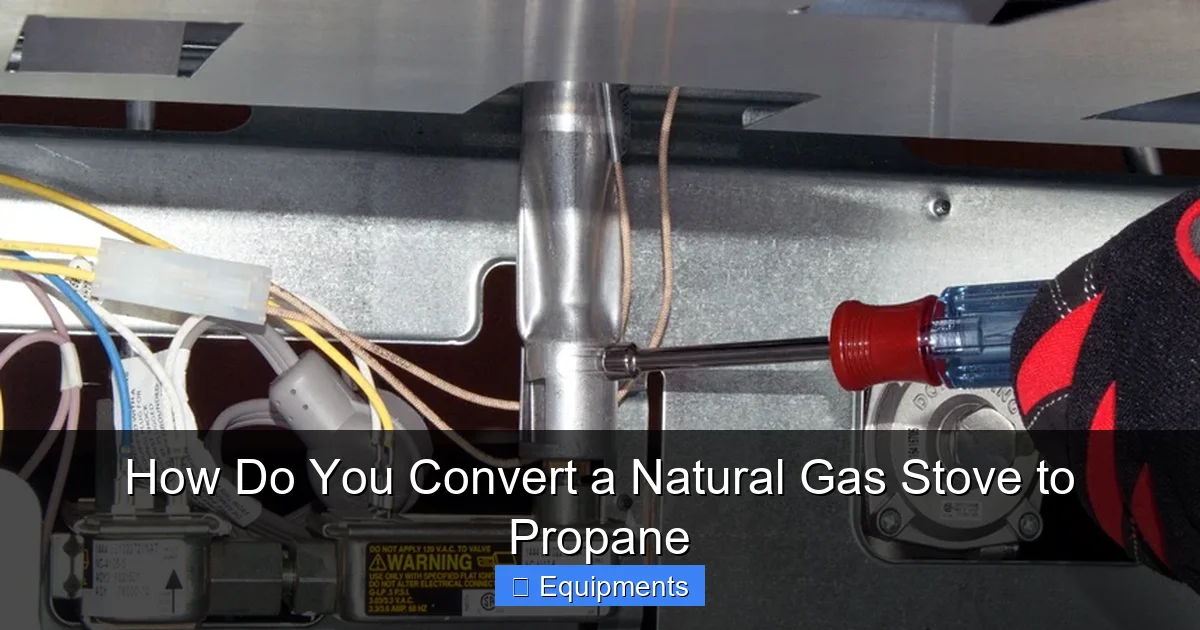
- Adjustable Regulator: Many modern stoves have a regulator with a small access cap. Under the cap is a screw (often a flathead). Turning it clockwise increases pressure, counter-clockwise decreases. Your kit will specify the exact turns (e.g., “turn 2 full turns clockwise”) or the target pressure (10.5” WC). You will need a manometer to set the pressure accurately.
- Replaceable Regulator: Some kits come with a completely new regulator pre-set for propane. In this case, you must remove the old natural gas regulator and install the new one exactly as instructed, ensuring all gas line connections are tight.
Step 5: Check/Replace the Pilot Assembly (If Applicable)
If your stove has a standing pilot light (a constantly burning small flame), it also needs conversion. The pilot orifice is much smaller and must be swapped. The pilot flame itself may need adjustment for a proper, crisp blue flame with a slight yellow tip. The conversion kit will include a new pilot orifice. This step is not needed for electronic ignition stoves.
Step 6: Reassemble the Stove
Carefully put the cooktop back in place, reinstall all burner caps and grates, and reinstall any oven panels. Ensure everything is seated properly.
Post-Conversion: The Mandatory Leak Test and Ignition
Do not, under any circumstances, skip this section. This is where you verify your work is safe.
The Soapy Water Leak Test
With the gas valve still off, mix a solution of dish soap and water in a spray bottle. Turn the gas shut-off valve back on. Now, liberally spray every single gas connection you touched: the orifice threads, the regulator connections, the gas line connection to the stove.
- Watch for Bubbles: If you see steady bubbles forming at any joint, you have a leak. Immediately shut off the gas, tighten that connection slightly, and retest. Do not overtighten brass threads.
- Test all stove burner valves by turning each knob to the “on” (ignite) position (but don’t light it yet). Spray the valve stems and connections behind the knobs if accessible.
Initial Lighting and Flame Adjustment
Once the leak test is 100% bubble-free on all connections:
- Light each burner according to your stove’s normal procedure (usually push and turn the knob).
- Observe the flames: A properly adjusted propane flame should be almost entirely blue, with a well-defined inner cone. It should be steady, not lifting off the burner or making excessive noise. There should be minimal yellow tipping at the very tip of the inner cone.
- If flames are yellow, noisy, or lifting, the pressure may be too high, or the orifice may be incorrect. Shut off the gas and recheck your work. Do not use the stove.
Testing the Oven
Set the oven to a bake cycle. Check the oven burner flame through the sight hole (usually at the back of the oven floor). It should also be blue and stable. Let the oven cycle on and off a few times to ensure stable operation.
Troubleshooting Common Post-Conversion Issues
Even with the correct parts, small adjustments might be needed. Here’s a guide to common problems.
Problem: Flames are Too High, Yellow, and Sooty
Likely Cause: Orifice is too large (from a wrong kit or mislabeled part) OR regulator pressure is set too high. Action: Double-check you have the exact kit for your model. Use a manometer to verify regulator pressure is at the manufacturer’s propane specification (usually 10-11” WC). If pressure is correct, the orifice is wrong.
Problem: Flames are Too Small, Weak, or Won’t Stay Lit
Likely Cause: Orifice is too small OR regulator pressure is set too low. Action: Verify orifice part numbers. Check regulator pressure setting. On older stoves, a weak pilot flame on a converted standing pilot can also cause this.
Problem: Burners Light but Flame Lifts Off the Burner (Hearing a “Whoosh”)
Likely Cause: Regulator pressure is too high, forcing gas out too fast for the burner to contain the flame. Action: Immediately shut off that burner. Reduce regulator pressure in small increments (1/4 turn at a time) and retest.
Problem: Oven Temperature is Inconsistent or Won’t Heat
Likely Cause: Oven burner orifice is incorrect or clogged, or the oven thermostat/control is not calibrated for propane (some require a separate calibration step in the service menu). Action: Verify correct oven orifice is installed. Consult your manual for any electronic calibration steps for propane conversion. This often requires a technician.
Professional Conversion vs. DIY: Making the Right Choice
We’ve laid out the DIY path, but it’s crucial to weigh the options honestly.
The Case for Hiring a Certified Technician
A professional appliance technician brings irreplaceable value:
- Guaranteed Safety: They are trained, insured, and bonded. They carry the proper tools (like calibrated manometers) and know-how to perform flawless leak tests.
- Code Compliance: They will ensure the work meets local mechanical and fuel gas codes, which is often a legal requirement.
- Warranty Preservation: If the manufacturer requires professional installation for warranty coverage, a pro ensures you’re protected.
- Diagnostic Expertise: If something isn’t working right after the conversion, they can quickly diagnose if it’s a part issue, an adjustment, or a deeper problem with the stove itself.
The DIY Scenario: Only If…
Consider DIY only if ALL of these are true:
- Your stove’s manufacturer provides a detailed, model-specific conversion guide.
- You can source the exact, official conversion kit for your model.
- You are mechanically adept, have worked with gas lines before, and own or can borrow a manometer.
- Your local codes explicitly allow homeowner-performed gas appliance conversions (many do not).
- You accept full responsibility for any future issues, warranty voidance, and the inherent risks.
For the vast majority of homeowners, the peace of mind, safety assurance, and relatively modest cost of a professional service call (often $150-$300) make hiring a technician the overwhelmingly smart and responsible choice when asking how do you convert a natural gas stove to propane.
Conclusion: Safety Over Savings
Converting a natural gas stove to propane is a precise technical procedure, not a casual weekend project. It hinges on one foundational principle: using only the manufacturer-approved, model-specific conversion kit and following its instructions to the letter. The process involves swapping tiny, critical orifices, adjusting gas pressure, and performing a meticulous leak test. A single mistake—a missed leak, a cross-threaded connection, a wrong orifice—can have devastating consequences. While the DIY route can save money, it demands significant skill, the right tools, and a deep respect for the dangers involved. For most people, the prudent path is to purchase the correct kit and hire a qualified appliance technician to install it. They will ensure your stove operates safely, efficiently, and reliably on propane for years to come, providing hot meals and peace of mind. Remember, when it comes to gas appliances, there is no such thing as being too safe.
Frequently Asked Questions
Can I convert my natural gas stove to propane myself?
Legally and safely, it depends on your local codes and your skill level. While the physical steps can be done by a competent DIYer with the official kit, many areas require a licensed technician for any gas appliance work. The risks of gas leaks, fire, or carbon monoxide poisoning are very real if done incorrectly. For most homeowners, hiring a pro is the recommended choice.
Will converting my stove to propane void the warranty?
Almost certainly, yes. Manufacturer warranties typically only cover the appliance as shipped from the factory with its designated fuel. Performing an unauthorized conversion, or even using an unapproved kit, will void the warranty. Some manufacturers may offer warranty extensions if the conversion is performed by an authorized service technician using genuine parts. You must check your specific warranty terms.
How much does a professional propane conversion cost?
The total cost typically ranges from $150 to $400, depending on your location, the service company’s rates, and the complexity of your stove. This usually includes the service call, labor, and sometimes the markup on the official conversion kit. It is a small price to pay for guaranteed safety and code compliance.
What happens if I use the wrong propane orifice?
Using an orifice that is too large will cause excessively large, yellow, sooty, and dangerously hot flames, which can damage cookware, cause burns, and create a fire hazard. Using an orifice that is too small will result in weak flames that won’t cook properly and may cause the burner to soot up. Both conditions lead to incomplete combustion and a high risk of carbon monoxide production.
My stove doesn’t have a listed conversion kit. What now?
If the manufacturer does not offer an approved propane conversion kit for your specific model number, you must not attempt the conversion. This means the stove was engineered and certified for natural gas only. Converting it would be an unsafe modification outside of its design and testing. Your only safe option is to continue using natural gas or replace the stove with one designed for propane.
How do I test for gas leaks after conversion?
Use a commercial leak detector solution or a 50/50 mix of dish soap and water in a spray bottle. With the gas turned on, liberally spray every connection you touched: the orifice threads, regulator connections, and gas line fittings. Watch for bubbles. Any steady stream of bubbles indicates a leak. Immediately shut off the gas, tighten the connection slightly, and retest. The test must be performed before attempting to light any burner and should be repeated after the stove has been running for a few minutes as pressure changes can reveal slow leaks.