Converting a natural gas stove to propane is a precise mechanical process that requires swapping key components like orifices and the regulator. It is absolutely critical to verify your specific stove model is convertible by consulting the manufacturer’s manual or a licensed technician. Safety is paramount: improper conversion risks gas leaks, fires, or carbon monoxide poisoning. While a skilled DIYer with the correct conversion kit can perform the job, hiring a qualified appliance technician is often the safest and most reliable choice.
So, you’ve got a beautiful natural gas stove, but your new home or RV only has a propane supply. Or perhaps you’re moving to a rural area with propane tanks. Your first question is likely: “How do you convert a natural gas stove to propane?” This is a common and practical dilemma. The short answer is that it’s a very doable mechanical swap, but it’s not a simple “turn this knob” job. It’s a precise process that demands attention to detail, the right parts, and an unwavering commitment to safety. Converting from natural gas to propane involves changing the tiny openings that meter gas flow (orifices) and the main pressure regulator. Propane is a different fuel with different pressure and energy characteristics. Using your natural gas stove on propane without conversion would be like trying to run a diesel engine on gasoline—it simply won’t work correctly and can be dangerously destructive. This comprehensive guide will walk you through every step, from initial checks to final testing, so you can make this conversion with confidence and security.
Key Takeaways
- Compatibility is non-negotiable: Not all stoves can be converted. You must confirm your model is “convertible” by checking the manufacturer’s specifications, manual, or contacting them directly before beginning.
- Use only manufacturer-approved kits: Never use generic or mismatched parts. A proper conversion kit includes the correct size propane orifices for each burner and a new propane-specific pressure regulator.
- Safety over speed: Always shut off the gas supply at the source, work in a well-ventilated area, and perform a meticulous soapy water leak test on every connection before and after lighting the burners.
- orifice size is critical: Propane has a higher energy density than natural gas, requiring smaller orifice holes. Installing the wrong size orifice causes dangerous, inefficient, or sooty flames.
- The regulator must be swapped: The regulator controls gas pressure to the stove. Natural gas and propane require different regulators; you cannot use the original natural gas regulator for propane.
- Know when to call a pro: If you lack experience, cannot find your model’s compatibility, encounter complex wiring (for electronic ignitions), or local code requires it, hire a licensed appliance technician.
- Post-conversion tuning is essential: After installation, you must adjust the air-shutter on each burner to achieve a steady, blue flame with minimal yellow tipping, ensuring clean combustion.
📑 Table of Contents
- Understanding the Fundamental Differences: Natural Gas vs. Propane
- Essential Tools and the All-Important Conversion Kit
- Step-by-Step Conversion Procedure: From Gas Off to Flame Test
- Safety Checks and the Critical Leak Test
- Lighting, Flame Adjustment, and Final Verification
- Troubleshooting Common Post-Conversion Issues
- Professional Conversion vs. DIY: Making the Right Choice
- Conclusion: Safety First, Always
Understanding the Fundamental Differences: Natural Gas vs. Propane
Before you touch a single wrench, you need to understand why the conversion is necessary. Natural gas (methane) and propane (LPG) are both fossil fuels, but they behave differently under pressure and have different energy contents.
Energy Density and Pressure
Propane is a “heavier” gas with about 2.5 times the energy content of an equal volume of natural gas. However, it’s typically stored and delivered at a much higher pressure (around 10-11 inches of water column for residential appliances) compared to natural gas (around 7 inches). Because propane is more potent, it needs a smaller hole to deliver the same amount of heat as natural gas. That’s where the orifice comes in.
The Role of the Orifice
The orifice is a tiny brass fitting, usually screwed into the burner valve stem, with a precisely drilled hole. Its sole job is to restrict gas flow to create the correct pressure drop for the burner to function. A natural gas orifice has a larger hole (e.g., #55 drill size). A propane orifice for the same burner has a smaller hole (e.g., #67 drill size). If you put a propane orifice on a natural gas line, the flame will be tiny and weak. If you mistakenly put a natural gas orifice on a propane line, the flame will be huge, loud, potentially sooty (yellow), and dangerously overheating the cooktop and cookware.
The Regulator’s Critical Function
The regulator is the heart of the gas supply system to your stove. It takes the high, variable pressure from your tank or house line and reduces it to a safe, consistent, low pressure (measured in “inches of water column”) that the stove’s internal valves can handle. The spring and diaphragm inside a regulator are calibrated for one specific gas type. A natural gas regulator set for 7″ w.c. will not correctly regulate propane at 10″ w.c. Using the wrong regulator leads to incorrect pressure at the orifices, causing the poor flame conditions described above. This is why swapping the regulator is the first and most important step in the physical conversion process.
Essential Tools and the All-Important Conversion Kit
Now that you understand the “what” and “why,” let’s talk about the “how” and “with what.” Success depends on having the correct tools and parts. The centerpiece is, without exception, the manufacturer-specific conversion kit.
Visual guide about How Do You Convert a Natural Gas Stove to Propane
Image source: stovewise.com
Sourcing the Correct Conversion Kit
This is your most important task. You cannot use a generic kit. You need the kit designed for your exact stove model, year, and serial number. Here’s how to find it:
- The User Manual: Always check here first. It will state if the stove is convertible and list the exact kit part number.
- Manufacturer’s Website/Support: Look for a “parts” or “owner’s support” section. Enter your model number. They will list the conversion kit if applicable.
- Appliance Parts Retailers: Websites like RepairClinic, AppliancePartsPros, or PartSelect are excellent resources. Enter your model number, and they will show compatibility and available kits.
- Call the Manufacturer: If you’re unsure, a quick call to customer service with your model and serial number will give you a definitive answer.
What’s in the Kit? A proper kit will include: a new propane regulator (with the correct pressure setting), a full set of propane orifices (one for each burner, including the oven and broiler burners), and often new pilot orifices (for older stoves with standing pilots). It may also include new labels or warning stickers to place on the stove, noting the conversion. Never attempt to mix and match orifices from different kits or sources.
Basic Tool Checklist
You’ll need a set of common hand tools:
- Screwdrivers (Phillips and flathead)
- Adjustable wrenches or a socket set (usually 1/2″ and 7/8″ for orifice nuts)
- Pliers (needle-nose are helpful)
- Adjustable wrench for the regulator connection (often 1-1/16″ or 1-1/8″)
- Flashlight or work light
- Masking tape and marker (for labeling hoses or parts)
- Brush for cleaning
- Soapy water solution (in a spray bottle) for leak testing
For your safety, also have a Class ABC fire extinguisher nearby and ensure the area is well-ventilated. Open windows and doors.
Step-by-Step Conversion Procedure: From Gas Off to Flame Test
With your correct kit and tools assembled, and after confirming the gas supply is shut off at the tank or main valve, you can begin. Remember: If at any point you feel unsure, STOP and call a professional.
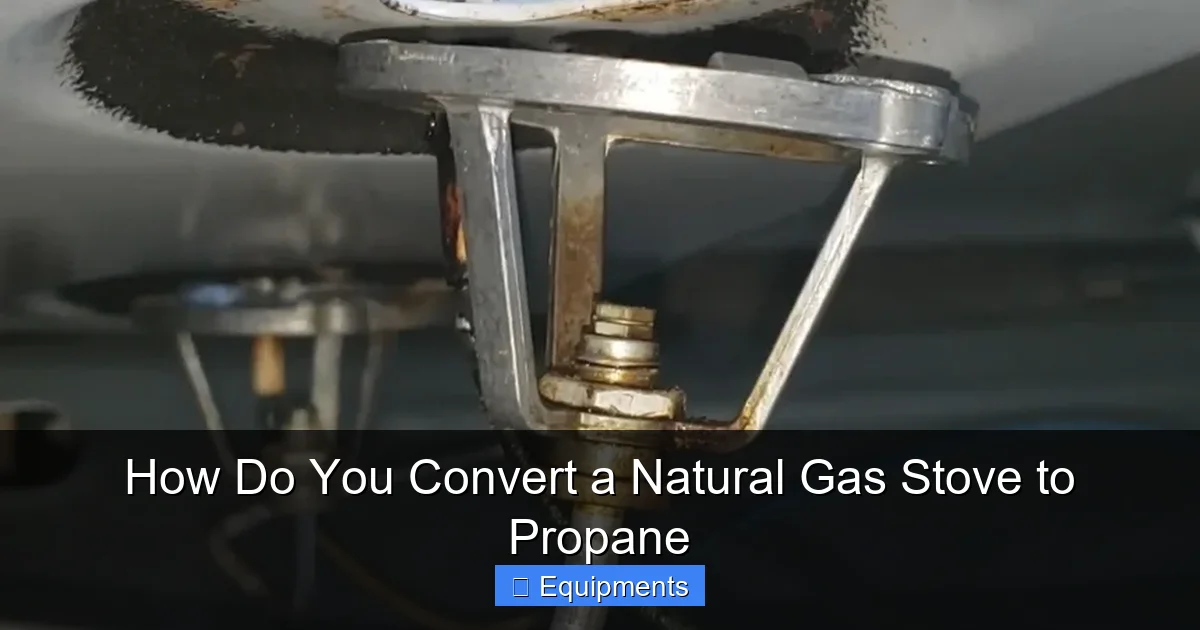
Visual guide about How Do You Convert a Natural Gas Stove to Propane
Image source: propaneva.com
Step 1: Remove the Old Regulator
The regulator is usually located behind the stove, connected to the gas inlet pipe. It’s a round or square metal canister with a dial or cap on top. Using your wrench, carefully disconnect the stove’s gas line from the regulator’s outlet side. Then, disconnect the regulator from the incoming gas line (the tank or house supply). Have a bucket or rag ready for any residual gas drip. Once disconnected, set the old natural gas regulator aside. You will not be using it again.
Step 2: Install the New Propane Regulator
Take the new propane regulator from your kit. Connect it to the incoming gas line first, hand-tightening the nut, then giving it a final quarter-turn with the wrench. Do not overtighten. Now, connect the stove’s gas line to the outlet side of the new regulator. Ensure all connections are snug but not stripped. The regulator should be mounted securely if it has a mounting bracket. Some stoves have the regulator built into the manifold; in that case, your kit will include a different pressure spring or a new manifold. Follow the kit instructions explicitly for this variation.
Step 3: Access and Replace the Burner Orifices
This is the most meticulous part. You need to access the burner valves. Often, this requires lifting the cooktop. Consult your manual for safe cooktop removal. Typically, there are screws at the front or back, and sometimes the grates and burner caps must be removed first. Once the cooktop is propped up safely, you’ll see the burner valves with the orifices screwed into their stems.
- Identify and Label: Take a photo before you start. Label each hose or connection with tape if it’s not obvious. The orifices are often specific to front/rear or left/right burners.
- Remove the Old Orifice: Using the correct size wrench (often 1/2″ or 7/8″), carefully unscrew the brass orifice from the valve stem. It may be tight. Hold the valve body steady with a second wrench to avoid stressing it.
- Clean the Valve Seat: Use a soft brush to clean the valve stem threads. Do not use a wire brush or abrasive tool that could damage the threads or the valve seat.
- Install the New Propane Orifice: Screw the new, smaller propane orifice in by hand first, then tighten it snugly with the wrench. Do not force it or overtighten. The brass threads are soft. A firm, snug connection is sufficient. Repeat for every burner orifice, including any for the oven or broiler if your kit includes them. These are usually accessed from inside the oven or behind a panel.
Step 4: Replace Pilot Orifices (If Applicable)
If your stove has a standing pilot light (a small, continuously burning flame), it also needs a new, smaller pilot orifice for propane. This is a tiny brass fitting located at the end of the pilot tube. The process is the same: remove the old one, clean the threads, and install the new one. Be extra careful with these tiny parts. Ensure the pilot assembly is clean before reassembly.
Step 5: Reassemble the Stove
Carefully lower the cooktop back into place, ensuring all wiring (for ignition lights or clock) and any burner alignment pins are properly seated. Reinstall any screws you removed. Reattach the grates and burner caps. Double-check that nothing is pinched or misaligned.
Safety Checks and the Critical Leak Test
Do not proceed to lighting burners without completing this phase. A gas leak is a silent, deadly hazard.
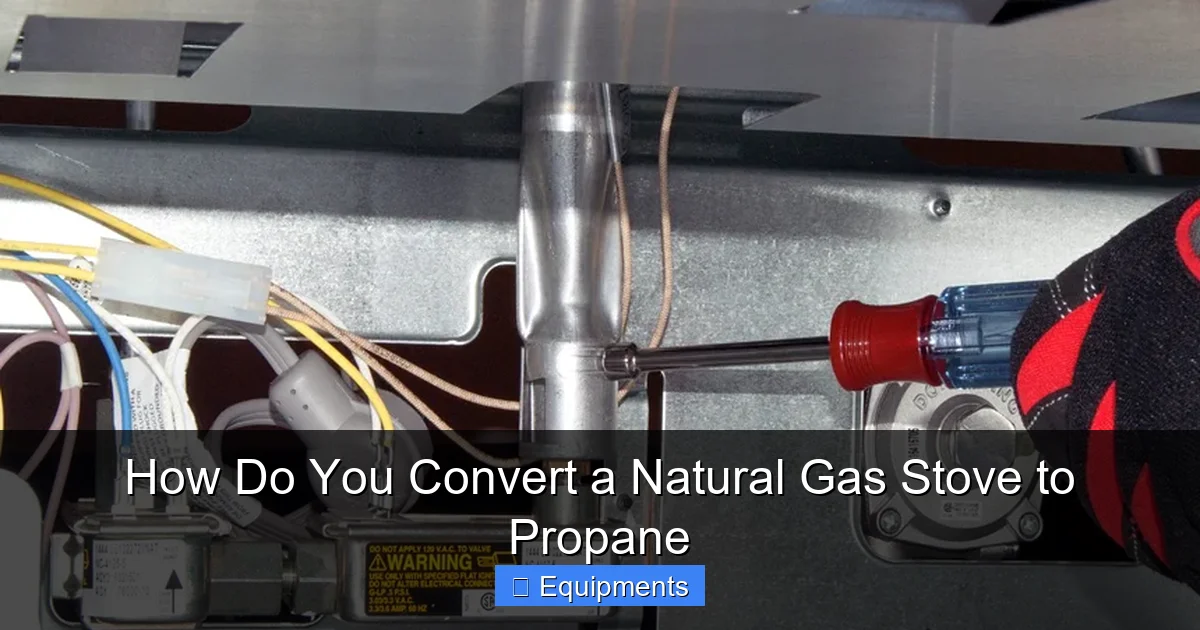
Visual guide about How Do You Convert a Natural Gas Stove to Propane
Image source: propaneva.com
Initial Pressure and Connection Check
With the stove fully reassembled but the burners still OFF, turn on the main gas supply at the tank or wall valve slowly. Listen for any hissing sound. Smell for the distinct “rotten egg” odor of mercaptan (the odorant added to propane). If you smell gas or hear a leak, immediately shut off the supply and re-check all your connections, especially the regulator fittings and orifice installations.
The Soapy Water Leak Test
This is the gold-standard, non-spark method for finding leaks.
- Mix a solution of dish soap and water (a 50/50 mix works well) in a spray bottle.
- With the gas supply ON, liberally spray the soapy water onto every single connection point: the regulator inlet and outlet fittings, all gas line connections, and the base of each burner orifice where it meets the valve stem.
- Do not use a flame to check for leaks.
- Watch the soapy water for bubbles. If bubbles form and grow, you have a leak. Immediately shut off the gas, tighten the connection slightly (do not over-tighten), wipe it dry, and re-test. If the leak persists, the connection may be faulty or the washer/seal damaged. Disassemble, inspect, and re-seal or replace the component.
- Test every connection until you have a completely bubble-free result. This step is not optional.
Lighting, Flame Adjustment, and Final Verification
Once you have a perfect seal, you can move to the final functional tests.
Ignition and Initial Burner Test
For an electric-ignition stove: Turn a burner knob to the “Light” position. The spark igniter should click and light the burner within a few seconds. For a manual pilot light: Ensure the pilot is lit (you may need to depress the pilot knob and hold a match to the pilot assembly). Once the pilot is stable, turn on a burner. What you should see: The flame should be predominantly blue with a well-defined inner cone. It should be stable, not lifting off the burner or making excessive noise. There should be minimal, if any, yellow tips at the top of the inner cone.
Adjusting the Air Shutter
If your flame is yellow, noisy, or lifting, it means the air-gas mixture is incorrect. Most burners have an adjustable air shutter—a sliding or rotating collar at the base of the burner tube. With the burner on, carefully adjust this shutter (usually by loosening a screw and sliding the collar) to allow more or less primary air. The goal is a steady, blue flame. This may require several adjustments. Consult your manual for the ideal flame pattern. A properly adjusted propane flame is often slightly more “pointed” or compact than a natural gas flame due to the higher pressure.
Oven and Broiler Testing
Light the oven burners. The bake and broil flames should also be blue and stable. Check the oven’s temperature accuracy with an oven thermometer after it has preheated. Propane may run slightly hotter; your oven’s thermostat should compensate, but it’s good to verify.
Final Documentation
Once everything is working perfectly, take final photos for your records. Affix any new warning labels from the conversion kit to the stove, typically near the gas inlet or inside the oven door. These labels state “Converted to Propane” and list the orifice sizes used, which is vital information for future service technicians.
Troubleshooting Common Post-Conversion Issues
Even with careful work, you might encounter a few hiccups. Here’s how to diagnose them.
Problem: Burners Light But Flame is Large, Loud, and/or Yellow
Likely Cause: This is the classic sign of using a natural gas orifice with propane, or having the wrong regulator. Double-check that every single orifice (including oven) is the new, smaller propane one from your kit. Also, confirm the new regulator is installed correctly. If both are correct, the air shutter may be closed too far, starving the flame of oxygen. Open the air shutter slightly to introduce more air.
Problem: Burners are Hard to Light or Flame is Very Small
Likely Cause: An orifice is blocked (debris from old threads), or you accidentally installed a natural gas orifice. Remove the orifice and inspect the hole with a magnifying glass. It should be clean and round. Use a small brass brush or compressed air to clean it. Ensure you have the correct propane orifice size. Also, check that the regulator is functioning and the gas supply valve is fully open.
Problem: Flame Lifts Off the Burner or “Pops”
Likely Cause: The air-gas mixture is too rich in air. The flame is literally being blown off the burner port. Close the air shutter slightly to reduce primary air intake. If the problem persists, there may be a pressure issue from the regulator or tank.
Problem: Hissing Sound from Burner When Off
Likely Cause: A very slow leak. Re-do the soapy water test meticulously on that specific burner’s valve and orifice connection. The valve itself may be faulty and not seating fully, which would require replacement.
Professional Conversion vs. DIY: Making the Right Choice
This brings us to the pivotal decision: should you do this yourself?
The Case for Professional Installation
For the vast majority of homeowners, hiring a licensed appliance technician or a qualified plumber is the wisest path. Here’s why:
- Code Compliance: Many jurisdictions require that any gas line work be performed by a licensed professional and may require an inspection afterward. A pro will know and follow the Uniform Plumbing Code (UPC) or International Fuel Gas Code (IFGC).
- Insurance and Warranty: Your homeowner’s insurance may not cover damages from a DIY gas conversion error. Furthermore, an improper DIY conversion will almost certainly void any remaining manufacturer’s warranty on the stove.
- Experience and Guarantee: A technician performs these conversions regularly. They have the correct tools, parts (often from their own inventory), and the trained eye to spot a non-convertible model or a hidden issue. The work is typically guaranteed.
- Peace of Mind: The value of knowing the job was done flawlessly and safely by an expert cannot be overstated when dealing with explosive gases.
When DIY Might Be Acceptable
You might consider a careful, well-researched DIY if:
- Your stove’s manual explicitly states it is user-convertible and provides detailed instructions.
- You have successfully sourced the exact, manufacturer-approved conversion kit.
- You are mechanically adept, have experience with basic appliance repair, and understand gas safety protocols implicitly.
- Your local jurisdiction permits homeowner-performed gas appliance conversions (call your local building department to ask).
- The stove is a simple, older model with manual pilots and no complex electronics.
Even in this case, be prepared to call a pro if you hit a snag. The cost of a service call is trivial compared to the potential cost of a gas explosion or fire.
Conclusion: Safety First, Always
Converting a natural gas stove to propane is a manageable project that sits at the intersection of mechanical skill and absolute safety responsibility. The process hinges on three pillars: correct parts (the specific conversion kit), correct procedure (methodical disassembly, installation, and testing), and correct judgment (knowing when your skill level is insufficient). The fundamental physics are simple—smaller holes for propane, a different regulator—but the margin for error is zero. A single missed leak or a mismatched orifice can have catastrophic consequences. Before you begin, invest time in the most crucial step: verification. Confirm your stove is convertible. Source the exact kit. Read the manual. If any doubt clouds your mind, the only correct answer is to pick up the phone and call a licensed professional. Your family’s safety, your home’s integrity, and your peace of mind are worth far more than the cost of a professional installation. By respecting the process and prioritizing safety above all else, you can successfully transition your stove to run on propane, whether in a new home, an RV, or a rural cabin, and enjoy countless meals cooked over a perfectly adjusted, blue flame.
Frequently Asked Questions
Can all natural gas stoves be converted to propane?
No. Many modern stoves, especially lower-cost or certain European models, are designed for one fuel type only. The only way to know is to check your stove’s manual, nameplate, or contact the manufacturer directly with your model number. Attempting to convert a non-convertible stove is extremely dangerous.
How much does a professional conversion typically cost?
Professional costs vary by region and company but typically range from $150 to $400. This usually includes the service call, labor, and often the markup on the manufacturer-specific conversion kit. It’s a small price for a guaranteed safe and code-compliant job.
How long does the conversion process take?
For a competent DIYer with all the correct parts and tools, the physical swap can take 1 to 3 hours. Adding in the meticulous leak testing and flame adjustment, budget about 2-4 hours. A professional technician will usually complete the job in 1-2 hours.
What happens if I use the wrong orifice size?
Using a natural gas orifice on propane will produce an oversized, sooty, yellow flame that overheats the stove and cookware, posing a severe fire and burn risk. Using a propane orifice on natural gas will yield a tiny, weak flame that may not stay lit. Both conditions are unsafe and inefficient.
Do I need a permit to convert my stove?
It depends entirely on your local jurisdiction. Many areas require a permit and inspection for any gas appliance work to ensure compliance with codes. You must check with your local building department or fire marshal. A licensed professional will handle permit acquisition and inspection scheduling as part of their service.
Will converting my stove void its warranty?
Almost certainly, yes. Manufacturer warranties typically stipulate that the appliance must be installed and maintained according to their instructions, which includes using only approved conversion kits and often requiring installation by an authorized service provider. Converting it yourself will void the warranty. Always check your warranty terms first.