Cutting Hardiebacker board requires the right tools and techniques to avoid chipping and ensure precise fits. Always wear proper safety gear, including a respirator and goggles. The most common method is scoring and snapping with a carbide-tipped tool, but a circular saw with a diamond blade is ideal for long, straight cuts, while a jigsaw handles curves. Measure twice, mark clearly, and support the board fully to prevent breakage.
So, you’ve got a big project—a bathroom remodel, a new shower surround, or maybe a sturdy tile backer for a kitchen backsplash. You’ve chosen James Hardie’s Hardiebacker board, the industry gold standard for cementitious backer board. It’s tough, water-resistant, and won’t rot. But now you face the task: how do you actually cut this stuff? It’s not like slicing through plywood. If you’ve ever picked up a sheet, you know it’s dense, heavy, and seems impervious to a utility knife. Don’t worry. Cutting Hardiebacker board is a skill anyone can master with the right knowledge and tools. It’s less about brute force and more about finesse and the correct technique. This guide will walk you through every method, tool, and pro tip you need to make clean, precise cuts without chipping the edges or creating a dusty nightmare. Let’s get you cutting like a seasoned pro.
Key Takeaways
- Score, Don’t Slice: The primary method for straight cuts is scoring the surface deeply with a carbide-tipped scoring tool and then snapping it cleanly along the score line.
- Safety is Non-Negotiable: Always wear an N95 respirator and safety goggles. Cutting Hardiebacker creates hazardous silica dust that must not be inhaled.
- Tool Choice Dictates Cut: Use a scoring knife for straight lines, a circular saw with a diamond blade for long straight cuts, and a jigsaw with a carbide-grit blade for curves and openings.
- Support is Crucial: Always cut on a stable, flat surface with the board fully supported on both sides of the cut to prevent vibration and irregular breaks.
- Mark Clearly: Use a pencil and a straightedge for precise lines. For complex cuts, make a template from cardboard first to test the fit.
- Finishing Matters: Use a rasp or sanding block with a carbide grit sleeve to smooth rough edges, especially in cutouts for pipes or outlets.
- Practice Makes Perfect: Always make practice cuts on a scrap piece to confirm your blade, technique, and measurements before cutting your actual installation piece.
📑 Table of Contents
- Understanding Your Material: What is Hardiebacker Board?
- Essential Tools & Safety Gear: Your Cutting Arsenal
- Method 1: The Score-and-Snap Technique (The Gold Standard)
- Method 2: Cutting with a Circular Saw (For Long, Straight Cuts)
- Method 3: Using a Jigsaw for Curves and Cutouts
- Handling Special Situations: Notches, Holes, and Small Pieces
- Finishing the Job: Cleaning Up and Preparing for Installation
- Conclusion: You’ve Got This
Understanding Your Material: What is Hardiebacker Board?
Before we pick up a tool, it helps to know what we’re dealing with. Hardiebacker board is a cement-based product made from a mixture of cement, sand, and cellulose fibers. This composition gives it exceptional strength and moisture resistance but also makes it abrasive and dusty to cut. Unlike gypsum-based backer boards (like green board), it contains no organic materials that can support mold growth, making it ideal for wet areas. Its density is your friend for the final installation but can feel like a foe during the cutting process. Understanding this helps you appreciate why specific tools—like carbide-tipped scoring tools and diamond-grit blades—are necessary. They’re designed to abrade and score the cement matrix, not just slice through it.
Essential Tools & Safety Gear: Your Cutting Arsenal
Having the right tools for the job is half the battle. Using a wood saw blade on cement board is a fast track to a ruined blade, a poor cut, and loads of frustration. Let’s break down your essential toolkit.
Visual guide about How Do I Cut Hardiebacker Board
Image source: thesawguy.com
The Fundamental Scoring Tool
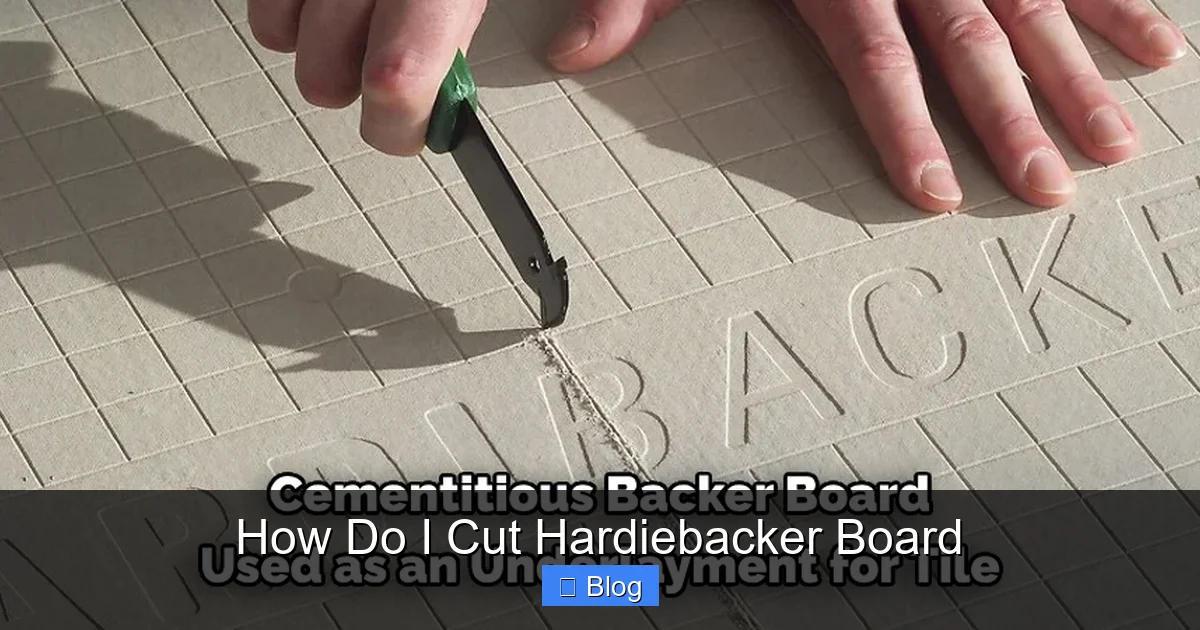
For most straight cuts, your primary weapon will be a carbide-tipped scoring tool. This looks like a heavy-duty utility knife but with a tiny, incredibly hard carbide scoring tip. It’s specifically designed to score the dense surface of cement board. You can also use a standard utility knife with a fresh, heavy-duty blade, but you’ll need to apply more passes and pressure, and the blade will dull quickly. The dedicated scoring tool is a worthwhile investment for any serious DIYer or pro.
Saws for Harder Cuts
For longer cuts or when you need to cut multiple sheets, a power saw is more efficient. But your standard wood-cutting circular saw blade will be destroyed in seconds. You need a blade with a diamond grit or carbide grit edge.
- Circular Saw: The workhorse for long, straight rip cuts or crosscuts. Use a circular saw with a diamond-tipped blade designed for masonry or cement board. A 7-1/4″ blade is common. Look for one with a high number of diamond segments for smoother cuts.
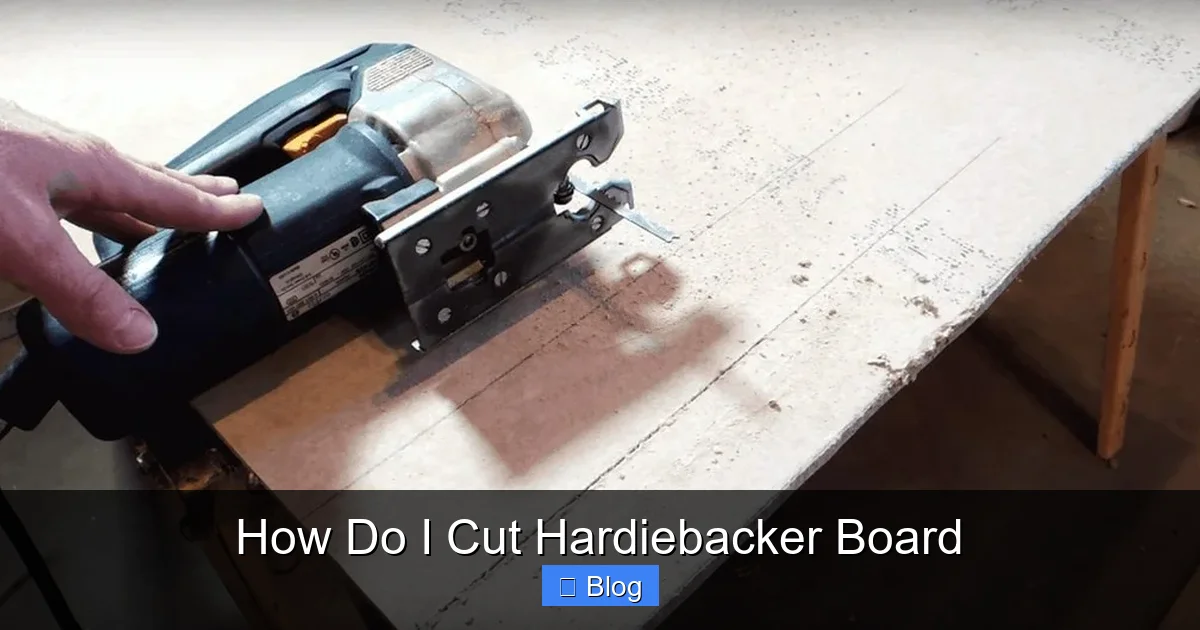
- Jigsaw: Your go-to for curves, circles, and cutouts around pipes or outlets. Again, use a carbide-grit jigsaw blade. These are usually shorter and designed for abrasive materials. Standard metal-cutting blades will wear out almost immediately.
- Oscillating Multi-Tool: Perfect for detailed, plunge cuts, trimming around pipes in already-installed boards, or making small adjustments. Fit it with a carbide-grit or diamond-grit segment blade.
Finishing & Measuring Tools
- Straightedge: A sturdy metal straightedge or a level is crucial for guiding your scoring tool in a perfectly straight line.
- Tape Measure & Pencil: The classics. A fine-lead pencil marks clearly without smearing.
- Rasp or Sanding Block: A carbide grit rasp (often sold as a “file for cement board”) is indispensable for smoothing rough cut edges, especially on interior cutouts. A regular wood rasp will clog instantly.
- Drill & Hole Saw: For plumbing or electrical penetrations, use a hole saw with a diamond or carbide-grit edge.
Safety Gear: This is Not Optional
Cutting cement board releases respirable crystalline silica dust, a serious lung hazard. You must protect yourself.
- Respirator: Use an N95 respirator at a minimum. A half-face respirator with P100 filters is the best practice for any prolonged cutting.
- Safety Goggles: Full-coverage safety glasses or goggles to protect your eyes from sharp, abrasive particles.
- Gloves: Cut-resistant gloves (like those for drywall) protect your hands from the rough edges and the scoring tool.
- Hearing Protection: Essential when using power saws.
- Long Sleeves & Pants: Prevent skin irritation from dust.
Method 1: The Score-and-Snap Technique (The Gold Standard)
This is the most common, cleanest, and often fastest method for making straight cuts on Hardiebacker board. It requires no electricity and produces less dust than power tools. The principle is simple: you create a deep, precise groove (score) on the face of the board, which acts as a fracture line, and then apply force to snap the board along that weakened plane.
Visual guide about How Do I Cut Hardiebacker Board
Image source: thekitchenix.com
Step-by-Step Score-and-Snap
- Prepare Your Workspace: Place your Hardiebacker sheet on a pair of sawhorses or a stable, flat work surface. Ensure the area where you’ll snap is clear. The board must be fully supported on both sides of your intended cut line. Cutting over an open gap will cause it to vibrate and break irregularly.
- Measure and Mark: Use your tape measure and pencil to mark your cut line clearly on the front (smooth) side of the board. Double-check your measurements. Use a straightedge to draw a perfect line.
- Score the Line: Place your straightedge firmly along the pencil line. Hold your carbide-tipped scoring tool like a pencil, with the scoring tip against the board. Apply firm, even pressure and drag the tool along the straightedge in a single, continuous motion. You should create a deep, audible groove—about 1/8″ deep. You’ll see a distinct line and a small pile of dust. One firm pass is often enough with a good scoring tool. If it feels shallow, make a second pass, but don’t gouge.
- The Snap: Lift the board. Position it so the scored line is directly over the edge of your sawhorse or work surface, with the larger piece (the part you’re keeping) supported. For a crosscut, you’ll snap the smaller waste piece off. Place your hands on either side of the score line, fingers clear of the line. Apply quick, firm, downward pressure on the waste side, leveraging the board over the edge. It should snap cleanly along the scored line with a crisp sound. You may need to give it a firm tap with your hand or the heel of your palm.
- Final Touch: The snapped edge will be sharp and may have a slight burr. Run your carbide grit rasp lightly along the cut edge to smooth it. This is especially important if the edge will be exposed or if you’re butting pieces together for a seamless look.
Pro Tips for Scoring
- Score on the Front: Always score the smooth, finished face. This ensures the break happens cleanly on the rough back side, leaving a relatively smooth edge on the front.
- Mind the Grain: Hardiebacker has a slight directional “grain” from manufacturing. Score parallel to the long edge of the sheet for the cleanest break. Scoring across the grain can lead to a slightly rougher edge.
- Use Your Whole Body: For the snap, don’t just use your arm strength. Use your body weight by shifting your weight onto the waste side as you push down.
- Small Pieces: For very small cuts (less than 6 inches), scoring and snapping can be tricky. It’s often easier and safer to cut these from a larger scrap piece using a jigsaw.
Method 2: Cutting with a Circular Saw (For Long, Straight Cuts)
When you need to rip a full 5′ x 5′ sheet of Hardiebacker down to a narrower width, or make a long crosscut, the circular saw is your best friend. It’s fast, accurate, and produces a very clean edge when equipped with the correct blade.

Visual guide about How Do I Cut Hardiebacker Board
Image source: thekitchenix.com
Setup and Execution
- Install the Correct Blade: This is the most critical step. Install a diamond-tipped blade specifically rated for cement board, fiber cement, or masonry. These blades have no teeth; they have a continuous rim or segments with industrial diamonds bonded to the edge. Ensure it’s properly tightened on the saw’s arbor.
- Prepare the Board: Place the sheet on your sawhorses. Measure and mark your cut line clearly on the front face. Since the saw blade will cut from the top down, you’ll get the cleanest finish on the top (marked) side.
- Set the Depth: Adjust your circular saw’s depth of cut so the blade extends about 1/4″ beyond the thickness of the board. This minimizes blade flex and reduces dust.
- Cutting: Align the saw’s base plate with your pencil line. Let the blade reach full speed before gently pushing it forward. Use steady, moderate pressure—don’t force it. Let the abrasive blade do the work. Guide the saw smoothly along your line. The cut will produce a fine, sand-like dust.
- Support the Cut-Off: As the cut piece separates, support it to prevent it from falling and potentially cracking or chipping at the end of the cut.
Circular Saw Pro Tips
- Use a Guide: For the straightest cut, clamp a long, straight piece of 1×4 or a metal track to the board, aligning its edge with your cut line. Run the base plate of the saw against this guide. This is far more accurate than freehanding.
- Cut from the Back? If you are concerned about chips on the top (finished) side, you can cut from the back (rough) side. The blade will pull the cement material toward the center of the cut, potentially leaving a cleaner edge on the back. However, scoring and snapping always leaves the cleanest edge on the front. Weigh your priorities.
- Ventilation: Do this outdoors or in a very well-ventilated area with a fan exhausting dust outside. Have a helper hold a vacuum nozzle near the cut (but never touching the blade) to capture some dust.
Method 3: Using a Jigsaw for Curves and Cutouts
Not every cut is a straight line. You’ll need to cut around a toilet flange, a curved tub surround, or make irregular-shaped patches. Enter the jigsaw. Its reciprocating action is perfect for this, but again, the blade is everything.
Jigsaw Best Practices
- Blade Selection: Install a carbide-grit jigsaw blade. These are typically shorter (around 3″) and have a uniform abrasive coating. They cut slowly but steadily and won’t dull on the first pass. Choose a blade with more teeth per inch (TPI) for smoother curves, but expect it to cut slower.
- Mark Your Curve: Draw your cut line clearly on the board. For circles or perfect curves, use a compass or template. For complex shapes, cut a template from cardboard first and trace it.
- Drill a Starter Hole: If your cut is an interior cutout (like a pipe opening) and not reaching an edge, you must drill a starter hole to insert the jigsaw blade. Use a diamond hole saw or a masonry bit to drill a hole large enough for the jigsaw blade to pass through (usually 1/2″ to 3/4″).
- Cutting Technique: Start the jigsaw with the blade in the starter hole or at the edge of your line. Let the blade gain speed before engaging the material. Guide the saw along the line with gentle pressure. Do not force it; forcing a jigsaw on cement board can cause the blade to deflect and ruin your curve. Let the abrasive blade grind its way through. Be patient—this is a slow process.
- Support the Workpiece: As with the circular saw, ensure the board is fully supported, especially near the cutting path, to reduce vibration and prevent chipping on the exit side of the cut.
Jigsaw Tips & Tricks
- Go Slow: The number one rule. A slower feed rate yields a cleaner cut with less chipping.
- Blade Cooling: For long, continuous curves, the blade can get hot. Pause occasionally to let it cool, or have a helper lightly mist the cut area with water (be extremely cautious of water and electricity—unplug the saw first if doing this).
- Finish the Edge: Jigsaw cuts, especially on curves, will be rough. Use your carbide grit rasp to smooth the edge to the exact shape you need. This is a normal and necessary finishing step.
Handling Special Situations: Notches, Holes, and Small Pieces
Real-world installations are rarely just full sheets with straight cuts. You’ll encounter plumbing stacks, electrical boxes, and corner notches. Here’s how to handle them.
Cutting Openings for Pipes and Outlets
For large, round openings (like a 3″ or 4″ drain pipe), a hole saw with a diamond or carbide-grit edge is the tool. Mark the center point, drill a small pilot hole with a masonry bit if needed, and then use the hole saw from the front face. Go slow, apply light pressure, and let the abrasive edge do the work. For rectangular electrical boxes, the jigsaw is your best bet. Drill starter holes in the corners and cut between them.
Notching and Trimming
Need to notch out a corner for a joist or pipe? Score the two sides of the notch with your scoring tool, then use a jigsaw to connect the scores and remove the waste piece. For final trimming to fit against a wall or fixture, a carbide-grit rasp is your best friend. It allows you to remove material incrementally and get a perfect, tight fit. It’s easier to take a little more off than to put it back on.
Cutting Small, Narrow Strips
Cutting a narrow strip (less than 2″ wide) from a larger sheet with a scoring tool can be dangerous; the piece can shatter or break unpredictably. The safer method is to make your full cut with a circular saw or jigsaw first, and then, if needed, break the smaller waste piece away. Alternatively, cut the narrow strip from a larger scrap piece.
Finishing the Job: Cleaning Up and Preparing for Installation
Your cuts are done, but the job isn’t finished until the edges are ready for installation.
Smoothing and Deburring
As emphasized, always run a carbide grit rasp over your cut edges. This does two things: it removes the sharp, hazardous burr that can cut you during handling, and it creates a slightly “toothed” edge that actually helps thin-set mortar adhere better when you install tile over it. Pay special attention to interior cutouts where the edges are most likely to be handled.
Dust Management: The Invisible Enemy
Cement board dust is fine, invasive, and harmful. Your cleanup strategy is part of the cutting process.
- Wet Cutting: If possible, use your power tools with a slight water mist (a helper with a spray bottle) to suppress dust at the source. **NEVER** use water with a scoring knife.
- Vacuum Immediately: After cutting, use a shop vacuum with a HEPA filter to clean up all dust from the work area, your tools, and the board itself before moving it. Do not sweep, as that just kicks dust back into the air.
- Personal Decontamination: Remove your work clothes carefully outside and wash them separately. Shower and wash your hair to remove any settled dust.
Final Inspection
Before you start installing, do a dry run. Place your cut pieces in their intended locations. Check for fit. Are there any high spots or gaps? Use your rasp for any final adjustments. A well-cut piece should fit snugly with minimal force. This final check saves time and frustration during the thinset and tile phase.
Conclusion: You’ve Got This
Cutting Hardiebacker board doesn’t have to be intimidating. It’s a straightforward process once you internalize the core principles: use the right abrasive tool for the shape of your cut, always prioritize safety with a respirator and eye protection, and fully support your workpiece. Start with the simple score-and-snap method for straight lines—it’s reliable and clean. Move to the circular saw for long rips and the jigsaw for curves, always with the correct blade. Remember to finish with a carbide rasp and manage the dust vigilantly. By respecting the material’s density and following these steps, you’ll achieve professional-looking cuts that provide a perfect, stable substrate for your tile. Your project’s long-term success—a beautiful, water-resistant, mold-free finish—starts with these precise, clean cuts. Now, measure twice, score once, and get to work.
Frequently Asked Questions
Can I cut Hardiebacker board with a regular utility knife?
You can make shallow scoring passes, but a standard utility knife blade will dull extremely quickly on the cementitious material. For clean, efficient cuts, a dedicated carbide-tipped scoring tool is highly recommended and will save you time and effort.
What kind of saw blade do I need for Hardiebacker board?
You must use a blade specifically designed for abrasive materials. Look for a diamond-tipped circular saw blade or carbide-grit jigsaw blade. Never use a standard wood or metal-cutting blade, as it will be destroyed and can overheat or kickback.
Is cutting Hardiebacker board dangerous?
The primary danger is inhaling the fine silica dust it creates, which can cause serious lung disease. The cut edges are also very sharp. The process is safe when you wear proper personal protective equipment (PPE): an N95 or P100 respirator, safety goggles, and gloves. Always cut in a well-ventilated area.
Which method produces the cleanest edge: scoring or a circular saw?
The score-and-snap method generally produces the cleanest, straightest edge on the front (finished) face of the board, which is ideal for visible seams. A circular saw with a diamond blade also makes a very clean cut, but may have a slightly rougher “fuzzy” edge on the exit side that may need light rasping.
How do I cut a hole for a toilet flange or pipe?
For round holes, use a hole saw with a diamond or carbide-grit edge. Mark the center, drill a small pilot hole if needed, and operate the hole saw at a slow speed with light pressure. For rectangular boxes (like electrical outlets), drill starter holes in the corners and use a jigsaw with a carbide-grit blade to connect them.
Why does my Hardiebacker board chip when I cut it?
Chipping usually happens due to three reasons: 1) Using the wrong blade (a wood blade). 2) Not supporting the board fully on both sides of the cut, causing vibration. 3) Applying too much force or speed, especially with a jigsaw. Always use the correct abrasive blade, secure your work, and let the tool do the work at a moderate pace.