Setting the clock on your Samsung microwave is a quick, universal process that typically takes under a minute. You’ll use the “Clock” or “Time Set” button, followed by the number pad to enter the time, and the “Enter” or “Start” button to confirm. The exact button labels and sequence can vary slightly by model series, but the core method remains consistent across nearly all Samsung microwaves. This guide provides detailed instructions for every common model type, plus solutions for common issues like a reset clock or a blank display.
Key Takeaways
- Universal Process: The core method (Clock/Time Set button > number input > Enter/Start) is standard across virtually all Samsung microwave models.
- Model-Specific Labels: Button names like “Clock,” “Time Set,” or a dedicated clock icon are your starting point; consult your manual if labels are unclear.
- Power Loss Resets Clock: Most Samsung microwaves will revert to “12:00” or “00:00” after a power outage or being unplugged, requiring a reset.
- 12/24-Hour Format: Many models default to 12-hour format (AM/PM), but some allow switching to 24-hour (military) time in the settings menu.
- Display vs. Timer: Ensure you are setting the *clock* (permanent time) and not the *cooking timer* (temporary countdown); they use different buttons.
- Troubleshooting First: If the clock won’t set, check for a “Child Lock” or “Demo Mode” activation, which can disable key functions.
- Manual is Key: Your user manual’s “Setting the Clock” section provides the definitive steps for your specific model number.
📑 Table of Contents
- Why Setting Your Microwave Clock Matters
- Locating the Controls: A Model-by-Model Map
- Step-by-Step: Setting the Clock on Common Samsung Models
- Troubleshooting: Why Your Clock Won’t Set & How to Fix It
- Beyond the Clock: Related Time-Based Features
- Maintenance and Long-Term Care for Your Microwave’s Clock
- Conclusion: Mastering Your Microwave’s Basics
Why Setting Your Microwave Clock Matters
It might seem like a small, mundane detail, but that little digital display on your Samsung microwave serves a purpose beyond just telling time. A correctly set clock integrates seamlessly into your kitchen’s rhythm. It allows you to use the microwave’s built-in timer function with accurate reference points, helps you coordinate cooking times with other appliances, and simply makes the kitchen feel complete and organized. Forgetting to set it after a power outage is common, but taking two minutes to fix it restores that small piece of daily order. More importantly, understanding how to set it empowers you to use all your microwave’s features confidently, from delayed start timers to scheduled cooking programs on certain models.
The Psychology of a Set Clock
There’s a subtle satisfaction in a kitchen where every clock agrees. When your microwave, oven, and wall clock all show the same time, it eliminates a tiny, nagging point of cognitive dissonance. It signals that your environment is under control. Conversely, a microwave flashing “12:00” is a universal symbol of a recent power surge or a forgotten reset—a minor household mystery. Setting it is a quick win, a small act of maintenance that contributes to a smoothly running home.
Functionality Beyond Timekeeping
On many Samsung microwave models, the clock is the gateway to more advanced scheduling features. Some newer models with SmartThings connectivity or specific “Convection” or “Counter-Depth” lines allow you to set delayed start times for cooking. You can tell the microwave, “Start cooking this frozen dinner at 6:30 PM,” and it will power on and begin the cycle at the exact time you set. This requires the internal clock to be accurate. Even on basic models, the clock provides a reference for the timer function, helping you track how long something has been cooking relative to the current time of day.
Locating the Controls: A Model-by-Model Map
Before you can set the time, you need to find the right buttons. Samsung has produced countless microwave models over the years, and while the logic is consistent, the physical layout and button *labels* can differ. Don’t be intimidated. We’ll break it down into the most common control panel styles you’ll encounter.
Visual guide about How to Set the Clock on My Samsung Microwave
Image source: wikihow.com
The Classic Touchpad Panel
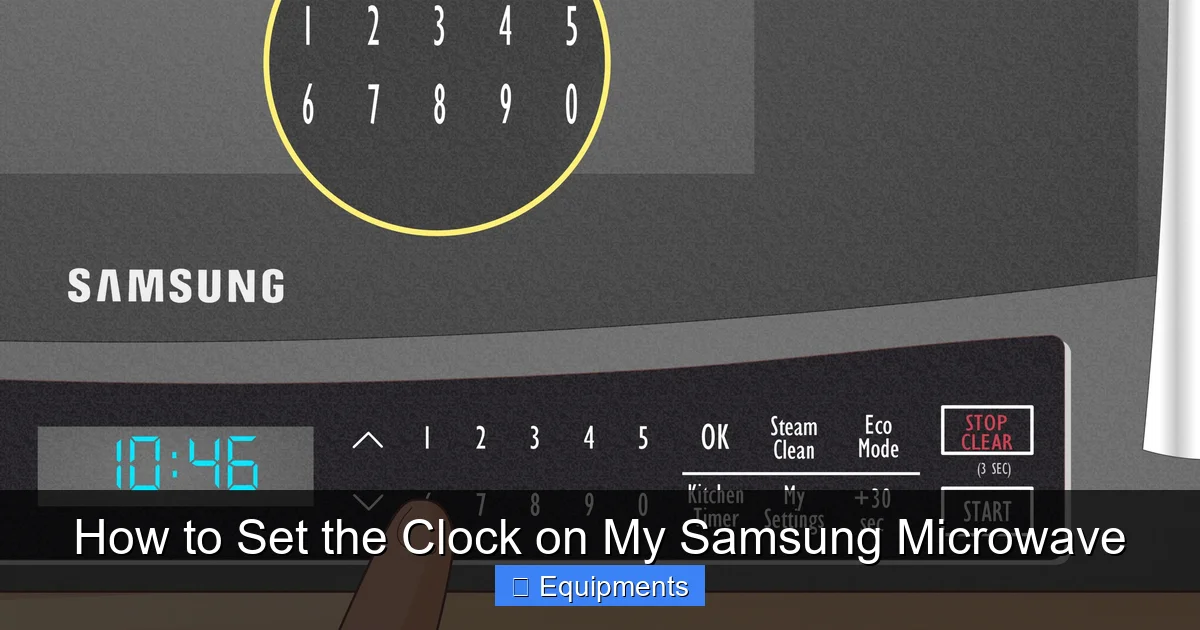
This is the most prevalent design. It’s a flat, smooth surface with printed symbols and numbers. You look for a button explicitly labeled “Clock” or “Time Set”. It’s often located in a row with other utility functions like “Timer,” “Stop/Cancel,” and “Power Level.” On some models, it might be a secondary function of another button, accessed by first pressing a “Function” or “Options” key. The keypad numbers (0-9) are used to input the digits of the time.
The Rotary Dial & Button Combo
Found on some older or more premium Samsung models (like certain MC microwave drawers), this features a central dial for scrolling through menus and a handful of physical buttons. Here, you typically press a “Menu” or “Settings” button, turn the dial to navigate to a “Clock” or “Time” option, press the dial to select it, and then use the number pad (which may be on a separate panel or appear on the display) to enter the time.
The Minimalist LED Display Panel
On very basic, compact models, the control panel might be extremely simple, with just a few buttons below the display. The clock-setting button might be marked with a small clock icon (🕒) instead of text. The process is the same: press the clock icon button, use the number buttons, press “Start” or “Enter.” If you’re unsure, a quick visual scan for any symbol resembling a clock face is your best bet.
Pro Tip: If your microwave has a “Demo Mode” (common in showroom models), it will often disable the clock and cooking functions. This is usually deactivated by pressing and holding the “Stop/Cancel” button for 3-5 seconds. A “Demo Mode Off” message should appear.
Step-by-Step: Setting the Clock on Common Samsung Models
Now for the meat of the guide. We’ll walk through the exact sequence for the three most common Samsung microwave control schemes. Remember: if your model has a dedicated “Clock” button, that’s your starting point. If not, look for “Time Set” or a clock symbol.
Visual guide about How to Set the Clock on My Samsung Microwave
Image source: wikihow.com
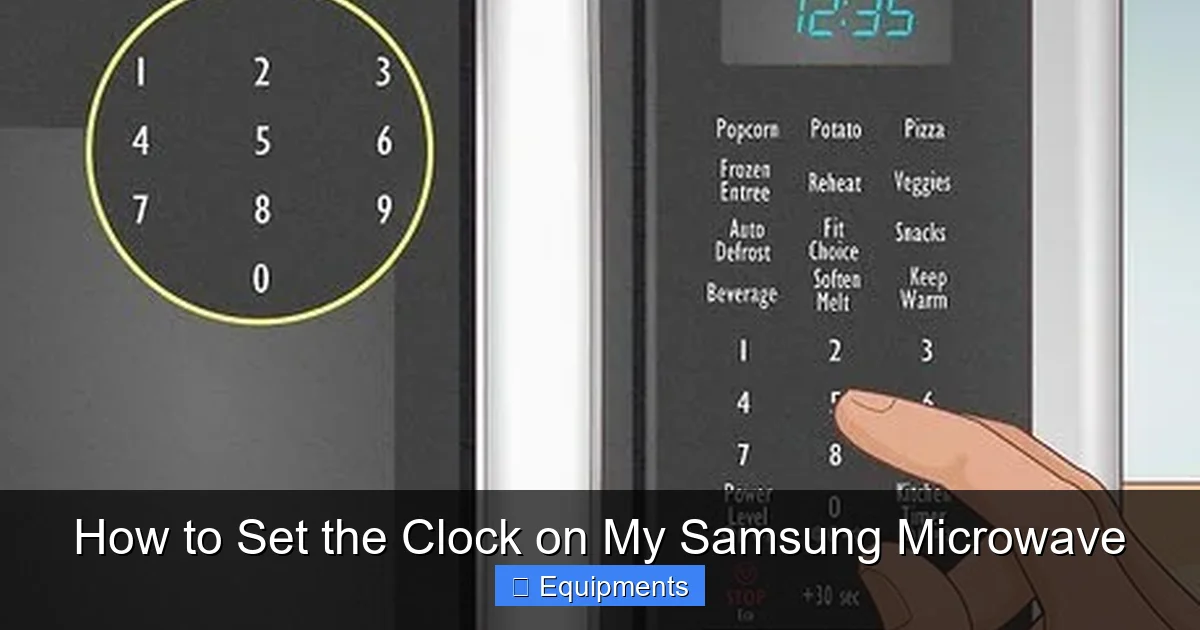
Method 1: The Standard “Clock Button” Method (Most Models)
This covers about 80% of Samsung microwaves, including popular series like the MC11K, MC12T, and many countertop models.
- Ensure the microwave is plugged in and the display is lit. If it’s blank, check your circuit breaker.
- Press the Clock or Time Set button once. You should see either the current time (if previously set) or a blinking “12:00” or “00:00” on the display. Some models may show “CL” or “TIME.”
- Enter the current time using the number pad. For 12-hour format (AM/PM), you typically enter 4 digits (e.g., 1:30 PM = 1330). For 24-hour format, you also use 4 digits (e.g., 1:30 PM = 1330). The display will show the numbers as you press them.
- Press the Enter or Start button to confirm. The colon will stop blinking, and the set time will remain on the display. On some models, you might need to press the “Clock” button again after entering the time.
- Check for AM/PM. If your model uses 12-hour format and you entered 1330, it should automatically interpret it as 1:30 PM. Some models have a separate AM/PM toggle; if so, a small “AM” or “PM” indicator will appear after you press “Enter.” Consult your manual if the time is wrong by 12 hours.
Method 2: The “Menu/Options” Navigation Method
This is common on Samsung’s more feature-rich models, including some over-the-range (OTR) units and convection microwaves.
- Press the Menu, Options, or Settings button. The display will show the first menu item, often “Weight Defrost” or similar.
- Use the Dial or Arrow buttons to scroll through the menu. Look for an option called “Clock Set”, “Time”, or an icon of a clock. The menu items are usually listed in a vertical line.
- Select the “Clock Set” option. Press the dial or an “Enter” button. The time display should begin blinking.
- Enter the time using the number pad. As before, use 4 digits for both 12h and 24h formats.
- Press Enter or Start to save. The microwave will usually beep once and return to the main display with the set time.
- Press Menu/Options again to exit the menu if it doesn’t exit automatically.
Method 3: The “Clock Icon” Button Method (Simple Panels)
For very basic models like the Samsung MC11A or similar compact units.
- Locate the button with a small clock symbol (🕒). It’s often near the “Timer” button.
- Press the clock button once. The display will show “12:00” or similar, with the colon blinking.
- Immediately enter the four-digit time. (e.g., for 8:45 AM, press 0,8,4,5).
- Press the Start button. This is the crucial step. On these simple models, the “Start” button is often used as the universal “Enter/Confirm” key for setting functions. Do not press “Stop/Cancel.”
- The time is set. The colon will stop blinking.
Critical Note: On some very old Samsung models, the sequence might be: Press “Clock,” enter time, press “Clock” *again* to set. If “Start” doesn’t work, try pressing the “Clock” button a second time after inputting the digits.
Troubleshooting: Why Your Clock Won’t Set & How to Fix It
You followed the steps, but the clock still flashes “12:00,” won’t accept input, or the display is blank. Don’t panic. This is almost always a simple fix. Let’s diagnose the problem.
Visual guide about How to Set the Clock on My Samsung Microwave
Image source: thekitchenix.com
Symptom: The Display is Completely Blank
Likely Cause: No power. This sounds obvious, but it’s the first thing to check.
- Solution: Ensure the microwave is securely plugged into a working outlet. Test the outlet with another device like a toaster. Check your home’s circuit breaker panel for a tripped breaker. If the microwave is on a GFCI outlet (common in kitchens), press the “Reset” button on the outlet.
Symptom: Buttons Don’t Respond / Display Shows “DEMO” or “dEMO”
Likely Cause: The microwave is in Demo Mode. This is a showroom feature that disables cooking and clock functions to prevent accidental use and to cycle through feature demonstrations.
- Solution: Press and hold the “Stop/Cancel” button for 3-5 seconds. You should hear a beep and see “DEMO OFF” or the regular display return. This is a very common issue with new installations or after a power surge.
Symptom: The Clock Resets to 12:00 Every Time There’s a Power Outage
Likely Cause: This is actually normal behavior for most microwaves. They lack a permanent battery backup like a computer. A brief power flicker or unplugging the unit will cause the clock to reset.
- Solution: Simply reset the clock using the methods above. If the clock resets *immediately* after you set it, without a power loss, there may be a faulty internal battery (rare) or a serious electrical issue. For frequent, unexplained resets, consult a Samsung service center.
Symptom: The Time is Wrong After Setting (e.g., 13:00 instead of 1:00 PM)
Likely Cause: Incorrect time format (12-hour vs. 24-hour) or AM/PM setting.
- Solution: Re-set the clock. Pay close attention to the display as you enter digits. If your model uses 12-hour format and you want 1:00 PM, you must enter 0100 or 1300? Try both. After pressing “Enter,” look for a small “PM” indicator. If it’s missing, your model may only use 24-hour format. To switch formats, you often need to access a deeper “System” or “Clock” menu via the “Menu” button—look for “12/24H” or “Time Format.”
Symptom: The “Clock” Button Does Nothing When Pressed
Likely Cause: Child Lock is activated. This safety feature disables most buttons to prevent accidental use by children.
- Solution: Look for a button labeled “Child Lock” or a padlock icon. You usually need to press and hold it for 3-5 seconds to deactivate. On some models, it’s a combination like pressing “Stop/Cancel” three times. A “LOCK” or padlock symbol should disappear from the display.
Symptom: The Display Shows “88:88” or All Dashes
Likely Cause: This typically indicates a severe internal fault or a corrupted control board memory, not a simple clock issue.
- Solution: Perform a hard reset. Unplug the microwave from the wall for at least 5 minutes. This clears the volatile memory. Plug it back in. If the display returns to normal, try setting the clock again. If it still shows “88:88,” the control board may need professional service.
Beyond the Clock: Related Time-Based Features
Once your clock is set, you unlock the full potential of your microwave’s time management tools. Understanding these related features will make you a power user.
Using the Timer Function
The timer is separate from the clock. It’s a countdown tool for any task—steeping tea, timing a child’s homework session, or reminding you to check the oven. To use it:
- Press the “Timer” button (not the Clock button).
- Enter the desired countdown time using the number pad (e.g., 5 minutes = 0050 or 5:00).
- Press “Start”. The display will count down. It will beep when finished.
- Key Difference: The timer does not use the set clock time. It’s a standalone stopwatch in reverse. The clock continues to show the current time in the corner while the timer counts down.
Delayed Start / Scheduled Cooking
This is the feature that truly leverages the set clock. Not all Samsung microwaves have it, but many convection and smart models do. It allows you to program the microwave to start cooking at a specific future time.
- Place food in the microwave and select the cooking program (e.g., “Sensor Cook,” “Convection Bake,” or a specific power level/time).
- Look for a button labeled “Delay Start”, “Schedule”, or a clock icon with a “+” sign.
- Press it, then enter the *start time* using the number pad (e.g., 1800 for 6:00 PM).
- Press “Start”. The microwave will display the scheduled start time and count down to it. The food will cook automatically.
- Note: This is perfect for having a frozen meal ready when you walk in the door, but ensure the food is safe to sit at room temperature for the delay period.
Auto Reheat / Sensor Cooking Timers
Many Samsung microwaves have “Sensor Reheat” or “Auto Cook” cycles. These use humidity sensors to determine when food is hot. The display will often show a *relative* time (e.g., “3:00”) counting down during the sensor cycle. This countdown is an estimate and can change based on moisture. The *actual* clock time remains visible in a smaller corner of the display (if your model has a dual-display). This is a normal, helpful feature that can confuse users who think the clock is wrong.
Maintenance and Long-Term Care for Your Microwave’s Clock
Keeping your microwave’s clock accurate and functional is mostly about understanding its quirks and performing occasional simple maintenance.
Managing Daylight Saving Time
Twice a year, you’ll need to adjust your microwave clock (unless you live in a region that doesn’t observe DST). Since the clock has no internet connection, it won’t update itself.
- Best Practice: When you change your clocks in spring/fall, add “change microwave clock” to your checklist. It’s a 30-second task.
- Pro Tip: If your model has a 24-hour format, you avoid the AM/PM confusion during the changeover. Simply add or subtract one hour from the 24-hour time (e.g., 14:00 becomes 15:00 in spring).
Dealing with a Fading or Partial Display
Over time, especially on older models, segments of the LED or LCD display can burn out. You might see only the top half of the number “8,” making “8” look like “0,” or a missing colon.
- Diagnosis: If only the clock is affected but cooking functions work perfectly, it’s likely a failing display segment. If the entire display is dim or unreadable, it could be a backlight issue or a failing control board power supply.
- Solution: A partial display failure is usually an aesthetic issue. You can still set the time by learning which segments are dead (e.g., if the top bar of “8” is out, an “8” will look like a “0”). For a completely dead display, the microwave may still work blindly, but setting the clock becomes impossible without external help. A service technician can replace the display assembly, but on an older unit, it may not be cost-effective.
When to Consult the Official Manual
While this guide covers 95% of cases, your specific model number (found on the door jamb or back label) has its own definitive manual. Download the PDF from the Samsung support website. Search the PDF for “clock,” “time,” or “set.” The manual will have the exact button labels and sequence for your unit, eliminating all guesswork. It’s the ultimate authority.
The “Last Resort” Factory Reset
If you’ve tried everything—unplugging, checking for demo/child lock—and the clock still won’t set or functions are erratic, a factory reset might help. This will clear all custom settings (like favorite cook modes, weight presets, etc.) and restore the microwave to its original out-of-box state, including the default clock setting procedure.
- How to (General Method): Press and hold the “Stop/Cancel” button for 10-15 seconds. Some models require a sequence: unplug, press and hold “Start” while plugging back in, then release after 5 seconds. Your user manual is essential here. Search for “reset” or “factory reset.”
- After the Reset: You will need to set the clock from scratch, using the standard method for your model.
Conclusion: Mastering Your Microwave’s Basics
Setting the clock on your Samsung microwave is more than a trivial chore; it’s the first step in fully mastering one of your most-used kitchen appliances. By understanding the common control schemes—the dedicated Clock button, the Menu navigation, or the simple icon button—you can confidently tackle this task on virtually any model. Remember the universal sequence: Find the Clock/Time Set button, enter the 4-digit time, confirm with Enter/Start.
When things go wrong, methodical troubleshooting solves most issues. Check for Demo Mode and Child Lock first, as these are the prime culprits behind unresponsive buttons. Understand that a power loss will almost always reset the clock, which is normal. And know that your user manual, specific to your model number, is the final word.
A correctly set clock brings harmony to your kitchen dashboard, enables the use of timers and delayed-start features, and simply makes daily life run a little smoother. So the next time the microwave flashes “12:00” after a storm, don’t ignore it. Take those 30 seconds, follow the steps for your model, and restore that small but significant piece of order to your culinary command center. You’ve got this.
Frequently Asked Questions
Why does my Samsung microwave clock keep resetting to 12:00?
This is normal. Samsung microwaves do not have a battery backup for the clock. Any power interruption, including a tripped breaker, unplugging, or even a strong power surge, will cause it to revert to the default “12:00” time. You simply need to reset it after power is restored.
How do I switch my Samsung microwave from 12-hour to 24-hour time format?
This setting is usually within a system menu. Press the “Menu” or “Options” button, scroll to find “Clock Set,” “System,” or “Time Format.” Select it and look for “12/24H” or “Time Format.” Toggle to your preferred setting and press “Enter.” Not all basic models offer this switch; consult your manual.
What’s the difference between setting the Clock and the Timer on my Samsung microwave?
The Clock is a permanent display of the current time of day. The Timer is a temporary countdown you set for any duration (e.g., 5 minutes). You set the clock once (until a power loss), while you use the timer repeatedly for different tasks. They use separate buttons and functions.
My microwave display is on, but pressing the Clock button does nothing. What’s wrong?
The two most likely causes are an active Child Lock or Demo Mode. For Child Lock, press and hold the “Child Lock” button (padlock icon) or sometimes “Stop/Cancel” for 3-5 seconds. For Demo Mode, press and hold “Stop/Cancel” for 3-5 seconds until “DEMO OFF” appears. Check your manual for the exact deactivation method for your model.
Can I set the clock on my Samsung microwave without using the number pad?
No. All Samsung microwaves require the numeric keypad (0-9) to input the hour and minute digits. There is no voice control or scroll-wheel time setting on these appliances. The process is always: button to initiate > numbers to set > button to confirm.
My microwave shows “88:88” on the display. Is this related to the clock?
Yes, “88:88” or all dashes is a general error or fault code indicating a serious problem with the control board or its connection to the display. It’s not just a clock issue. Try unplugging the microwave for 5 minutes to perform a hard reset. If the display returns to normal, reset the clock. If “88:88” persists, the microwave requires professional service.