A clogged sink drain from hair is a common, frustrating household problem. The good news is you can usually fix it yourself without a plumber. This guide covers everything from simple prevention tricks to using a drain snake or natural cleaners. We’ll walk you through each method step-by-step, so you can choose the safest, most effective solution for your situation. By the end, you’ll know exactly how to tackle that hairball and stop it from coming back.
Let’s be honest: there’s a special kind of dread that comes from watching the water swirl lazily in your bathroom or kitchen sink, then just… sit there. You know what’s down there. It’s a tangled, soggy mat of hair, mixed with soap scum and who knows what else, creating a perfect, stubborn plug. Before you call a plumber and brace for a hefty bill, take a deep breath. Getting hair out of a sink drain is a classic DIY challenge, and with the right knowledge and tools, you are more than capable of handling it. This isn’t just about a one-time fix; it’s about understanding your plumbing, using the right equipment safely, and implementing habits that keep your drains freely flowing for the long haul. We’re going to break it all down, from the easiest prevention tricks to the tools you might need for a serious clog.
First, a quick note on equipment. The category for this guide is “Equipments,” and that’s exactly what we’ll focus on. You don’t need a warehouse full of tools. A few key, inexpensive items kept in a kitchen cabinet or utility closet will solve nearly every hair-clog scenario. Think of this as building your personal “drain-clearing kit.” We’ll explore what each tool does, how to use it properly, and when it’s the right choice. Safety is paramount, too, especially when dealing with chemicals or tools near water. So, roll up your sleeves, and let’s dive into the satisfying work of reclaiming your sink’s drainage.
Key Takeaways
- Prevention is the most effective strategy: Using simple drain covers and regular flushing with hot water stops most clogs before they start.
- Start with the simplest methods first: Always attempt manual removal with a drain claw or bent wire before reaching for chemical cleaners.
- Chemical drain cleaners have significant downsides: They can damage old pipes, harm the environment, and are dangerous if misused; they should be a last resort.
- A manual drain snake (auger) is a versatile, reusable tool: It’s highly effective for deep clogs and a worthy investment for any homeowner.
- Natural solutions like baking soda and vinegar work for mild buildup: They are safe for all pipes and good for regular maintenance but may not dissolve a solid hair clog.
- Understanding your drain type matters: Pop-up drains in bathrooms require a different removal approach than simple strainers in kitchen sinks.
- Regular monthly maintenance is key: A quick routine of cleaning the stopper and flushing with hot water or a baking soda/vinegar mix prevents 90% of hair clogs.
📑 Table of Contents
- Understanding the Enemy: How Hair Clogs Happen
- First Line of Defense: Essential Tools for Hair Removal
- Method 1: The Manual Approach – No Tools or Simple Tools
- Method 2: The Auger Approach – For Deep, Stubborn Clogs
- Method 3: Chemical and Natural Cleaners – Use With Caution
- Method 4: Professional-Grade Tools for Tough Jobs
- Method 5: The Nuclear Option – Disassembling the P-Trap
- Long-Term Maintenance: Keeping Hair Out for Good
Understanding the Enemy: How Hair Clogs Happen
To defeat a problem, you must first understand it. A hair clog isn’t just a single, long strand that slides down the pipe. It’s a gradual process of accumulation. When hair goes down the drain, it doesn’t travel alone. It immediately mixes with other substances—soap residue, shampoo chemicals, shaving cream, toothpaste, and grease from the kitchen. This mixture coats the hair, making it sticky and causing individual strands to clump together. These clumps then catch on the inside walls of your drain pipe, at the P-trap (the U-shaped curve under your sink designed to hold water and block sewer gases), or right at the drain opening itself.
The Role of Soap Scum and Other Debris
Soap, especially traditional bar soap, is a major contributor. When it mixes with the minerals in hard water, it forms a tough, chalky substance called soap scum. This scum acts like a glue, binding hair strands together and to the pipe. In kitchen sinks, the problem is often grease and food particles that congeal in the cooler pipes, trapping hair in the process. The result is a dense, felt-like mass that slowly restricts water flow until it stops it completely.
Why Bathroom Sinks Are Prime Targets
Bathroom sinks and shower drains are the most common victims of hair clogs. This is simple volume. We brush our hair, shave, and wash our faces daily, shedding countless strands directly over the drain. A single person can contribute enough hair in a year to make a small wig! And it’s not just head hair; beard trimmings, pet hair from washing a dog, and even leg hair all add to the mix. Kitchen sinks see hair from washing vegetables, meat, or even from pets drinking from bowls placed nearby. The location dictates the primary culprit, but the solution remains largely the same.
First Line of Defense: Essential Tools for Hair Removal
Before you ever pour a drop of liquid cleaner down there, you need to arm yourself with the physical tools that can mechanically remove the obstruction. These tools are your best friends because they actually *remove* the hair, rather than just attempting to dissolve it (which can be incomplete and leave behind residue). They are reusable, chemical-free, and give you immediate visual confirmation of success. Here’s your core equipment checklist.

Visual guide about How to Get Hair Out of a Sink Drain
Image source: allcoasthomeinspections.com
The Classic Drain Claw or Hair Snake
This is the simplest, cheapest, and often most effective tool for a clog right at the drain opening. It’s a long, flexible strip of metal (usually spring steel) with a barbed or hooked tip. You simply feed it down the drain, twist it, and pull it back out. The barbs catch the hair and pull it to the surface. It’s perfect for bathroom sinks and shower drains where the clog is shallow. Pro Tip: After you pull out a clump, wipe the tool clean with a paper towel before reinserting it. This prevents you from just pushing the hair further down.
The Manual Drain Auger (Plumber’s Snake)
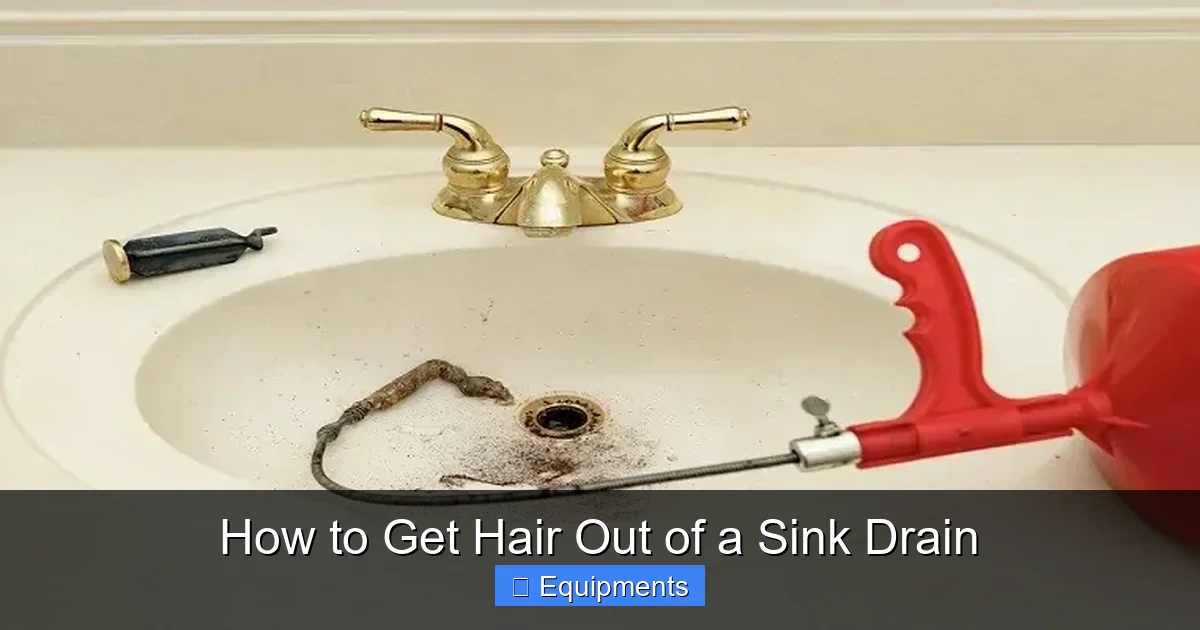
This is the heavy-duty sibling of the drain claw. It’s a coiled, flexible metal cable (usually ¼-inch thick) housed in a hand-crank drum. The tip is often more robust. You feed the cable into the drain while cranking the handle. The rotation allows the tip to navigate bends in the pipe (like the P-trap) and either hook onto the clog or break it apart. When you feel resistance, you crank a few more times, then pull the cable back out, bringing the entangled hair with it. This tool is essential for clogs that are deeper than a few feet. They are available at any hardware store for $15-$40 and are a fantastic investment.
The Zip-It or Plastic Drain Snake
A cheaper, plastic alternative to the metal drain claw. It’s a long, thin strip of flexible plastic with barbs along its sides. It works on the same principle—insert, twist, remove. It’s disposable and great for very shallow clogs, but it lacks the strength and reach of metal tools. It’s good to have on hand for a quick fix, but don’t expect it to solve a tough, deep blockage.
Basic Hand Tools: Pliers and a Bucket
Don’t underestimate the basics. A pair of needle-nose pliers is invaluable for reaching into the drain opening (after removing the stopper) and grabbing visible hair. A small bucket or large bowl is crucial for catching water and debris when you disassemble the P-trap under the sink. You’ll also need an adjustable wrench or channel-lock pliers to loosen the slip nuts on the P-trap. Having a old toothbrush and some rags on hand for cleanup is also smart.
Method 1: The Manual Approach – No Tools or Simple Tools
This is your starting point. It requires minimal equipment and carries zero risk of chemical damage. Often, the clog is right at the surface, and a little manual effort is all it takes. This method also gives you the most control and the cleanest result, as you physically extract the offending material.

Visual guide about How to Get Hair Out of a Sink Drain
Image source: sinkformula.com
Step 1: Clear the Area and Remove the Stopper
Place your bucket or bowl under the sink’s P-trap (the U-shaped pipe under the drain). This will catch any dirty water and debris when we potentially open the pipe later. Now, look at your sink drain. Is it a simple strainer that screws out? A pop-up stopper linked to a lift rod? A push-pull drain? You need to remove the mechanism blocking the drain opening. For a strainer, simply unscrew it counter-clockwise. For a pop-up stopper, you usually need to disconnect the pivot rod. Look for a nut connecting the rod to the drain tailpipe. Loosen it with pliers and pull the rod out, then lift the stopper out. For a push-pull, you may need to unscrew the top knob and pull the whole assembly out. Consult your faucet’s manual if you’re unsure. Place the stopper aside.
Step 2: The Visible Hair Grab
With the stopper gone, shine a flashlight down the drain. You will likely see the problem immediately: a dark, wet clump of hair sitting right at the drain mouth. Using your needle-nose pliers, reach in and grab as much as you can. Pull it out slowly to avoid breaking it apart. Use your fingers (wearing a rubber glove if you prefer) to feel for more. Get everything you can see and feel. This initial removal alone might restore good flow.
Step 3: Employ the Drain Claw or Zip-It
Now, insert your drain claw or Zip-It tool slowly into the drain. Feed it in until you feel resistance—this is likely the clog deeper in the pipe. Once you feel it, twist the tool clockwise a few times to let the barbs engage the hair. Then, pull the tool straight out. You should see hair wrapped around the barbs. Wipe it off on a paper towel, and repeat the process. You may need to do this 3-5 times to fully clear the pipe. The key is patience and repetition. Each pass removes more material.
Step 4: Test and Flush
Once the tool comes out relatively clean, run the tap on hot water. Does it drain quickly? If yes, success! Let it run for 30 seconds to flush any remaining small particles down the line. If it’s still slow, the clog is deeper, and it’s time to escalate to the next method.
Method 2: The Auger Approach – For Deep, Stubborn Clogs
When the simple claw can’t reach or the clog is firmly lodged past the P-trap, you need an auger. This tool is designed for exactly this scenario. It’s important to use it correctly to avoid damaging your pipes.
Visual guide about How to Get Hair Out of a Sink Drain
Image source: classifiedmom.com
Preparing the Auger and Drain
If you haven’t already, remove the drain stopper as described in Method 1. If you have a P-trap (the curved pipe under your sink), it’s often easier and more effective to snake through the clean-out. Place your bucket under the P-trap. Using your wrench, carefully loosen the slip nuts on both ends of the P-trap and remove it. You’ll now have a straight shot into the drain line going into the wall. Have rags ready; a little water will spill out.
Feeding the Cable
Insert the tip of the auger cable into the drain opening (or the open P-trap line). Hold the drum steady with one hand. With your other hand, crank the handle clockwise. You should feel the cable feeding itself into the pipe. Crank steadily. Do not force it. If you feel a hard stop, stop cranking. You’ve likely hit a bend in the pipe or the clog itself.
Hooking and Breaking the Clog
Once you feel resistance, continue cranking gently. The rotation of the cable and its tip will do two things: it can hook into the hair mass, or it can grind into it and break it apart. You might feel the resistance lessen as the clog breaks up. Keep cranking for another 10-15 turns past the point of resistance. Now, slowly reverse the direction by cranking counter-clockwise, pulling the cable back out. As it emerges, you will almost certainly see hair, gunk, and debris wrapped around the cable. Wipe it off continuously. You may need to repeat this feed-and-retrieve process 2-3 times until the cable comes out mostly clean.
Reassembly and Final Flush
Once the cable is clean, reinstall the P-trap. Hand-tighten the slip nuts first, then give them a quarter-turn with the wrench—don’t overtighten. Reinstall your drain stopper. Now, run hot water at a strong flow for a full minute. Watch for any backup. If the water drains swiftly and silently, you’ve won. If it’s still slow, the clog might be further down the main line, which may require a longer auger or a professional.
Method 3: Chemical and Natural Cleaners – Use With Caution
These methods come with significant caveats. They don’t *remove* hair; they attempt to dissolve it and other organic matter. They are best for maintenance or for very recent, small clogs. For a solid, dense hairball, they often fail or only make a partial hole through the center, leaving the outer mass intact.
Chemical Drain Cleaners: The Last Resort
Products like Drano or Liquid-Plumr contain powerful chemicals (sodium hydroxide or sulfuric acid) that generate heat and dissolve organic matter. We do not recommend them as a first choice. The risks are real: they can damage older metal or PVC pipes if misused or left too long, they are extremely hazardous to skin and eyes, and their fumes are dangerous in enclosed spaces. If you must use one:
- Read the label. Follow every instruction precisely.
- Use only in a well-ventilated area.
- Never mix with other cleaners. This can create deadly chlorine gas.
- Wear rubber gloves and eye protection.
- Pour the specified amount into the drain and wait the exact time listed. Do not let it sit overnight unless the product explicitly says it’s safe.
- Flush thoroughly with cold water afterward.
Given the effectiveness and safety of manual methods, chemical cleaners should be your absolute last option, reserved for when all else fails and you are willing to accept the risks.
The Baking Soda and Vinegar Method
This is a safe, non-toxic, and excellent method for light buildup and regular maintenance. It won’t clear a solid clog, but it’s perfect for keeping pipes clean and deodorized.
- Pour ½ cup of baking soda down the drain.
- Follow it with ½ cup of white distilled vinegar.
- Immediately cover the drain opening with a wet rag or plug to contain the fizzing reaction.
- Let it sit for at least 30 minutes, or overnight for best results.
- Remove the plug and flush with a kettle of boiling water.
The chemical reaction between the alkaline baking soda and acidic vinegar creates carbon dioxide bubbles that can help dislodge minor grime. The final hot water flush washes it all away. This is a fantastic monthly ritual.
Method 4: Professional-Grade Tools for Tough Jobs
If you’ve tried the manual auger and the clog persists, it might be time to consider renting or purchasing a more powerful tool. These are what professional plumbers use.
Electric Drain Augers (Power Snakes)
These are motorized versions of the hand auger. They have a longer cable (often 25-50 feet) and a motor that spins the cable at high speed. They are ideal for clogs that are deep in the branch line or even in the main stack. You can rent them from most hardware stores for $30-$50 per day. Caution: These are powerful machines. You must read the rental instructions carefully. The cable can kink, get stuck, or even cause injury if it whips back. Always wear gloves and eye protection. Feed the cable slowly, and if it jams, reverse it immediately. This tool is for serious, persistent clogs that have defeated all hand-powered efforts.
Wet/Dry Vacuum
A powerful shop vac can sometimes suck a clog out. This works best if the clog is relatively shallow and the vacuum can create a tight seal around the drain opening. You’ll need to create a good seal—wrap a rag around the vacuum hose and shove it into the drain. Set the vacuum to “wet” mode if it has that setting, turn it on, and hold the seal firmly for a minute or two. The suction can sometimes pull the hair mass up and out. This method is hit-or-miss but worth a try before a major disassembly.
Method 5: The Nuclear Option – Disassembling the P-Trap
When all else fails, or when you just want to see and remove the clog in its entirety, you go directly to the source. This is a guaranteed way to get the hair out, as you are literally opening the pipe and pulling it out by hand. It’s messy but highly effective.
Step-by-Step P-Trap Removal
You’ve already placed your bucket under the sink. Now, using your wrench, loosen the two slip nuts on the P-trap—the one connecting it to the sink drain tailpiece and the one connecting it to the wall pipe. Loosen them by hand until they are free, then use the wrench for the final turn. Be prepared for a gush of dirty water into your bucket. Once both nuts are off, carefully lower the P-trap and dump its contents into the bucket. You will almost certainly find the hair clog right there, sitting in the curve of the trap. Pull it out with your fingers or pliers.
Cleaning and Reassembly
Take the P-trap outside or to a utility sink. Use a bottle brush or an old toothbrush and some soapy water to scrub the inside of the trap thoroughly. You’ll be amazed at the gunk that lines it. Rinse it clean. While it’s off, also reach into the horizontal drain pipe going into the wall (the “waste arm”) and pull out any debris you can feel. Once everything is clean, reassemble the P-trap. Hand-tighten the slip nuts first to avoid cross-threading, then give each a firm quarter-turn with the wrench. Do not overtighten, as you could crack the plastic or metal. Test for leaks by running water, then check the nuts for any drips and tighten slightly if needed.
Long-Term Maintenance: Keeping Hair Out for Good
Clearing a clog is satisfying, but preventing one is even better. A few simple habits and cheap pieces of equipment will save you hours of frustration down the line. Think of this as the final, most important section.
Install Drain Strainers and Covers
This is the single most effective piece of equipment you can buy. A simple, inexpensive stainless steel or silicone mesh strainer that sits over the drain opening will catch 95% of hair before it even enters the pipe. For shower drains, there are many designs: some sit on top, some insert into the drain, and some (like the “ShowerShroom”) are designed to be pushed into the drain and pulled out with hair wrapped around them. Clean these strainers weekly. It takes two seconds and prevents a world of trouble.
Adopt a “Flush with Hot Water” Habit
After every shower, shave, or sink use, run the hot water tap for 15-20 seconds. This helps melt any soap scum and pushes hair fragments through the pipe before they can accumulate and stick. In the kitchen, after washing dishes, run hot water with the disposal (if you have one) to flush grease particles.
Monthly Baking Soda & Vinegar Treatment
As mentioned earlier, this is the perfect monthly maintenance routine. It keeps pipes clean, deodorized, and free of the sticky film that causes hair to cling. Set a calendar reminder. It’s a 5-minute job that has a huge preventive impact.
Be Proactive with Hair
This sounds obvious, but it’s the root cause. Try to brush your hair *before* you shower to remove loose strands. If you shave in the sink, wipe the hair from the basin with a paper towel before rinsing. For pet baths, place a washcloth over the drain to catch fur. Simply being aware of the volume of hair going down is half the battle.
Know Your Limits
If you’ve attempted the auger and P-trap removal and the drain is still slow, the clog is likely far down the main sewer line. This could be due to tree roots, a collapsed pipe, or a severe buildup over many years. At this point, it’s time to call a professional plumber. They have industrial-grade drain cameras to diagnose the exact problem and powerful motorized augers that can reach 100+ feet. Trying to force a hand auger further than it’s designed for can damage your pipes.
Frequently Asked Questions
Is it safe to use chemical drain cleaners on hair clogs?
Chemical drain cleaners can sometimes dissolve a hair clog, but they carry significant risks. They can damage older or PVC pipes, produce dangerous fumes, and cause severe burns. They also rarely remove the entire clog, often leaving a sticky residue. Manual removal with a snake or drain claw is safer, more effective, and provides immediate results.
How do I remove hair from a pop-up sink stopper?
First, remove the stopper. For most pop-ups, loosen the pivot rod nut under the sink with pliers, slide the rod out, and lift the stopper. Hair will be wrapped around the pivot rod and the clevis strap. Clean all that off. Then, with the stopper out, you can see and clean the drain opening directly and use a drain snake.
What’s the difference between a drain snake and a drain auger?
The terms are often used interchangeably. A small, handheld tool for shallow clogs is usually called a drain snake, clog remover, or drain claw. A larger, drum-housed tool with a thicker cable for deeper pipes is called a hand auger or plumber’s snake. Both work on the same principle of mechanically hooking and removing the clog.
Will baking soda and vinegar dissolve a solid hair clog?
No. The reaction between baking soda and vinegar creates fizzy bubbles that are good for dislodging light grime and soap scum, but it does not generate enough heat or chemical strength to dissolve a dense, matted hairball. It is excellent for prevention and maintenance but ineffective for a full blockage.
My sink drains slowly but not completely clogged. What should I do?
A slow drain indicates a partial clog, usually a buildup on the pipe walls. This is the perfect time to use the baking soda and vinegar method followed by a hot water flush. You can also try a drain claw to see if you can pull out the beginning of a hair mass. Addressing it now prevents a total blockage later.
How often should I clean my sink drain to prevent hair clogs?
For best prevention, adopt a weekly habit of removing the drain stopper/strainer and cleaning out any visible hair. Then, perform a monthly deep maintenance routine with baking soda and vinegar followed by hot water. If you shed a lot of hair or have multiple people using the sink, you may need to do the weekly clean more often.