Forget flat, crispy cookies. This Levain Bakery Cookie Recipe Copycat unlocks the secret to the bakery’s famous, massive, ultra-chewy cookies with a perfectly crisp exterior and a gooey, underbaked center. We replicate the high butter-to-flour ratio, the strategic use of bread flour, and the critical chilling step that prevents spreading. Get ready to bake cookies that are impossibly thick, deeply flavorful, and have that signature crackly top—all with simple ingredients and clear, foolproof instructions. It’s the definitive homemade version you’ve been searching for.
Key Takeaways
- The Secret is in the Ratio: Levain’s signature texture comes from an unusually high fat-and-sugar-to-flour ratio, creating a dense, moist, and chewy cookie that barely spreads.
- Bread Flour is Non-Negotiable: The higher protein content in bread flour develops more gluten, giving the cookies their characteristic chew and structural integrity to stay thick.
- Chilling is Crucial: Refrigerating the dough for at least 24 hours (up to 72) solidifies the butter, preventing excessive spread and allowing flavors to meld for a richer taste.
- Weigh Your Ingredients: For true copycat accuracy, use a kitchen scale. Volume measurements (cups) can vary wildly, leading to dry or overly greasy cookies that don’t match the original.
- Embrace the “Underbaked” Look: The cookies will look pale and underdone when pulled from the oven. They continue cooking on the hot sheet, setting the exterior while keeping the center gloriously gooey.
- Size Matters: Use a 3.5-ounce (100g) scoop for each cookie. This massive size is key to achieving the bakery’s dramatic, bakery-style appearance and texture ratio.
- Dark Chocolate is Best: Levain uses high-quality dark chocolate chunks. Using a good 60-70% dark chocolate bar, chopped, mimics the deep, sophisticated flavor and melty pockets perfectly.
📑 Table of Contents
The Legend of Levain: Why We’re All Obsessed
If you’ve ever found yourself in New York City, specifically on the Upper West Side, you’ve likely heard the whispers, seen the lines, or perhaps even braved them yourself. We’re talking about Levain Bakery, a legendary spot that transformed the humble chocolate chip cookie into a cult object. Their cookies are not just baked goods; they are architectural marvels. They are famously massive—each one a hefty, palm-sized disk of pure indulgence. They are famously thick, standing proud and proud, barely spreading a centimeter. And they are famously textured: a shatteringly crisp, crackly top that gives way to a dense, fudgy, almost underbaked center that is the pinnacle of chewy perfection.
This texture profile is the holy grail for home bakers. For years, the exact recipe was a closely guarded secret, fueling countless failed attempts to replicate it. Flat, crispy cookies? We’ve all been there. Cakey, soft cookies? Not the goal. The Levain cookie is in a league of its own. It’s a cookie that defies conventional baking wisdom. It uses more butter, more sugar, and less flour than your standard recipe. It employs bread flour, not all-purpose. It demands patience with a long chill. This Levain Bakery Cookie Recipe Copycat is the culmination of meticulous testing, reverse-engineering, and a deep dive into the science of baking to bring that iconic bakery experience straight to your kitchen. Prepare to have your cookie expectations forever changed.
The Anatomy of an Icon: Deconstructing the Levain Cookie
To truly copycat something, you must first understand it. Let’s break down what makes a Levain cookie unique. First, the shape and size. These are not delicate, dainty cookies. They are robust, hefty, and baked in large, free-form mounds. This size is critical; it creates a specific ratio of crust to chewy interior. Second, the texture contrast. The top is matte, craggy, and crisp—almost like a fine biscotti. It cracks audibly when you bite. The interior, however, is dense, moist, and fudgy. It’s not raw, but it’s certainly not fully set like a traditional cookie. This is achieved through precise baking time and that high fat content, which keeps the center soft. Third, the flavor. It’s deeply buttery, richly chocolatey, with a hint of vanilla and a subtle, pleasant saltiness from the sea salt on top. There’s no spice, no brown sugar molasses flavor—it’s a pure, elegant expression of chocolate and butter. Our copycat recipe targets each of these attributes with surgical precision.
The Essential Pantry: Your Copycat Toolkit
Before we mix a single spoonful of sugar, let’s talk equipment and ingredients. Success here depends on using the right tools and understanding *why* each ingredient is specified. This isn’t a recipe where you can freely substitute without consequence.
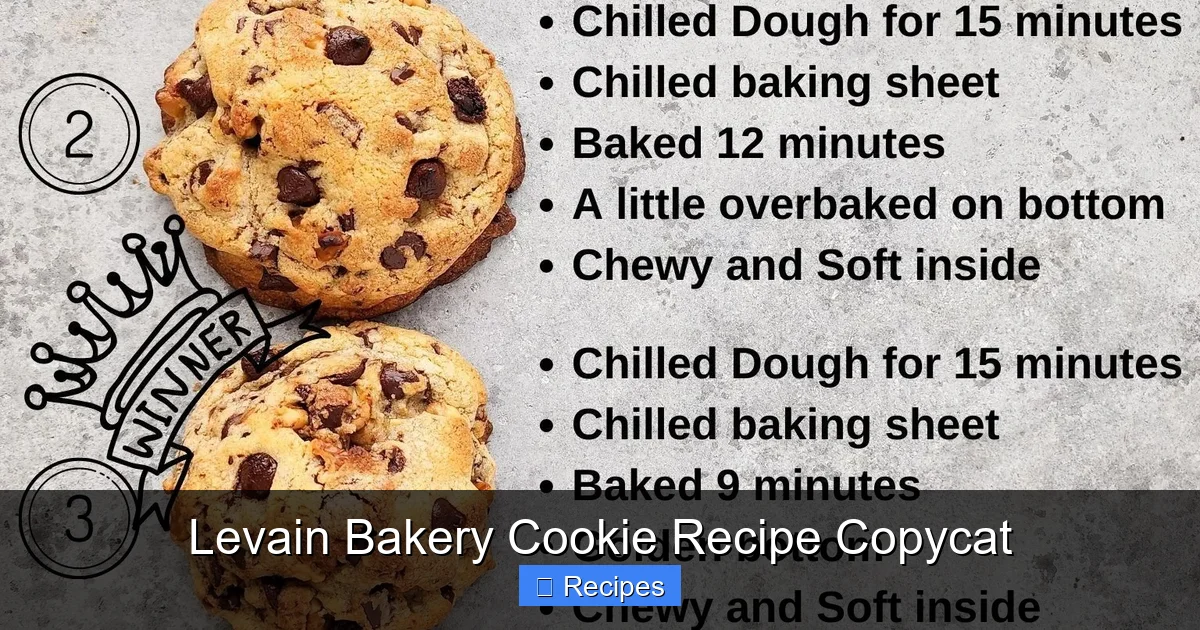
Visual guide about Levain Bakery Cookie Recipe Copycat
Image source: i.pinimg.com
Equipment: The Bare Necessities (and One Luxury)
You don’t need a commercial kitchen, but a few key items will make your life infinitely easier and ensure bakery-style results.
- A Kitchen Scale: This is the most important tool. The recipe weights are in grams for a reason. A cup of flour can weigh anywhere from 120 to 150 grams depending on how you scoop. To hit the precise flour-to-butter ratio that defines Levain’s texture, you must weigh. Invest in a simple digital scale; it’s the single best baking purchase you can make.
- Stand Mixer (or a strong arm): A stand mixer with a paddle attachment is ideal for creaming the massive amount of butter and sugar until light and fluffy. You can use a hand mixer, but it will require patience and a sturdy bowl. Do not attempt this by hand unless you want a great workout and potentially overmixed dough.
- Large Cookie Scoop (3.5 oz / 100g): This is the magic size. A standard #20 scoop holds about 3 tablespoons. You need something bigger. An ice cream scoop is perfect. Consistent sizing means even baking and that iconic, bakery-style appearance.
- Parchment Paper or Silpat Mats: Do not bake these directly on the sheet pan. They need a non-stick surface to release easily and to prevent the bottoms from over-browning before the centers set.
- Heavy-Duty Baking Sheets: Use the heaviest, thickest baking sheets you own. Thin sheets can warp in the oven and cause uneven baking. Nordic Ware or similar thick, aluminum sheets are fantastic.
Ingredient Deep Dive: No Substitutions Allowed (Mostly)
This is where the magic (and the science) happens. Each ingredient plays a specific, non-interchangeable role.
- Bread Flour (280g): The champion. Its higher protein (gluten) content than all-purpose flour is what gives the cookies their signature chew. It creates more structure, preventing the cookie from becoming a puddle while still allowing for a tender, dense crumb. Substituting all-purpose flour will yield a cakier, less chewy result.
- Unsalted Butter (226g, 1 cup, room temperature): The foundation. The amount is lavish, contributing to the rich flavor and moist texture. It must be truly at room temperature—soft enough to leave a thumbprint, but not oily or melted—for proper creaming.
- Granulated Sugar (200g, 1 cup): Provides sweetness, but more importantly, it promotes crispness and spread. It’s a hygroscopic sugar, meaning it attracts moisture, which helps create that crackly top.
- Dark Brown Sugar (100g, ½ cup, packed): Adds moisture, chew, and a subtle caramel/molasses depth. It’s used in a smaller proportion than in many recipes to keep the flavor profile clean and chocolate-forward, not spicy or treacly.
- Large Eggs (2, room temperature): Provide structure, moisture, and emulsification. Room temperature eggs incorporate more evenly into the butter/sugar mixture, creating a stable, homogenous dough.
- High-Quality Dark Chocolate (340g, 12 oz): This is not the time for chocolate chips. Use a good 60-70% dark chocolate bar, roughly chopped. You want irregular chunks and shards, not uniform pellets. This creates pockets of intense, melty chocolate and varied texture. Brands like Ghirardelli, Callebaut, or Valrhona are excellent choices.
- Vanilla Extract (2 tsp): Use pure vanilla extract. It enhances all the other flavors without competing.
- Baking Powder (1 tsp): A small amount provides a tiny lift, preventing the cookies from being completely dense and heavy. It’s a key leavening agent in this low-flour recipe.
- Kosher Salt (1 tsp): Balances the sweetness and intensifies the chocolate flavor. If using table salt, reduce to ¾ tsp.
- Flaky Sea Salt (for finishing): The iconic finish. A sprinkle of Maldon or similar flaky sea salt on top of each cookie right after baking is essential for that sweet-salty contrast and gourmet touch.
The Sacred Ritual: Step-by-Step Copycat Method
Now, the moment you’ve been waiting for. The method is deliberate and has specific, non-negotiable steps. Follow them exactly for the first batch. Once you understand the why, you can experiment.
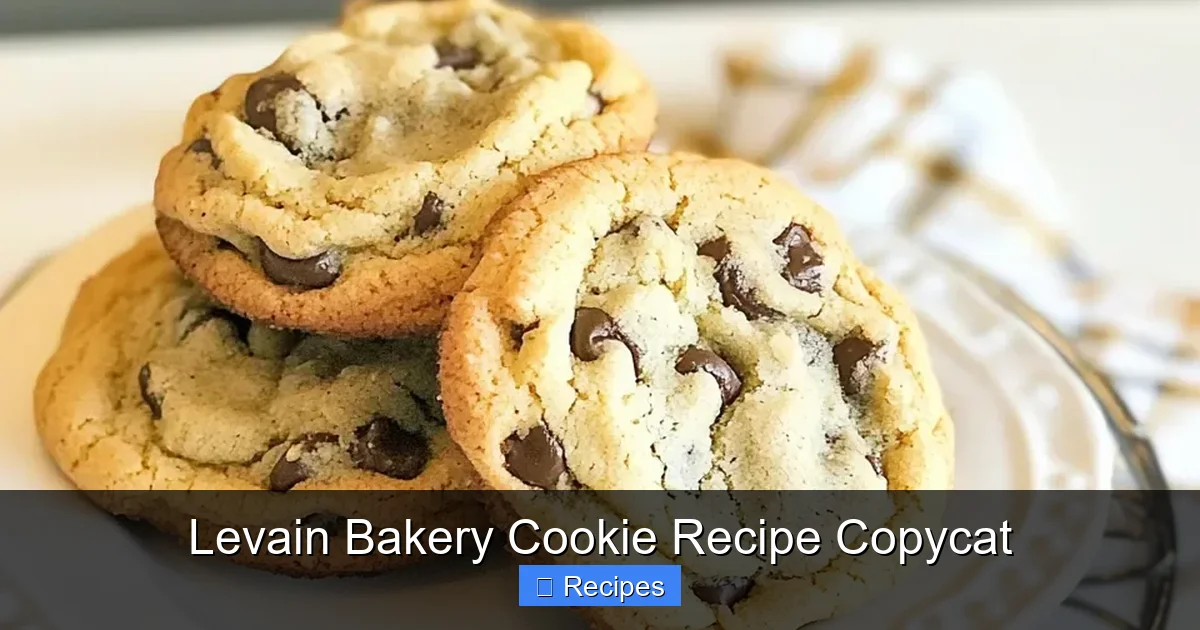
Visual guide about Levain Bakery Cookie Recipe Copycat
Image source: forkandpan.com
Step 1: The Creaming – Building Air and Structure
In the bowl of your stand mixer fitted with the paddle attachment, cream the room temperature butter, granulated sugar, and dark brown sugar on medium-high speed. This is not a quick 30-second job. You will cream for a full 5-7 minutes. The mixture will become visibly lighter in color, almost pale yellow, and will have a fluffy, creamy texture. Scrape down the bowl and paddle several times during this process. This step incorporates air into the butter, which is crucial for the cookie’s final texture. It also ensures the sugar is fully dissolved, which contributes to that crackly top. Under-creaming is a common mistake that leads to denser, less crisp cookies.
Step 2: Incorporating Eggs and Vanilla
With the mixer on low, add the room temperature eggs one at a time, letting the first fully incorporate before adding the second. Then add the vanilla extract. Mix just until combined. Adding eggs on low speed prevents the mixture from curdling and ensures a smooth, emulsified dough.
Step 3: The Dry Addition – Low and Slow
In a separate bowl, whisk together the bread flour, baking powder, and kosher salt. Do not skip whisking. This distributes the leavening and salt evenly. With the mixer on the lowest possible speed, gradually add the dry ingredients to the wet. Mix just until no dry flour remains. This is the most critical moment for avoiding overmixing. Overmixing develops too much gluten, leading to a tough, dense cookie. Stop the mixer as soon as the flour disappears. You will likely still have some flour visible on the sides of the bowl—this is fine; it will get incorporated when you add the chocolate.
Step 4: The Chocolate Fold – The Final Act
Turn off the mixer. Add your roughly chopped dark chocolate. Using a large spatula, fold the chocolate into the dough by hand. This ensures even distribution without overworking the dough. You want a generous, chaotic distribution of chocolate chunks. The dough will be very thick, stiff, and almost crumbly—this is normal and expected. It should not be a pourable batter. If it feels overly dry, you can let it rest for 10 minutes; the butter will soften and bring it together.
Step 5: The Mandatory Chill – Patience is a Virtue
This is the non-negotiable step that separates good cookies from legendary ones. Cover the bowl tightly with plastic wrap and refrigerate the dough for at least 24 hours, and up to 72 hours. Why so long? First, it re-solidifies the butter, which is crucial. When you scoop cold, firm dough onto a hot baking sheet, the butter takes longer to melt. This slower melt means the cookie spreads less, staying thick and proud. Second, the long chill allows the flour to fully hydrate and the flavors to deepen and meld. The sugars also have time to dissolve further, promoting that coveted crackly top. You will notice the dough darken slightly and become even firmer after a day or two. This is good.
Step 6: Baking – Precision Timing
Preheat your oven to 375°F (190°C). Place racks in the upper and lower thirds. Line your heavy baking sheets with parchment paper or Silpats. Using your large 3.5-ounce scoop, drop mounds of dough onto the prepared sheets, leaving at least 2 inches between each cookie. They will spread slightly. Do not flatten them. Sprinkle each mound with a tiny pinch of flaky sea salt. Bake one sheet at a time, on the middle rack, for 9-11 minutes. This is the most variable step. You are looking for the cookies to be puffed, golden on the edges, and pale in the center. The tops will look dry and crackly, but the centers will look dramatically underdone and soft. This is the goal. They will look underbaked. Do not bake until they look “done” in the center. The residual heat from the hot baking sheet will continue to cook the interior as they cool.
Step 7: The Rest – Where Magic Happens
Remove the baking sheet from the oven and let the cookies rest on the sheet for 5-10 minutes. They will deflate slightly and set. Trying to move them immediately will cause them to break. After resting, use a spatula to transfer them to a wire rack to cool completely. They will firm up significantly as they cool, but the center will remain soft and fudgy. For the best texture, let them cool for at least an hour before eating. I know, the torture is real.
Troubleshooting: Why Didn’t My Cookies Turn Out?
Even with the best recipe, things can go awry. Let’s diagnose the most common issues.

Visual guide about Levain Bakery Cookie Recipe Copycat
Image source: savorthebest.com
“My cookies spread too much and became thin.”
This is the #1 problem. The cause is almost always butter that was too warm. This could be from using soft (not room temp) butter, over-creaming (which warms the butter), or not chilling the dough long enough. Solution: Ensure butter is soft, not warm. Cream for the full time but stop when pale and fluffy. Chill the dough for the full 24 hours. If your kitchen is very warm, chill the scooped dough balls on the baking sheet for 15 minutes before baking.
“My cookies are cakey/soft instead of chewy/crisp.”
Likely causes: using all-purpose flour instead of bread flour, or under-baking in a different way (baking until golden all over). The bread flour is essential for chew. The pale, underdone center is essential for the gooey texture. If you bake until the center looks set, you’ll get a uniformly cakey cookie.
“My cookies are too greasy or dense.”
This can happen from overmixing after adding the flour, which can cause the butter to separate, or from measuring flour by volume (using too little). Always weigh your flour. Mix the dough just until combined.
“I don’t have bread flour. Can I use all-purpose?”
You can, but the result will be different—softer, less chewy, and likely to spread more. For a closer approximation, you can make a substitute by removing 1 tablespoon of all-purpose flour from each cup and replacing it with 1 tablespoon of vital wheat gluten. However, for the true Levain experience, seek out bread flour.
Storage, Reheating, and Enjoying Like a Pro
These cookies are best the day they are baked, but their sturdy nature means they store exceptionally well.
Room Temperature Storage
Store completely cooled cookies in an airtight container at room temperature for up to 5 days. They will soften slightly over time but remain delicious. Place a piece of parchment paper between layers if stacking to prevent sticking.
Freezing for Future Joy
You have two excellent freezing options. First, freeze the baked cookies. Place cooled cookies on a baking sheet and freeze until solid, then transfer to a freezer bag. They keep for 3 months. To serve, let them thaw at room temperature or warm in a 300°F oven for 5-7 minutes. Second, and perhaps better, freeze the dough. After scooping and salting, place the dough balls on a baking sheet and freeze until solid. Transfer frozen dough balls to a freezer bag. You can bake them straight from the freezer—just add 1-2 minutes to the baking time. This is the ultimate make-ahead tip for fresh-baked cookies anytime.
The Perfect Reheat
To recapture that just-baked magic, place a cookie on a parchment-lined baking sheet and warm in a 300°F oven for 5-8 minutes. It will become soft, melty, and fragrant again. Microwaving for 10-15 seconds works in a pinch but can make the cookie greasy.
Conclusion: Your Bakery is Open
There you have it. The secrets, the science, and the step-by-step method to replicate one of the world’s most famous cookies in your own kitchen. This Levain Bakery Cookie Recipe Copycat is more than just a recipe; it’s a lesson in baking precision. It teaches the power of ingredient ratios, the necessity of chilling, and the beauty of embracing an “underbaked” look. The first time you pull a tray of these massive, crackly-topped, gloriously gooey cookies from your oven, you’ll understand the hype. The dense, chocolate-studded, impossibly chewy result is worth every minute of waiting for that dough to chill. You’ve earned this. You’ve baked the legend. Now, grab a glass of milk, pour a cup of coffee, and enjoy the fruits of your labor. Your secret is safe with me.
Frequently Asked Questions
Can I use all-purpose flour instead of bread flour?
You can, but the cookies will be less chewy and more soft/cakey, and they may spread more. Bread flour’s higher protein content is key for the signature Levain chew. For a closer substitute, remove 1 tablespoon of AP flour per cup and replace with 1 tablespoon of vital wheat gluten.
Why is my cookie dough so dry and crumbly?
This is usually due to over-creaming the butter (which warms it too much) or measuring flour by volume (using too much). Ensure your butter is soft but cool, cream for 5-7 minutes, and weigh your flour. If the dough is still crumbly after mixing, let it rest for 10 minutes; the butter will soften and bring it together.
Is the 24-hour chill really necessary?
Yes, for an authentic copycat. The chill solidifies the butter to prevent excessive spread and allows flavors to develop. For a quicker option, you can chill for a minimum of 2 hours, but the results will be less thick and may spread more. For best texture and flavor, the long chill is worth the wait.
How do I get that perfect crackly top?
The crackly top comes from a combination of factors: the high sugar content (especially granulated), proper creaming of butter and sugar (5-7 minutes), and the long chill which allows sugar to fully dissolve. Baking until the tops are set and dry but the centers are underdone is also crucial.
My cookies are still spreading too much even after chilling. Why?
Check your oven temperature with an oven thermometer. If it’s running hot, the butter will melt too quickly. Also, ensure your dough balls are truly cold when they go into the oven—if your kitchen is warm, chill the scooped dough on the sheet for 15 minutes before baking. Finally, use a heavy, thick baking sheet to prevent excessive bottom heat.
Can I make smaller cookies?
You can, but the texture ratio will change. Smaller cookies bake faster and will have a higher proportion of crispy edge to chewy center. If using a smaller scoop (e.g., 2 tbsp), reduce baking time by 1-2 minutes. For true Levain-style results, the large size is integral to the experience.